
Popular categories
Looking for a yarn?


Comments / Questions (54)
![]() Sonjamarie wrote:
Sonjamarie wrote:
Ich kann Astrid Runge nur zustimmen. Warum ist Anleitung so karg? Ich bin eine erfahrene Strickerin und musste auch erst verschiedene Varianten von M1 ausprobieren und ribbeln! Warum sind die Reihen nicht nummeriert? Das würde ja schon helfen.... Wie werden die Umschläge auf der Rückreihe denn nun abgestrickt? Links oder rechts?
02.11.2015 - 01:07DROPS Design answered:
Die Diagramme zeigen bei uns grundsätzlich immer alle Muster-R, also Hin- und Rück-R, und werden wie üblich unten rechts beginnend gelesen. Die erste R ist eine Hin-R. Die Umschläge werden entsprechend der Beschreibung abgestrickt - bei einem "x" in der Rück-R stricken Sie die Umschläge rechts ab, bei einem leeren Kästchen stricken Sie die Umschläge links ab. Der Diagrammtext wird gleich sprachlich etwas angepasst, damit er deutlicher wird.
02.11.2015 - 12:06
![]() Karen Catlow wrote:
Karen Catlow wrote:
I'm having trouble printing this pattern, trust me it's not me or my printer...I can print other things. When I use the "print this pattern" button it takes me to a advert,picture which says in small print at the top "to continue to print" -->. When you tap there it takes you back to the pattern page again. I've tried this over and over again to no avail! If you go to "photo" you can print that! Help please.
15.10.2014 - 20:30DROPS Design answered:
Hi there Karen, what browser are you using? We cannot replicate your problem without knowing. Thanks!
15.10.2014 - 20:54
![]() Wegner wrote:
Wegner wrote:
Hallo an das Korrekturbüro, Zitat aus der Ärmelbeschriebung: "An der Manschette von der rechten Seite, innerhalb der Randm 60-60-60-70-70-70 M. aufnehmen. 1 R. re. von links stricken und gleichzeitig gleichmässig verteilt 50-52-56-60-62-64 M. abn" Das ist irreführend beschrieben. Wenn man sich so daran hält, dann hat man am Ende nur noch 6 M um den Ärmel zu stricken. R8ichtig heißt es: so weit Maschen abnehmen, bis noch 50-52-56-....usw
16.07.2013 - 11:19DROPS Design answered:
Liebe Frau Wegner, vielen Dank für den Hinweis, der Fehler ist nun korrigiert.
19.07.2013 - 08:08
![]() Gwen Price wrote:
Gwen Price wrote:
This pattern refers to a collar but no instructions given on the collar. Please help with advice. Many thanks.
05.11.2012 - 12:13DROPS Design answered:
Hi Gwen, the stitches of the pattern band are knitted 8-9 cm longer than the front pieces and form the collar.
13.11.2012 - 12:43
![]() Astrid Runge wrote:
Astrid Runge wrote:
Ist die Anleitung mit hin- und Rückreihen? ich verstehe die Darstellung des Musters nicht, wenn ich rechts auf rechts stricke, erscheint das Rombenmusterv doch in links. Wie und wo erfolgt die Abnahme innerhalb des Musters? die Anleitung ist nicht gerade sehr aussagefähig, wenn ich erst sämtliche Varianten ausprobieren muß, werde ich wohl bald aufgeben.
16.03.2012 - 22:20DROPS Design answered:
Das Diagramm zeigt alle Reihen von der Vorderseite. Achten Sie darauf dass die M1 für das rechten Vorderteil und M2 für das linke Vorderteil benutzen.
19.03.2012 - 09:40
![]() Katherine Starks wrote:
Katherine Starks wrote:
Ich bin am vorderteil und finde meins sieht anders aus als das Bild. Habt ihr wirklich die Maschen die mit X gekennzeichnet sind auf der Rückreihe rechts gestrickt? Hab ich das richtig verstanden? habt ihr am Anfang von M1 und am ende von m2 eine Randmasche gestrickt?
18.02.2012 - 08:51DROPS Design answered:
Ja, die X Maschen werden auf der Rückseite re. gestrickt. Am Anfang des Musters gibt es keine Randmaschen.
21.02.2012 - 16:32
![]() DROPS Design NL wrote:
DROPS Design NL wrote:
Ik kan niet zien wat u fout doet. Ik kan alleen zeggen dat volgt u de teltekening, dan zou u 8 tricotst overhouden in nld 3. Let ook op dat het ajourmotief links ook breder wordt. Probeer opnieuw of ga naar uw winkel voor persoonlijke uitleg.
01.02.2012 - 11:09
![]() Marja wrote:
Marja wrote:
Hallo drop design, Ik snap dat je 1tricost minder heb maar bij nld3 moet ik volgens telpatroon er 9 0ver hebben maar als je gaat breien hou ik er 8 over,heb het verschillende malen opnieuw gedaan,help
31.01.2012 - 21:44
![]() DROPS Design NL wrote:
DROPS Design NL wrote:
Hoi Marja. door het samenbreien + omslagen minder je 1 st in de eerste nld. In nld 3 heb je dus 35 st in het patroon ipv 36. Je herhaalt deze "mindering" in nld 3 en hebt dan ook 1 tricots minder tussen het samenbreien en het ajourmotief.
31.01.2012 - 11:41
![]() Marja wrote:
Marja wrote:
Hallo,ben met het voorpand bezig tek.M1 8xsamen breien en 7omslagen,de 3de toer kom ik dan niet uit met de telling van de tricosteken na de gesamengebreide steken,wat doe ik verkeerd b.v.d.
30.01.2012 - 19:45
|
|||||||||||||||||||
Summer Sands |
|||||||||||||||||||
|
|
|||||||||||||||||||
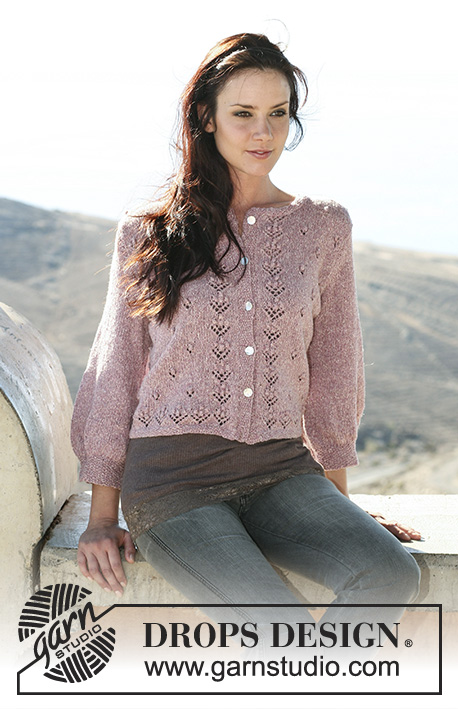
DROPS jacket with textured pattern in “Muskat”. Size S – XXXL
DROPS 105-33 |
|||||||||||||||||||
|
Garter st, back and forth on needle: K all rows Pattern: See diagram M.1 and M.2. The diagram shows the pattern from the RS side. Note! On row 14 in M.1 and on row 15 in M.2 cast on 7 new sts at the end of row. Decreasing tip (applies to neckline): Dec on the inside of M.1/M.2. Make all dec from RS! Dec as follows after M.1: slip 1 st as if to knit, K1, psso Dec as follows before M.2: K2 tog. Back piece: Cast on 82-90-98-108-118-128 sts (incl 1 edge st each side) on needle size 4.5 mm. Work 4 rows garter st and continue in stocking st. Remember the knitting tension! When piece measures 6 cm dec 1 st each side on every 3 cm a total of 5 times = 72-80-88-98-108-118 sts. When piece measures 22-23-24-25-26-27 cm inc 1 st each side on every 2 cm a total of 7 times = 86-94-102-112-122-132 sts. When piece measures 39-40-41-42-43-44 cm cast off for armhole each side on every other row: 3 sts 1-1-1-1-2-2 times, 2 sts 1-2-3-4-5-6 times and 1 st 1-2-3-5-4-6 times = 74-76-78-80-82-84 sts. Continue in stocking st until piece measures 54-56-58-60-62-64 cm and now cast off the middle 24-24-24-26-26-26 sts for neck. Dec to shape the neckline on every other row: 1 st 4 times = 21-22-23-23-24-25 sts left on each shoulder. Cast off when piece measures 58-60-62-64-66-68 cm. Right front piece: Cast on 52-56-60-65-70-75 sts (incl 1 edge st at side) on needle size 4.5 mm. Work 4 rows garter st and work next row as follows from RS: M.1, stocking st on remaining sts. Dec and inc at side as described for back piece. At the same time when piece measures 38 cm dec for neckline inside M.1 – see Decreasing tip: 1 st on every 6-5-5-5-5-6 cm a total of 4-4-4-5-5-5 times. At the same time when piece measures 39-40-41-42-43-44 cm cast off for armhole as described for back piece. After all dec for neckline and armhole are complete there are 44-45-46-46-47-48 sts left on row (If you’re at the beg or end of M.1, if elsewhere in M.1 this number may be up to 7 sts less). When piece measures 58-60-62-64-66-68 cm cast off the outermost 21-22-23-23-24-25 sts for shoulder = between 16 and 23 sts left on row. Continue in pattern as before on these sts for 8-8-8-9-9-9 cm (this part is to be stretched slightly when sewn on to neckline on back piece). Put remaining sts on a thread. Left front piece: Cast on and work like right front piece, but mirrored, i.e. work M.2 on sts towards mid front. Sleeve: The cuff is knitted separately and worked crosswise. Sts are then picked up on the upper side of the cuff and sleeve worked from cuff up. Cuff: Cast on 37 sts on needle size 4.5 mm and work M.1 with 1 garter st on the left side of piece. Work 5-5-5-6-6-6 vertical repeats of M.1 and cast off. Sleeve: Pick up 60-60-60-70-70-70 sts along the garter st edge on the cuff inside 1 edge st. Work 1 row garter st from WS, at the same time dec evenly to 50-52-56-60-62-64 sts. Now measure piece from here! Continue in stocking st, at the same time when piece measures 2 cm inc 1 st each side on every 3-2.5-2.5-2-2-1.5 cm a total of 10-11-11-12-13-14 times = 70-74-78-84-88-92 sts. When piece measures 31-30-29-28-27-26 cm (less on the larger sizes because of larger sleeve cap) dec to shape the sleeve cap each side on every other row: 3 sts 1 time, 2 sts 3 times, 1 st 2-4-5-6-8-10 times, then 2 sts each side until piece measures 38 cm, dec 3 sts each side 1 time and cast off remaining sts. Sleeve measures approx 58 cm, incl cuff. Assembly: Sew shoulder seams. Sew tog collar mid back – sew in the outermost sts to avoid a chunky seam. Sew collar to neckline, stretch collar slightly. Set in sleeves and sew side and sleeve seams inside 1 edge st. |
|||||||||||||||||||
Diagram explanations |
|||||||||||||||||||
|
|||||||||||||||||||
 |
|||||||||||||||||||
Have you finished this pattern?Tag your pictures with #dropspattern or submit them to the #dropsfan gallery. Do you need help with this pattern?You'll find 20 tutorial videos, a Comments/Questions area and more by visiting the pattern on garnstudio.com. © 1982-2026 DROPS Design A/S. We reserve all rights. This document, including all its sub-sections, has copyrights. Read more about what you can do with our patterns at the bottom of each pattern on our site. |
|||||||||||||||||||


With over 40 years in knitting and crochet design, DROPS Design offers one of the most extensive collections of free patterns on the internet - translated to 17 languages. As of today we count 324 catalogues and 12290 patterns translated into English (UK/cm). 12290
We work hard to bring you the best knitting and crochet have to offer, inspiration and advice as well as great quality yarns at incredible prices! Would you like to use our patterns for other than personal use? You can read what you are allowed to do in the Copyright text at the bottom of all our patterns. Happy crafting!
Post a comment to pattern DROPS 105-33
We would love to hear what you have to say about this pattern!
If you want to leave a question, please make sure you select the correct category in the form below, to speed up the answering process. Required fields are marked *.