
Popular categories
Looking for a yarn?


Comments / Questions (4)
![]() Gismonde MOIZAN wrote:
Gismonde MOIZAN wrote:
Bonsoir, j'en suis à l'empiècement mais je ne comprends pas bien combien il faut faire de M2 sur les 342 m et combien de fois il faut faire M3 sur l'empiècement ? Je ne comprend pas car d'habitude vos explications sont bien plus claires !!! Merci pour vos informations
11.03.2025 - 20:31DROPS Design answered:
Bonjour Mme Moizan, procédez ainsi, vu sur l'endroit: 16 m de bordure comme avant, puis tricotez 17 fois les 18 mailes de M.2 (sur les 17x18=306 mailles suivantes), tricotez ensuite les 4 mailles de M.3 et terminez par les 16 mailles de bordure devant comme avant. Vous avez ainsi bien: 16+306+4+16=342 mailles. Bon tricot!
12.03.2025 - 09:44
![]() Essi wrote:
Essi wrote:
Hei! En ymmärrä tuota kohtaa, että neulo kummassakin reunassa 4 ainaoikeaa s ja 2 oikeaa s (oikealta puolelta katsottuna).
26.04.2021 - 16:40DROPS Design answered:
Hei, oikean puolen kerroksella neulotaan 4 silmukkaa ainaoikeaa ja 2 oikeaa silmukkaa, nurjalta puolelta neulotaan reunasta alkaen 2 nurjaa silmukkaa ja 4 silmukkaa ainaoikeaa.
05.05.2021 - 17:09
![]() DROPS / Lena wrote:
DROPS / Lena wrote:
No wonder - this sentence was a total mess. Thank you so much for letting us know. I've now been able to correct it! Please try again, and let me know if you have further problems.
25.10.2007 - 00:11
![]() Carmela wrote:
Carmela wrote:
I don't quite understand what this means in the pattern: When the piece measures 48-50-52-51-53 cm dec 1 st in each purl rib (as seen from the right side – &&¬ over sts on buttonbands) as follows: dec a total of 6 times:dec by att knit alternately the 2 first am purl tills and the 2 last am vridna reverse stockinette st tills (de 2 sts over every fläta continues i slätst).
24.10.2007 - 22:47
|
||||||||||||||||
DROPS 92-19 |
||||||||||||||||
|
|
||||||||||||||||
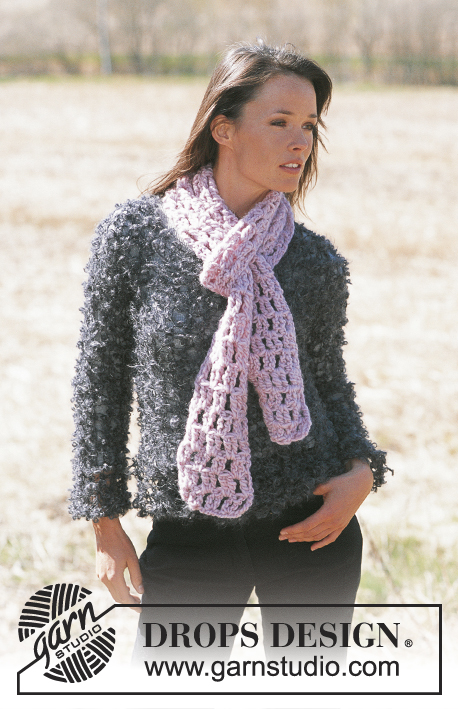
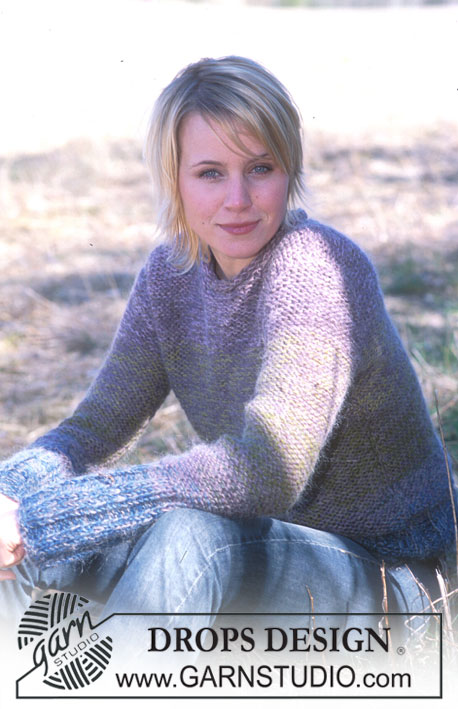
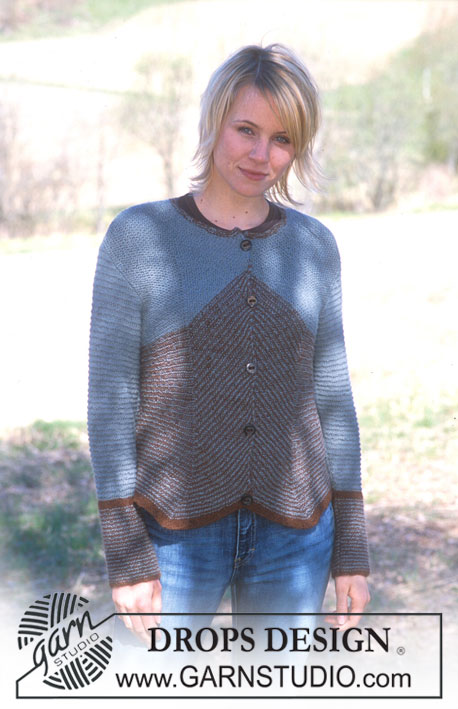
DROPS Cardigan in Karisma and woolly Boa.
DROPS 92-19 |
||||||||||||||||
|
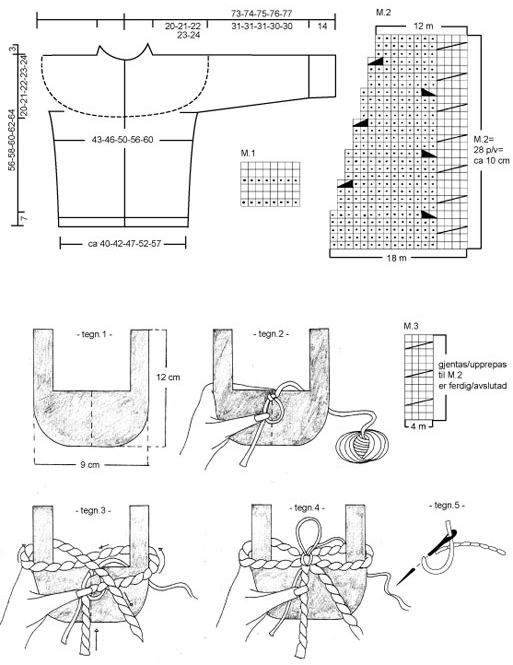
CARDIGAN: Knitting Gauge: 21 sts x 28 rows on needles size 4mm with Karisma in stocking sts. = 10 x 10 cm. Rib-1: *K2, P4*, repeat from *-* Rib-2: *K2, P5*, repeat from *-* Pattern: See diagrams M.1 to M.3. The diagrams are seen from the right side. Buttonholes: Bind off for buttonholes on the right front piece as follows: K4, make a yo, K2 tog into back of st. Bind off for buttonholes when piece measures: Size S: 2, 10, 17, 24, 31, 38, 45, 52 and 58 cm Size M: 2, 10, 17, 25, 32, 40, 47, 54 and 60 cm Size L: 2, 10, 18, 25, 33, 41, 49, 55 and 62 cm Size XL: 2, 10, 18, 26, 34, 42, 50, 57 and 64 cm Size XXL: 2, 10, 18, 26, 34, 42, 51, 59 and 66 cm NB: Position the buttonholes so that the top hole is approx 2 cm from the edge. Body: The cardigan is knitted to and fro on circular needles starting from the centre mid front. Cast on 178-190-208-232-250 sts (inclusive of 16 edge sts each side = front bands) on circular needles size 3.5 with Karisma. Purl 1st row from the wrong side and continue with Rib-1, but knit 4 garter sts and 2 stocking sts each side. Remember the button holes at the front edge – see explanation above. When piece measures 7 cm change to circular needles size 4 and continue in stocking sts, but knit the 16 centre mid front edge sts at each side as before (Rib-1 plus 4 garter sts and 2 stocking sts). Remember to check your knitting gauge! Insert a marking thread 48-51-55-61-66 sts in from each side = 82-88-98-110-118 sts between the marking threads = back piece. When piece measures 10 cm inc. 1 st on both sides of the marking threads on every 6 cm 4 times = 194-206-224-248-266 sts. When piece measures 36-37-38-39-40 cm bind off each side for armhole 10-10-10-12-12 sts (i.e. 5-5-6-6-6 sts on both sides of the marking threads) = 80-86-96-106-114 sts left on back piece and 47-50-54-59-64 sts left on each front piece. Now put the work aside and knit the sleeves. Sleeve: Cast on 63-63-63-70-70 sts on double pointed needles 3.5 with Karisma. Knit 1 round. Continue with Rib-2 – see above. After 4 rounds of Rib-2 dec. all P5 to P4 = 54-54-54-60-60 sts. Continue the rib (K2, P4). When sleeve measures 14 cm change to double pointed needles size 4 and continue in stocking sts. When piece measures 17-17-17-18-20 cm inc. 2 sts at the centre of the sleeve on every 3-2.5-2-2-1.5 cm a total of 9-11-13-12-14 times = 72-76-80-84-88 sts. When sleeve measures 45-45-45-44-44 cm, bind off 10-10-10-12-12- sts at the centre of the sleeve = 62-66-70-72-76 sts. Put the sts on a thread and knit the other sleeve. Yoke: Read the whole of this section before continuing ! Put the sleeves in on the same circular needle as the body where you bound off for armholes = 298-318-344-368-394 sts. Knit next row from the right side. Knit M.1 (continue to knit the 16 edge sts mid front as before) - at the same time, on the 3rd row in M.1, bind off evenly on row 10-12-2-8-16 sts.(do not bind off in the 16 edge sts.) = 288-306-342-360-378 sts. Continue the next row from the right side as follows: 16 edge sts as before, M.2 on the next 252-270-306-324-342 sts, M.3 (=4 sts) and finish with 16 edge sts as before. Continue the pattern like this – at the same time binding off in M.2 as shown in the diagram. After M.2 (and M.3) = 204-216-240-252-264 sts left. On the next row (= right side) bind off 2 sts in each cable as follows: K2 tog, slip 1 st as if to knit, K1, pass the loose st. over (the other sts are knitted as before) = 174-184-204-214-224 sts. Continue to knit K over K and P over P. When piece measures 48-50-52-51-53 cm bind off in each Purl report - seen from the right side (this only applies to the purl reports in M.2 not the front bands) as follows: Bind off sts a total of 6 times in Size S + M + L on every 4th row and in size XL + XXL on every 6th row as follows: P the first 2 purl sts tog., P the last 2 purl sts. tog into back of st (continue to knit the 2 sts over the cables in stocking sts.) = 90-94-102-106-110 sts left. When piece measures 59-61-63-65-67 cm K 4 rows stocking sts over all sts,, incl sts on front bands = roll over edge, and bind of remaining sts loosely – to avoid the edge being too tight make a yo between every 5 sts at the same time you bind off (the yo’s are bound off as sts). Assembly: Sew the openings under the arms. BOA: Length: approx 150 cm Materials: Snow 50 g colour no. 09, Old rose Materials: Puddel 50 g colour no. 03, Brown and use: Vivaldi: 50 g colour no. 13, Beige Boa scarf: Draw a "comb" on a piece of cardboard with the correct measures –see fig. 1, and cut it out. Mark the middle with a dotted line. Wind up approx 20 m of Vivaldi yarn into a small ball. Make a loop with the Vivaldi yarn you just wound up and hold it against the "comb" on the dotted line with the loop pointing down and the yarn thread lying over the edge and behind the "comb" – see fig. 2. Keep the Vivaldi loop in place with your thumb and at the same time hold a thread of Vivaldi (the remaining ball) + Snow + Puddel . Now make an "8 loop" around the "comb" as shown in fig.3. Pick up the Vivaldi loop and hand crochet a ch around the "8 loop" where the Snow + Vivaldi + Puddel threads cross each other in the middle of the "comb", as follows: Put your thumb and your index finger through the loop pulling the Vivaldi thread from behind the "comb" through the loop (this makes a new loop). Pull tight. The loop is now pointing up and a ch has been crocheted around the cross point – see fig. 4. Make another 8 loop as before and now hand crochet again over the cross section. NB: It is important that the Vivaldi loop and the Vivaldi thread from the small ball is always kept in position as described above (loop in the front and thread at the back) for the hand crochet. When the "comb" is full, lift off the loops and put the work in front of the "comb", but put the last "8 loop" you made back onto the comb and continue as before. Make the Boa approx 150 cm or to your desired length. NB: The loops can be quite loose and you can pull them out easily, so we recommend securing your work by sewing backstitches – see fig. 5, with Vivaldi into the row of ch’s to tighten up the loops. It is important to sew through all the threads if possible. |
||||||||||||||||
Diagram explanations |
||||||||||||||||
|
||||||||||||||||
 |
||||||||||||||||
Have you finished this pattern?Tag your pictures with #dropspattern or submit them to the #dropsfan gallery. Do you need help with this pattern?You'll find 22 tutorial videos, a Comments/Questions area and more by visiting the pattern on garnstudio.com. © 1982-2026 DROPS Design A/S. We reserve all rights. This document, including all its sub-sections, has copyrights. Read more about what you can do with our patterns at the bottom of each pattern on our site. |
||||||||||||||||


With over 40 years in knitting and crochet design, DROPS Design offers one of the most extensive collections of free patterns on the internet - translated to 17 languages. As of today we count 324 catalogues and 12290 patterns translated into English (UK/cm). 12290
We work hard to bring you the best knitting and crochet have to offer, inspiration and advice as well as great quality yarns at incredible prices! Would you like to use our patterns for other than personal use? You can read what you are allowed to do in the Copyright text at the bottom of all our patterns. Happy crafting!
Post a comment to pattern DROPS 92-19
We would love to hear what you have to say about this pattern!
If you want to leave a question, please make sure you select the correct category in the form below, to speed up the answering process. Required fields are marked *.