
Popular categories
Looking for a yarn?








































Comments / Questions (18)
 Roberta wrote:
Grazie per le risposte. Ho un\' altra domanda, sugli aumenti per le maniche. Sto lavorando una XL. Arrivata alla lavorazione dello sprone non riesco a capire come arrivare a 76 maglie per ogni manica. Nei miei conteggi i 14 aumenti mi restituiscono 38 maglie e non 76. Per arrivare a 76 maglie ogni 6 giri dovrei lavorare 157 giri, mi sembrano troppi. Dove sbaglio?
28.10.2026 - 16:39DROPS Design answered:
Buonasera Roberta, il totale degli aumenti comprende anche quelli lavorate durante la lavorazione del collo. Buon lavoro!
31.10.2026 - 17:24
 Hana wrote:
Dobrý den, moc nerozumím návodu pro svetr Evening secret sweatr pletený lícovým žerzejem shora dolů na kruhových jehlicích . V začátku pro pletení průkrčníku jsou uvedeny rubové strany pleťte obrace, to ale u pletení na kruhových jehlicích nevychází. Prosím o radu, co jsem nepochopila?
24.10.2026 - 17:08DROPS Design answered:
Dobrý den, Hano, ano začínáme plést v rovných řadách - to proto, abychom vytvarovali průkrčník. Jakmile máme nahozený dostatek ok, vše spojíme a sedlo už pleteme v kruhu. Hodně zdaru! Hana
27.10.2026 - 06:19
 Monica wrote:
The project is knitted back and forth at the start around the neck and then it continues in the round. This will surely leave a whole where the first rows are not connected since they are knitted back and forth. Am I missing something?
24.10.2026 - 01:20DROPS Design answered:
Dear Monica, there won't be a hole left, because where we turn the rows we are casting on extra stitches, for the neckline in the front piece. Then, when we join the piece to work in the round all the stitches will be connected. This "hole" will help shape the neckline at the front piece. Then, you will work a neck edge over these stitches, in rib. Happy knitting!
25.10.2026 - 20:37
Roberta wrote:
Per il collo: se avvio 82 maglie (XL) come posso riprenderne 100? Se al ferro 6 ho 16 maglie per ogni manica, come ne posso avere 26 al ferro 8? Ancora più avanti sì parla di "aumenti quando viene formato il collo" , ma ormai si è già in fase avanzata della lavorazione. Grazie per i chiarimenti che vorrete darmi.
14.10.2026 - 16:15DROPS Design answered:
Buongiorno Roberta, le maglie delle maniche sono 26, A.1 + 10 + A.2. Abbiamo corretto il testo per renderlo più chiaro. Buon lavoro!
17.10.2026 - 14:28
Roberta wrote:
Dopo le istruzioni per il ferro 6, si legge: "Poi lavorare come segue dal diritto del lavoro: Lavorare a maglia rasata e aumentare per il raglan come spiegato sotto (maniche lavorare il 1° ferro di A.1, 16 maglie diritto, 1° ferro di A.2), avviare 14-14-16-18-22-24-26 nuove maglie alla fine del ferro ". Ma così si forma un buco nella lavorazione. Cosa non capisco?
14.10.2026 - 13:17DROPS Design answered:
Buongiorno Roberta, abbiamo leggermente modificato il testo per renderlo più chiaro. Buon lavoro!
17.10.2026 - 14:21
 Camilla Åbrandt wrote:
Hej! Maskantalet ökar alldeles för fort då jag stickar ärmarna. I diagram A1 och A2 på varv 1 (= flätan) ska man göra 1 omslag, vilket betyder att man får en maska till. På varv 3 ska man också göra 1 omslag. Totalt får man alltså en ökning på 4 maskor per ärm varje gång man stickar diagrammen, vilket gör att antalet maskor ökar alldeles för fort. Vad har jag missförstått?
10.10.2026 - 09:50DROPS Design answered:
Hej Camilla, du starter nederst i diagrammet og tager ud på 1.pind og 3. pind ifølge diagrammet som består af 6 pinde og ialt 8 udtagninger ifølge diagrammet. Når du har strikket alle 6 pinde starter du nederst i diagrammet igen :)
15.10.2026 - 11:51
Annica Palm wrote:
Hej! I beskrivningen står det slätstickning för halskanten, men om jag tittar på bilden tycker jag att det ser ut som resår. Vad är det som gäller egentligen?? Hälsn. Annica
01.10.2026 - 13:54DROPS Design answered:
Hei Annica. Arbetet stickas uppifrån och ner. Lägg upp maskor till hals (ikke halskanten / resår) och sticka fram och tillbaka på rundsticka med ökningar till raglan. Når genseren er "ferdig", stickas det upp maskor runt halsen, och halskanten stickas runt och i resår. Les nederst på oppskriften och under HALSKANT. mvh DROPS Design
05.10.2026 - 08:47
 Regina wrote:
I jeszcze jedno pytanie gdy po 6 rzędzie zaczynam robić karczek na okrągło to jest napisane ze dodawanie oczek ma być z każdej strony oczek raglanu. Czyli jest zmiana bo do tej pory było dodawane na przód i tył a teraz z każdej strony?
28.09.2026 - 14:13DROPS Design answered:
Witaj Regino, dodawanie oczek na reglan ma być wykonywane z każdej strony oczka reglanu, jak wcześniej (nie dodajesz już tylko żadnych oczek na dekolt bo jest zakończony) czyli: 1) dodawanie oczek na przód i tył jest wykonywane co 2 okrążenia (czyli na 6 przerobionych okrążeń dodasz oczka 3 razy), a 2) dodawanie oczek na rękawy jest dalej wykonywane wg schematów A.1 i A.2 (na 6 przerobionych okrążeń dodasz oczka 2 razy na rękawy). Dodając w ten sposób wykonujesz narzuty z każdej strony oczek reglanu w 1-szym i 3 cim okrążeniu (dodanych 8 o. w okrążeniu), w okrążeniu nr 5 dodasz tylko 4 oczka (na przód i tył, bo w schematach nie ma dodawania oczek). Pozdrawiamy!
30.09.2026 - 09:23
Regina wrote:
Nie rozumiem tego wzoru. Jeśli w rzędzie piątym jest napisane ze w schematach A1 A2 nie dodaję oczek to rozumiem ze chodzi o to ze nie robie tych narzutów które są w schemacie zaznaczone jako czarna i biała kulka. ale wtedy póz zakończeniu rzędu 6 mam 104 oczka a nie 108. prosze o wyjaśnienie
27.09.2026 - 15:54DROPS Design answered:
Witaj Regino, czy robisz rozmiar L? Zawsze to pisz proszę. Jeśli tak przed 5-tym rzędem masz 102 o. Nie dodajesz oczek w schematach A.1 i A.2 dokładnie jak piszesz. Dodajesz oczka na reglan przodu i tyłu - 4 o. i nabierasz 2 o. na końcu rzędu. Razem będzie 102+4+2=108 o. po zakończeniu rzędu 5. Pozdrawiamy!
29.09.2026 - 09:09
 Merli wrote:
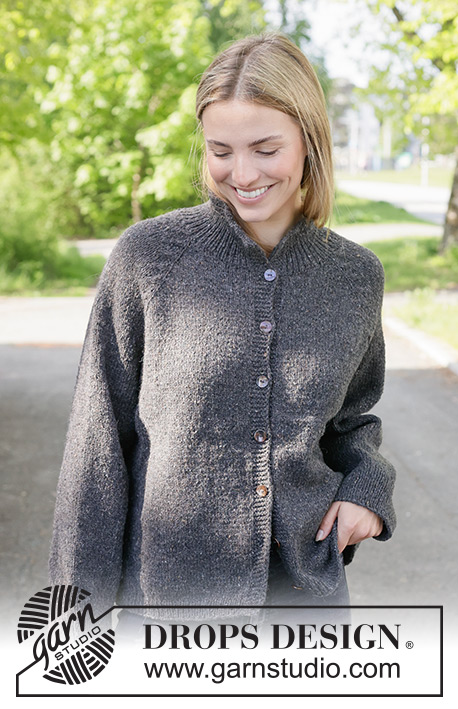
Tere. Mustri algus on pikalt tõlgitud täpselt nii nagu on mõeldud tõlget samale mustri kardiganile. Mulle tundub, et mustri alguse tõlget tuleks parandada.
25.09.2026 - 15:07DROPS Design answered:
Tere Merli! Nii džemper kui ka kardigan on mõlemad kootud ülevalt alla, kasvatades silmuseid kaelaaugu jaoks. St algus on ühesugune, kuni kaelaauk on tehtud. Siis džempril jätkatakse passet hoopis ringselt, kardiganil jätkatakse edasi-tagasi kududes. Sõnastust on natuke uuendatud, ehk on abiks.
08.10.2026 - 11:27
|
||||||||||||||||
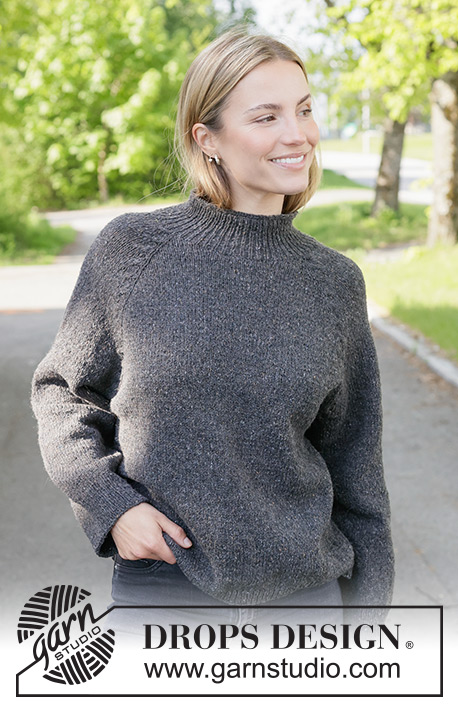
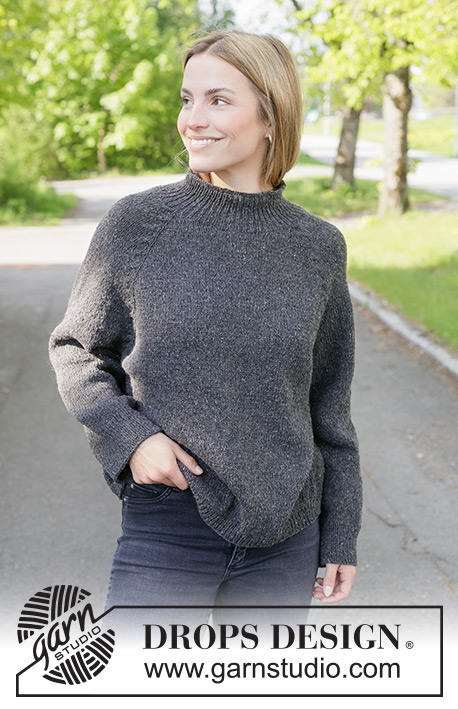
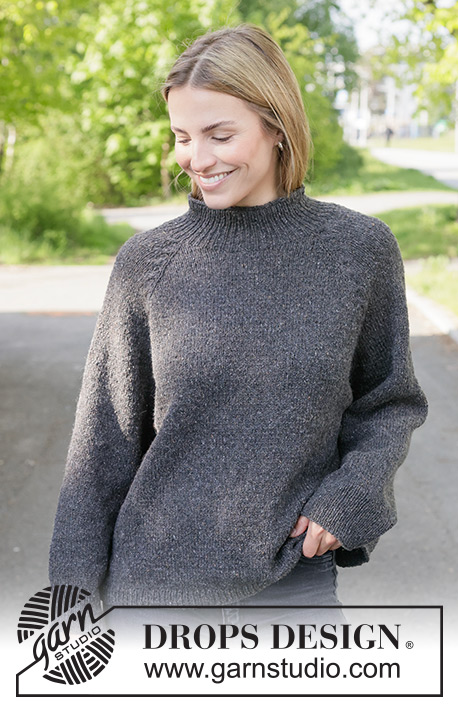
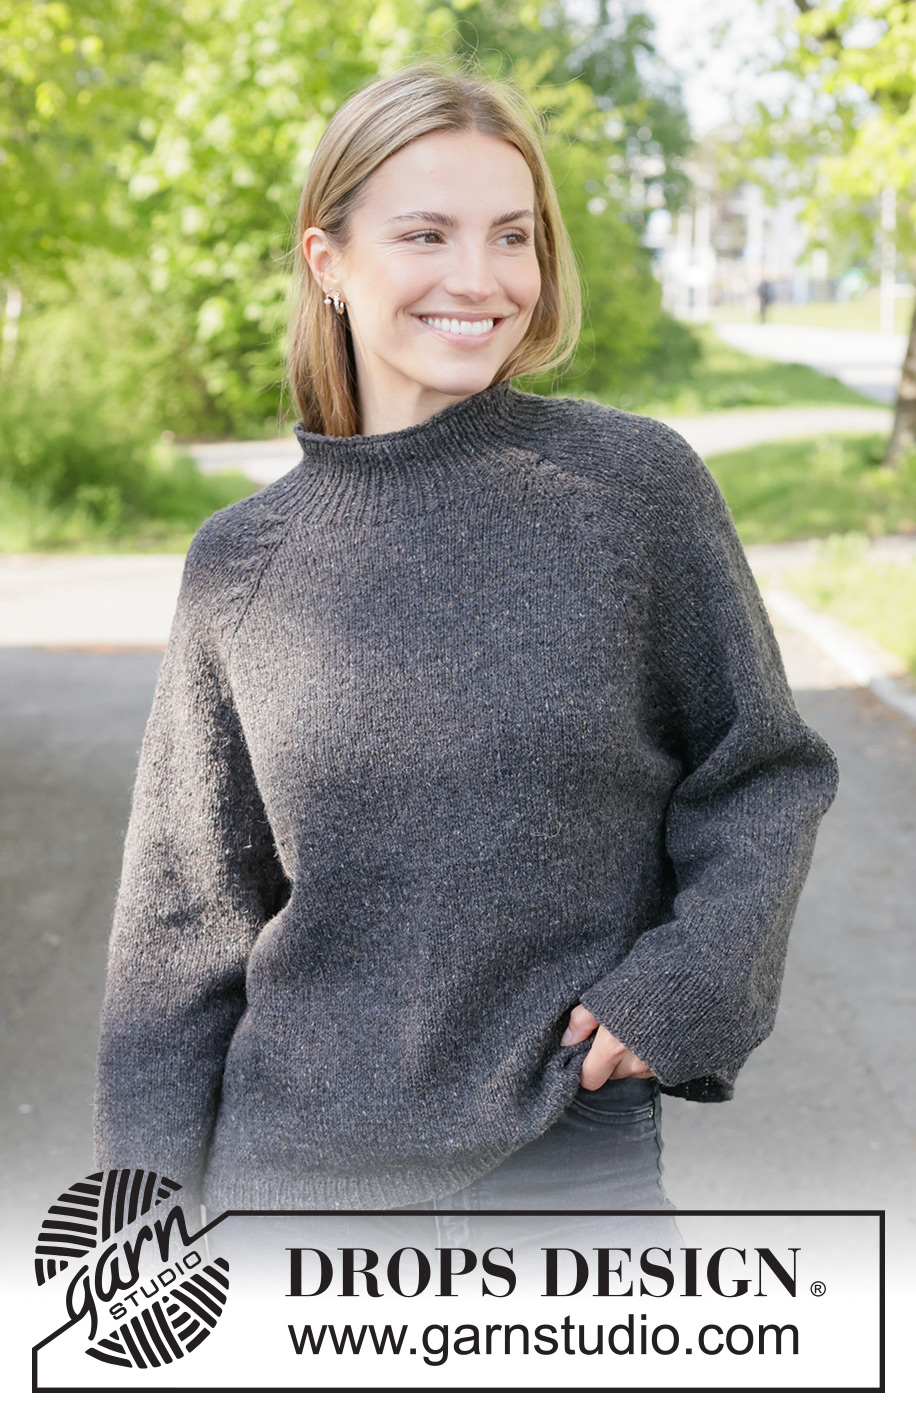
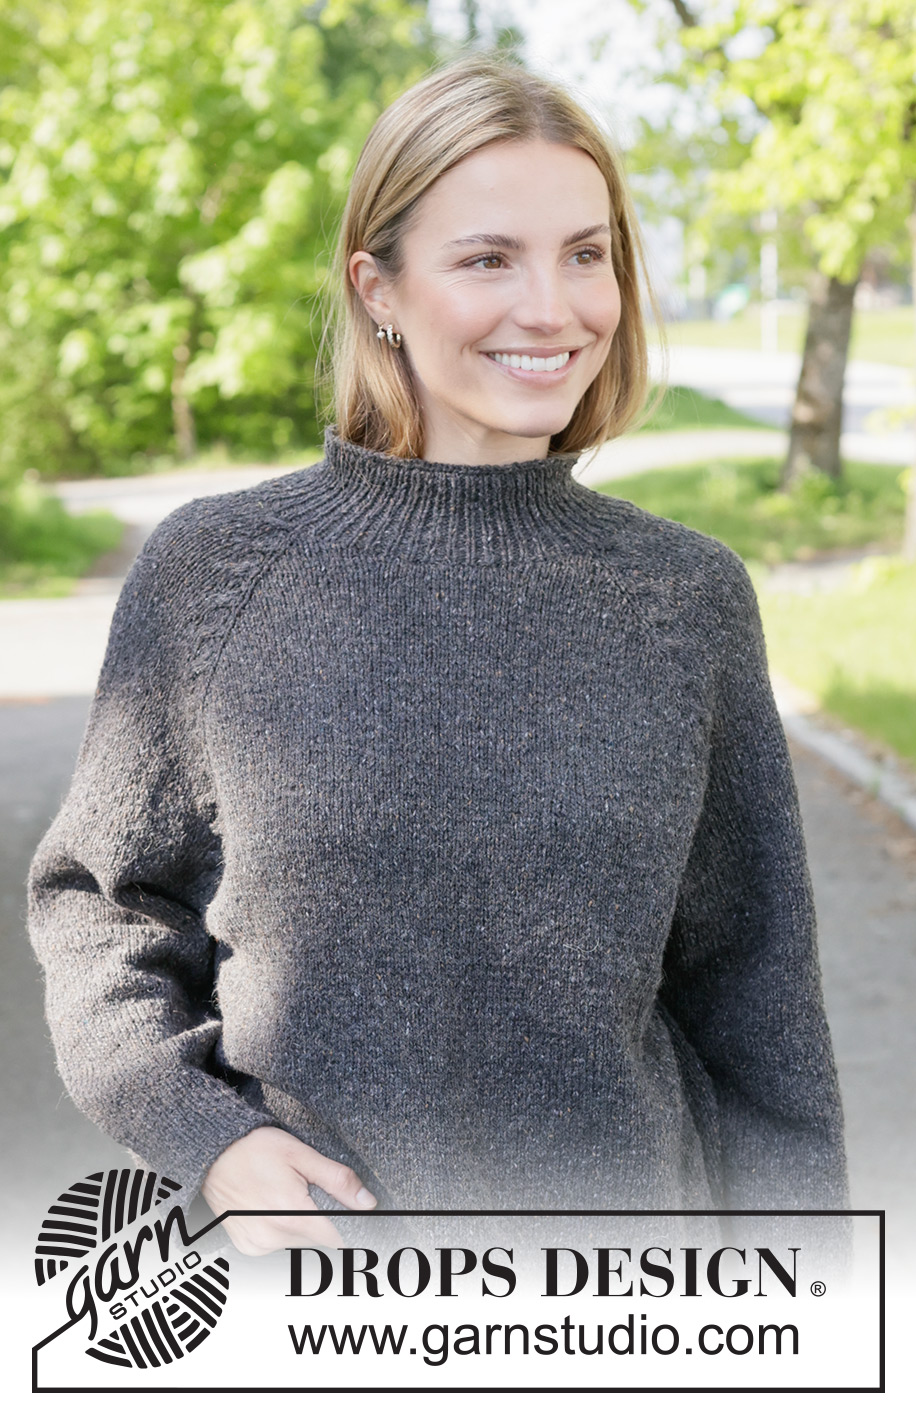
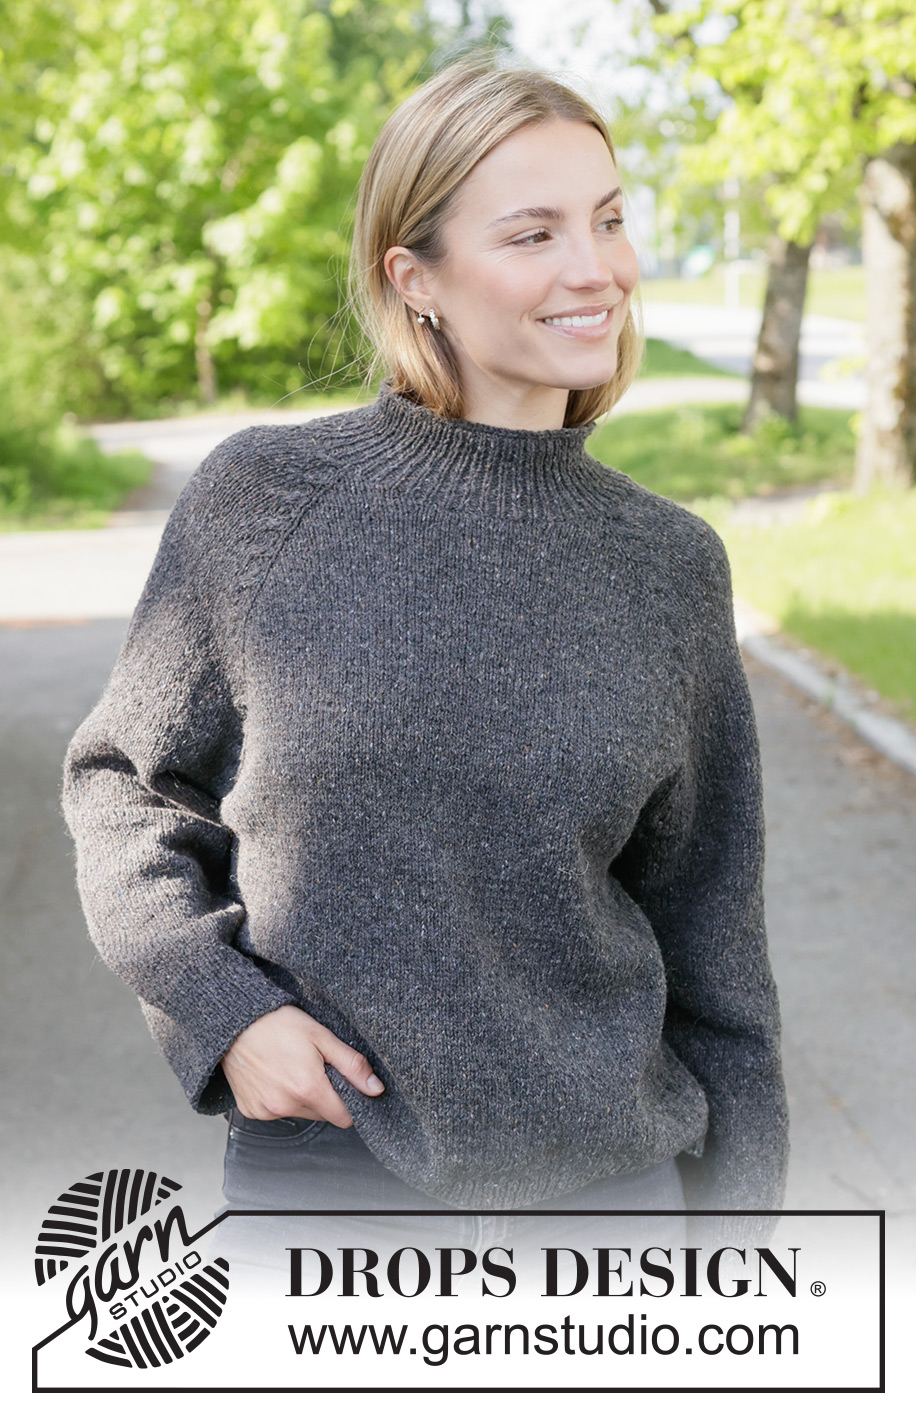
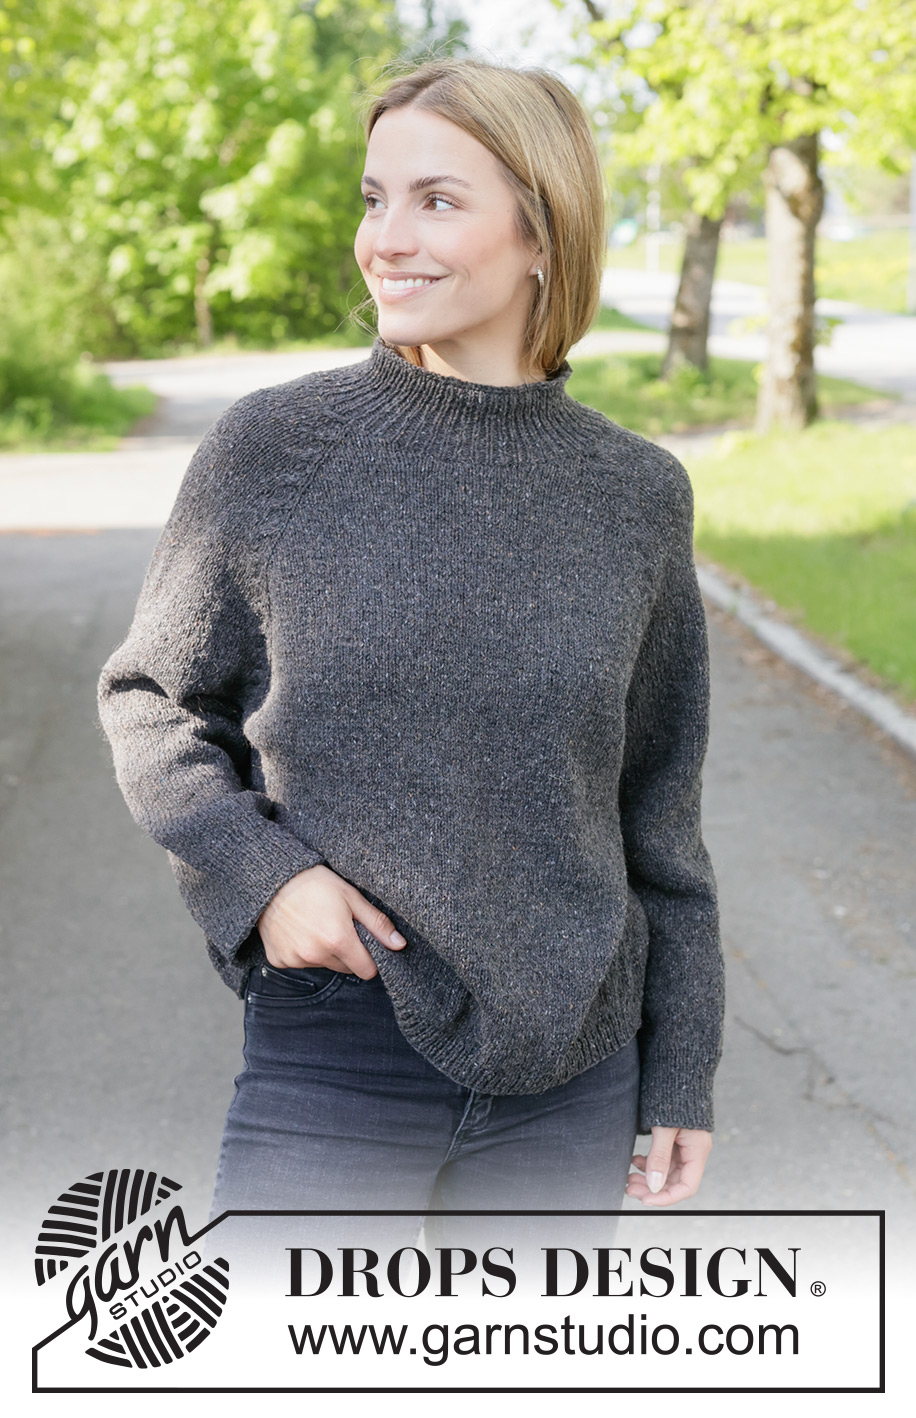
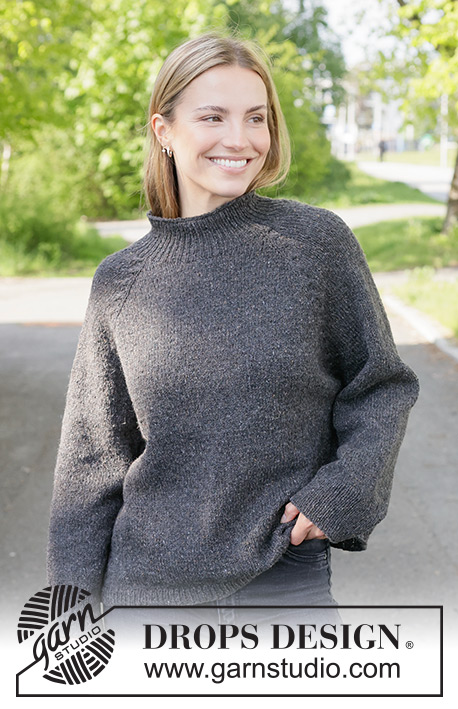
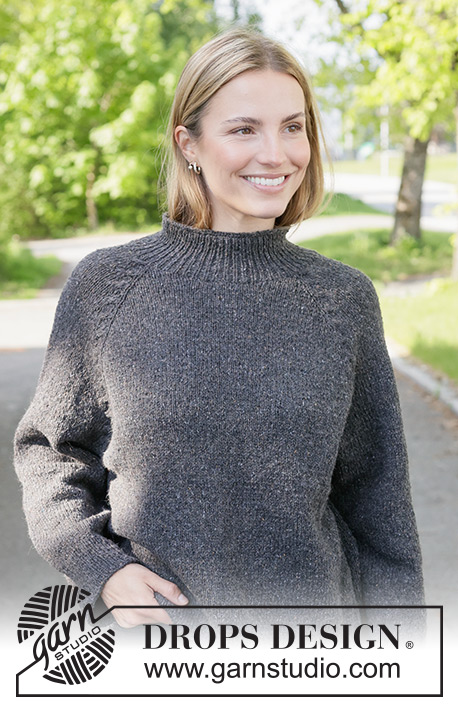
Evening Secret Sweater#eveningsecretsweater |
||||||||||||||||
 |
 |
|||||||||||||||
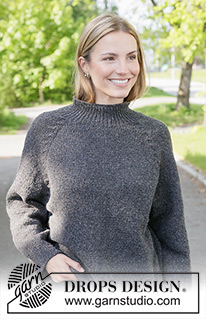
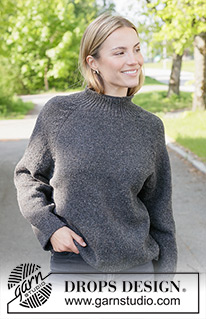
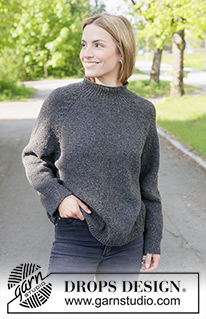
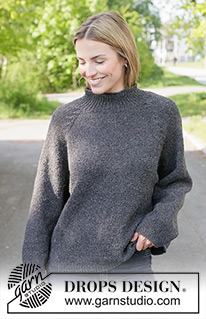
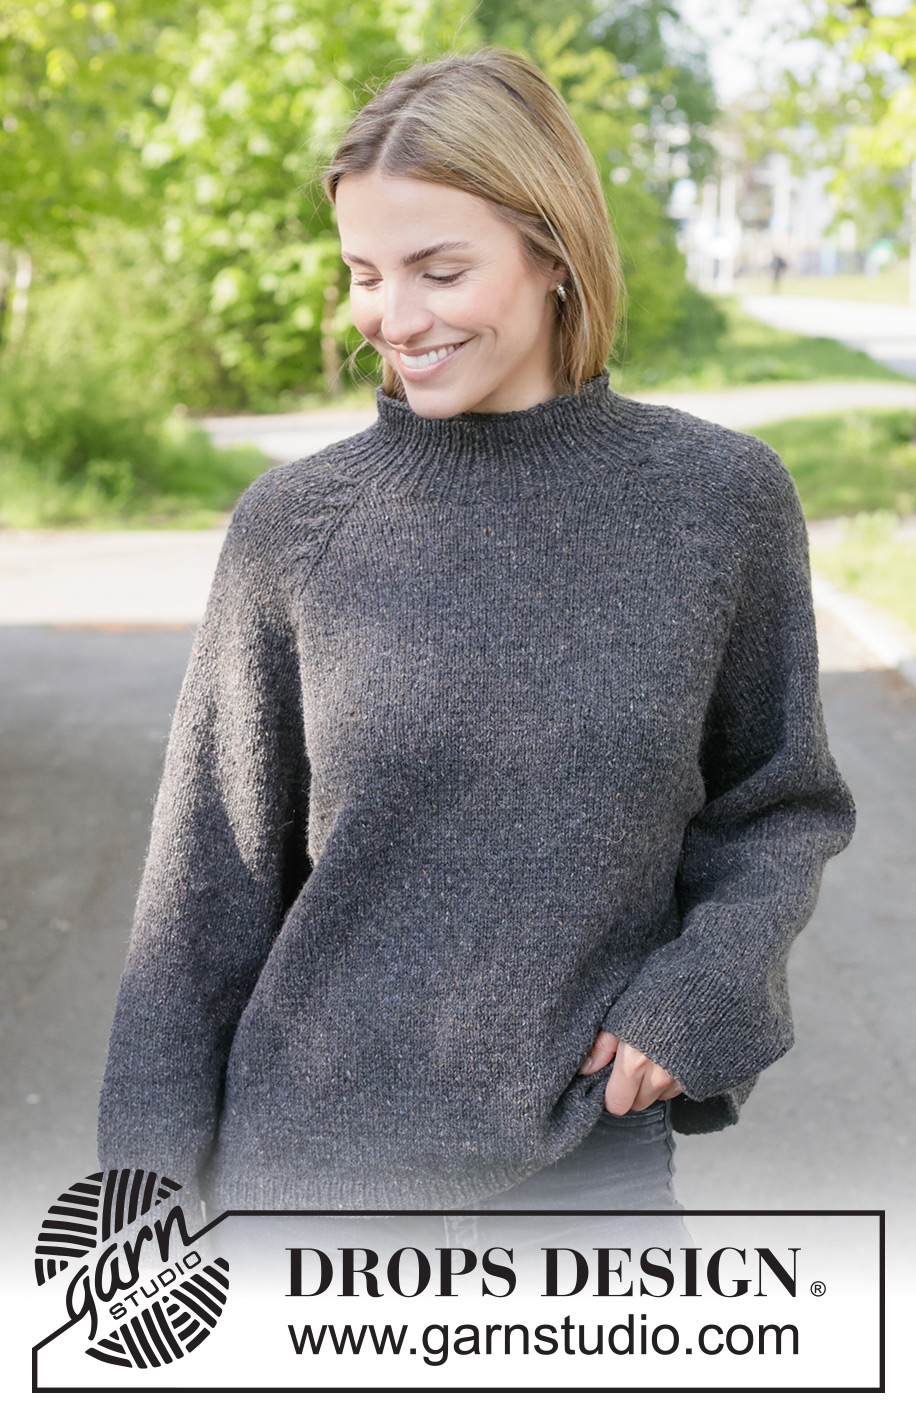
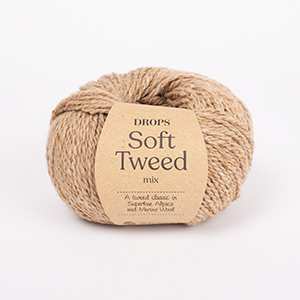
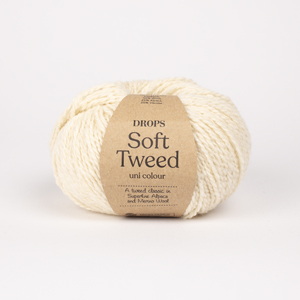
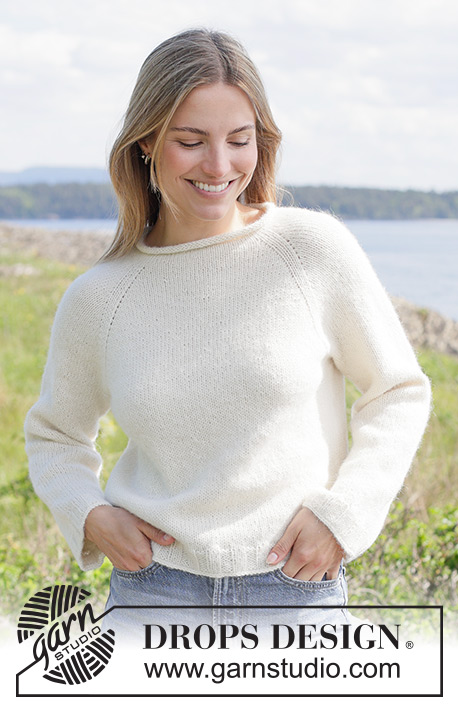
Knitted, oversized jumper in DROPS Soft Tweed. Piece is knitted top down with stocking stitch, raglan and cables. Size XS – XXXL.
DROPS 271-23 |
||||||||||||||||
|
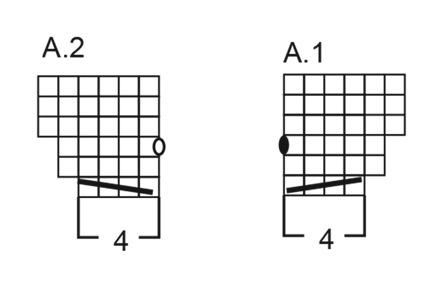
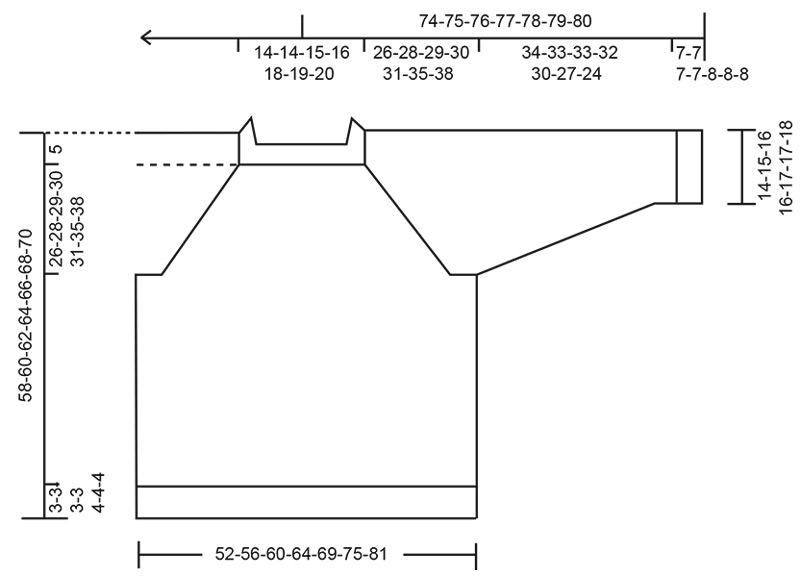
---------------------------------------------------------- EXPLANATION FOR THE PATTERN: ---------------------------------------------------------- RAGLAN – when working back and forth: Increase 1 stitch by making 1 yarn over from right side. On next row work yarn overs as explained below: BEFORE RAGLAN STITCH: Purl yarn overs in back loop of stitches to avoid holes. Work the new stitches in stocking stitch. AFTER RAGLAN STITCH: Slip yarn over off left needle and slip it back on left needle but the opposite way (insert left needle from behind when slipping it back on needle). Purl yarn overs in front loop of stitches to avoid holes. Work the new stitches in stocking stitch. RAGLAN – when working in the round: Increase 1 stitch by making 1 yarn over. On next round work yarn overs as explained below: BEFORE RAGLAN STITCH: Slip yarn over off left needle and put it back on left needle but the opposite way (insert left needle in from behind when slipping it back on needle). Knit yarn overs in front loop of stitches to avoid holes. Work the new stitches in stocking stitch. AFTER RAGLAN STITCH: Knit yarn overs in back loop of stitch - to avoid holes. Work the new stitches in stocking stitch. PATTERN: See diagrams A.1 and A.2. Read the diagram from right to left when working from right side and from left to right when working from wrong side. SLEEVE TIP: When picking up stitches mid under sleeve, there will be a small hole in the transition between stitches on body and sleeves. The holes can be closed by picking up the strand between two stitches - work this strand twisted together with the first stitch between body and sleeve to close the hole. DECREASE TIP: Decrease 1 stitch on each side of marker as follows: Work until 3 stitches remain before marker, knit 2 together, knit 2 (marker thread is between these 2 stitches) slip 1 stitch knitwise, knit 1, pass slipped stitch over stitch worked (= 2 stitches decreased). ---------------------------------------------------------- START THE PIECE HERE: ---------------------------------------------------------- JUMPER - SHORT OVERVIEW OF THE PIECE: In this pattern needles of different length have been used, begin with fitting length for number of stitches and switch as needed. Worked top down. Cast on stitches for neck and work back and forth on circular needle with increases in raglan – AT THE SAME TIME cast on stitches in each side of row until correct number of stitches and the neck is done. Then work the yoke in the round on circular needle top down. When yoke is done, divide piece for body and sleeves. Work body downwards in the round on circular needle while putting the sleeves aside. Then work sleeves downwards in the round on needle. Finish by picking up stitches around the neck and work a neck edge in the round. NECKLINE: Cast on 74-74-76-78-82-84-86 stitches on circular needle size 4 mm with DROPS Soft Tweed. Purl 1 row from wrong side. Insert 4 markers in piece while working next row, insert markers in a stitch, these stitches are called raglan stitches and increase is done for raglan on each side of raglan stitches. On front pieces and back piece increase by making 1 yarn over on every row from right side - read RAGLAN. On the sleeves work and increase according to diagram A.1/A.2. ROW 1 (= from right side): Knit 1, make 1 yarn over, knit 1 and insert 1 marker in this stitch (= raglan stitch), A.1 (=4 stitches), knit 12 (= sleeve), A.2 (= 4 stitches), knit 1 and insert 1 marker in this stitch (= raglan stitch), make 1 yarn over, knit 28-28-30-32-36-38-40 (= back piece), make 1 yarn over, knit 1 and insert 1 marker in this stitch (= raglan stitch), A.1, knit 12 (= sleeve), A.2, knit 1 and insert 1 marker in this stitch (= raglan stitch), make 1 yarn over, knit 1 and cast on 2 new stitches at the end of row = 84-84-86-88-92-94-96 stitches. ROW 2 (= from wrong side): Purl over all stitches (remember to work yarn overs as explained in RAGLAN and as explained in A.1/A.2), cast on 2 new stitches at the end of row = 86-86-88-90-94-96-98 stitches. ROW 3 (= from right side): Work in stocking stitch and A.1/A.2 and increase for raglan on front pieces and back piece as before, cast on 2 new stitches at the end of row = 96-96-98-100-104-106-108 stitches. ROW 4 (= from wrong side): Purl over all stitches, cast on 2 new stitches at the end of row = 98-98-100-102-106-108-110 stitches. ROW 5 (= from right side): Work in stocking stitch and A.1/A.2 and increase for raglan on front pieces and back piece, there are no increases in A.1/A.2 on this row, cast on 2 new stitches at the end of row = 104-104-106-108-112-114-116 stitches. ROW 6 (= from wrong side): Purl over all stitches, cast on 2 new stitches at the end of row = 106-106-108-110-114-116-118 stitches. Remember to follow the knitting tension! 3 increases for raglan have been done on front pieces and back piece, 2 times in each side of each sleeve and 6 new stitches have been cast on in each side for neck. Then work as follows from right side: Work in stocking stitch and increase for raglan as explained above (sleeves work first row in A.1, knit 16, first row in A.2), cast on 14-14-16-18-22-24-26 new stitches at the end of row = 128-128-132-136-144-148-152 stitches. Continue working yoke in the round over all stitches as explained below. Work 1 round in stocking stitch over all stitches. There are now 36-36-38-40-44-46-48 stitches on back piece / front piece, 26 stitches on each sleeve and 1 stitch in each raglan line. Continue in stocking stitch and increase for raglan on each side of raglan stitches. On sleeves increase with A.1 at beginning of sleeve and A.2 at the end of sleeve (= 2 stitches increased in each side every 6th round). On front pieces and back piece increase with yarn overs on every other round. Continue until 20-24-26-26-28-28-30 increases have been done on sleeves (including increases when the neck was formed), A.1 and A.2 have been worked 10-12-13-13-14-14-15 times in total vertically. Increases on sleeves are now done, cables are done, continue in stocking stitch. Continue increases on front piece and back piece as before until 36-39-41-42-44-49-53 increases have been done (including increases when the neck was formed) = 324-352-372-380-404-428-456 stitches on needle. There are now 60-68-72-72-76-76-80 stitches on each sleeve, 100-106-112-116-124-136-146 stitches on back piece/front piece and 4 raglan stitches. Now divide yoke for body and sleeves. DIVIDING FOR BODY AND SLEEVES: AT THE SAME TIME as next round is worked divide yoke for body and sleeves as follows: Work to and with the first raglan stitch (= belongs to front piece), slip the next 60-68-72-72-76-76-80 stitches on a thread for sleeve, cast on 8-10-12-16-18-20-22 new stitches on needle (= in the side mid under sleeve), work 102-108-114-118-126-138-148 stitches in stocking stitch (= back piece), slip the next 60-68-72-72-76-76-80 stitches on a thread for sleeve, cast on 8-10-12-16-18-20-22 new stitches on needle (= in the side mid under sleeve), and work the last stitches from front piece (= 102-108-114-118-126-138-148 stitches on front piece). Finish body and sleeves separately. BODY: = 220-236-252-268-288-316-340 stitches. Work in stocking stitch until piece measures 50-52-54-56-57-59-61 cm from cast-on edge mid back. Switch to circular needle size 3 mm, work rib (= knit 1 and purl 1) while AT THE SAME TIME increasing 24-24-26-28-28-30-32-34 stitches evenly on 1st round = 244-260-278-296-318-348-374 stitches. When rib measures 3-3-3-3-4-4-4 cm, cast off with knit and purl over purl. Jumper measures approx. 53-55-57-59-61-63-65 cm from mid back and 58-60-62-64-66-68-70 cm from the shoulder. SLEEVES: Slip 60-68-72-72-76-76-80 sleeve stitches from one thread on to circular needle size 4 mm and pick in addition up 1 stitch in each of the 8-10-12-16-18-20-22 stitches cast on under sleeve– read SLEEVE TIP = 68-78-84-88-94-96-102 stitches. Insert 1 marker in the middle of the 8-10-12-16-18-20-22 new stitches under sleeve - round begins at the marker thread. Work stocking stitch in the round on needle - AT THE SAME TIME on first round after division decrease mid under sleeve – read DECREASE TIP and decrease as follows: Decrease 2 stitches every 3-3-2½-2½-2-2-1½ cm 5-7-9-10-12-12-14 times in total = 58-64-66-68-70-72-74 stitches. Work until sleeve measures 34-33-33-32-30-27-24 cm from division. Switch to double pointed needles size 3 mm and work rib (= knit 1 and purl 1) while AT THE SAME TIME increasing 12-12-14-14-14-14-14 stitches evenly on 1st round = 70-76-80-82-84-86-88 stitches. When rib measures 7-7-7-7-8-8-8 cm, cast off with knit over knit and purl over purl. Sleeve measures approx. 41-40-40-39-38-35-32 cm from division. NECK EDGE: Use circular needle size 3 mm. Begin from right side at right shoulder at the back, pick up approx. 100 to 124 stitches around the neck, number of stitches must be divisible by 2. Work rib in the round (= knit 1 and purl 1) for 8-8-8-8-9-9-9 cm. Knit 1 round and loosely cast off by knitting. |
||||||||||||||||
Diagram explanations |
||||||||||||||||
|
||||||||||||||||
 |
||||||||||||||||
 |
||||||||||||||||
Have you finished this pattern?Tag your pictures with #dropspattern #eveningsecretsweater or submit them to the #dropsfan gallery. Do you need help with this pattern?You'll find 23 tutorial videos, a Comments/Questions area and more by visiting the pattern on garnstudio.com. © 1982-2026 DROPS Design A/S. We reserve all rights. This document, including all its sub-sections, has copyrights. Read more about what you can do with our patterns at the bottom of each pattern on our site. |
||||||||||||||||






With over 40 years in knitting and crochet design, DROPS Design offers one of the most extensive collections of free patterns on the internet - translated to 17 languages. As of today we count 333 catalogues and 12525 patterns translated into English (UK/cm). 12525
We work hard to bring you the best knitting and crochet have to offer, inspiration and advice as well as great quality yarns at incredible prices! Would you like to use our patterns for other than personal use? You can read what you are allowed to do in the Copyright text at the bottom of all our patterns. Happy crafting!
Post a comment to pattern DROPS 271-23
We would love to hear what you have to say about this pattern!
If you want to leave a question, please make sure you select the correct category in the form below, to speed up the answering process. Required fields are marked *.