
Popular categories
Looking for a yarn?


Comments / Questions (21)
![]() Petra wrote:
Petra wrote:
Ik heb een vraag over November Novelty Vest patroon ai-490 drops 252-28. Kunt u mij uitleggen hoe ik moet minderen voor het armsgat voorpand? Met name wat er bedoelt word met minder iedere 4-4 -4-2 -2-2 naald als volgt 1-2-3-5-7 -11 keer 1 steek aan elke kant. Dan zou ik nog 86 steken overhouden. van de 108. Ik begrijp wel het minderen maar niet hoe het hier in het patroon bedoelt word. Hartelijk dank alvast . Met vriendelijk groet Petra
16.04.2026 - 10:42
![]() Fabienne wrote:
Fabienne wrote:
Bonjour Je viens d’envoyer une question concernant les diminutions et m’aperçois que j’ai oublié de comptabiliser les rabats de 8 maillesx2 Tout s’éclaire Merci néanmoins pour votre espace question, bien utile.
02.01.2026 - 09:59DROPS Design answered:
Bonjour Fabienne, et bonne continuation :)
02.01.2026 - 10:07
![]() Fabienne wrote:
Fabienne wrote:
J’en suis au dos, à 33 cm. Je ne comprends pas les diminutions. On part de 98 mailles et on doit arriver à 76, et le texte nous dit de diminuer nous les 4 rangs en diminution 1 , soit deux diminutions début et fin, « trois fois une maille de chaque côté « = 6 diminutions. 98 -6 =92. Comment arrive t-on à 76? Merci d’avance
02.01.2026 - 09:55
![]() Anne wrote:
Anne wrote:
Bonjour, Pourriez-vous rétablir le lien vers le pull sans manche, encolure en V avec bordure I-cord et boutonné sur les côtés, auquel les questions ci-dessous font référence, et que je ne peux malheureusement pas continuer à tricoter faute d'explications relatives à ce modèle ? Je vous en remercie d'avance !
26.11.2025 - 18:32DROPS Design answered:
Bonjour Anne, les questions/réponses ci-dessous se reportent à ce modèle, pour les explications du pull sans manches avec boutons que l'on voit sous la liste des fournitures, cliquez ici. Bon tricot!
27.11.2025 - 09:24
![]() Cristina wrote:
Cristina wrote:
Buonasera, sto iniziando a diminuire per il collo a V. Leggo che le diminuzioni devono essere fatte solo sul diritto del lavoro ogni 1 cm. Siccome il mio campione ha 23 ferri ogni 10 cm, cioè 2,3 ferri per cm, ogni quanti ferri devo diminuire? Grazie molte per la gentile risposta. Saluti. Cristina
17.11.2025 - 21:22DROPS Design answered:
Buongiorno Cristina, in questa sede non ci è possibile adattare le spiegazioni alle singole esigenze, ma può rivolgersi direttamente al suo rivenditore DROPS di fiducia. Buon lavoro!
18.11.2025 - 11:18
![]() Fabienne wrote:
Fabienne wrote:
Bonjour J’en suis au devant, épaule droite. Je ne comprends pas comment on peut passer de 40 mailles à 30 si on nous demande de diminuer 10 fois tous les 1 cm avec, quand la diminution est nécessaire, une diminution en début de rang et une en fin de rang (soit deux diminutions x 10 ) Cordialement
12.11.2025 - 18:09DROPS Design answered:
Bonjour Fabienne, lorsque vous tricotez l'épaule droite, vous ne diminuez pour l'encolure que d'un seul côté, vous allez donc diminuer 10 fois 1 maille. Vous diminuez pour l'encolure V en début de rang sur l'endroit pour l'épaule droite / en fin de rang sur l'endroit pur l'épaule gauche. Bon tricot!
13.11.2025 - 14:50
![]() Fabienne Faur wrote:
Fabienne Faur wrote:
Bonjour Je ne comprends pas pourquoi dans le détail des explications, on nous demande de diminuer au premier rang après les côtes alors que le dessin du patron nous montre un devant parfaitement rectiligne avant les emmanchures. Cdt
02.11.2025 - 13:49DROPS Design answered:
Bonjour Mme Faur, pour la même largeur, il faudra davantage de mailles pour tricoter des côtes avec les aiguilles 4 que pour tricoter en jersey avec des aiguilles 5, on va donc devoir diminuer après les côtes pour bien conserver la bonne largeur. Bon tricot!
03.11.2025 - 08:01
![]() Carolyn wrote:
Carolyn wrote:
Hi Is the " I-cord cast off for back neckline " just decorative ? I propose using 2 strands of yarn group A to make the 'C' required for this pattern and it might be a bit difficult for me where the method asks to twust 2 strands and I will have 4 ! Can I just cast off?
17.09.2025 - 12:01DROPS Design answered:
Hi Carolyn, of course you can. Happy knitting!
22.10.2025 - 15:20
![]() Nathalie Joubert wrote:
Nathalie Joubert wrote:
Bonjour. Je ne comprends pas comment terminer l'encolure dos. Auriez vous plus d'explications sur "RABATTRE AVEC BORDURE I-CORD". Sur combien de rang fait il faire ça? Que signifie " remettre les 3 mailles sur l'aiguille gauche"?. Merci de bien vouloir m'aider. Cordialement. Nathalie Joubert
19.01.2025 - 23:17DROPS Design answered:
Bonjour Mme Joubert, vous montez d'abord 2 mailles puis vous relevez les mailles de l'encolure dos, puis vous coupez le fil. Vous allez maintenant rabattre avec bordure i-cord: vous tricotez sur l'endroit les 2 mailles montées, puis les 2 mailles suivantes ensemble à l'endroit, remettez ces 3 mailles de nouveau sur l'aiguille gauche et tricotez de nouveau 2 m endroit, 2 m ens à l'endroit et continuez ainsi tout du long jusqu'à ce qu'il ne reste que ces 3 m. Retrouvez cette technique en vidéo ici. Bon tricot!
20.01.2025 - 08:51
![]() Ramaa wrote:
Ramaa wrote:
Hej team Tak for jeres fantastiske opskrifter. Har strikket mange af jeres opskrifter. Jeg har et spørgsmål til denne her Slipover “Halskant bagstykke: Brug rundpind 4, start fra retsiden. Slå 2 masker op på pinden, strik ca 28 til 32 masker op langs med halskanten. “ Hvordan skal jeg lave kanten? Har brug for lidt hjælp. På forhånd tak!
10.01.2025 - 10:02DROPS Design answered:
Hei Ramaa. Halskanten med I-cord avfelling er forklart øverst i oppskriften under I-CORD AFLUKNING (gælder halskant på bagstykke). Om du tar en titt på videoen: Hvordan strikkes en i-cord aflukning. Så ser du en lignende teknikk og da er det kanskje lettere å forstå hva det menes med det som står i oppskriften. mvh DROPS Design.
13.01.2025 - 14:00
|
|
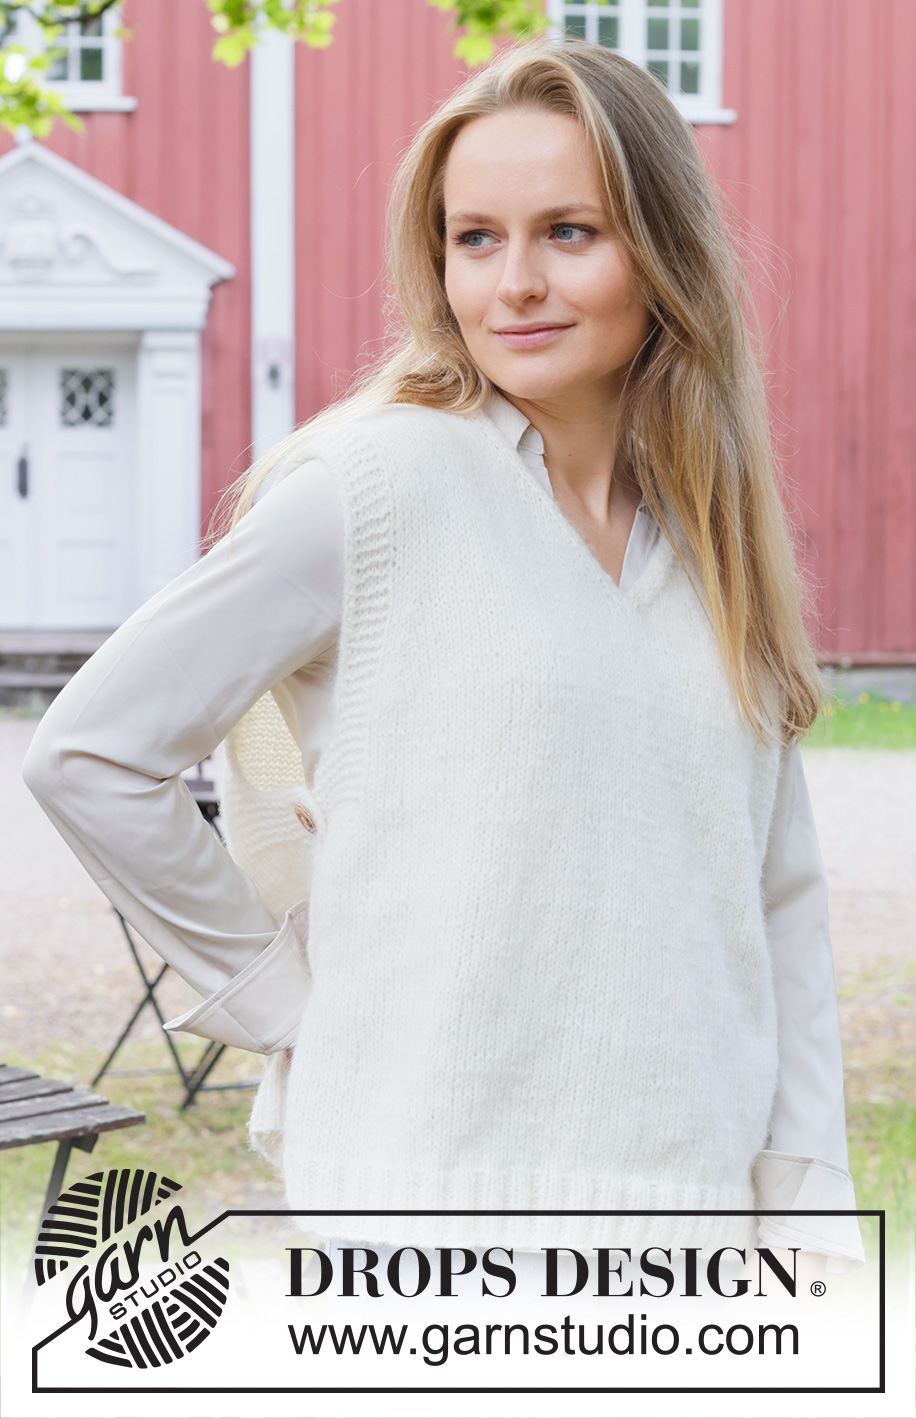
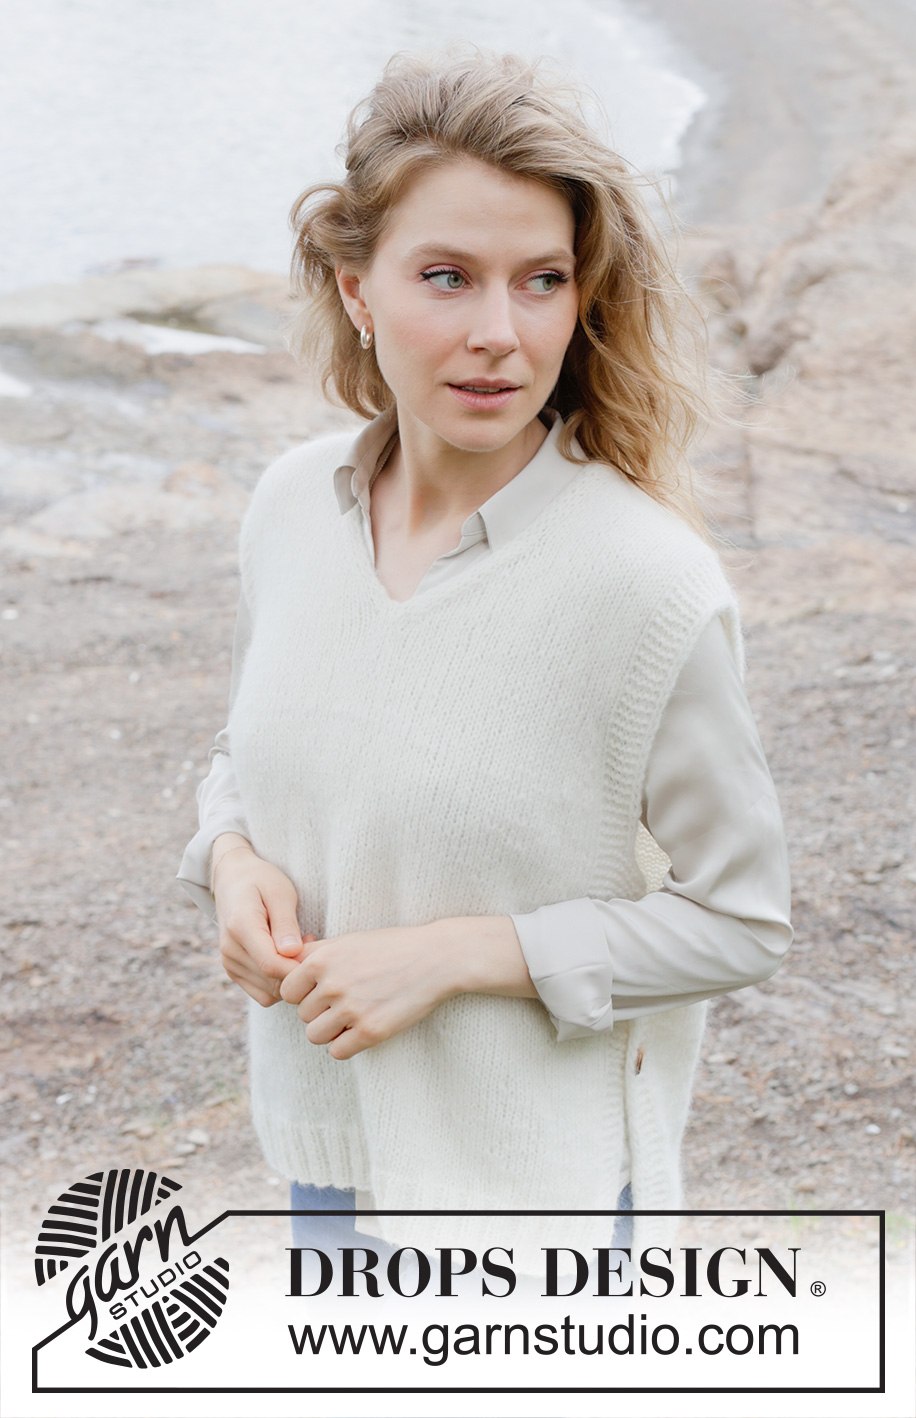
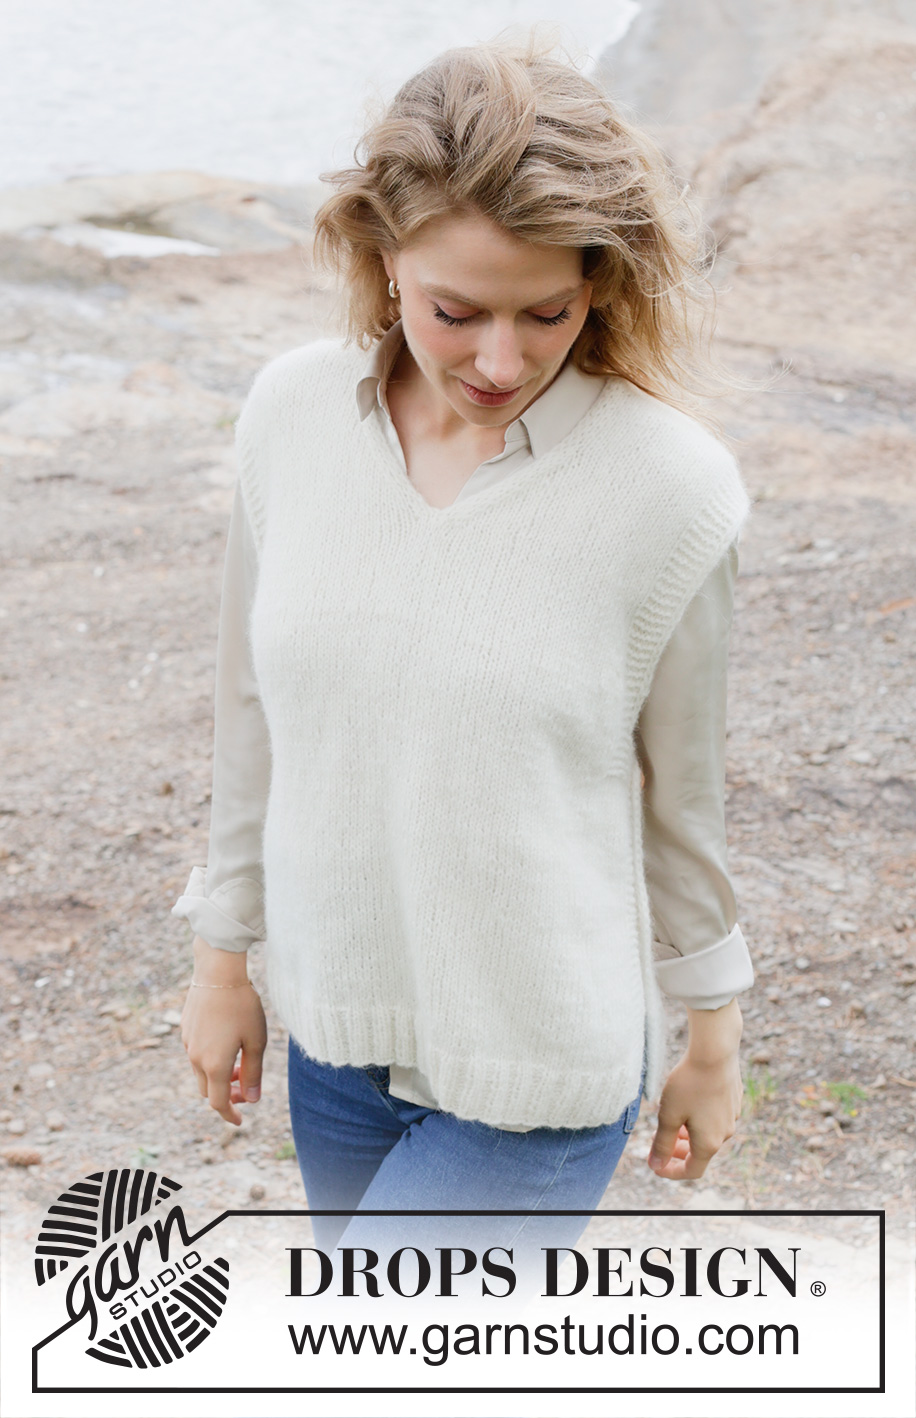
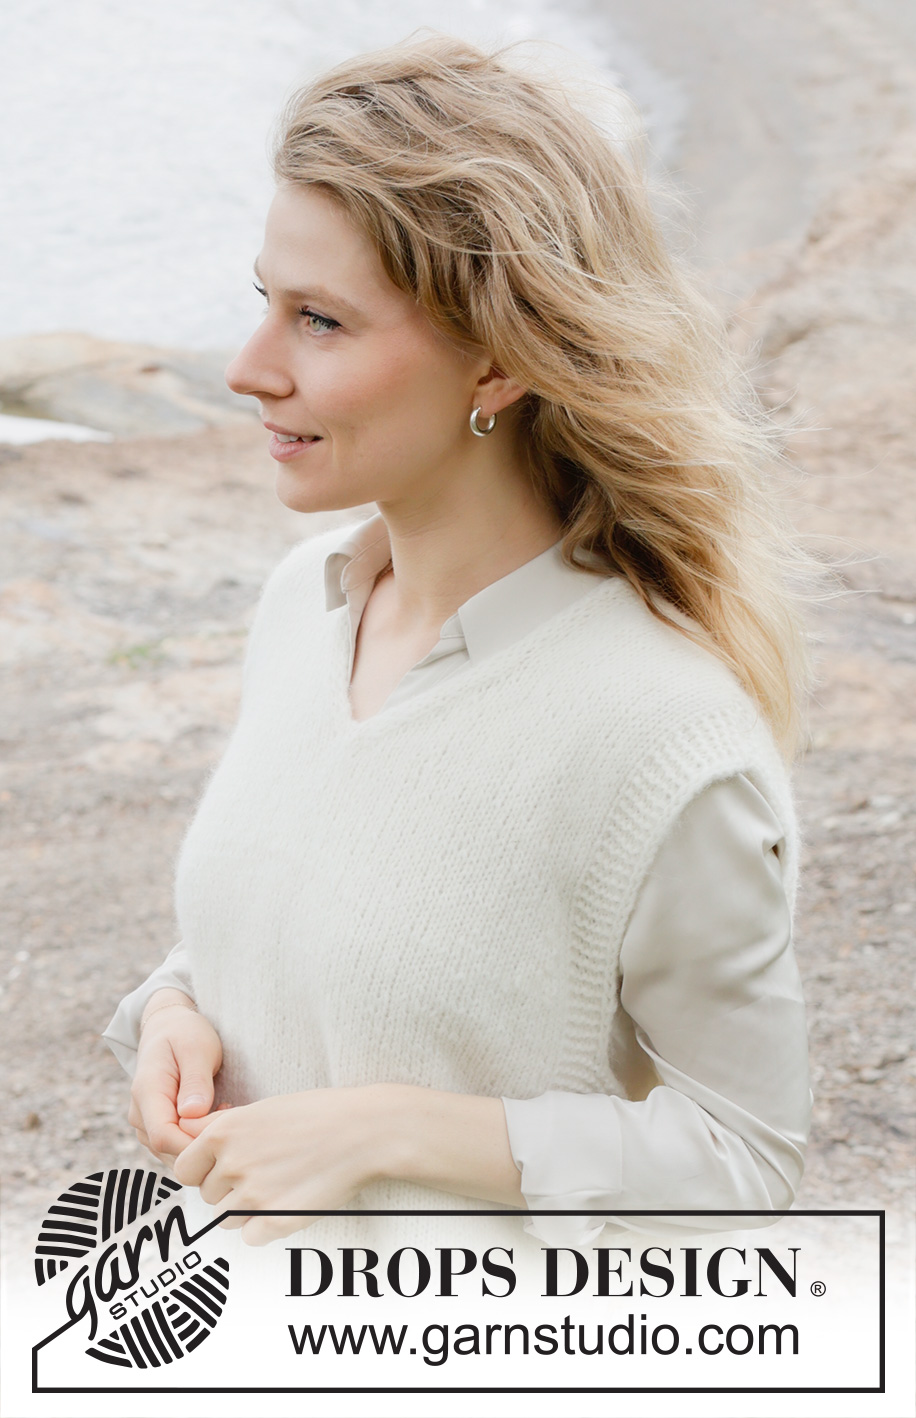
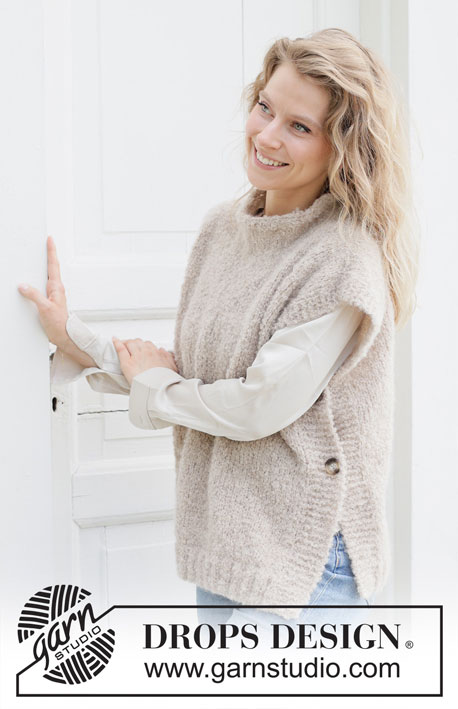
November Novelty Vest#novembernoveltyvest |
|
 |
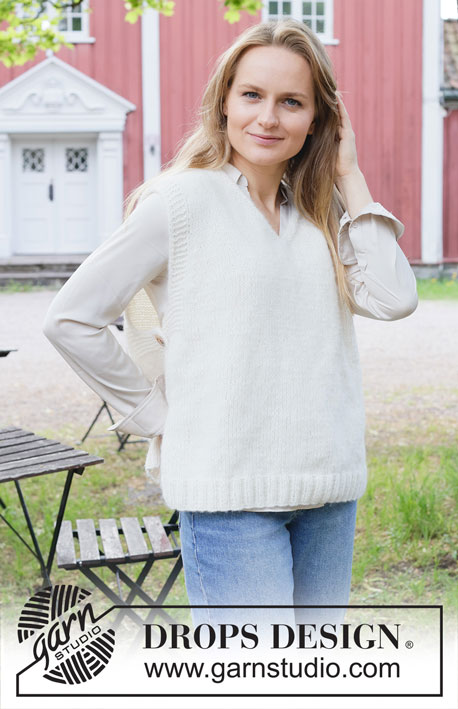 |
Knitted vest in DROPS Air. The piece is worked bottom up, with V-neck, diagonal shoulders and split in sides. Sizes XS - XXL.
DROPS 252-28 |
|
|
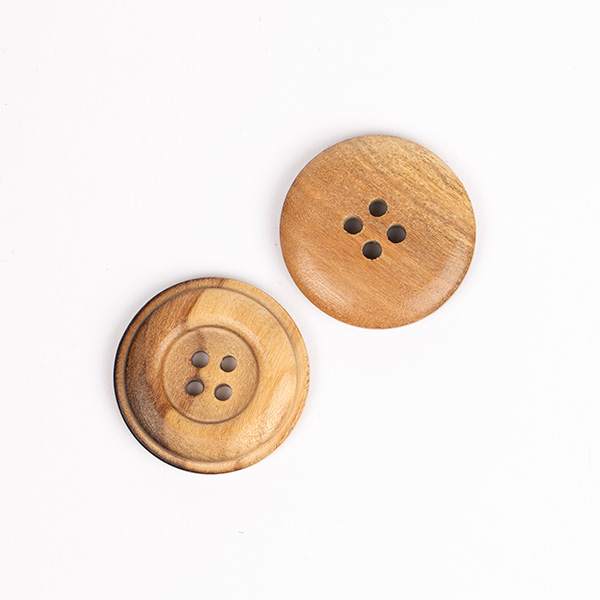
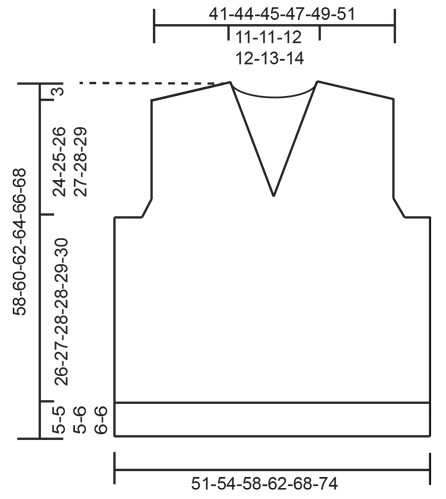
------------------------------------------------------- EXPLANATIONS FOR THE PATTERN: ------------------------------------------------------- GARTER STITCH (worked back and forth): Knit all rows, from both the right and wrong side. 1 ridge in height = knit 2 rows. BANDS WITH I-CORD: START OF ROW: Work the band as follows: Slip 1 stitch purl-wise, with yarn in front, knit 1, work 5 garter stitches. END OF ROW: Work the band as follows: Work until there are 7 stitches left on the row, work 5 garter stitches, slip 1 stitch purl-wise with yarn in front, knit 1. Work like this from both the right and wrong side. EDGE STITCHES WITH I-CORD (for V-neck): START OF ROW: Work the stitches as follows: Slip 1 stitch purl-wise, with yarn in front, knit 1. END OF ROW: Work the stitches as follows: Work until there are 2 stitches left on the row, slip 1 stitch purl-wise with yarn in front, knit 1. Work like this from both the right and wrong side. DECREASE TIP-1 (for armholes): All decreases are worked from the right side! START OF ROW: Work the first 9 stitches as before, slip 1 stitch knit-wise, knit 1 and pass the slipped stitch over the knitted stitch (= 1 stitch decreased). END OF ROW: Work until there are 11 stitches left on the row, knit 2 together (= 1 stitch decreased), work to end of row as before. DECREASE TIP-2 (for V-neck): All decreases are worked from the right side! START OF ROW: Work the first 3 stitches as before, slip 1 stitch knit-wise, knit 1 and pass the slipped stitch over the knitted stitch (= 1 stitch decreased). END OF ROW: Work until there are 5 stitches left on the row, knit 2 together (= 1 stitch decreased), work the remaining 3 stitches as before. I-CORD CAST OFF (for back neckline): ROW 1 (right side): Knit 2, knit 2 twisted together. ROW 2 (right side): Slip the 3 stitches on the right needle back onto the left needle, knit 2, knit 2 twisted together. Repeat ROW 2 until there are 3 stitches left on the right needle. Slip these 3 stitches back onto the left needle. Cast off. ------------------------------------------------------- START THE PIECE HERE: ------------------------------------------------------- VEST - SHORT OVERVIEW OF THE PIECE: The piece is worked back and forth with circular needle, bottom up. The front and back pieces are worked separately, sewn together at the shoulders and decorative buttons are sewn onto each side. FRONT PIECE: Cast on 96-100-108-116-128-140 stitches with circular needle size 4 mm and DROPS Air. Work rib from the wrong side as follows: 7 stitches according to BANDS WITH I-CORD, work rib (purl 2, knit 2) until there are 9 stitches left, purl 2 and 7 stitches according to BANDS WITH I-CORD. Work this rib back and forth for 5-5-5-6-6-6 cm. Change to circular needle size 5 mm. Work 1 row of stocking stitch with 7 band-stitches on each side. AT THE SAME TIME decrease 10-8-10-10-12-14 stitches evenly over the stocking stitches on the first row = 86-92-98-106-116-126 stitches. Continue with stocking stitch and the band-stitches. Remember to maintain the knitting tension When the piece measures 28-29-30-31-32-33 cm, work an extra 7-7-8-8-9-9 garter stitches on each side (the bands now consist of the outermost 14-14-15-15-16-16 stitches on each side). When the piece measures 31-32-33-34-35-36 cm, start to decrease for the armholes as follows. Cast off 7-7-8-8-9-9 stitches on each side. Then continue the bands across the outermost 7 stitches on each side and decrease for the armholes – read DECREASE TIP-1, decreasing every 4th-4th-4th-2nd-2nd-2nd row as follows: 1 stitch 1-2-3-5-7-11 times on each side = 70-74-76-80-84-86 stitches. When the piece measures 42-44-45-47-48-50 cm, with the next row from the right side, cable the middle 2 stitches as follows: Work 34-36-37-39-41-42 stitches, place the next stitch on a cable needle behind the piece, knit 1 and knit 1 from the cable needle, work to end of row as before. Place the first 35-37-38-40-42-43 stitches on a stitch holder for the left shoulder and work the right shoulder. RIGHT SHOULDER: = 35-37-38-40-42-43 stitches. Work from the wrong side as before, cast on 2 stitches at the end of the row (by the neck) = 37-39-40-42-44-45 stitches. Continue working 2 EDGE STITCHES WITH I-CORD – read description above, by the neck and 7 band-stitches at the side as before. AT THE SAME TIME decrease for the V-neck – read DECREASE TIP-2, every 1 cm 9-9-10-10-11-12 times = 28-30-30-32-33-33 stitches. When the piece measures 55-57-59-61-63-65 cm (approx. 3 cm left to finished length) cast off for the diagonal shoulders at the beginning of each row from the wrong side: 5-5-5-6-6-6 stitches 3 times, then cast off the remaining 13-15-15-14-15-15 stitches. The piece measures approx. 58-60-62-64-66-68 cm. LEFT SHOULDER: Cast on 2 stitches (by the neck) then work from the wrong side as before across the 35-37-38-40-42-43 stitches on the stitch holder = 37-39-40-42-44-45 stitches. Continue working 2 EDGE STITCHES WITH I-CORD by the neck and 7 band-stitches at the side as before. AT THE SAME TIME decrease for the V-neck – remember DECREASE TIP-2, every 1 cm 9-9-10-10-11-12 times = 28-30-30-32-33-33 stitches. When the piece measures 55-57-59-61-63-65 cm (approx. 3 cm left to finished length) cast off for the diagonal shoulders at the beginning of each row from the right side: 5-5-5-6-6-6 stitches 3 times, then cast off the remaining 13-15-15-14-15-15 stitches. The piece measures approx. 58-60-62-64-66-68 cm. BACK PIECE: Cast on 96-100-108-116-128-140 stitches with circular needle size 4 mm and DROPS Air. Work rib from the wrong side as follows: 7 stitches according to BANDS WITH I-CORD, work rib (purl 2, knit 2) until there are 9 stitches left, purl 2 and 7 stitches according to BANDS WITH I-CORD. Work this rib back and forth for 5-5-5-6-6-6 cm. Change to circular needle size 5 mm. Work 1 row of stocking stitch with 7 band-stitches on each side. AT THE SAME TIME decrease 10-8-10-10-12-14 stitches evenly over the stocking stitches on the first row = 86-92-98-106-116-126 stitches. Continue with stocking stitch and band-stitches. When the piece measures 28-29-30-31-32-33 cm, work an extra 7-7-8-8-9-9 garter stitches on each side (the bands now consist of the outermost 14-14-15-15-16-16 stitches on each side). When the piece measures 31-32-33-34-35-36 cm, start to decrease for the armholes as follows. Cast off 7-7-8-8-9-9 stitches on each side. Then continue the bands across the outermost 7 stitches on each side and decrease for the armholes – remember DECREASE TIP-1, decreasing every 4th-4th-4th-2nd-2nd-2nd row as follows: 1 stitch 1-2-3-5-7-11 times on each side = 70-74-76-80-84-86 stitches. When the piece measures 54-56-58-60-62-64 cm, cast off the middle 18-18-20-20-22-24 stitches for the neckline and finish each shoulder separately. DIAGONAL SHOULDERS: = 26-28-28-30-31-31 stitches. Continue working until the piece measures 55-57-59-61-63-65 cm. Now cast off for the shoulders: 5-5-5-6-6-6 stitches on each row from the armhole 3 times, then cast off the remaining 11-13-13-12-13-13 stitches (2 fewer stitches on the back piece than on the front piece). The piece measures approx. 58-60-62-64-66-68 cm. BACK NECKLINE: Use circular needle size 4 mm. Start from the right side. Cast on 2 stitches, then knit up 28 to 32 stitches around the back neckline. Cut the strand so you cast off from the right side. Use circular needle size 5 mm and work I-CORD CAST OFF – read description above. ASSEMBLY: Sew the shoulder seams, making sure the edge stitches on the V-neck are sewn neatly to the I-cord cast-off at the back. Sew a couple of stitches at the bottom of the V-neck, to collect the 2 cast-on stitches on each side. Sew 2 decorative buttons onto each side of the vest; lay the edge stitches on the front piece over the edge stitches on the back piece, sew on the buttons through both layers. The top button is positioned 1 cm below the armhole, the second button 9-10 cm below the first. |
|
 |
|
Have you finished this pattern?Tag your pictures with #dropspattern #novembernoveltyvest or submit them to the #dropsfan gallery. Do you need help with this pattern?You'll find 23 tutorial videos, a Comments/Questions area and more by visiting the pattern on garnstudio.com. © 1982-2026 DROPS Design A/S. We reserve all rights. This document, including all its sub-sections, has copyrights. Read more about what you can do with our patterns at the bottom of each pattern on our site. |
|


With over 40 years in knitting and crochet design, DROPS Design offers one of the most extensive collections of free patterns on the internet - translated to 17 languages. As of today we count 324 catalogues and 12290 patterns translated into English (UK/cm). 12290
We work hard to bring you the best knitting and crochet have to offer, inspiration and advice as well as great quality yarns at incredible prices! Would you like to use our patterns for other than personal use? You can read what you are allowed to do in the Copyright text at the bottom of all our patterns. Happy crafting!
Post a comment to pattern DROPS 252-28
We would love to hear what you have to say about this pattern!
If you want to leave a question, please make sure you select the correct category in the form below, to speed up the answering process. Required fields are marked *.