
Popular categories
Looking for a yarn?


Comments / Questions (47)
![]() Amani wrote:
Amani wrote:
Hei, jeg lurte på hvilket garn som er brukt, og hvor mange som trengs til en genser i størrelse small. Er det Drops Kid-Silk som er brukt, og kan det erstattes med Drops Brushed Alpaca Silk? Takk for svar :)
07.01.2025 - 17:45DROPS Design answered:
Hei Amani, Drops Kid Silk kommer i 25 g nøster, slik at du trenger 3 nøster i hver farge og strikker hele genseren med 1 tråd fra hvert nøste. Drops Brushed Alpaca Silk tilhører samme garngruppe og kan brukes på samme måte og med samme antall nøster. God fornøyelse!
09.01.2025 - 11:14
![]() Agnès wrote:
Agnès wrote:
Bonjour, Pouvez-vous m'indiquer la couleur du fil Kid -Silk utilisé pour ce modèle et porté par le mannequin . Merci3lis3 Merci !
26.12.2024 - 17:01DROPS Design answered:
Bonjour Agnès, le pull porté par notre modèle a été tricoté avec 1 fil des 4 coloris demandés: on tricote ce pull avec 4 fils Kid-Silk, 1 de chaque couleur. Bon tricot!
02.01.2025 - 11:35
![]() Cinzia wrote:
Cinzia wrote:
Si può lavorare con i ferri dritti questo modello? Grazie
25.11.2024 - 17:49DROPS Design answered:
Buonasera Cinzia, questo modello è lavorato in parte in piano e in parte in tondo. Se vuole lavorarlo tutto in piano, deve riadattare le spiegazioni. Buon lavoro!
27.11.2024 - 00:04
![]() Cinzia wrote:
Cinzia wrote:
Si può lavorare con i ferri fritti questo modello?Grazie
25.11.2024 - 17:47DROPS Design answered:
Buonasera Cinzia, questo modello è lavorato in parte in piano e in parte in tondo. Se vuole lavorarlo tutto in piano, deve riadattare le spiegazioni. Buon lavoro!
27.11.2024 - 00:04
![]() Madeleine wrote:
Madeleine wrote:
Hej, i instruktionsvideon visar ni två olika sätt att lägga upp maskor för halsen mellan framstyckena. Vilket sätt rekommenderar ni till detta mönster?
18.11.2024 - 19:15DROPS Design answered:
Hei Madeleine. I denne oppleggskanten skal det senere strikkes opp masker til hals, så anbefaler at du bruker den metoden du syns er best for deg. Strikk gjerne en prøvelapp med oppleggskanten og hvordan du strikker opp masker til hals. Syns du det blir noe forskjell? Bruk den metoden du syns er best :) mvh DROPS Design
25.11.2024 - 08:45
![]() Gabriella wrote:
Gabriella wrote:
Perché non c’è più il disegno con le varie misure del modello?
23.10.2024 - 15:41DROPS Design answered:
Buongiorno Gabriella, lo schema è visibile in fondo alla pagina. Provi ad aggiornarla o a svuotare la cache del browser. Buon lavoro!
23.10.2024 - 16:15
![]() Joanna Luxton wrote:
Joanna Luxton wrote:
The back piece is knitted to a length of 16cm (M). The front piece is knitted to a length of 28 cm. Then we join the two to make the body. This seems very strange to me. Is the pattern correct? 🤔 Thanks very much for your help!
22.10.2024 - 07:22DROPS Design answered:
Dear Mrs Luxton, sure it is, in such patterns the back piece will be shorter and front piece longer before armhole so that the shoulders are slightly down on the back - look at the videos/lessons under tabs above in header, you will see how to work each part of a similar jumper. When you have worked to armholes in M you will have 16 cm back piece + 26 cm front piece before armhole = 42/2 = 21 cm armhole. Happy knitting!
22.10.2024 - 09:28
![]() Helene Tellbe wrote:
Helene Tellbe wrote:
Jag stickar bakstycket , i XL , lägger upp 30 m , ska öka varje varv 11 ggr , i början och slutet av varje varv , dvs 22 m . Blir 52 m . Sedan ska det stickas slätstickning tills det är 74 m på varvet . Men fortsätter man ökningarna då som förut !!?? Beskrivningen är ju bara 11 ökningar i början och slutet av varje varv ??
13.10.2024 - 13:56DROPS Design answered:
Hej Helene. Du ökar 2 maskor på varv 2, och 2 maskor på varv 3. Så 2 ökningar på varv 2 är 22 ökade maskor och 2 ökningar på varv 3 är 22 ökade maskor. 30+22+22= 74 m. Mvh DROPS Design
14.10.2024 - 10:01
![]() Päivi Johansson wrote:
Päivi Johansson wrote:
Kan man sticka tröjan med färre trådar Kid Silk till exempel 2 eller 3 eller ändras storleken på tröjan då?
13.10.2024 - 06:41DROPS Design answered:
Hej Päivi. Ja då kommer storleken på tröjan att ändras, eftersom du kommer få en annan stickfasthet än den som uppges i mönstret. Mvh DROPS Design
14.10.2024 - 09:20
![]() Marianne Köchel wrote:
Marianne Köchel wrote:
Könnte ich diesen Pullover Mit Brushed Alpaka Silk 2 Fäden stricken
02.10.2024 - 22:41DROPS Design answered:
Liebe Frau Köhchel, ja sicher, benutzen Sie den Garnumrechner um die neue Garnmenge kalkulieren zu lassen. Viel Spaß beim Stricken!
03.10.2024 - 09:45
|
|
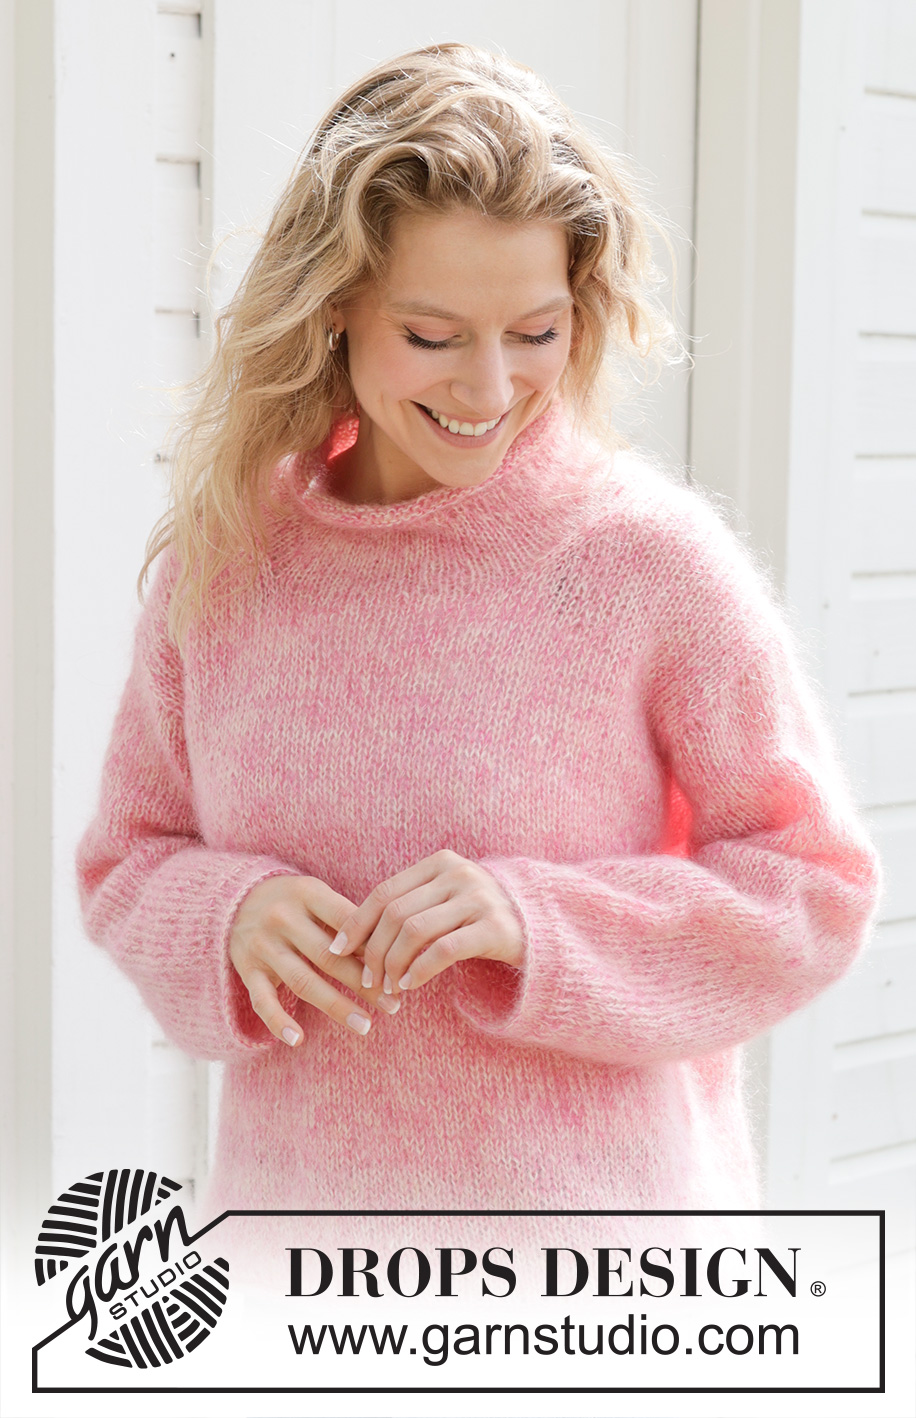
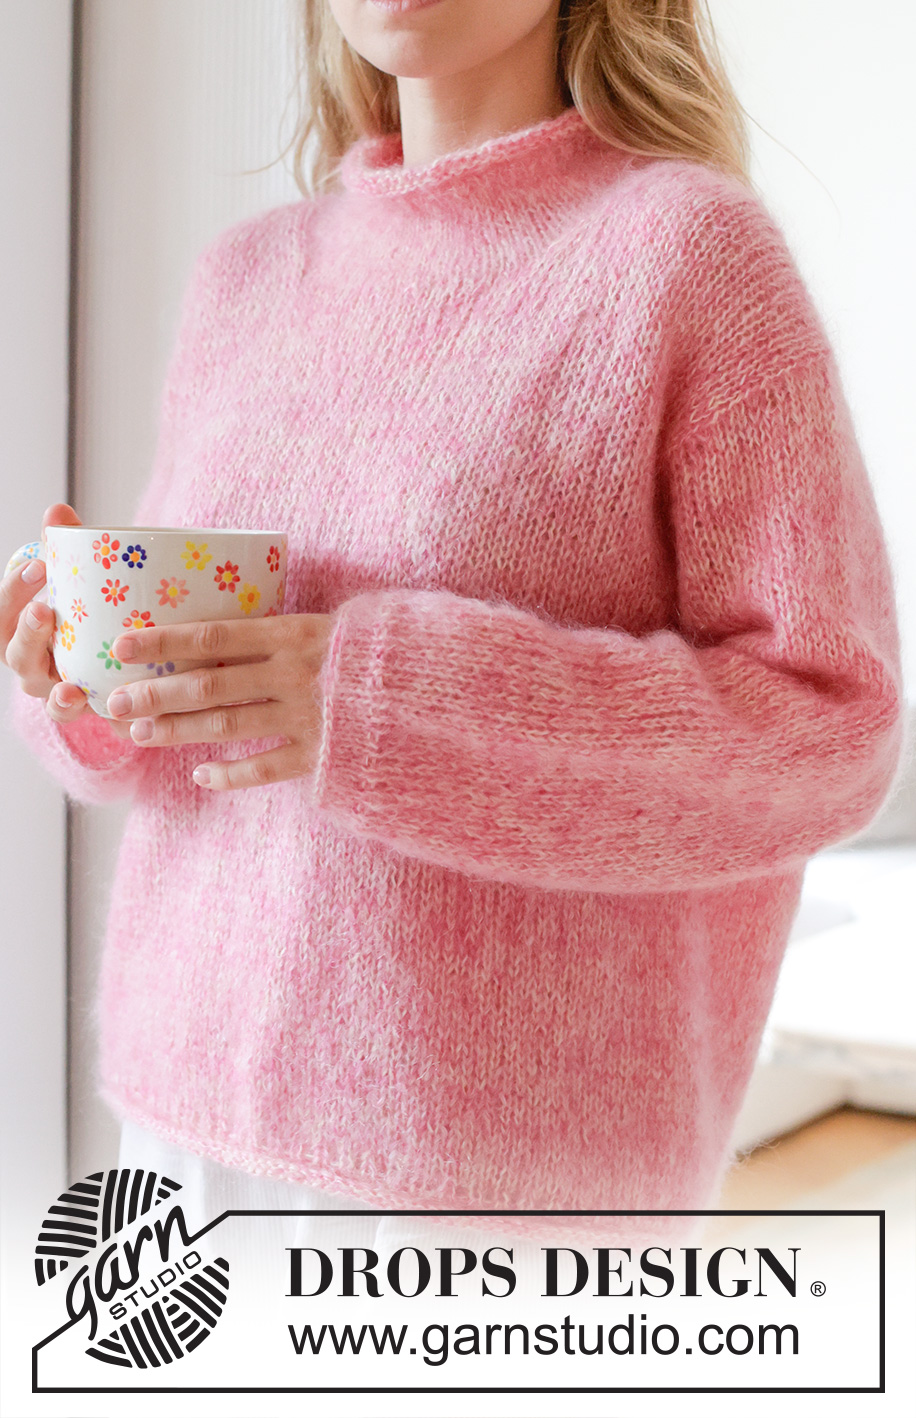
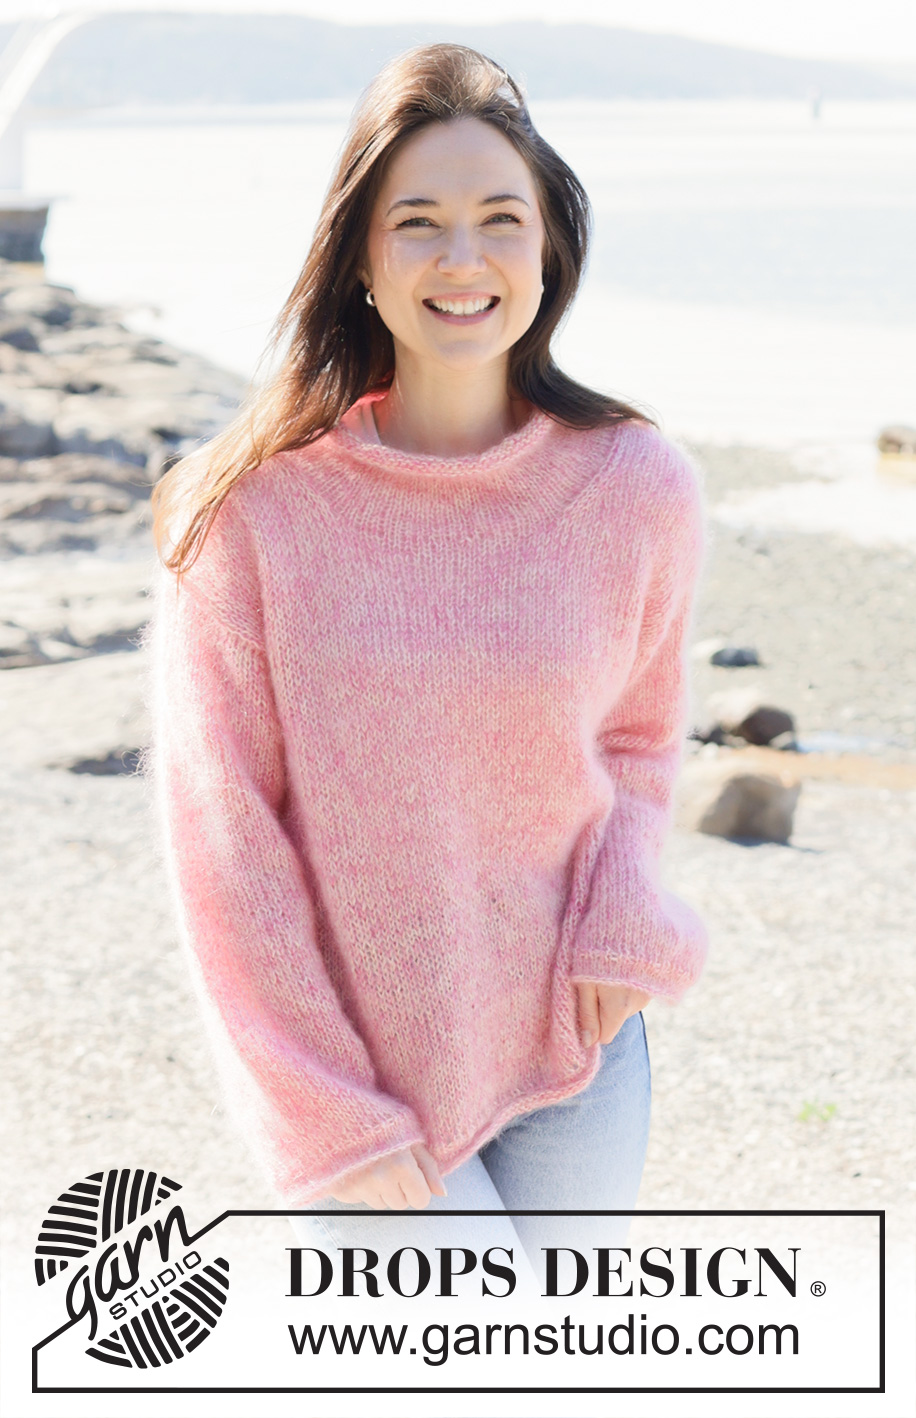
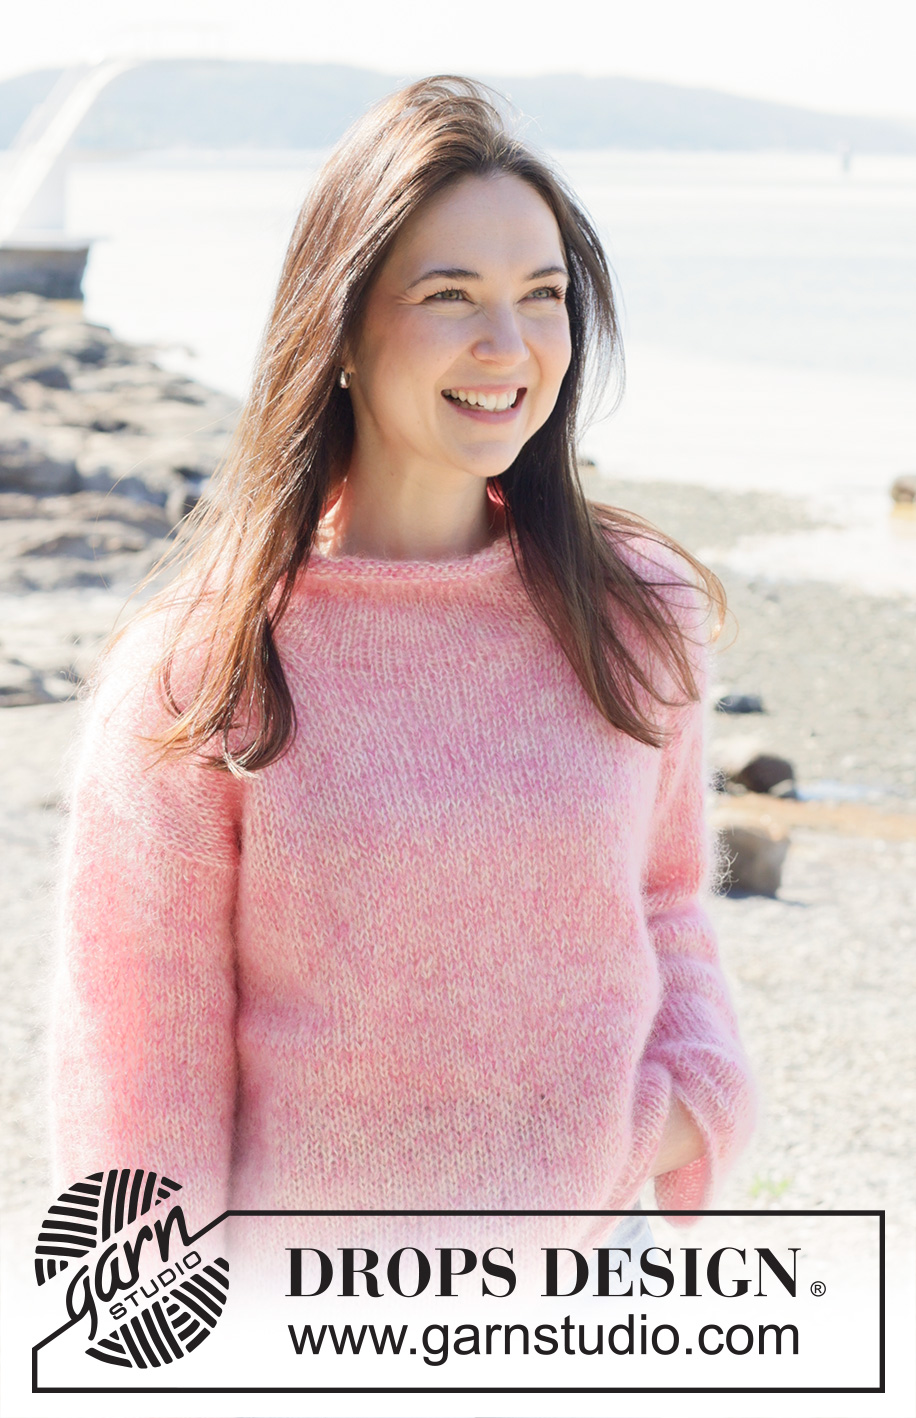
Pink Melody#pinkmelodysweater |
|
 |
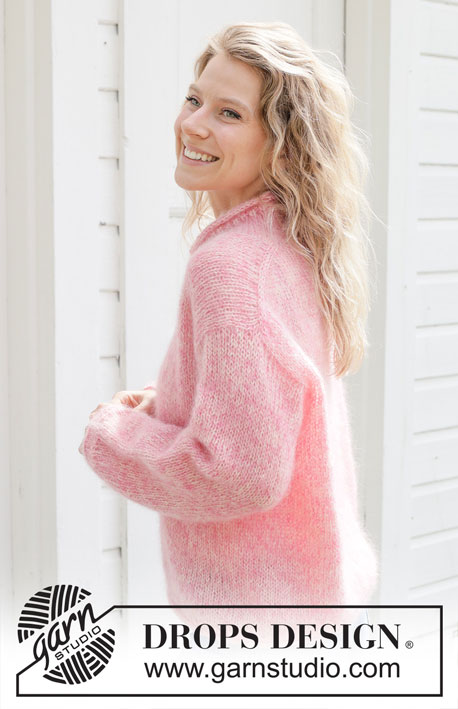 |
Knitted jumper in 4 strands DROPS Kid-Silk. Piece is knitted top down with European / diagonal shoulder. Size: S - XXXL
DROPS 255-6 |
|
|
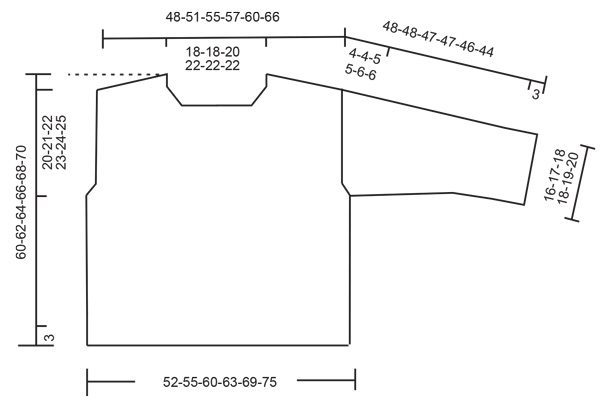
---------------------------------------------------------- EXPLANATION FOR THE PATTERN: ---------------------------------------------------------- INCREASE TIP-1: INCREASE 1 STITCH TOWARDS THE LEFT - from RIGHT SIDE: Use left needle to pick up yarn between 2 stitches from row below, pick up yarn from the front and knit in the stitch loop that is on the back of the needle. INCREASE 1 STITCH TOWARDS THE RIGHT - from RIGHT SIDE: Use left needle to pick up yarn between 2 stitches from row below, pick up yarn from the back and knit in the stitch loop that is on the front side of the needle. INCREASE TIP-2: INCREASE 1 STITCH TOWARDS THE RIGHT - from WRONG SIDE: Use left needle to pick up yarn between 2 stitches from row below, pick up yarn from the back and purl in the stitch loop that is on the front side of the needle. INCREASE 1 STITCH TOWARDS THE LEFT - from WRONG SIDE: Use left needle to pick up yarn between 2 stitches from row below, pick up yarn from the front and purl in the stitch loop that is on the back side of the needle. KNITTING TIP: When working short row there will be a small hole when turning the piece - the hole can be closed by tightening the yarn or using the technique German Short Rows as follows: Slip first stitch purlwise. Place strand over right needle and tighten well at the back (should lead to two loops on needle). Work these loops together on next row. DECREASE TIP: Decrease 1 stitch on each side of marker thread as follows: Work until 3 stitches remain before marker thread and knit 2 together, knit 2 (marker thread is in the middle of these 2 stitches), slip 1 stitch knitwise, knit 1, pass slipped stitch over stitch worked (= 2 stitches decreased). ---------------------------------------------------------- START THE PIECE HERE: ---------------------------------------------------------- JUMPER - SHORT OVERVIEW OF THE PIECE: In this pattern needles of different length have been used, begin with fitting length for number of stitches and switch as needed. First work piece back and forth on circular needle. Begin by casting on stitches in the back of neck. Then work back piece downwards while AT THE SAME TIME increasing in each side of piece until number of stitches for shoulder width is reached. Back piece has a slight diagonal shoulder. Then work down to armholes. Now put back piece a side and work the front piece. Front piece is first worked in 2 parts. Begin by picking up stitches along one shoulder from back piece, work while increasing towards the neck. Repeat on the other shoulder. Put right and left front piece together when increases for neck are done. Then work front piece down to armholes. Now slip front piece and back piece on to same circular needle and work body downwards in the round on circular needle. Pick up stitches for sleeves around the armholes and work sleeves downwards. First work back and forth with short rows to form a sleeve cap, then work sleeves downwards in the round on needle. Finish by picking up stitches around the neck, and work a neck edge. BACK PIECE: Work piece back and forth on needle. Cast on 26-26-28-30-30-30 stitches on circular needle size 6 mm with 1 strand of each colour in DROPS Kid-Silk. ROW 1 (= wrong side): Purl all stitches. ROW 2 (= right side): Read INCREASE TIP-1 and knit 3, increase 1 stitch towards the left, knit until 3 stitches remain, increase 1 stitch towards the right, knit 3. ROW 3 (= wrong side): Read INCREASE TIP-2 and purl 3, increase 1 stitch towards the right, purl until 3 stitches remain, increase 1 stitch towards the left, purl 3. Work 2nd and 3rd ROW 9-10-11-11-12-14 times, after last increase there are = 62-66-72-74-78-86 stitches on needle. Insert 1 marker in the side. Now measure piece from here! Continue in stocking stitch - remember to follow the knitting tension - until piece measures 12-13-13-13-13-14 cm measured from marker along armhole. Now increase in each side for armholes. INCREASE FOR ARMHOLES: ROW 1 (= right side): Remember INCREASE TIP-1 and knit 3, increase 1 stitch towards the left, knit until 3 stitches remain, increase 1 stitch towards the right, knit 3. ROW 2 (= wrong side): Purl all stitches. Work 1st and 2nd ROW 2-2-2-3-3-3 times in total = 66-70-76-80-84-92 stitches on needle. Work until piece measures 15-16-16-17-17-18 cm, measured from marker along armhole, finish with a row from wrong side. Cut the yarn, slip stitches on a thread or stitch holder, now work left front piece along the left shoulder as explained below. LEFT FRONT PIECE: Find left shoulder on back piece as follows: Place back piece flat with right side up, place back piece so that stitches on thread/stitch holder is towards you, left side of piece = left shoulder. Now pick up stitches along left diagonal shoulder on back piece - begin from right side at the neck and pick up stitches out towards the shoulder as follows: Pick up 1 stitch in every worked row, inside outermost stitch = 18-20-22-22-24-28 stitches. All length measurements on front piece are done from pick up edge. Work in stocking stitch (work first row from wrong side). When piece measures 9 cm, increase stitches towards the neck as follows: ROW 1 (= right side): Remember INCREASE TIP-1 and knit 3, increase 1 stitch towards the left, work the rest of row. ROW 2 (= wrong side): Purl all stitches. Work 1st and 2nd ROW 4 times in total = 22-24-26-26-28-32 stitches, (next row should be worked from right side). Cut the yarn, slip stitches on a thread or stitch holder, now work right front piece along the shoulder – read explanation below. RIGHT FRONT PIECE: Now pick up stitches right left diagonal shoulder on back piece - begin from right side at the shoulder and pick up stitches out towards the neck as follows: Pick up 1 stitch in every worked row inside outermost stitch = 18-20-22-22-24-28 stitches. All length measurements on front piece are done from pick up edge. Work in stocking stitch (work first row from wrong side). When piece measures 9 cm, increase stitches towards the neck as follows: ROW 1 (= right side): Work until 3 stitches remain, increase towards the right, knit 3 – remember INCREASE TIP-1. ROW 2 (= wrong side): Purl all stitches. Work 1st and 2nd ROW 4 times in total = 22-24-26-26-28-32 stitches (= next row should be worked from right side). Then place the front pieces together– read explanation below. FRONT PIECE (right and left part together): Work first row from right side as follows: Work the 22-24-26-26-28-32 stitches from right front, cast on 18-18-20-22-22-22 stitches for neck at the end of this row, then work the 22-24-26-26-28-32 stitches from left front piece = 62-66-72-74-78-86 stitches on needle. Work stocking stitch back and forth until piece measures 22-23-25-25-27-28 cm. Now increase in each side for armholes. INCREASE FOR ARMHOLES: ROW 1 (= right side): Remember INCREASE TIP-1 and knit 3, increase 1 stitch towards the left, work until 3 stitches remain, increase 1 stitch towards the right, knit 3. ROW 2 (= wrong side): Purl all stitches. Work 1st and 2nd ROW 2-2-2-3-3-3 times in total = 66-70-76-80-84-92 stitches on needle. Work until piece measures 25-26-28-29-31-32 cm, finish with a row from wrong side. Now put front piece and back piece together for body as explained below. Now measure the piece from here. BODY: Work the 66-70-76-80-84-92 stitches from front piece, cast on 2-2-2-2-6-6 new stitches at the end of this row (= in the side mid under sleeve), then work the 66-70-76-80-84-92 stitches from back piece and cast on 2-2-2-2-6-6 new stitches on row (= in the side mid under sleeve) = 136-144-156-164-180-196 stitches on needle. Work in the round until piece measures approx. 59-61-63-65-66-67 cm, measured from the top point on shoulder. Switch to circular needle size 4.5 mm. Work 2 rounds with rib knit 1/purl 1, then work 4 rounds in stocking stitch. Use circular needle size 6 mm and cast off by knitting. Front piece measures 62-64-66-68-70-72 cm measured from pick up edge, front piece approx. 2 cm longer than finished measurements because the pick up edge is not mid on top of shoulder but somewhat down on back piece, jumper measures 60-62-64-66-68-70 cm. SLEEVES: Place piece flat and insert 1 marker at the top of armhole = mid on top shoulder (NOTE! Mid on top shoulder is not same place as stitches were picked up for front piece but approx. 5-5-6-6-7-7 cm down on front piece). Pick up stitches around armhole, use circular needle size 6 mm, begin in the middle of the new stitches cast on under sleeve - pick up 52-54-58-60-64-68 stitches - adjust to pick up same number of stitches on each side of marker along armhole. Now work in stocking stitch back and forth with short rows over sleeve cap to get a better shape on sleeve, begin round mid under sleeve as follows: ROW 1 (= right side): Work 6-6-7-7-8-8 stitches past marker on top of shoulder, turn piece – read KNITTING TIP. ROW 2 (= wrong side): Work 6-6-7-7-8-8 stitches past marker, turn piece. ROW 3 (= right side): Work 5-5-5-5-4-4 stitches past where the previous turn was, turn piece. ROW 4 (= wrong side): Work 5-5-5-5-4-4 stitches past where the previous turn was, turn piece. Repeat ROWS 3 and 4. Work until 6-6-8-8-10-10 turns have been done in total (= 3-3-4-4-5-5 times in each side and last row is worked from wrong side). AFTER LAST TURN: The last time 4th row is repeated finish row by turning piece, then work from right side until beginning of round (mid under sleeve). Insert 1 marker thread mid under sleeve, this is used when decreasing stitches under sleeve. Move marker thread upwards when working. Now work in the round in stocking stitch over all stitches while at the same time decreasing under sleeve like this: When sleeve measures 1 cm (measured mid under sleeve), decrease 2 stitches mid under sleeve – read DECREASE TIP, decrease every other round 3 times, then decrease every 18-18-12-8-6-5 cm 2-2-3-3-4-5 times in total = 42-44-46-48-50-52 stitches on needle. Work until sleeve measures 45-45-44-44-43-42 cm from shoulder. Switch to double pointed needles size 4.5 mm and work 2 rounds with rib knit 1/purl 1, then work 4 rounds in stocking stitch. Use double pointed needles size 6 mm and cast off. Sleeve measures approx. 48-48-47-47-46-44 cm from mid on top of shoulder. NECK EDGE: Pick up approx. 80 to 94 stitches around the neck with circular needle size 4.5 mm with 1 strand of each colour in DROPS Kid-Silk. Work in stocking stitch for 6 cm, then work 2 rounds rib knit 1/purl 1. Work 4 rounds in stocking stitch. Use circular needle size 6 mm and cast off by knitting. |
|
 |
|
Have you finished this pattern?Tag your pictures with #dropspattern #pinkmelodysweater or submit them to the #dropsfan gallery. Do you need help with this pattern?You'll find 30 tutorial videos, a Comments/Questions area and more by visiting the pattern on garnstudio.com. © 1982-2026 DROPS Design A/S. We reserve all rights. This document, including all its sub-sections, has copyrights. Read more about what you can do with our patterns at the bottom of each pattern on our site. |
|


With over 40 years in knitting and crochet design, DROPS Design offers one of the most extensive collections of free patterns on the internet - translated to 17 languages. As of today we count 324 catalogues and 12290 patterns translated into English (UK/cm). 12290
We work hard to bring you the best knitting and crochet have to offer, inspiration and advice as well as great quality yarns at incredible prices! Would you like to use our patterns for other than personal use? You can read what you are allowed to do in the Copyright text at the bottom of all our patterns. Happy crafting!
Post a comment to pattern DROPS 255-6
We would love to hear what you have to say about this pattern!
If you want to leave a question, please make sure you select the correct category in the form below, to speed up the answering process. Required fields are marked *.