
Popular categories
Looking for a yarn?


Comments / Questions (47)
![]() Angelika Krakau wrote:
Angelika Krakau wrote:
Zu Beginn der Anleitung steht, dass mit vier Fäden des Garns gestrickt werden soll. Beim Rückenteil setht dann je ein Faden pro Farbe. Da in der Anleitung nur von zwei Farben die Rede ist, mneine Frage: wird nun gleichzeitig mit vier Knäuel (d.h. je zwei Knäuel pro Farbe) oder mit zwei (je ein Knäuel pro Farbe) gestrickt? Vielen Dank für eine Antwort.
16.03.2026 - 11:36DROPS Design answered:
Liebe Frau Krakau, man braucht hier 4 Farben Kid-Silk und wird mit je 1 Faden jeder Farbe stricken, dh 4 Fäding. Oder misverstehe ich Ihre Frage?
16.03.2026 - 16:18
![]() Loredana wrote:
Loredana wrote:
Bonjour. Si je veux utiliser une seul couleur, combien de fil j'ai besoin s'il vous plaît !? Merci d'avance
28.01.2026 - 18:54DROPS Design answered:
Bonjour Loredana, pour le tricoter avec une seule couleur Kid-Silk, additionnez la quantité pour chaque couleur, il vous en faudra peut être un peu moins (nous n'avons plus ce modèle à notre disposition); pour le tricoter dans une autre laine, utilisez le convertisseur pour voir les alternatives possibles et les quantités correspondantes. Bon tricot!
29.01.2026 - 09:03
![]() Wilma Jansen wrote:
Wilma Jansen wrote:
Dit model wordt met vier draden Kids Silk gebreid. Kan ik ook een combinatie van DROPS Kid-Silk met DROPS Nord gebruiken. En welke pendikte ik dan moet gebruiken met welke stekenverhouding. Alvast bedankt voor uw reactie.
30.12.2025 - 18:02DROPS Design answered:
Dag Wilma,
Kid Silk En Alpaca is inderdaad onderling vervangbaar met ongeveer dezelfde pendikte. Maak wel altijd een proeflapje en pas eventueel de naalddikte aan.
Met de garenvervanger, waarvan een link staat onder de materialenlijst bij ieder patroon, kun je ook vervangend garen vinden voor je project. De benodigde hoeveelheid wordt dan ook gelijk aangegeven.
30.12.2025 - 20:48
![]() Gesiena Van Der Giessen wrote:
Gesiena Van Der Giessen wrote:
Gistgeren plaatste ik deze vraag. Ik ben géén spammer! Graag zou ik de video´s erbij willen hebben.Waar vind ik de instructievideo´s van dit patroon? Pink Melody. Vriendelijk bedankt, Gesiena
20.11.2025 - 08:55DROPS Design answered:
Dag Gesiena,
Bovenaan het patroon (vlak onder de titel en beschrijving) vind je een link naar de video's die bij dit patroon horen.
20.11.2025 - 22:11
![]() Staci wrote:
Staci wrote:
Bonjour, Je n'arrive pas à trouver une guide des tailles sur votre site. Je porte une taille 38/40, est-ce plutôt une taille "S" ou "M"? Merci pour votre aide!
13.11.2025 - 21:34DROPS Design answered:
Bonjour Staci, retrouvez ici et en détail comment trouver la taille à tricoter. Bon tricot!
14.11.2025 - 08:28
![]() Laila wrote:
Laila wrote:
Kan godt lide denne bluse
16.09.2025 - 09:27
![]() Laila wrote:
Laila wrote:
Jeg kan godt lide den slags bluser
16.09.2025 - 09:26
![]() Ela wrote:
Ela wrote:
Prosiłabym o dodatkowe wyjaśnienie jak nabierać tu oczka. Czy chodzi o to, żeby z każdym nabierać oczko i łączyć te dwie części? Nie rozumiem w którą stronę należy nabierać oczka. PRAWY PRZÓD: Teraz nabieramy oczka wzdłuż skosu prawego ramienia tyłu – zacząć na prawej stronie robótki, od ramienia i nabierać w stronę dekoltu następująco: nabrać 1 oczko, w odl. 1 oczka od brzegu, w każdy przerobiony rząd = 18
12.09.2025 - 09:09DROPS Design answered:
Witaj Elu, zobacz koniecznie nasze video TUTAJ. Na początku właśnie są nabierane oczka na prawy przód. W razie dodatkowych pytań pisz śmiało. Pozdrawiamy!
12.09.2025 - 09:30
![]() Lisa wrote:
Lisa wrote:
Can I do this pattern inYarn Group C?
30.08.2025 - 14:54
![]() Farkas Anna wrote:
Farkas Anna wrote:
Szia! Ezt a darabot kell blokkolni? Ha igen, hogyan? Ahol nem lettek egyenletesek a szemek, azt ki lehet javítani blokkolással? Előre is köszönöm a választ!
16.06.2025 - 07:41DROPS Design answered:
Kedves Anna! Minden kötött darabnak jót tesz, ha kiblokkoljuk, amivel nagyban tudunk segíteni azon is, ha a kötés, a kötéskép nem, vagy nem mindenhol egyenletes. Ugyanakkor, ezekkel a finom fonalakkal nagyon óvatosan kell bánni, semmiképp se tegye mosógépbe, és ne centrifugázza, csak óvatosan nyomkodja ki belőle a vizet, majd gondosan méretre igazítva, vízszintes felületen szárítsa. Sikeres kézimunkázást!
19.07.2025 - 22:35
|
|
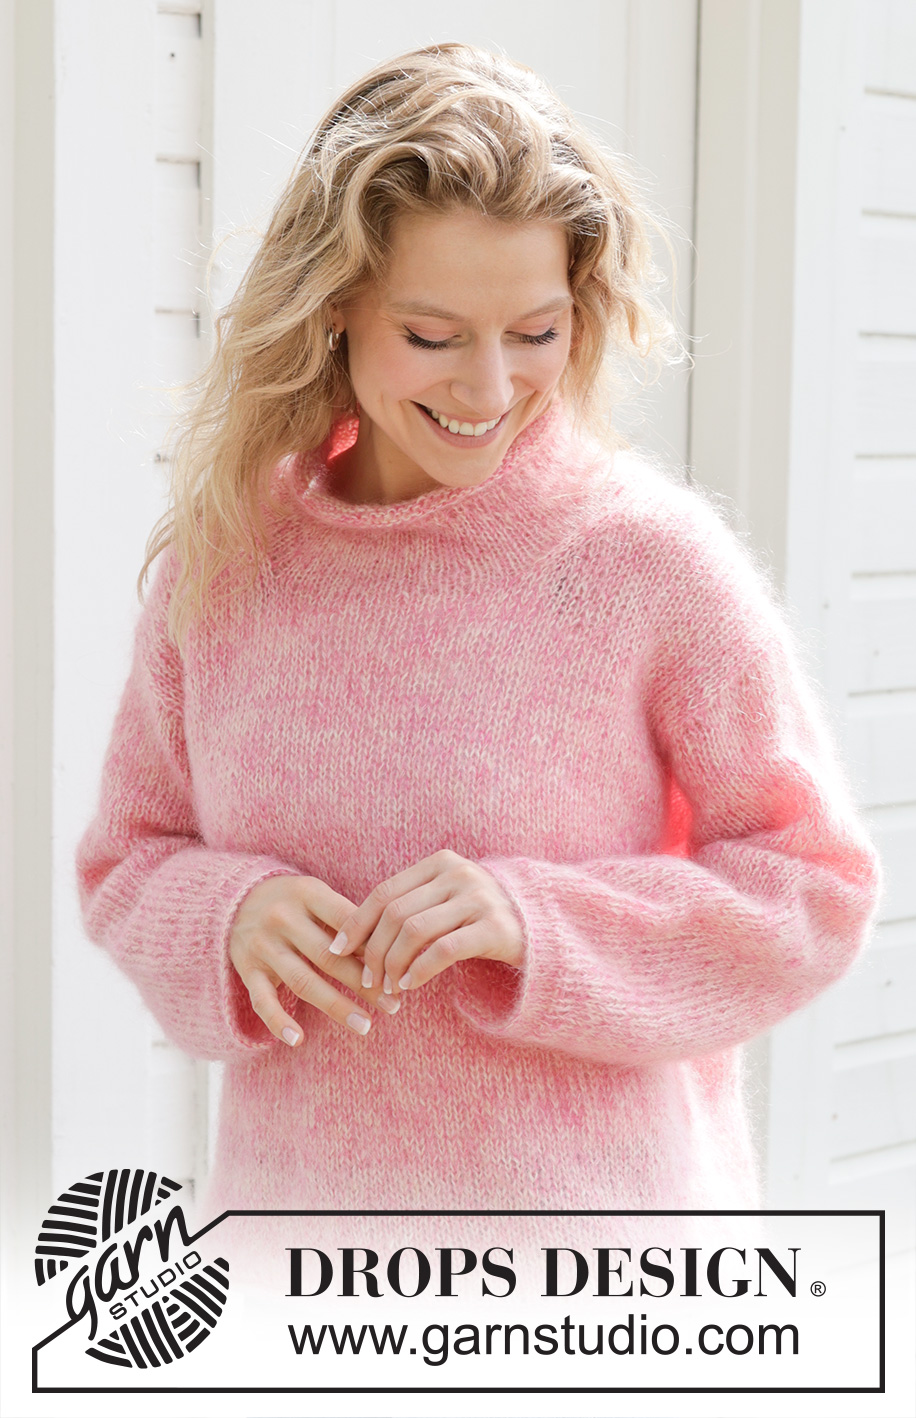
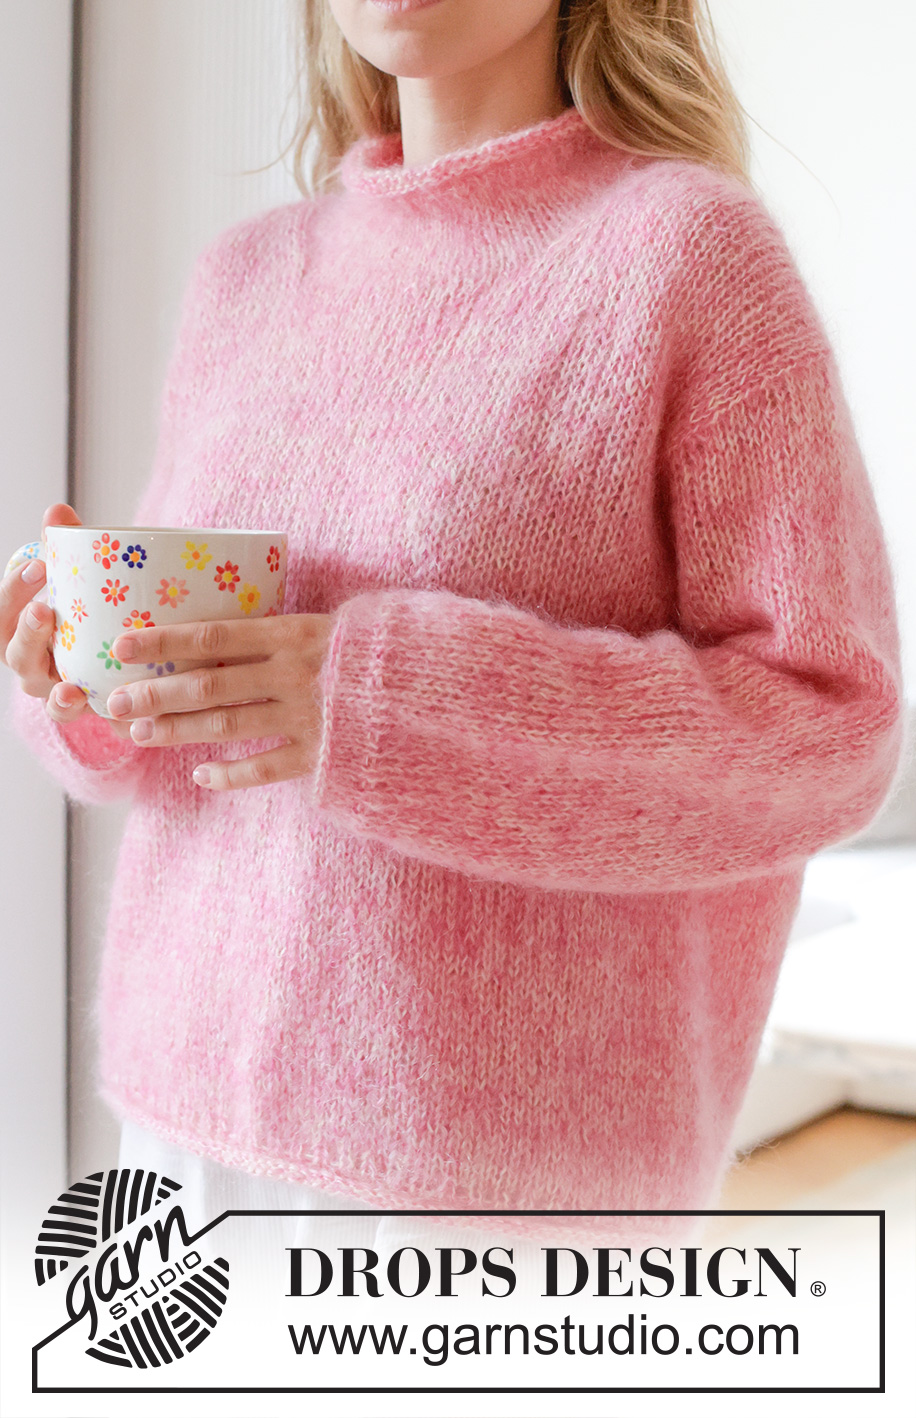
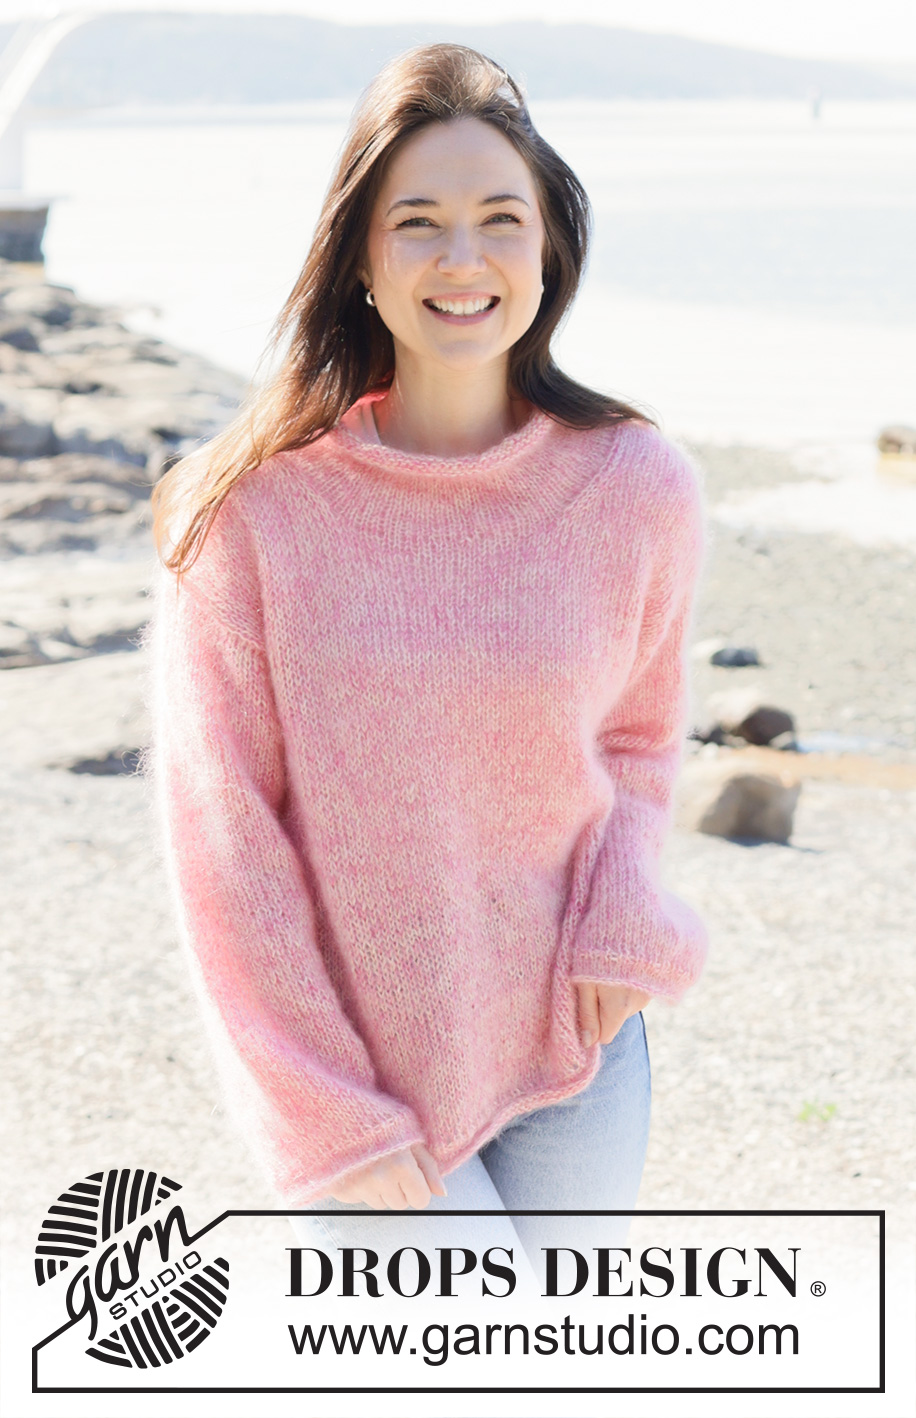
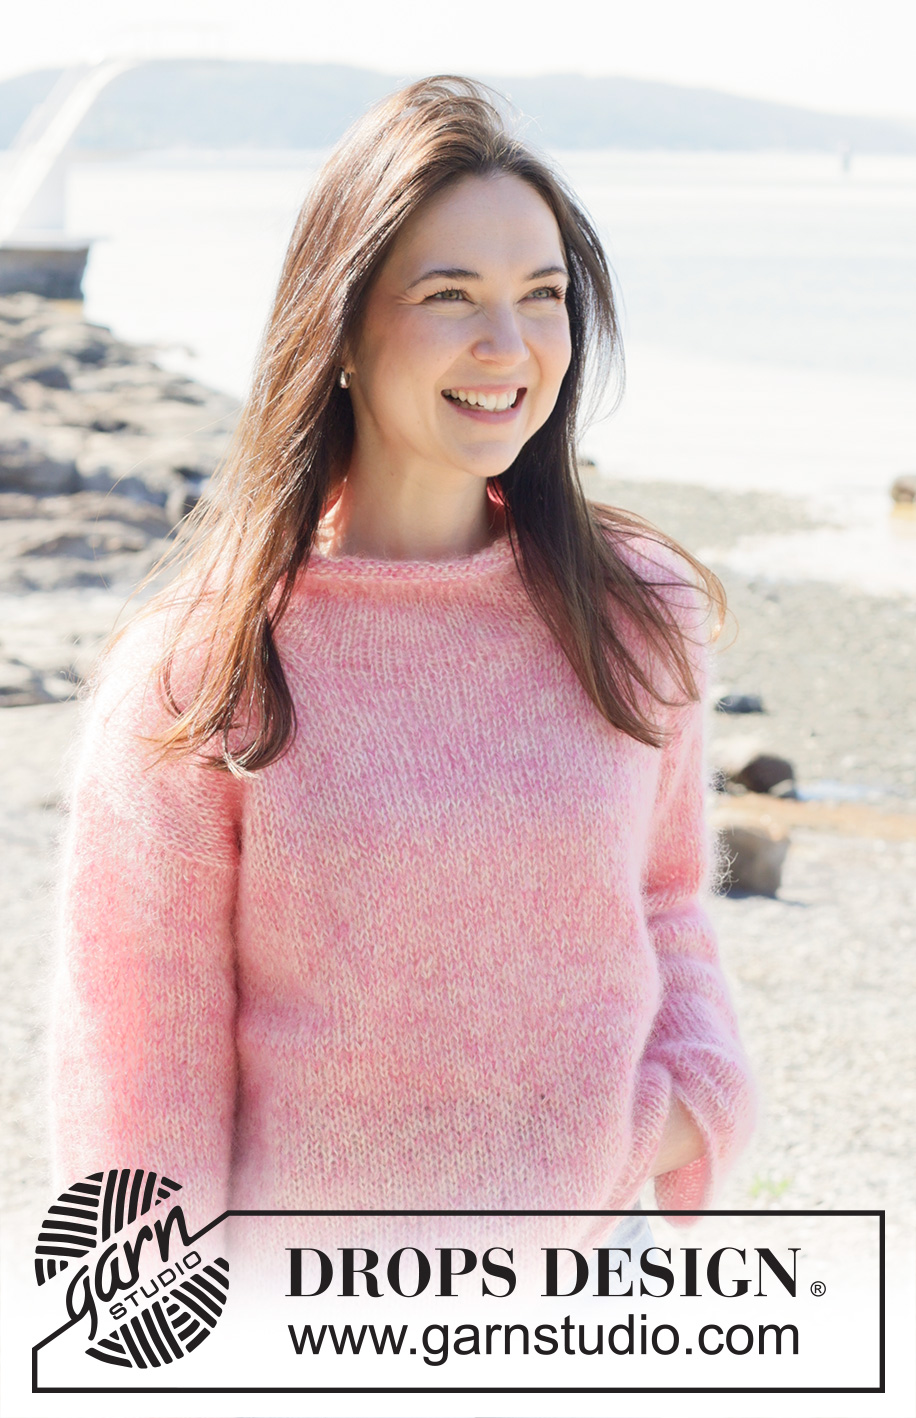
Pink Melody#pinkmelodysweater |
|
 |
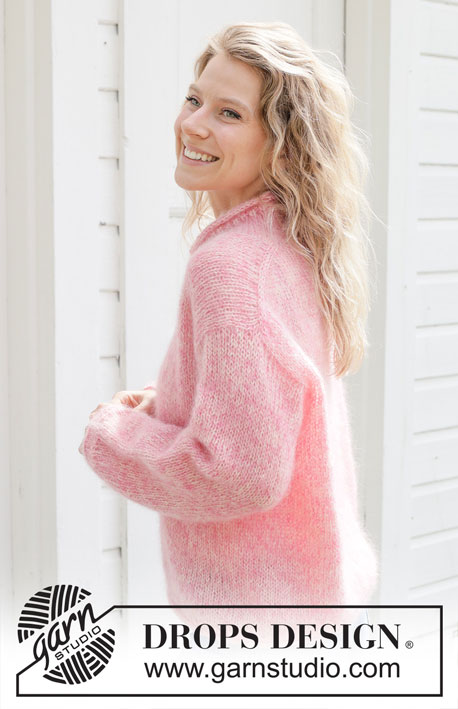 |
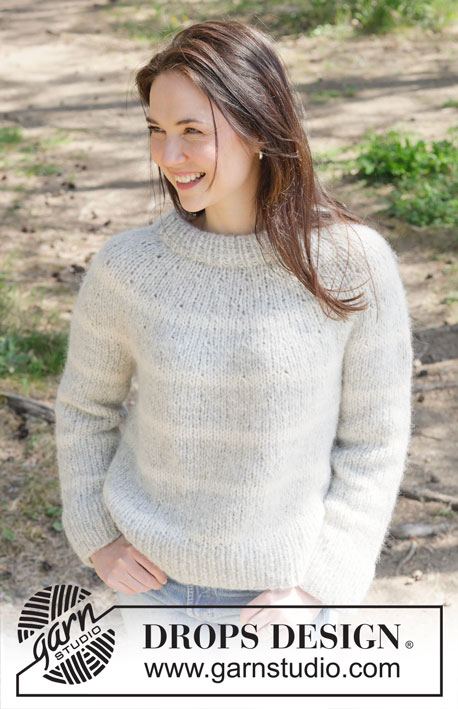
Knitted jumper in 4 strands DROPS Kid-Silk. Piece is knitted top down with European / diagonal shoulder. Size: S - XXXL
DROPS 255-6 |
|
|
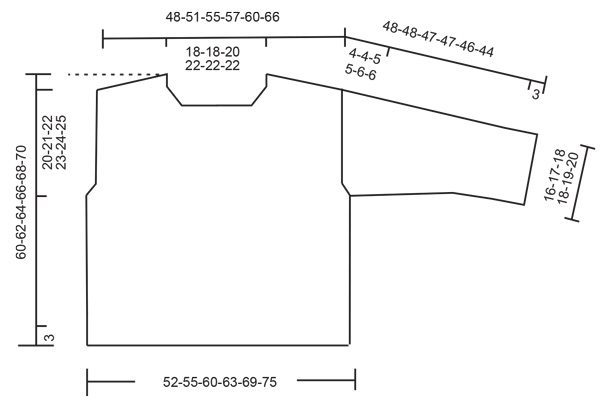
---------------------------------------------------------- EXPLANATION FOR THE PATTERN: ---------------------------------------------------------- INCREASE TIP-1: INCREASE 1 STITCH TOWARDS THE LEFT - from RIGHT SIDE: Use left needle to pick up yarn between 2 stitches from row below, pick up yarn from the front and knit in the stitch loop that is on the back of the needle. INCREASE 1 STITCH TOWARDS THE RIGHT - from RIGHT SIDE: Use left needle to pick up yarn between 2 stitches from row below, pick up yarn from the back and knit in the stitch loop that is on the front side of the needle. INCREASE TIP-2: INCREASE 1 STITCH TOWARDS THE RIGHT - from WRONG SIDE: Use left needle to pick up yarn between 2 stitches from row below, pick up yarn from the back and purl in the stitch loop that is on the front side of the needle. INCREASE 1 STITCH TOWARDS THE LEFT - from WRONG SIDE: Use left needle to pick up yarn between 2 stitches from row below, pick up yarn from the front and purl in the stitch loop that is on the back side of the needle. KNITTING TIP: When working short row there will be a small hole when turning the piece - the hole can be closed by tightening the yarn or using the technique German Short Rows as follows: Slip first stitch purlwise. Place strand over right needle and tighten well at the back (should lead to two loops on needle). Work these loops together on next row. DECREASE TIP: Decrease 1 stitch on each side of marker thread as follows: Work until 3 stitches remain before marker thread and knit 2 together, knit 2 (marker thread is in the middle of these 2 stitches), slip 1 stitch knitwise, knit 1, pass slipped stitch over stitch worked (= 2 stitches decreased). ---------------------------------------------------------- START THE PIECE HERE: ---------------------------------------------------------- JUMPER - SHORT OVERVIEW OF THE PIECE: In this pattern needles of different length have been used, begin with fitting length for number of stitches and switch as needed. First work piece back and forth on circular needle. Begin by casting on stitches in the back of neck. Then work back piece downwards while AT THE SAME TIME increasing in each side of piece until number of stitches for shoulder width is reached. Back piece has a slight diagonal shoulder. Then work down to armholes. Now put back piece a side and work the front piece. Front piece is first worked in 2 parts. Begin by picking up stitches along one shoulder from back piece, work while increasing towards the neck. Repeat on the other shoulder. Put right and left front piece together when increases for neck are done. Then work front piece down to armholes. Now slip front piece and back piece on to same circular needle and work body downwards in the round on circular needle. Pick up stitches for sleeves around the armholes and work sleeves downwards. First work back and forth with short rows to form a sleeve cap, then work sleeves downwards in the round on needle. Finish by picking up stitches around the neck, and work a neck edge. BACK PIECE: Work piece back and forth on needle. Cast on 26-26-28-30-30-30 stitches on circular needle size 6 mm with 1 strand of each colour in DROPS Kid-Silk. ROW 1 (= wrong side): Purl all stitches. ROW 2 (= right side): Read INCREASE TIP-1 and knit 3, increase 1 stitch towards the left, knit until 3 stitches remain, increase 1 stitch towards the right, knit 3. ROW 3 (= wrong side): Read INCREASE TIP-2 and purl 3, increase 1 stitch towards the right, purl until 3 stitches remain, increase 1 stitch towards the left, purl 3. Work 2nd and 3rd ROW 9-10-11-11-12-14 times, after last increase there are = 62-66-72-74-78-86 stitches on needle. Insert 1 marker in the side. Now measure piece from here! Continue in stocking stitch - remember to follow the knitting tension - until piece measures 12-13-13-13-13-14 cm measured from marker along armhole. Now increase in each side for armholes. INCREASE FOR ARMHOLES: ROW 1 (= right side): Remember INCREASE TIP-1 and knit 3, increase 1 stitch towards the left, knit until 3 stitches remain, increase 1 stitch towards the right, knit 3. ROW 2 (= wrong side): Purl all stitches. Work 1st and 2nd ROW 2-2-2-3-3-3 times in total = 66-70-76-80-84-92 stitches on needle. Work until piece measures 15-16-16-17-17-18 cm, measured from marker along armhole, finish with a row from wrong side. Cut the yarn, slip stitches on a thread or stitch holder, now work left front piece along the left shoulder as explained below. LEFT FRONT PIECE: Find left shoulder on back piece as follows: Place back piece flat with right side up, place back piece so that stitches on thread/stitch holder is towards you, left side of piece = left shoulder. Now pick up stitches along left diagonal shoulder on back piece - begin from right side at the neck and pick up stitches out towards the shoulder as follows: Pick up 1 stitch in every worked row, inside outermost stitch = 18-20-22-22-24-28 stitches. All length measurements on front piece are done from pick up edge. Work in stocking stitch (work first row from wrong side). When piece measures 9 cm, increase stitches towards the neck as follows: ROW 1 (= right side): Remember INCREASE TIP-1 and knit 3, increase 1 stitch towards the left, work the rest of row. ROW 2 (= wrong side): Purl all stitches. Work 1st and 2nd ROW 4 times in total = 22-24-26-26-28-32 stitches, (next row should be worked from right side). Cut the yarn, slip stitches on a thread or stitch holder, now work right front piece along the shoulder – read explanation below. RIGHT FRONT PIECE: Now pick up stitches right left diagonal shoulder on back piece - begin from right side at the shoulder and pick up stitches out towards the neck as follows: Pick up 1 stitch in every worked row inside outermost stitch = 18-20-22-22-24-28 stitches. All length measurements on front piece are done from pick up edge. Work in stocking stitch (work first row from wrong side). When piece measures 9 cm, increase stitches towards the neck as follows: ROW 1 (= right side): Work until 3 stitches remain, increase towards the right, knit 3 – remember INCREASE TIP-1. ROW 2 (= wrong side): Purl all stitches. Work 1st and 2nd ROW 4 times in total = 22-24-26-26-28-32 stitches (= next row should be worked from right side). Then place the front pieces together– read explanation below. FRONT PIECE (right and left part together): Work first row from right side as follows: Work the 22-24-26-26-28-32 stitches from right front, cast on 18-18-20-22-22-22 stitches for neck at the end of this row, then work the 22-24-26-26-28-32 stitches from left front piece = 62-66-72-74-78-86 stitches on needle. Work stocking stitch back and forth until piece measures 22-23-25-25-27-28 cm. Now increase in each side for armholes. INCREASE FOR ARMHOLES: ROW 1 (= right side): Remember INCREASE TIP-1 and knit 3, increase 1 stitch towards the left, work until 3 stitches remain, increase 1 stitch towards the right, knit 3. ROW 2 (= wrong side): Purl all stitches. Work 1st and 2nd ROW 2-2-2-3-3-3 times in total = 66-70-76-80-84-92 stitches on needle. Work until piece measures 25-26-28-29-31-32 cm, finish with a row from wrong side. Now put front piece and back piece together for body as explained below. Now measure the piece from here. BODY: Work the 66-70-76-80-84-92 stitches from front piece, cast on 2-2-2-2-6-6 new stitches at the end of this row (= in the side mid under sleeve), then work the 66-70-76-80-84-92 stitches from back piece and cast on 2-2-2-2-6-6 new stitches on row (= in the side mid under sleeve) = 136-144-156-164-180-196 stitches on needle. Work in the round until piece measures approx. 59-61-63-65-66-67 cm, measured from the top point on shoulder. Switch to circular needle size 4.5 mm. Work 2 rounds with rib knit 1/purl 1, then work 4 rounds in stocking stitch. Use circular needle size 6 mm and cast off by knitting. Front piece measures 62-64-66-68-70-72 cm measured from pick up edge, front piece approx. 2 cm longer than finished measurements because the pick up edge is not mid on top of shoulder but somewhat down on back piece, jumper measures 60-62-64-66-68-70 cm. SLEEVES: Place piece flat and insert 1 marker at the top of armhole = mid on top shoulder (NOTE! Mid on top shoulder is not same place as stitches were picked up for front piece but approx. 5-5-6-6-7-7 cm down on front piece). Pick up stitches around armhole, use circular needle size 6 mm, begin in the middle of the new stitches cast on under sleeve - pick up 52-54-58-60-64-68 stitches - adjust to pick up same number of stitches on each side of marker along armhole. Now work in stocking stitch back and forth with short rows over sleeve cap to get a better shape on sleeve, begin round mid under sleeve as follows: ROW 1 (= right side): Work 6-6-7-7-8-8 stitches past marker on top of shoulder, turn piece – read KNITTING TIP. ROW 2 (= wrong side): Work 6-6-7-7-8-8 stitches past marker, turn piece. ROW 3 (= right side): Work 5-5-5-5-4-4 stitches past where the previous turn was, turn piece. ROW 4 (= wrong side): Work 5-5-5-5-4-4 stitches past where the previous turn was, turn piece. Repeat ROWS 3 and 4. Work until 6-6-8-8-10-10 turns have been done in total (= 3-3-4-4-5-5 times in each side and last row is worked from wrong side). AFTER LAST TURN: The last time 4th row is repeated finish row by turning piece, then work from right side until beginning of round (mid under sleeve). Insert 1 marker thread mid under sleeve, this is used when decreasing stitches under sleeve. Move marker thread upwards when working. Now work in the round in stocking stitch over all stitches while at the same time decreasing under sleeve like this: When sleeve measures 1 cm (measured mid under sleeve), decrease 2 stitches mid under sleeve – read DECREASE TIP, decrease every other round 3 times, then decrease every 18-18-12-8-6-5 cm 2-2-3-3-4-5 times in total = 42-44-46-48-50-52 stitches on needle. Work until sleeve measures 45-45-44-44-43-42 cm from shoulder. Switch to double pointed needles size 4.5 mm and work 2 rounds with rib knit 1/purl 1, then work 4 rounds in stocking stitch. Use double pointed needles size 6 mm and cast off. Sleeve measures approx. 48-48-47-47-46-44 cm from mid on top of shoulder. NECK EDGE: Pick up approx. 80 to 94 stitches around the neck with circular needle size 4.5 mm with 1 strand of each colour in DROPS Kid-Silk. Work in stocking stitch for 6 cm, then work 2 rounds rib knit 1/purl 1. Work 4 rounds in stocking stitch. Use circular needle size 6 mm and cast off by knitting. |
|
 |
|
Have you finished this pattern?Tag your pictures with #dropspattern #pinkmelodysweater or submit them to the #dropsfan gallery. Do you need help with this pattern?You'll find 30 tutorial videos, a Comments/Questions area and more by visiting the pattern on garnstudio.com. © 1982-2026 DROPS Design A/S. We reserve all rights. This document, including all its sub-sections, has copyrights. Read more about what you can do with our patterns at the bottom of each pattern on our site. |
|


With over 40 years in knitting and crochet design, DROPS Design offers one of the most extensive collections of free patterns on the internet - translated to 17 languages. As of today we count 324 catalogues and 12290 patterns translated into English (UK/cm). 12290
We work hard to bring you the best knitting and crochet have to offer, inspiration and advice as well as great quality yarns at incredible prices! Would you like to use our patterns for other than personal use? You can read what you are allowed to do in the Copyright text at the bottom of all our patterns. Happy crafting!
Post a comment to pattern DROPS 255-6
We would love to hear what you have to say about this pattern!
If you want to leave a question, please make sure you select the correct category in the form below, to speed up the answering process. Required fields are marked *.