
Popular categories
Looking for a yarn?


Comments / Questions (208)
![]() Carryservais wrote:
Carryservais wrote:
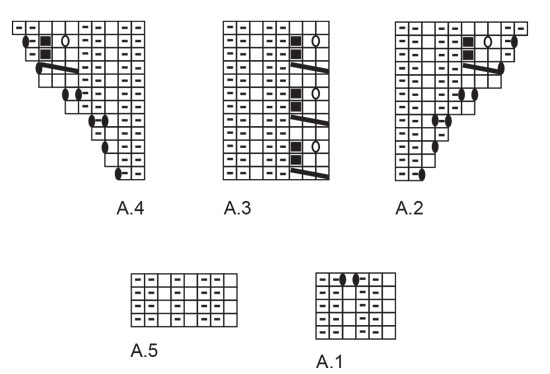
Bonjour, lorsque je suis les indications de la partie empiècement j’obtiens 142 mailles et non 162 y’a t’il quelque chose que j’ai mal compris sur la lecture du diagramme A3? Merci!
09.12.2024 - 12:32DROPS Design answered:
Bonjour Mme Carryservais, notez qu'au 1er rang de A.3, vous diminuez 1 maille et avez ainsi seulement 7 mailles au lieu de 8 dans chaque A.3, il se peut ainsi que votre nombre de mailles soit juste si vous comptez bien 8 mailles dans chaque A.3. Bon tricot!
11.12.2024 - 07:49
![]() Francine wrote:
Francine wrote:
Que voulez-vous dire exactement par relever une maille dans le tour précédent? Merci de votre réponse!
07.12.2024 - 21:29DROPS Design answered:
Bonjour Francine, on va augmenter 1 maille de chaque côté de la maille endroit des côtes, pour ce faire, on va relever 1 maille du rang précédent entre la maille sur l'aiguille droite (déjà tricotée) et la maille endroit sur l'aiguille gauche, puis on tricote la maille sur l'aiguille gauche à l'endroit et on relève 1 maille après cette maille et avant la maille suivante on tricote ces 3 mailles ainsi: 1 m env, 1 m end, 1 m env. Pour relever ces 2 mailles, vous pouvez utiliser cette technique, mais pensez bien à les tricoter à l'envers (pas à l'endroit comme dans la vidéo). Bon tricot!
09.12.2024 - 08:33
![]() Joyce Van Dijk wrote:
Joyce Van Dijk wrote:
In de beschrijving van de pas staat: brei A2,A3 over de volgende 24 steken, moet ik dan A2 en A3 allebei herhalen tot ik 24 steken heb gebreid?
04.12.2024 - 10:15DROPS Design answered:
Dag Joyce,
Nee, je breit eerst A.2, dan brei je over de volgende 24 steken A.3 (A.3 is 8 steken breed, dus dat betekent 3 herhalingen van A.3 in de breedte)
04.12.2024 - 20:04
![]() Bodil Sjöberg wrote:
Bodil Sjöberg wrote:
Hej! Jag tänker sticka denna tröja nu och är nybörjare på att sticka både flätning och ragland. När jag läser kommentarsfältet verkar fler ha problem att sticka enligt mönstret. Är mönstret korrekt eller kommer det någon rättelse i närtid? Med vänliga hälsningar Bodil
03.12.2024 - 17:52DROPS Design answered:
Hej Bodil, mønsteret er korrekt, så følg mønsteret maske for maske, så skal du nok finde ud af det :)
06.12.2024 - 14:14
![]() Birgitte wrote:
Birgitte wrote:
Jeg tror der er fejl i A3 diagrammet eller opskriften. For at overgangen fra hals til bærestykke kommer til at passe med maskeantal skal den sidste række i A3 strikkes i stedet for første række.
28.11.2024 - 22:18
![]() Natália wrote:
Natália wrote:
Hi, may I add some short rows after the neck for better fitting?
22.11.2024 - 21:27
![]() Anita Toft Pedersen wrote:
Anita Toft Pedersen wrote:
Kan se at rigtig mange, også mig selv inklusiv har lidt svært ved at forstå de første omgang efter ribben i halsen, hvor der står at man skal have 160 masker, men ender med 142, måske man skulle forklare det lidt bedre. De fleste tæller de masker der er på pinde, og lægger i de masker til om ikke skal strikkes.
21.11.2024 - 21:36
![]() Engelien Vinken wrote:
Engelien Vinken wrote:
Hoe neem ik een steek op van de vorige naald?
20.11.2024 - 08:18DROPS Design answered:
Dag Engelien,
Bij de video's die bij het patroon zijn geplaatst staat een video over hoe je steken opneemt onder de mouw. Bedoel je dit?
21.11.2024 - 20:04
![]() Mona wrote:
Mona wrote:
Hvor mange nøster trenger jeg av kid-silk for størrelse S med dobbelttråd strikking?
15.11.2024 - 08:18DROPS Design answered:
Hei Mona, Du trenger 3 nøster Kid-Silk til din størrelse, når du strikker sammen med Drops Alpaca. Hvis du skal bare bruke Kid-Silk må du ha 6 nøster. God fornøyelse!
19.11.2024 - 11:06
![]() Jaccard wrote:
Jaccard wrote:
Bonjour Je suis en train de tester la partie du raglan et je n'arrive pas au résultat visible sur la photo. Le cumul de raglan + A2 et A4 font un dessin avec 3 lignes de mailles endroit alors que sur la photo les divers motifs sont liés à une seule chaine de mailles endroit.La 3ème M de A2 est à l'endroit ainsi que la 3ème M avant raglan de A4. Est-ce que j'ai raté une explication ou le modèle de la photo a -t-il été tricoté autrement? Merci de votre aide RMay
13.11.2024 - 22:28DROPS Design answered:
Bonjour Mme Jaccard, les augmentations du raglan figurent dans les diagrammes A.2 et A.4 et ne sont pas à faire en plus; suivez bien les diagrammes en augmentant comme indiqué dans les diagrammes au début de A.2 (après les mailles du raglan) et à la fin de A.4 (avant les mailles du raglan). Les motifs doivent ainsi continuer en "ligne droite". Bon tricot!
14.11.2024 - 10:00
|
|||||||||||||||||||
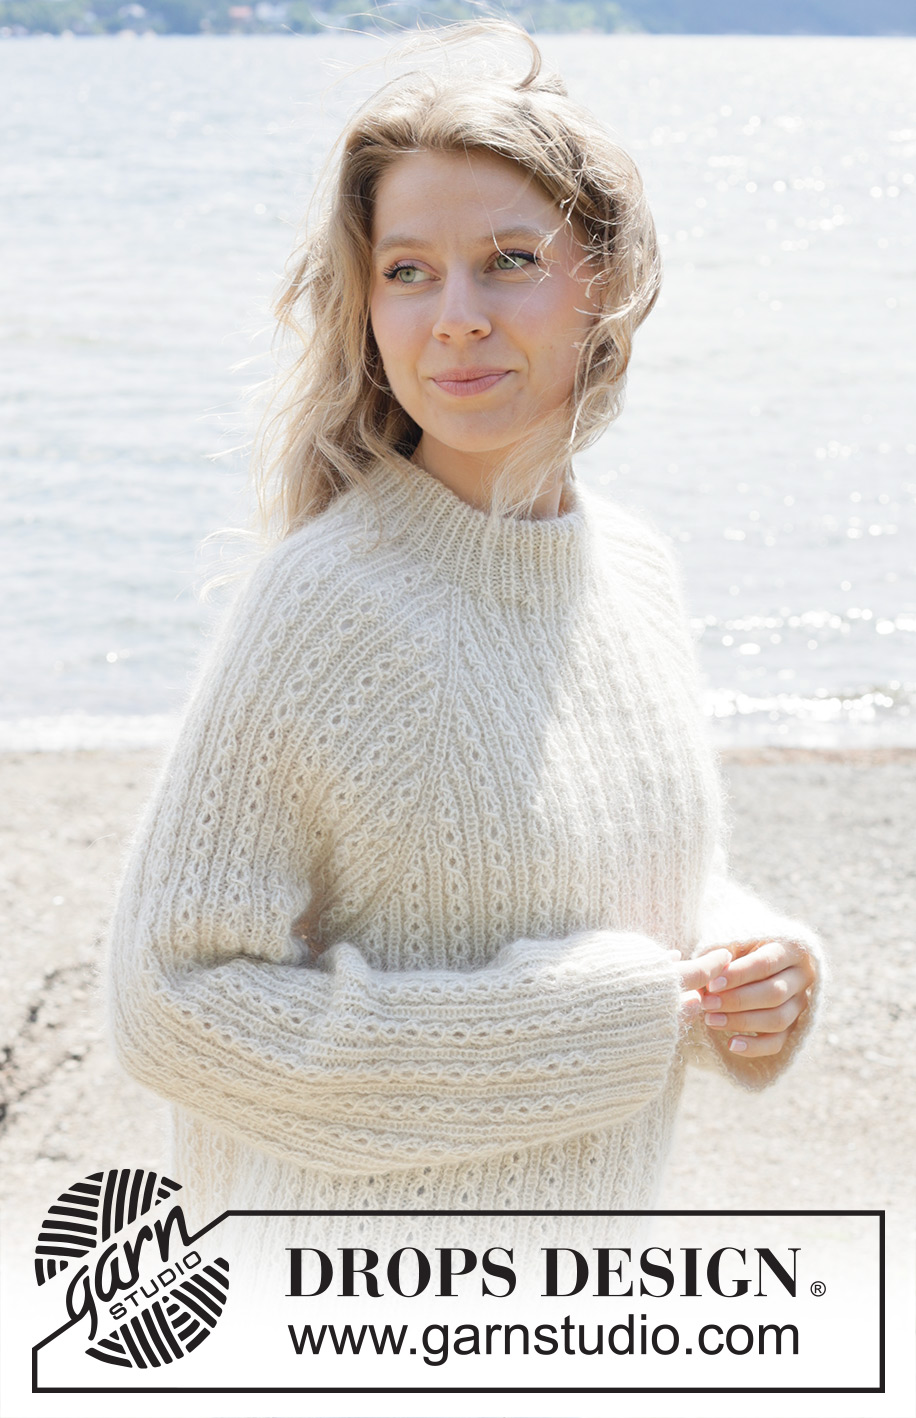
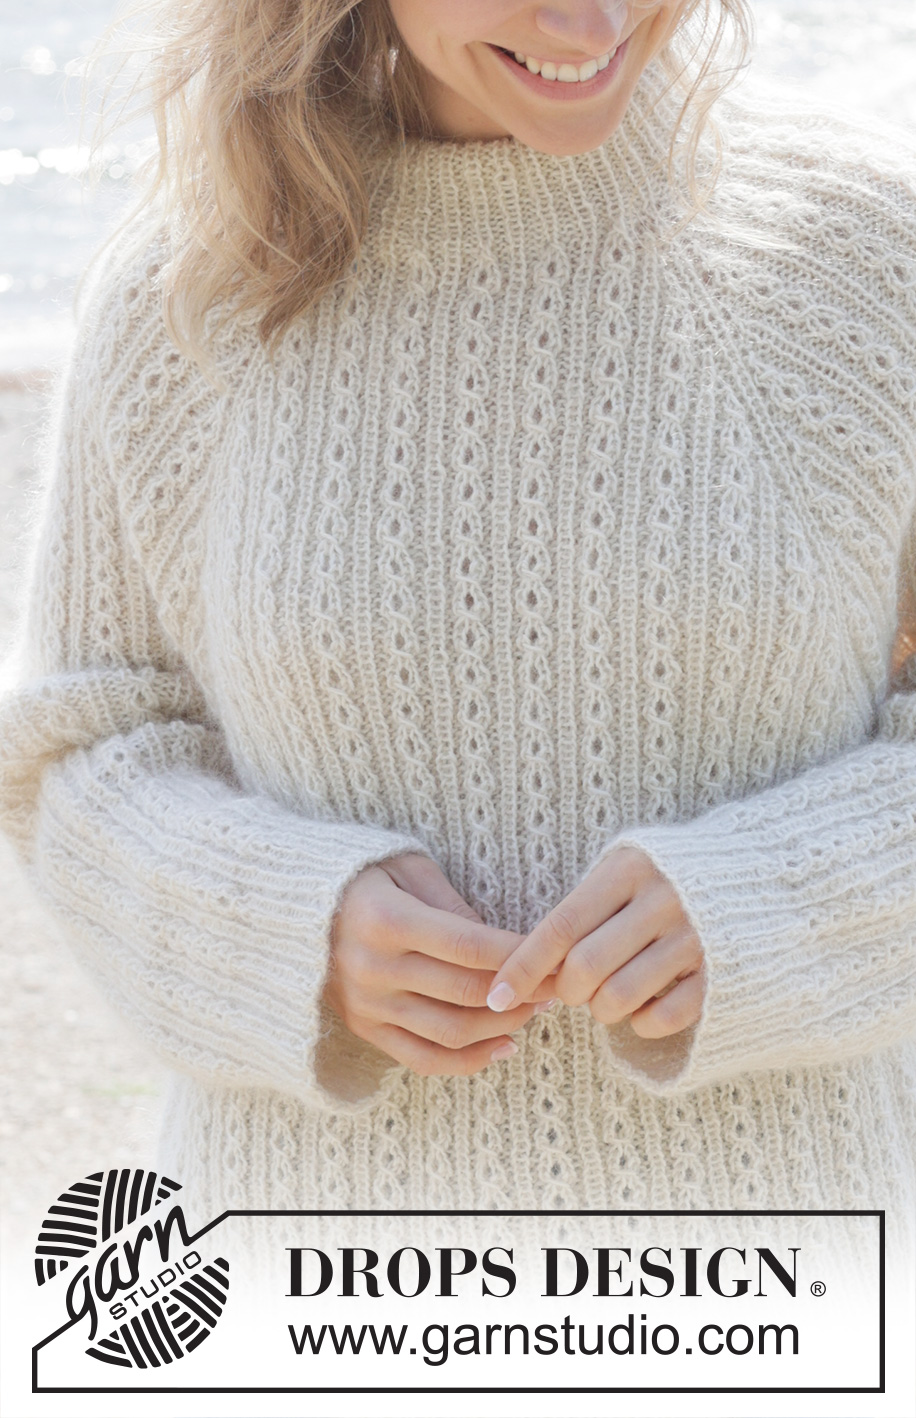
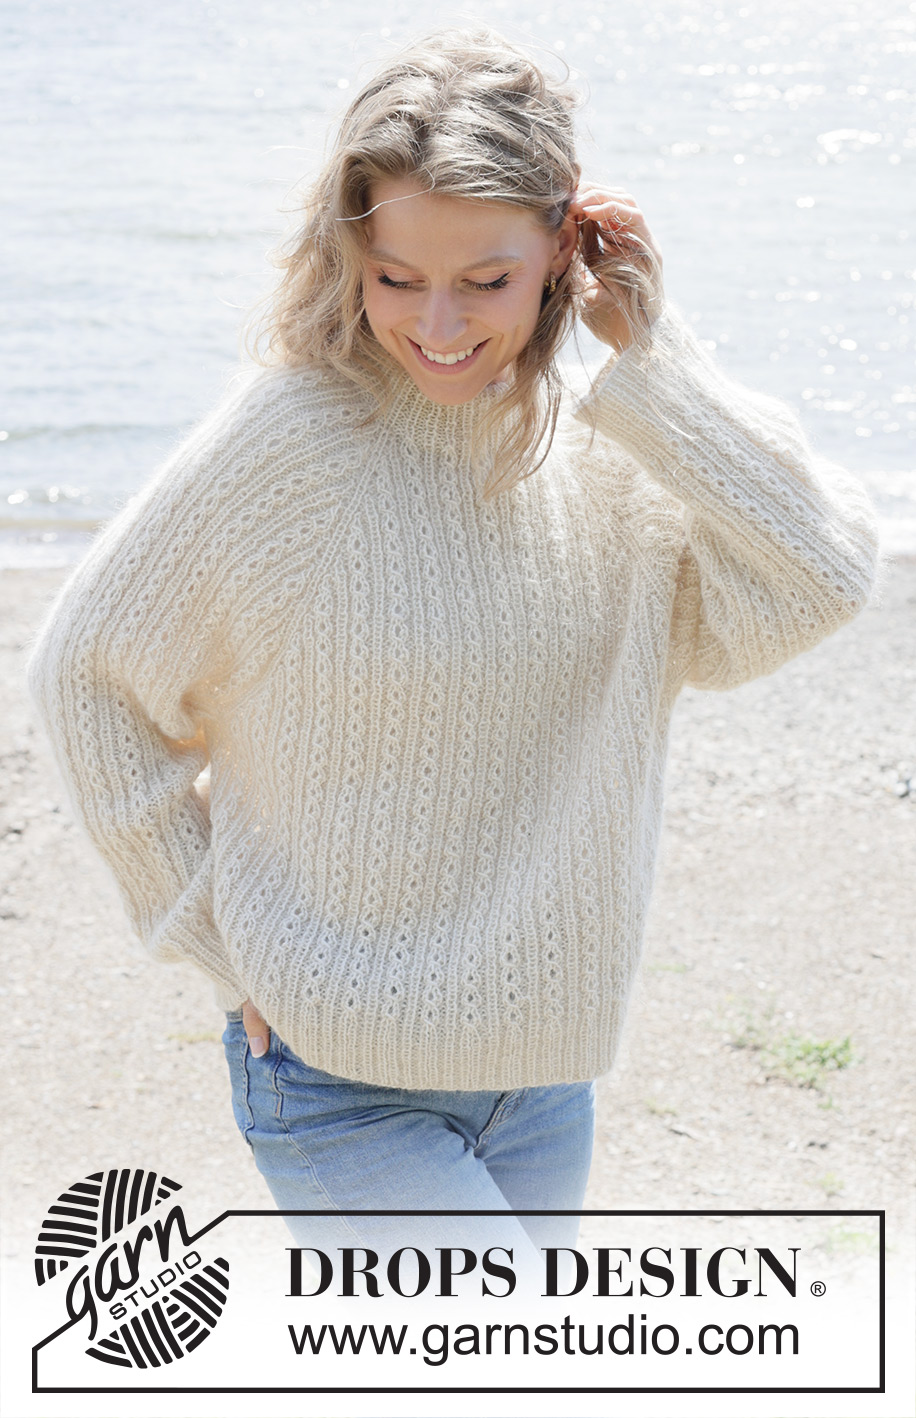
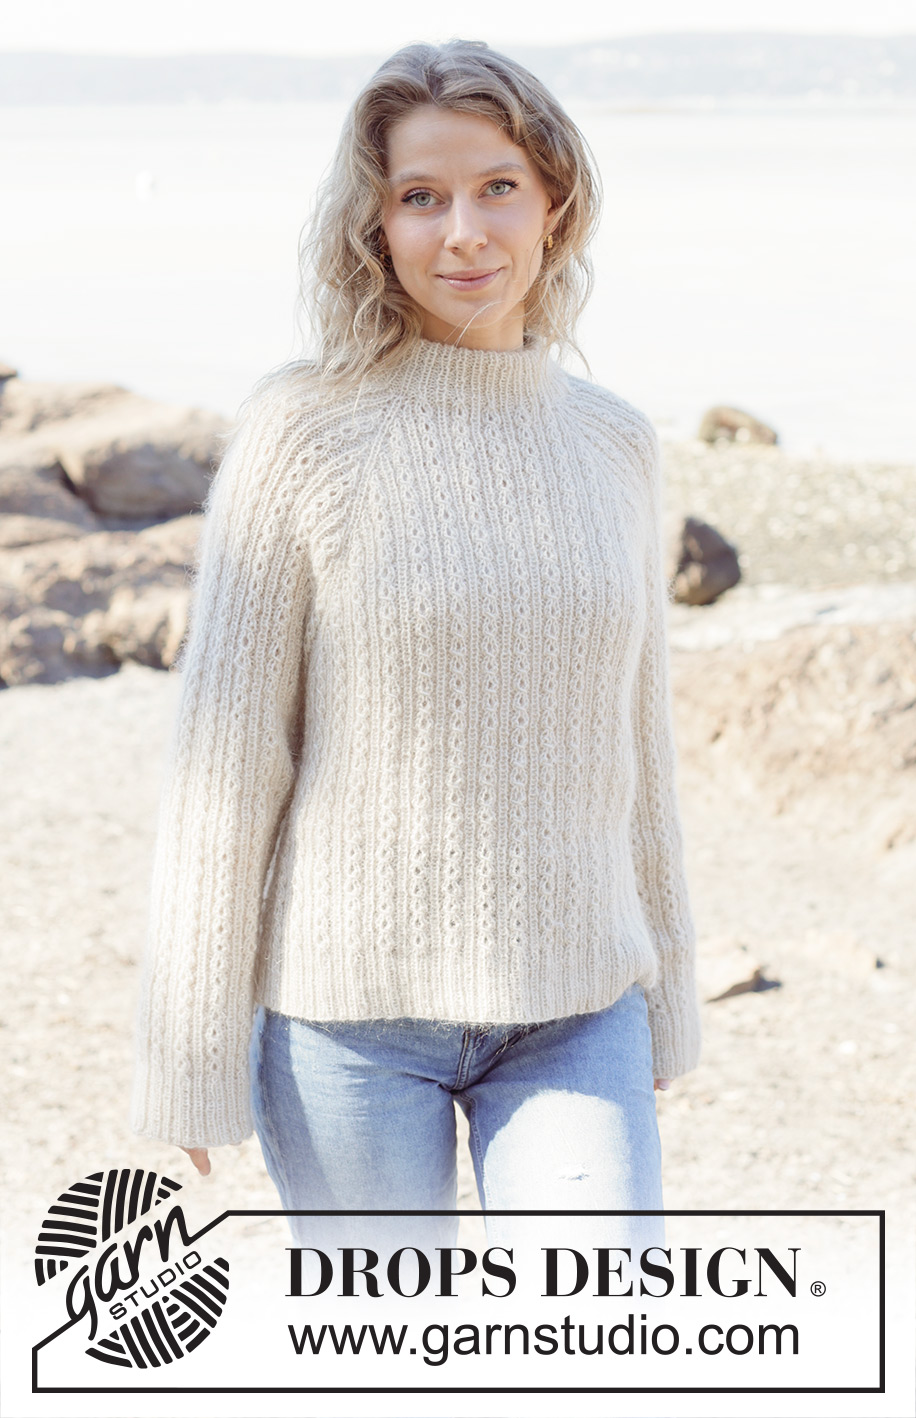
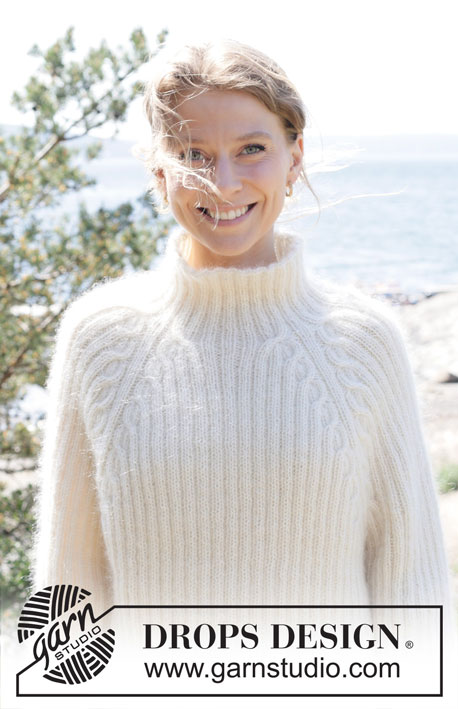
Winter Pearl Sweater#winterpearlsweater |
|||||||||||||||||||
 |
 |
||||||||||||||||||
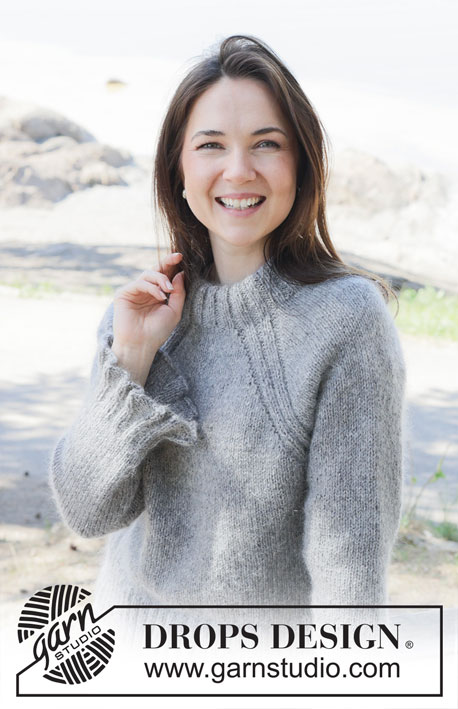
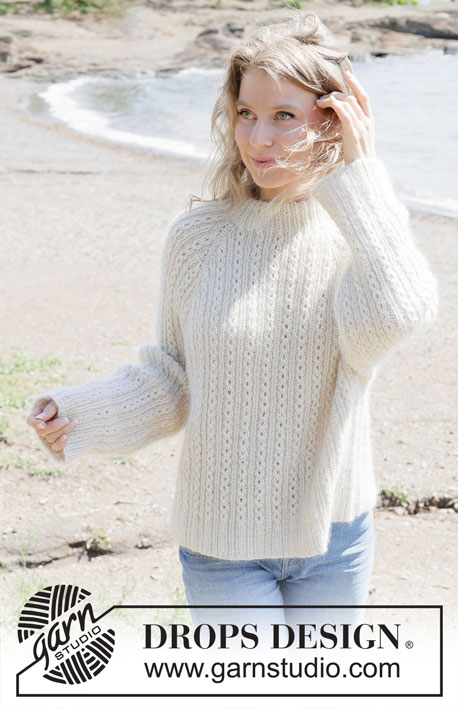
Knitted jumper in DROPS Alpaca and DROPS Kid-Silk. The piece is worked top down with double neck, raglan and cables. Sizes S - XXXL.
DROPS 255-1 |
|||||||||||||||||||
|
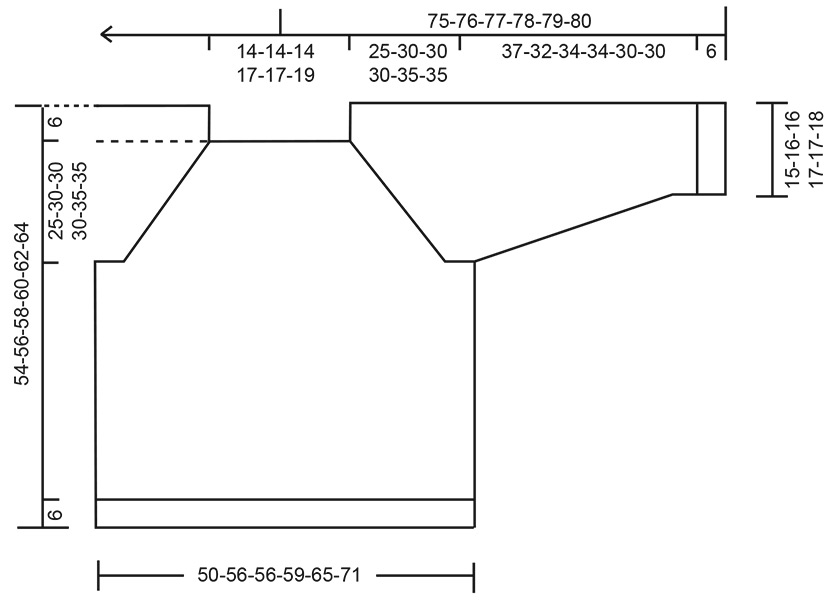
------------------------------------------------------- EXPLANATIONS FOR THE PATTERN: ------------------------------------------------------- PATTERN: See diagrams A.1 to A.5. A.3 is always counted as 8 stitches. RAGLAN: Increase for raglan before/after 1 purled + 1 knitted + 1 purled stitch (= raglan-line). The increased stitches are worked into the pattern. The increases are marked in the diagrams. DECREASE TIP (for sleeves): Decrease by purling 2 together on each side of 1 knitted stitch (= 2 decreased stitches). The stitches which do not fit into a complete cable are knitted. ----------------------------------------------------- START THE PIECE HERE: ------------------------------------------------------- JUMPER – SHORT OVERVIEW OF THE PIECE: The pattern uses both long and short needles; start with the length which fits the number of stitches and change when necessary. The neck and yoke are worked in the round with circular needle, top down and from the right back shoulder. When the yoke is finished, it is divided for the body and sleeves and the body continued in the round, while the sleeves wait. The sleeves are worked top down, in the round. The neck is folded double and fastened to the inside. DOUBLE NECK: Cast on 108-108-108-120-120-132 stitches with circular needle size 3 mm and 1 strand of each quality (= 2 strands). Work rib according to A.1 in the round. Repeat the first 4 rounds of A.1 until the rib measures 9-9-9-11-11-11 cm; the neck is later folded double. Change to circular needle size 4.5 mm and work the last round in A.1 (yarn overs knitted twisted on the next round) = 144-144-144-160-160-176 stitches. Insert 1 marker after the first 52-52-52-57-57-61 stitches (approx. mid-front); the piece is measured from here. YOKE: Continue in the round as follows: Pick up 1 stitch from the previous round (all picked-up stitches are purled twisted), knit 1 ( = raglan-line), pick up 1 stitch from the previous round, work A.2, A.3 across the next 24 stitches, work the first 3 stitches in A.3, A.4 (= sleeve), pick up 1 stitch from the previous round, knit 1 (= raglan-line), pick up 1 stitch from the previous round, work A.2, A.3 across the next 32-32-32-40-40-48 stitches, work the first 3 stitches in A.3, A.4 (= front piece), pick up 1 stitch from the previous round, knit 1 (= raglan-line), pick up 1 stitch from the previous round, work A.2, A.3 across the next 24 stitches, work the first 3 stitches in A.3, work A.4 (= sleeve) pick up 1 stitch from the previous round, knit 1 (= raglan-line), pick up 1 stitch from the previous round, work A.2, A.3 across the next 32-32-32-40-40-48 stitches, work the first 3 stitches in A.3, A.4 (= back piece). NOTE! Make sure the pattern matches the rib. The increases for raglan are marked in the diagrams, you have picked up 8 extra stitches = 160-160-160-176-176-192 stitches. RAGLAN: Increase as shown in the diagrams, increasing on each side of 1 purled + 1 knitted + 1 purled stitch in each raglan-line. Each time A.2 and A.4 are finished in height, there is room for 2 more repeats of A.3 in width. Continue with pattern and increases until A.2, A.3 and A.4 have been worked a total of 3-4-4-4-5-5 times in height. There are 344-408-408-424-488-504 stitches. Now increase only on the front and back pieces; the increases on the sleeves are finished. Work 2 more repeats in height with increases as shown in A.2 and A.4 on the front and back pieces, continuing the pattern on the sleeves without further increases. There are 408-472-472-488-552-568 stitches. Continue working without further increases until the yoke measures 25-30-30-30-35-35 cm from the marker mid-front. DIVIDE FOR BODY AND SLEEVES: Work the next round as follows: Work the first 2 stitches (belong to back piece), place the next 81-97-97-97-113-113 stitches on a thread for the sleeve, cast on 13-13-13-13-13-21 stitches (in side under sleeve), work 123-139-139-147-163-171 stitches (front piece), place the next 81-97-97-97-113-113 stitches on a thread for the sleeve, cast on 13-13-13-13-13-21 stitches (in side under sleeve), work the remaining 121-137-137-145-161-169 stitches (back piece). BODY: = 272-304-304-320-352-384 stitches. Continue the pattern in the round until the piece measures 42-44-46-48-50-52 cm from the marker mid-front. Change to circular needle size 3 mm and work rib according to A.5 for 6 cm, make sure you have knit 1, purl 1, knit 1 across the cables and knit over knit and purl over purl otherwise. Cast off. The jumper measures approx. 48-50-52-54-56-58 cm from the marker and 54-56-58-60-62-64 cm from the shoulder. SLEEVES: Place the 81-97-97-97-113-113 sleeve-stitches from the thread on one side of the piece on circular needle size 4.5 mm and knit up 1 stitch in each of the 13-13-13-13-13-21 stitches cast on under the sleeve + 1 extra stitch on each side = 96-112-112-112-128-136 stitches. Insert a marker-thread mid-under sleeve. Continue the pattern from the yoke, in the round. When the sleeve measures 4 cm, decrease 2 stitches under the sleeve – read DECREASE TIP. Decrease like this every 4-2-2-2½-1-1 cm a total of 8-14-13-11-18-20 times = 80-84-86-90-92-96 stitches. Continue working until the sleeve measures 37-32-34-34-30-30 cm. Change to double pointed needles size 3 mm. Work rib as shown in A.5 for 6 cm, make sure you have knit 1, purl 1, knit 1 across the cables and knit over knit and purl over purl otherwise. Cast off. The sleeve measures approx. 43-38-40-40-36-36 cm from the division. ASSEMBLY: Fold the neck double to the inside and sew down. Make sure the seam is elastic to avoid the neck being tight. |
|||||||||||||||||||
Diagram explanations |
|||||||||||||||||||
|
|||||||||||||||||||
 |
|||||||||||||||||||
 |
|||||||||||||||||||
Have you finished this pattern?Tag your pictures with #dropspattern #winterpearlsweater or submit them to the #dropsfan gallery. Do you need help with this pattern?You'll find 24 tutorial videos, a Comments/Questions area and more by visiting the pattern on garnstudio.com. © 1982-2026 DROPS Design A/S. We reserve all rights. This document, including all its sub-sections, has copyrights. Read more about what you can do with our patterns at the bottom of each pattern on our site. |
|||||||||||||||||||


With over 40 years in knitting and crochet design, DROPS Design offers one of the most extensive collections of free patterns on the internet - translated to 17 languages. As of today we count 324 catalogues and 12290 patterns translated into English (UK/cm). 12290
We work hard to bring you the best knitting and crochet have to offer, inspiration and advice as well as great quality yarns at incredible prices! Would you like to use our patterns for other than personal use? You can read what you are allowed to do in the Copyright text at the bottom of all our patterns. Happy crafting!
Post a comment to pattern DROPS 255-1
We would love to hear what you have to say about this pattern!
If you want to leave a question, please make sure you select the correct category in the form below, to speed up the answering process. Required fields are marked *.