
Popular categories
Looking for a yarn?


Comments / Questions (15)
![]() Mie wrote:
Mie wrote:
Sidste afsnit inden aflukningskantbmedvpicot forstår jeg ikke Skal jeg strikke 1 pind glatstrik over alle 105 m og så bukke strikketøjet på midten og så samle 105 m op i opslagskanten på rundpind? Hvilken kant i Venstre side skal jeg springe over? Vh Mie
18.09.2023 - 19:10DROPS Design answered:
Hej Mie, det er korsiderne i hver side du hopper over, så du får en kant (som du kan se mod forstykket) når du gør det får du et ærmegab :)
26.09.2023 - 14:45
![]() Catherine Perard wrote:
Catherine Perard wrote:
Houps.. .... Je viens de voir la vidéo, donc plus de souci, elle est très bien expliquée. Merci
16.04.2023 - 18:15
![]() Catherine Perard wrote:
Catherine Perard wrote:
Bonjour. Je ne comprends pas la bordure Picot. Pourriez vous me donner une autre explication . Merci de votre retour rapi
15.04.2023 - 21:43DROPS Design answered:
Bonjour Mme Perard, dans cette vidéo, nous montrons comment réaliser ce type de bordure picot. Attention à bien suivre les nombres indiqués dans ce modèle, ils peuvent ne pas être exactement les mêmes que dans la vidéo, toutefois, la technique sera la même. Bon tricot!
17.04.2023 - 09:10
![]() Jennie Hast wrote:
Jennie Hast wrote:
Hej! Förstår inte sista partiet. Vilken kant är det jag ska hoppa över? Och vad menas med "sticka upp" är det samma som att "plocka upp"? Och vad är det som ska vikas? Mvh Jennie
29.07.2021 - 19:03DROPS Design answered:
Hei Jennie. Når arbeidet måler ca 46-50-54 cm, strikker du neste pinne fra retten i glattstrikk. Når du har strikket denne pinnen, vri arbeidet slik at du hopper over sidekanten på arbeidet og starter med å strikke opp (plukke opp ) masker i oppleggskanten. Du får nå et stort "hull" i den ene siden = 1 ermhull. Fortsett videre med å strikke opp (plukke opp) 105-117-129 masker fra oppleggskanten (sett fra retten) = 210-234-258 masker på pinnen (dvs at arbeidet brettes opp før det strikkes opp masker langs oppleggskanten). Videre strikkes arbeidet rundt på rundpinne og du har nå 2 store "hull" til ermene. mvh DROPS design
12.08.2021 - 06:57
![]() Melinda Fülöp wrote:
Melinda Fülöp wrote:
Jag håller på med A1. Har gjort varvet med omslag och hoptagning. Men ska göra avigsidan och då ska jag väl göra avigmaskor hela vägen, men ska omslagen göras räta ändå eller göras aviga?
09.11.2020 - 12:06DROPS Design answered:
Hej Melinda. Du stickar omslagen enligt diagram (dvs avigt här) men du stickar de inte vridet, för det ska bli ett hål. Mvh DROPS Design
10.11.2020 - 09:54
![]() Audrée wrote:
Audrée wrote:
On April 10, 2019, you provided clarification for the Adalmina pattern but I don't understand what you mean! You wrote: work YO so does this mean to pass it over the knit that follows? If so, this makes two decreases. Then you said: knit together the last stitch in A with the first stitch in B but the pattern asks for a YO, slip, knit and passover. I can't figure out how to work the B section 14 times with section A crossing over it and B section crossing over C. Thanks for your help!
18.07.2020 - 15:27DROPS Design answered:
Dear Audrée, on row 3 for example you work A= K1, K2 tog, YO, K1, then make a yarn over (as shown in diagram), 1 stitch remain in A - K tog this last st in A. with first st in B (= the last st in A is now the YO and the first st in B is now the K2 tog). At the end of B, work the yarn over, then slip 1 as if to K (= last st in B), K first st in B/C, and psso = the YO is now the last st in B and the decrease is the first stitch next B / C. A. will be worked only once at the beg, then you repeat B and finish row with C; Hope this will help :) Happy knitting!
20.07.2020 - 09:23
![]() Raffaella wrote:
Raffaella wrote:
Ciao, non riesco a capire questo passaggio iniziale in cui si dice dopo il diagramma A.1 lavorare 1 maglia a maglia rasata e 4 maglie a Lavorare 4 maglie a PUNTO LEGACCIO – vedere le spiegazioni sopra, diagramma A.1 sulle 96-108-120 maglie successive (= 16-18-20 ripetizioni), 1 maglia a maglia rasata e 4 maglie a punto legaccio. Mi aspetto di trovare simmetricamente un’altra maglia rasata e 4 punti a legaccio alla fine del ferro, ma la maglia rasata non la trovo, è corretto così?
20.07.2019 - 21:00DROPS Design answered:
Buongiorno Raffaella. È corretto come indicato. La maglia rasata prima delle ultime 4 m legaccio serve per rendere simmetrico il lavoro nella riga con le maglie gettate. Buon lavoro!
21.07.2019 - 14:41
![]() Silke Spröd wrote:
Silke Spröd wrote:
Wie wird die rechte Masche am Ende des Mustersatzes in den Rückreihen gestrickt? Diese Masche irririert mich.
16.06.2019 - 19:53DROPS Design answered:
Liebe Frau Spröd, nach A.2 stricken Sie 1 Masche glatt rechts (vor den 4 M krausrechts), dh diese Masche wird rechts bei den Hinreihen und links bei den Rückreihen gestrickt. Viel Spaß beim stricken!
17.06.2019 - 08:24
![]() Amanda wrote:
Amanda wrote:
Jag förstår inte riktigt hur den maskan mad slätstickning blir. Det står "Sticka 4 maskor RÄTSTICKNING, A.1 över de nästa 96 maskorna, 1 maska slätstickning och 4 maskor rätstickning." Ska där enda maskan slätstickning stickas varannan gång på höger och varannan gång på vänster, så att det alltid blir 5e maskan före slutet? Eller ska den alltid vara på samma sida, dvs varannan gång 5e maskan innan slutet, och varannan gång 5e maskan från början?
23.05.2019 - 19:31DROPS Design answered:
Hei Amanda. Det strikkes frem og tilbake, altså annenhver pinne fra rettsiden og annenhver pinne fra vrangsiden. Mønsteret blir forklart fra første pinne (= rettsiden), så når det strikkes fra vrangsiden må du strikke motsatt av forklaringen. Den slettstrikkede masken skal strikkes på samme sted hele veien, altså: fra rettsiden strikkes den ETTER A.1, og fra vrangsiden strikkes den FØR A.1. I dette tilfelle strikkes slik fra vrangsiden: 4 masker rettstrikning, 1 maske slettstrikkning (=vrang fra vrangen), A.1 over 96 masker (husk å lese diagrammet motsatt vei: fra høyre mot venstre når du strikker fra vrangen) og avslutt med 4 masker rettstrikning. God fornøyelse.
24.05.2019 - 08:00
![]() Lynn wrote:
Lynn wrote:
I'm working this pattern at the moment, I've done the A1, A2, then A1, then the pattern says work A.3A over the first 5 stitches, repeat A.3B over the next 84 stitches, I cant understand how I can work the 6 stitches in the A.3B part when you have to knit 2 together or slip stitch knit 2 together slip stitch over when this part goes over to part A.3C, hope you can understand what i'm trying to say.
09.04.2019 - 17:08DROPS Design answered:
Dear Lynn, on row 3 for example you work A= K1, K2 tog, YO, K1, then work YO, K tog the last st in A. with first st in B (= the last st in A is now the YO and the first st in B is now the K2 tog). At the end of B, work the yarn over, then slip 1 as if to K (= last st in B), K first st in B/C, and psso = the YO is now the last st in B and the decrease is the first stitch next B / C. Happy knitting!
10.04.2019 - 10:02
|
||||||||||||||||||||||
Adalmina#adalminashrug |
||||||||||||||||||||||
 |
 |
|||||||||||||||||||||
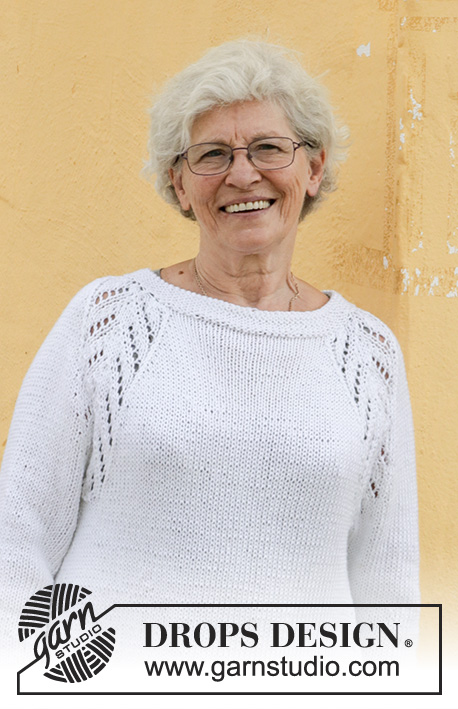
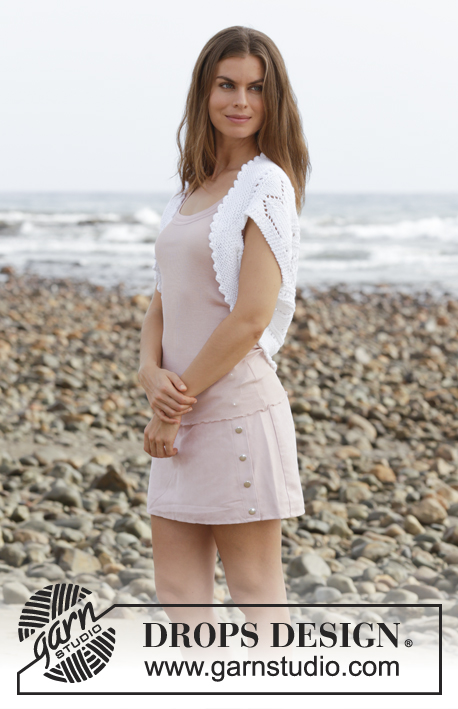
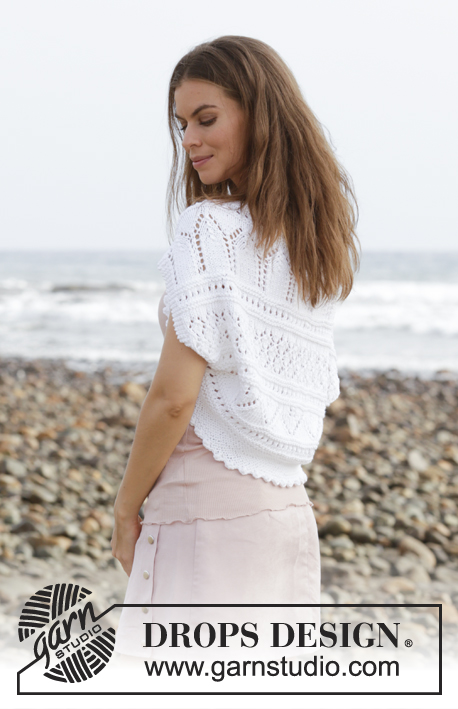
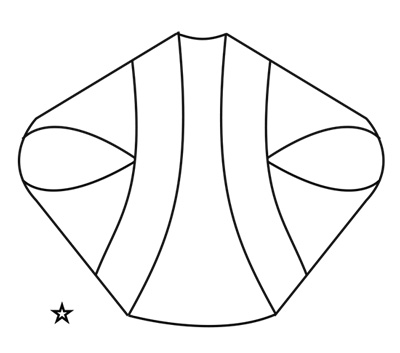
Knitted shoulder piece with lace pattern. Sizes S - XXXL. The piece is worked in DROPS Paris.
DROPS 188-38 |
||||||||||||||||||||||
|
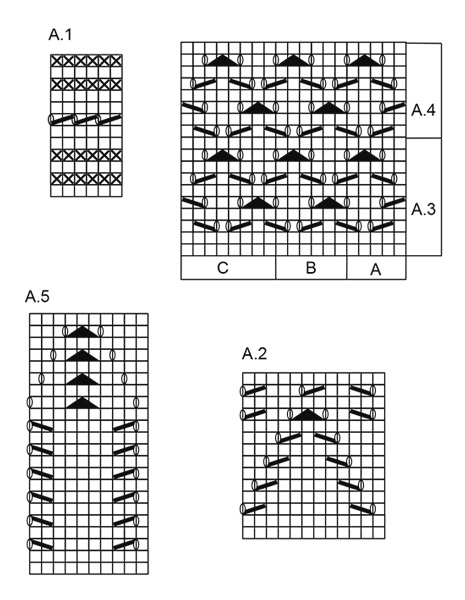
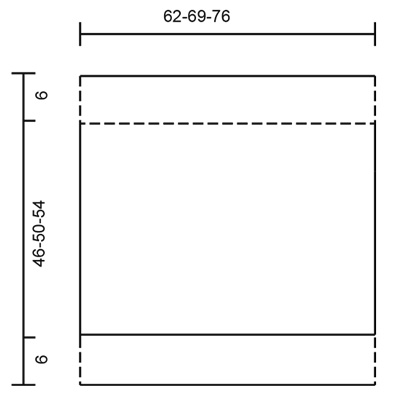
INFORMATION FOR THE PATTERN: RIDGE/GARTER STITCH (worked in the round): 1 ridge = 2 rounds. Knit 1 round and purl 1 round. RIDGE/GARTER STITCH (worked back and forth): 1 ridge = Knit 2 rows. PATTERN: See diagrams A.1 to A.5. The diagrams show all the rows in the pattern seen from the right side. ---------------------------------------------------------- SHOULDER PIECE: The piece is first worked back and forth with circular needle. Then an edge is worked in the round. Cast on 105-117-129 stitches with circular needle size 5 mm and Paris. Work 4 stitches in GARTER STITCH – see description above, A.1 over the next 96-108-120 stitches (= 16-18-20 repeats), 1 stitch in stocking stitch and 4 stitches in garter stitch. When A.1 has been worked 1 time in height, continue as follows: 4 stitches in garter stitch, A.2 over the next 96-108-120 stitches (= 8-9-10 repeats in width), 1 stitch in stocking stitch, 4 stitches in garter stitch. When A.2 has been worked 1 time in height, continue as follows: 4 stitches in garter stitch, A.1 over the next 96-108-120 stitches, 1 stitch in stocking stitch and 4 stitches in garter stitch. When A.1 has been worked 1 time in height, continue as follows: 4 stitches in garter stitch, A.3A over the first 5 stitches, repeat A.3B over the next 84-96-108 stitches (= 14-16-18 times), A.3 C over the next 8 stitches and finish with 4 stitches in garter stitch. When A.3 has been worked 1 time in height, continue with A.4 A-C over the stitches in A.3 A-C. Work A.4 1-2-3 times in height. When A.4 has been completed, continue as follows: 4 stitches in garter stitch, A.1 over the next 96-108-120 stitches, 1 stitch in stocking stitch and 4 stitches in garter stitch, AT THE SAME TIME on the last row in A.1 increase 4-2-0 stitches evenly on row = 109-119-129 stitches. Then work as follows: 4 stitches in garter stitch, A.5 over the next 100-110-120 stitches (= 10-11-12 repeats in width), 1 stitch in stocking stitch and 4 stitches in garter stitch. On the last row in A.5 decrease 4-2-0 stitches evenly on row = 105-117-129 stitches. Work 4 stitches in garter stitch, A.1 over the next 96-108-120 stitches, 1 stitch in stocking stitch and 4 stitches in garter stitch. Now the piece measures approx. 46-50-54 cm. Continue working as follows from the right side: Work 1 row stocking stitch, do not turn the piece, skip the edge in the left side, continue by knitting up 105-117-129 stitches along the cast-on edge (seen from the right side) = 210-234-258 stitches on needle (in other words, the piece is folded before knitting up the stitches along the cast-on edge). Continue working in the round with circular needle. Continue with GARTER STITCH in the round until the edge measures 6 cm – see description above. Then cast off with picot edge. FINISHING EDGE WITH PICOT: Knit 1 stitch, (* insert the right needle between the first 2 stitches on the left needle, i.e. between the stitches not through the stitches), make 1 yarn over the right needle, pull the yarn over between the stitches and place it on the left needle *, repeat from *-* 2 more times = 3 new stitches on the left needle. ** Knit the first stitch on the left needle, pass the first stitch from the right needle over the last stitch worked **), repeat from **-** a total of 6 times and repeat from (-) along the whole edge until there are 2 stitches left, cast off the last 2 stitches. Cut and fasten the strand. |
||||||||||||||||||||||
Diagram explanations |
||||||||||||||||||||||
|
||||||||||||||||||||||
 |
||||||||||||||||||||||
 |
||||||||||||||||||||||
 |
||||||||||||||||||||||
Have you finished this pattern?Tag your pictures with #dropspattern #adalminashrug or submit them to the #dropsfan gallery. Do you need help with this pattern?You'll find 20 tutorial videos, a Comments/Questions area and more by visiting the pattern on garnstudio.com. © 1982-2026 DROPS Design A/S. We reserve all rights. This document, including all its sub-sections, has copyrights. Read more about what you can do with our patterns at the bottom of each pattern on our site. |
||||||||||||||||||||||


With over 40 years in knitting and crochet design, DROPS Design offers one of the most extensive collections of free patterns on the internet - translated to 17 languages. As of today we count 324 catalogues and 12290 patterns translated into English (UK/cm). 12290
We work hard to bring you the best knitting and crochet have to offer, inspiration and advice as well as great quality yarns at incredible prices! Would you like to use our patterns for other than personal use? You can read what you are allowed to do in the Copyright text at the bottom of all our patterns. Happy crafting!
Post a comment to pattern DROPS 188-38
We would love to hear what you have to say about this pattern!
If you want to leave a question, please make sure you select the correct category in the form below, to speed up the answering process. Required fields are marked *.