
Popular categories
Looking for a yarn?


Comments / Questions (12)
![]() Vigdis Stuberg Thodal wrote:
Vigdis Stuberg Thodal wrote:
Jeg får ikke til å brette kyllingen etter instruksjonen! Finnes det en monteringsvideo?
21.02.2025 - 17:18DROPS Design answered:
Hei Vigdis. Har dessverre ingen monteringsvideo, men ta en titt på startbildet til videoen til kyllingen. Legg den øverste delen du ser til venstre under den delen med kammen (vrangen mot vrangen). Sy denne kanten sammen med små sting. Sy deretter baksiden sammen (kortsiden av retanglet). Du har nå en side igjen å sy. Fyll kyllingen med vatt, brett avfellingskanten (den som ikke er sydd enda) på tvers av sømmen øverst. Stikk inn et ben i hver side nede og sy sammen langs hele avfellingskanten + noen sting gjennom begge ben. mvh DROPS Design
24.02.2025 - 13:06
![]() Renée Azéma wrote:
Renée Azéma wrote:
Oh, merci pour vos conseils ! j'ai repassé la vidéo à vitesse lente et en notant "avec mes mots" ce que je voyais, c'est un très joli modèle !
10.05.2022 - 18:51
![]() Renée Azéma wrote:
Renée Azéma wrote:
Bonjour je fais mon premier poussin, avec la vidéo je comprends, mais comment reconnaitre le devant de l'envers ? je me suis trompée et la crête du poussin est à l'envers. (les côtés obliques de la crête sont orientés vers le centre) Merci de m'aider
10.05.2022 - 15:53DROPS Design answered:
Bonjour Mme Azéma, vous relevez les mailles de la crête sur l'envers de la poule, autrement dit, après le rang sur l'endroit de l'attache, tricotez 1 rang (= sur l'envers) pour la poule et relevez les mailles - en plaçant la crête comme dans la vidéo - time code 07.30. Bon tricot!
10.05.2022 - 16:34
![]() Christine wrote:
Christine wrote:
Merci pour ses explications je vais essayer sa a air d etre facile encore merci beaucou
02.09.2019 - 08:47
![]() Karolyne wrote:
Karolyne wrote:
Vraiment au top :) Un réel plaisir de la tricoter :) mes enfants sont ravis d'avoir chacun sa petite poule :) encore merci pour le tuto .
10.04.2019 - 15:37Maria wrote:
Te escribo de Argentina, muy buenas tus explicaciones y muy hermosos todos los trabajos , gracias y muchas gracias por compartirlos.
24.09.2016 - 18:43
![]() éliane Villain wrote:
éliane Villain wrote:
Bonjour, on voit bien sur la photo de la poule que le corps est réalisé d'un seul morceau et pourtant vous faites relever des mailles uniquement sur un côté ... vraiment pas clair !
30.03.2015 - 10:19DROPS Design answered:
Bonjour Mme Villain, effectivement, la poule se tricote d'une seule pièce, on la plie ensuite en double le long de la crête pour coudre le haut de la tête. Bon tricot!
30.03.2015 - 16:02
![]() Paulette wrote:
Paulette wrote:
Poule de Pâques Pour le bec de la poule: je tricote 12 mailles et je reprend à partir de la 12 ème 3 mailles du bec et les 3 autres ou vont 'elles?
29.03.2015 - 14:50DROPS Design answered:
Bonjour Paulette, tricotez d'abord les 12 premières m puis tricotez les mailles suivantes et les mailles du bec ainsi: la 13ème m sur l'aiguille et la 1ère m du bec ensemble, puis la 14ème m et la 2ème m du bec ensemble et ainsi de suite jusqu'à ce que toutes les mailles du bec aient été tricotées, et terminez par les dernières m de la poule. Bon tricot!
30.03.2015 - 15:44
![]() Stricker Petra wrote:
Stricker Petra wrote:
Bei dieser Anleitung kann die Maschenzahl für den Körper nicht stimmen. Es werden 15 M aus dem Kamm aufgenommen, später soll man dann den Schnabel mit 6 M nach 12 M mit dem Körper zusammenstricken, da sind nur noch 3 M übrig. Wo ist die andere Seite des Huhns?
19.03.2015 - 08:00DROPS Design answered:
Die von Ihnen vermissten M sind vorhanden - sie werden nach dem Aufhänger angeschlagen. Nachdem Sie den Aufhänger gestrickt haben, schlagen Sie 14 neue M an, stricken 1 R re über diese M und fassen dann 15 M aus dem Kamm auf, dann haben Sie 30 M auf der Nadel (die M des Aufhängers ist ja auch noch dabei). Die Anschlagskante wird zuletzt oben an die andere Seite des Kamms genäht.
19.03.2015 - 10:13
![]() Helen wrote:
Helen wrote:
Hvordan får dere 12+6 m til å passe? Når nebb skal strikkes inn i kropp. Helen
09.03.2015 - 21:24
|
|
Kikiri-Key#dropskikirikey |
|
 |
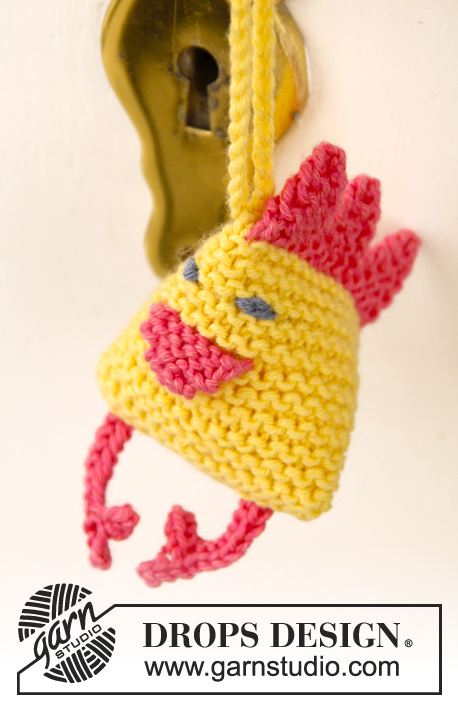 |
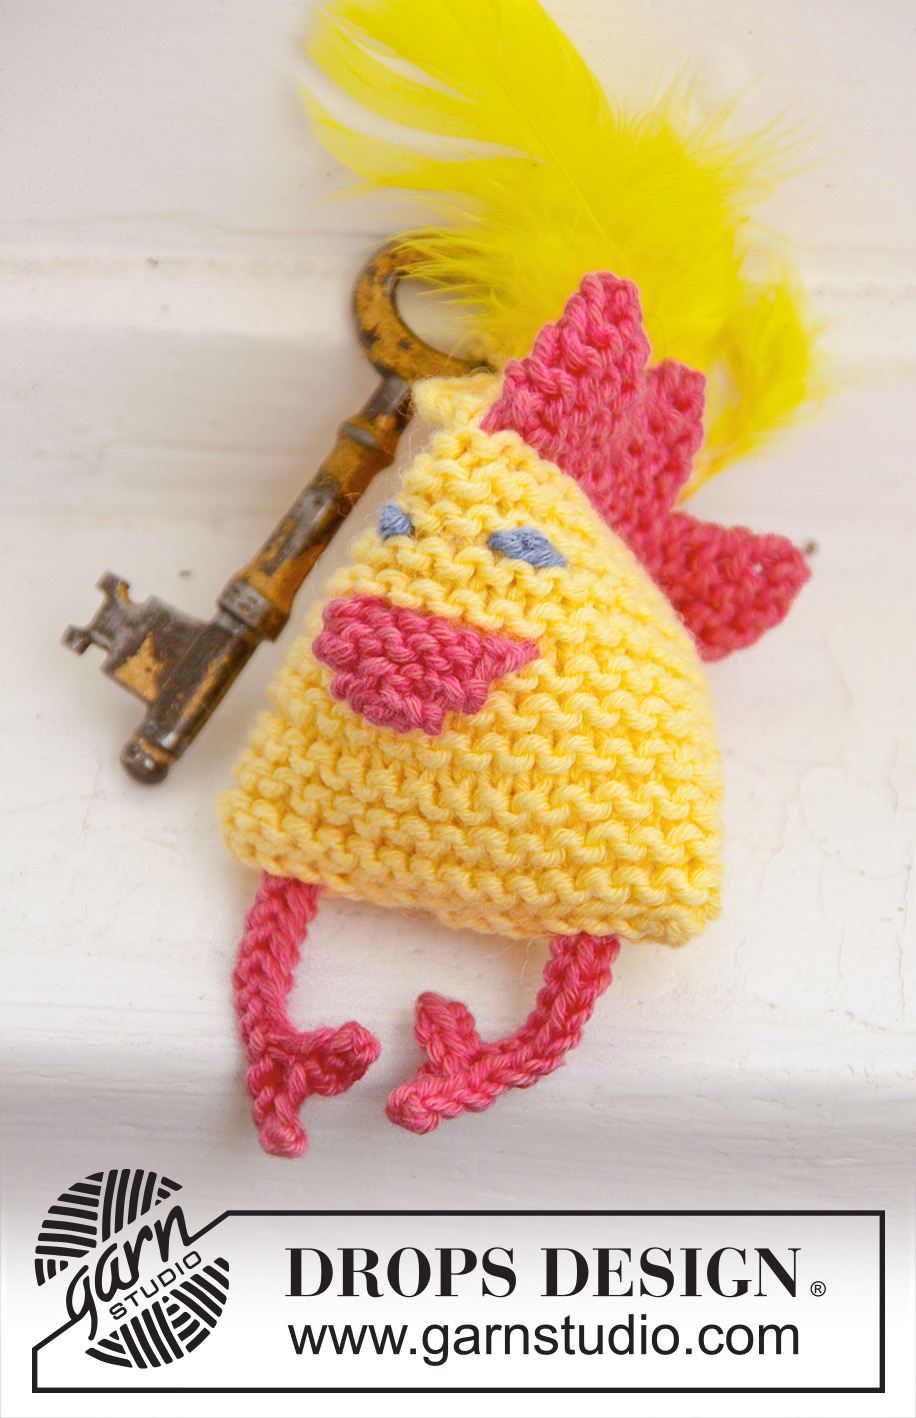
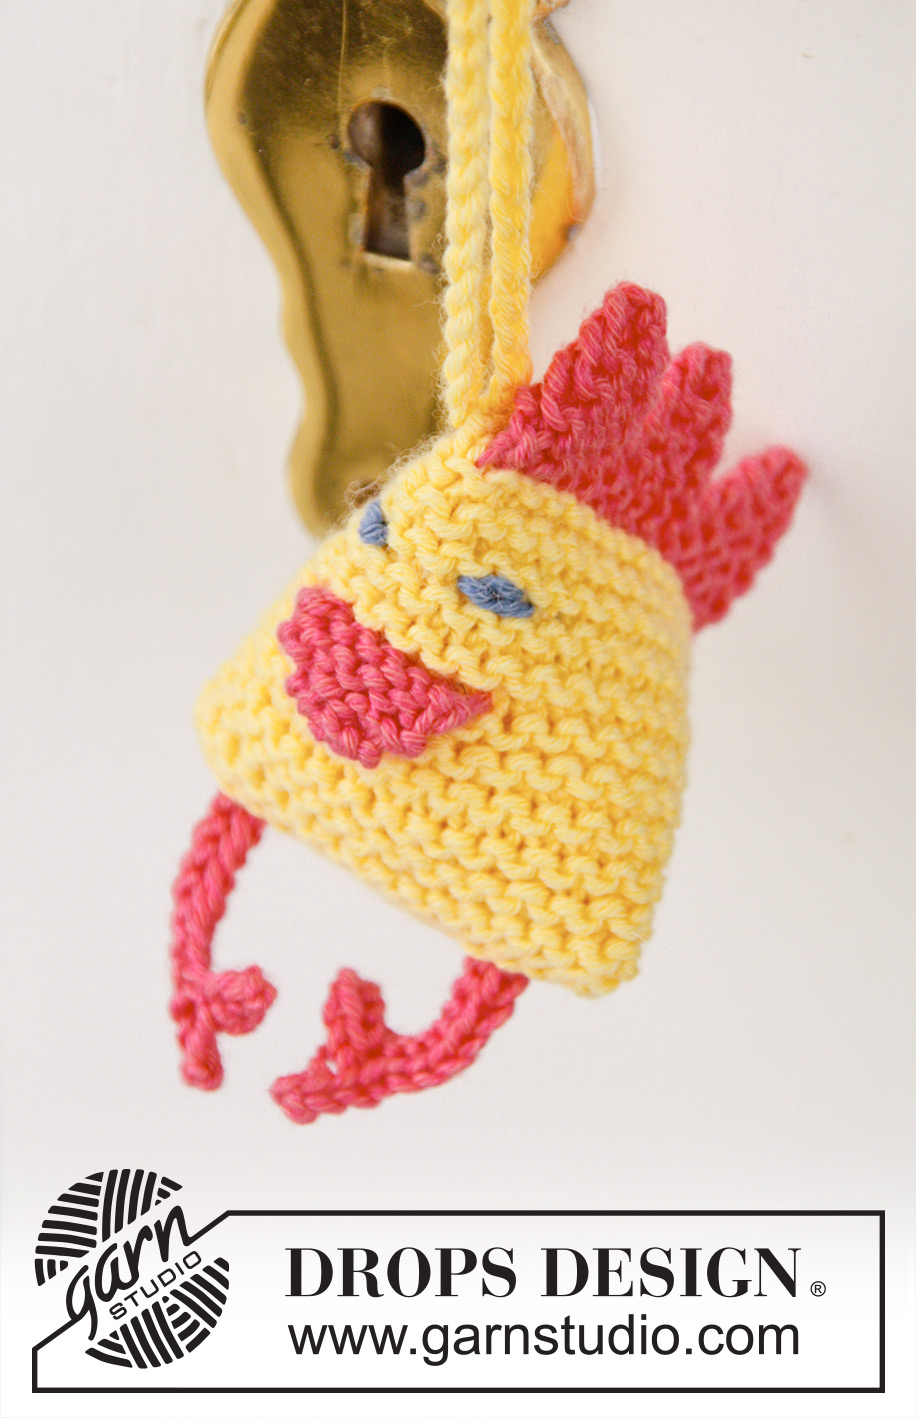
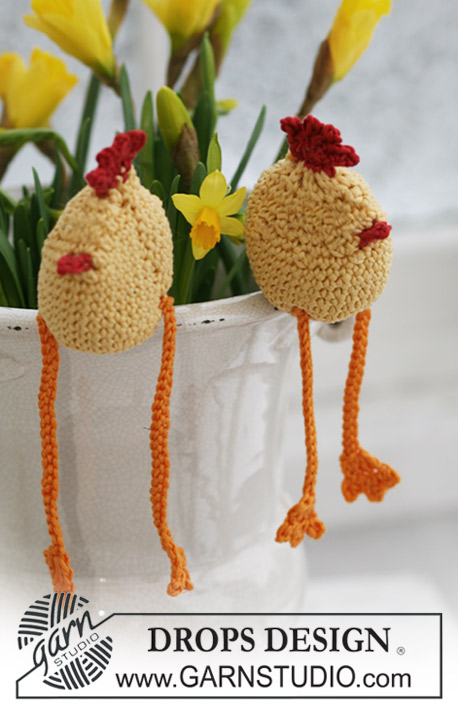
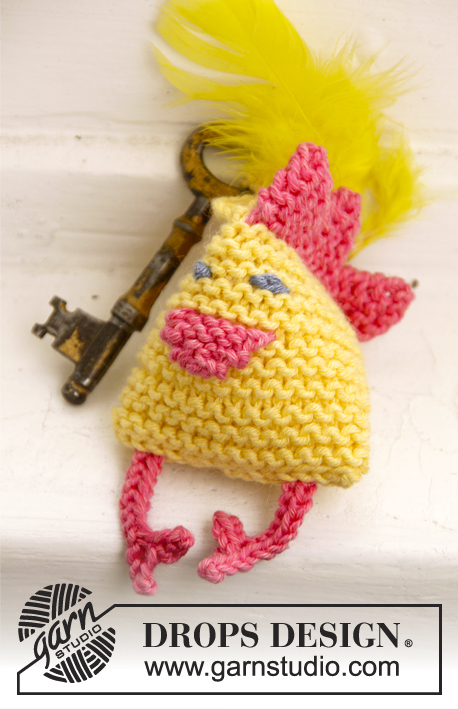
DROPS Easter: Knitted Easter chicken in garter st in ”Cotton Merino”.
DROPS Extra 0-1021 |
|
|
GARTER ST (back and forth on needle): K all rows. 1 ridge = 2 rows K. ---------------------------------------------------------- EASTER CHICKEN: Worked back and forth on needle. First work comb, then strap, then the chicken and to last leg. COMB: Cast on 2 sts on needles size 3.5 mm with coral. Then work spikes as follows: ROW 1: K 1, 1 YO, K 1. ROW 2: K all sts, K YO twisted = 3 sts. ROW 3: K 2, 1 YO, K 1. ROW 4: K all sts, K YO twisted = 4 sts. ROW 5: K 3, 1 YO, K 1. ROW 6: K all sts, K YO twisted = 5 sts. ROW 7: K 4, 1 YO, K 1. ROW 8: K all sts, K YO twisted = 6 sts. ROW 9: K 5, 1 YO, K 1. ROW 10: K all sts, K YO twisted - AT THE SAME TIME cast off the first 5 sts and work the rest of row = 2 sts. Repeat rows 1-10 until 3 spikes have been worked in total, cast off all sts on 10th row after last spike. Cut the yarn, fasten the strand and put comb aside. STRAP: Make a strap as follows: Cast on 1 st on needle size 3.5 mm with vanilla, * make a YO and cast off st *, repeat from *-* until strap is approx. 12 cm long. Then pick up 1 st in first st (= cast on-st) and pass st on needle over this st. Cast on 14 new sts, K 1 row over these sts. CHICKEN : Pick up 15 sts in outer loops of edge sts on the underside of comb (= WS). Then work ridges in GARTER ST - see explanation above, work 5 ridges in total. Finish with 1 row from WS. Put piece aside and knit a beak as follows: Cast on 2 sts on needle size 3.5 mm with coral. Then inc 1 st on every row by working a YO inside 1st st, K YO twisted on next row. Work like this until there are 6 sts on needle. Finish with 1 row P without inc, there are now 2 rows in stocking st on one side of beak. Put beak aside and find the chicken again. K the first 12 sts, find the beak and place it on RS of chicken with the 2 rows in stocking st towards you. Work 1 st from beak tog with 1 st from chicken and then continue on chicken. Work in garter st until 11 ridges have been worked in total and cast off from RS. LEG: Cast on 13 sts on needle size 3.5 mm with coral. Work and cast off the first 3 sts, slip 4th st (= st on right needle) back on left needle. Turn piece and cast on 3 new sts. Work and cast off all sts on needle. Cut the yarn and fasten. Work another leg the same way. ASSEMBLY AND DECORATION: Embroider a couple of eyes above beak, use some left-over blue or black yarn. Fold the piece double so that cast on-edge and comb are placed towards each other, WS against WS. Sew tog with neat little stitches. Then sew down along the side of piece (= back of chicken). Fill the chicken with some cotton wool, fold the piece so that cast off-edge is across the seam at the top, work in one leg in each side at the bottom. Sew tog along the entire cast off-edge and make sure to place a few stitches through each leg. |
|
Have you finished this pattern?Tag your pictures with #dropspattern #dropskikirikey or submit them to the #dropsfan gallery. Do you need help with this pattern?You'll find 17 tutorial videos, a Comments/Questions area and more by visiting the pattern on garnstudio.com. © 1982-2026 DROPS Design A/S. We reserve all rights. This document, including all its sub-sections, has copyrights. Read more about what you can do with our patterns at the bottom of each pattern on our site. |
|


With over 40 years in knitting and crochet design, DROPS Design offers one of the most extensive collections of free patterns on the internet - translated to 17 languages. As of today we count 324 catalogues and 12290 patterns translated into English (UK/cm). 12290
We work hard to bring you the best knitting and crochet have to offer, inspiration and advice as well as great quality yarns at incredible prices! Would you like to use our patterns for other than personal use? You can read what you are allowed to do in the Copyright text at the bottom of all our patterns. Happy crafting!
Post a comment to pattern DROPS Extra 0-1021
We would love to hear what you have to say about this pattern!
If you want to leave a question, please make sure you select the correct category in the form below, to speed up the answering process. Required fields are marked *.