
Popular categories
Looking for a yarn?


Comments / Questions (68)
![]() Jean wrote:
Jean wrote:
I’m having great difficulties finishing this sock! The instructions for assembly are very bare bones and I wish the author took pictures of the entire process with the socks. Does anyone have a video example?
23.06.2019 - 23:38DROPS Design answered:
Dear Jean, we have a bunch of tutorial videos on our site. Fpr each pattern the links to the relvant videos can be found just below the picture of teh model. Happy Crafting!
24.06.2019 - 00:02
![]() Catherine wrote:
Catherine wrote:
Bonjour, quand vous dites "Crocheter en rond, en ms (= 1 ms dans chaque ms) jusqu'à ce que l'ouvrage mesure 14-16-18 cm.", je n'arrive pas à comprendre si je dois mesurer la hauteur? la largeur? ou la circonférence totale de cette forme ronde étrange !?? merci de me répondre vite si vous pouvez car là je suis en panne d'inspiration ;) cordialement catherine
15.06.2019 - 18:13DROPS Design answered:
Bonjour Catherine, vous crochetez le pied en commençant par la pointe, quand les augmentations sont terminées, vous continuez en mailles serrées, en rond jusqu'à ce que l'ouvrage mesure 14-16-18 cm depuis la pointe du pied puis vous allez crocheter en allers et retours pour former l'ouverture du pied autour de laquelle sera ensuite attachée la tige. Bon crochet!
17.06.2019 - 07:30
![]() Wunjo wrote:
Wunjo wrote:
Ik zag dat 2x16 cm voor de pijp veel te lang zou zijn. Nu is mijn vraag of je 16 cm moet haken en dan de pijp uitrekken tot het past aan de voet, die ongeveer 20 cm telt. Je kunt de ribbel namelijk goed uitrekken.
26.01.2019 - 11:28DROPS Design answered:
Dag Wunjo,
Je kunt dit inderdaad aanpassen zodat de pijp op de opening van de sok past. Je kan hem een beetje uitrekken of wat langer haken. Af en toe even passen.
27.01.2019 - 13:56
![]() Wunjo wrote:
Wunjo wrote:
Voor de pijp staat voor de kleinste maat een lengte van 16 cm aangegeven. Kan het zijn dat dat de helft is van de totale lengte die nodig is om hem aan de voet te laten passen?
26.01.2019 - 09:15DROPS Design answered:
Dag Wunjo,
Nee, hiermee wordt de lengte , maar omdat de pijp overdwars wordt gebreid is de aangegeven lengte van 16 cm eigenlijk de omtrek van de sok en je maakt de opzet- en afkantrand aan elkaar vast, zodat er midden achter een naad komt.
27.01.2019 - 13:45
![]() Andrea wrote:
Andrea wrote:
I do not understand the pattern instructions for assembly....do you fold the leg in half, sew it together first then attach it to the sock?
20.01.2019 - 14:42DROPS Design answered:
Dear Andrea, after the leg is done back and forth, it is attached to the foot with slip stitches and then folder and worked together at the back. I hope this helps. Happy Crafting!
20.01.2019 - 20:19
![]() Alexander wrote:
Alexander wrote:
Hei Hva er rett og hva er vrang på selve sokken? Hvordan ser jeg forskjell?
15.01.2019 - 19:31DROPS Design answered:
Hej, Når du starter med at hækle rundt, så vil retsiden automatisk vende udad. God fornøjelse!
17.01.2019 - 08:31
![]() Jessica wrote:
Jessica wrote:
Det står att första fasta maskan ersätts med en luftmaska, ska jag inte virka i den första maskan? Då blir det ett hål men om jag virkar den första så blir det inte 12 kvar utan 13
06.12.2018 - 14:53DROPS Design answered:
Hej Jessica, det stämmer, när du kommer till ALLA STL - läs VIRKINFO! - skall första fm ersättas med 1 lm. Lycka till :)
07.12.2018 - 13:50
![]() Jessica wrote:
Jessica wrote:
Jag har lite svårt att förstå hur hälen ska virkas. Om det ska virkas fram och tillbaka, hur ska man då fästa med en smygmaska i det förra varvet?
06.12.2018 - 01:35DROPS Design answered:
Hei Jessica. Når du hekler frem og tilbake starter du i motsatt side annenhver gang. dvs at der du slutter en rad var der du startet forrige rad. Du fester raden i den første luftmasken på raden under. Du hekler altså slik: 1 luftmaske, fastmasker til enden av raden, 1 kjedemaske i den første luftmasken på raden under, hekle 1 luftmaske, snu og hekle fastmasker til enden av raden, 1 kjedemaske i den første luftmasken på raden under osv. God fornøyelse
06.12.2018 - 09:36
![]() Cecilie W wrote:
Cecilie W wrote:
Hei. Det står hekle 6-6-5 fm, og 12-12-10 fm osv. Hva menes med det? Hvor mange masker skal det være etter runden? Eller hvor mange fm skal i en fm.
16.04.2018 - 02:15DROPS Design answered:
Hei Cecilie Når det står hekle 6-6-5 fm, henviser de forskjellige tallene til hver sin størrelse (i dette tilfellet 35/37 - 38/40 - 41/43), du må finne hvilken størrelse du vil hekle også følge det tallet i rekken gjennom hele oppskriften. Hvis det skal hekles flere masker i en maske, hoppes over masker ol. står dette spesifisert i oppskriften. På instruksjonene for «Sokken» er det som står etter erlik-tegnet på slutten av hver omgang det totale maskeantallet når omgangen er ferdig. God fornøyelse
25.04.2018 - 13:55
![]() Maja Berg wrote:
Maja Berg wrote:
Hvor står det antall garn nøster man trenger til oppskriften?
12.07.2017 - 09:39DROPS Design answered:
Hei Maja, Det står antall gram garn man trenger til oppskriften øverst ved siden av bildet. Så for sokkene, hvis du kjøper 50g nøster, må du ha 4 av dem for å strikke størrelser 35/37 eller 38/40 og 5 for å strikke størrelse 41/43. God fornøyelse.
12.07.2017 - 10:10
|
|
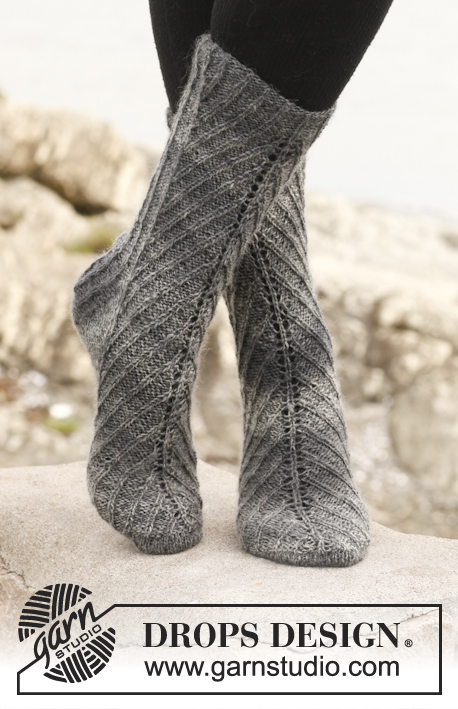
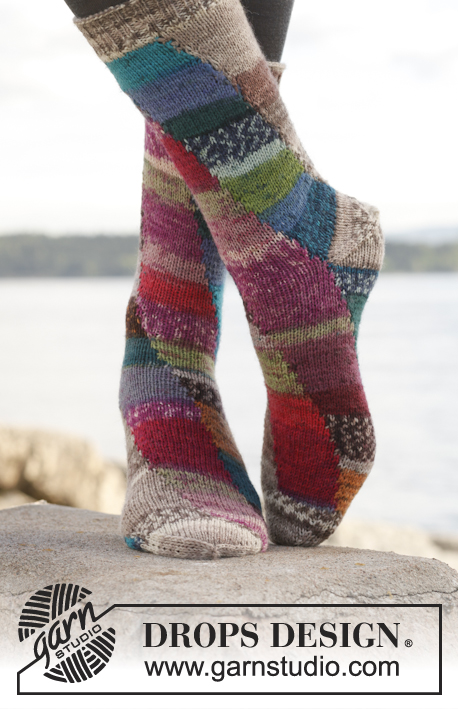
Comfort Rib#comfortribsocks |
|
|
|
|
Crochet DROPS socks in "Alaska". Size 35 - 43
DROPS 149-21 |
|
|
WORK IN THE ROUND IN A CIRCLE: After last dc on the round, continue to next round with 1 dc in next dc (= 1st dc from previous round). NOTE: Insert a marker at the beg of round between last dc on round and 1st dc on next round, move the marker upwards when working. CROCHET INFO: Replace first dc at beg of every dc round with 1 ch. Finish every round with 1 sl st in ch from beg of round. Replace first dc at beg of every dc row with 1 ch. Finish every row with 1 sl st in ch from beg of previous row. DECREASE TIP: Work 1 dc but wait with last pull through (= 2 sts on hook), then work next dc but on last pull through, pull thread through all sts on hook = 1 dc dec. ---------------------------------------------------------- SOCK: Piece is worked in the round from toe and back to instep, then work back and forth from mid back on heel. Then work leg sideways and crochet onto sock. Crochet 4 ch on hook size 3.5 mm with Alaska and form 1 ring with 1 sl st in 1st ch. ROUND 1: Work 6-6-5 dc in ch-ring - READ WORK IN THE ROUND IN A CIRCLE. ROUND 2: Work 2 dc in every dc = 12-12-10 dc. ROUND 3 (and then every other round): Work 1 dc in every dc. ROUND 4: * 1 dc in first dc, 2 dc in next dc *, repeat from *-* 6-6-5 times in total = 18-18-15 dc. ROUND 6: * 1 dc in each of the first 2 dc, 2 dc in next dc *, repeat from *-* 6-6-5 times in total = 24-24-20 dc. ROUND 8: * 1 dc in each of the first 3 dc, 2 dc in next dc *, repeat from *-* 6-6-5 times in total = 30-30-25 dc. ROUND 10: * 1 dc in each of the first 4 dc, 2 dc in next dc *, repeat from *-* 6-6-5 times in total = 36-36-30 dc. Inc are now done in size 35/37. ROUND 12: * 1 dc in each of the first 5 dc, 2 dc in next dc *, repeat from *-* 6-5 times in total = 42-35 dc. Inc are now done in size 38/40. ROUND 14: * 1 dc in each of the first 6 dc, 2 dc in next dc *, repeat from *-* 5 times in total = 40 dc. ROUND 16: * 1 dc in each of the first 7 dc, 2 dc in next dc *, repeat from *-* 5 times in total = 45 dc. Inc are now done in size 41/43. ALL SIZES: = 36-42-45 dc on round. Work in the round with 1 dc in every dc until piece measures 14-16-18 cm. Then work dc back and forth over the first 24-30-32 dc (i.e. do not work over the last 12-12-13 dc on round) - read CROCHET INFO! When sock measures 20-22-25 cm (i.e. approx. 6-6-7 cm from where it is divided), insert 1 marker in the middle of piece (= 12-15-16 dc on each side of marker). On next row dec 1 dc on each side of marker, i.e. beg 2 sts before marker and work the next 4 dc tog 2 by 2 – READ DECREASE TIP (= 2 dc dec). Work 1 row without dec. Repeat dec on next row (= 2 dc dec) = 20-26-28 sts remain on row. Work 1 row without dec, sock now measures approx. 22-24-27 cm from toe to heel. Put piece aside. LEG: Work leg as follows: Work 33 loose ch with Alaska on hook size 3.5 mm. Work 1 dc in 2nd ch from hook, then work 1 dc in every ch the entire row = 32 dc. Work back and forth with dc only in back loop of sts until piece measures 16-16-18 cm, adjust so that one long side fits the opening of sock. Place leg and sock opening towards each other and work tog from WS with a row of sl sts through both layers. NOTE – opening on sock should be mid back of sock. ASSEMBLY: Turn the sock inside out, place it double and work tog the back from WS with a row of sl sts through both layers. Fasten off. |
|
Have you finished this pattern?Tag your pictures with #dropspattern #comfortribsocks or submit them to the #dropsfan gallery. Do you need help with this pattern?You'll find 9 tutorial videos, a Comments/Questions area and more by visiting the pattern on garnstudio.com. © 1982-2026 DROPS Design A/S. We reserve all rights. This document, including all its sub-sections, has copyrights. Read more about what you can do with our patterns at the bottom of each pattern on our site. |


With over 40 years in knitting and crochet design, DROPS Design offers one of the most extensive collections of free patterns on the internet - translated to 17 languages. As of today we count 324 catalogues and 12290 patterns translated into English (UK/cm). 12290
We work hard to bring you the best knitting and crochet have to offer, inspiration and advice as well as great quality yarns at incredible prices! Would you like to use our patterns for other than personal use? You can read what you are allowed to do in the Copyright text at the bottom of all our patterns. Happy crafting!
Post a comment to pattern DROPS 149-21
We would love to hear what you have to say about this pattern!
If you want to leave a question, please make sure you select the correct category in the form below, to speed up the answering process. Required fields are marked *.