Comments / Questions (96)
![]() Karin wrote:
Karin wrote:
Den er fint hvis det hadde vært hvit jakke og pent til sommerbruk.
11.12.2010 - 00:05
![]() Elise wrote:
Elise wrote:
Her må oppskriften komme raskt!!! Veldig fin, men ikke rosa til meg ;-)
10.12.2010 - 20:56
![]() Sara wrote:
Sara wrote:
Skir elegans - men jag väljer en annan kulör.
10.12.2010 - 01:06
![]() Anette wrote:
Anette wrote:
Vilken dröm!!!
09.12.2010 - 19:15
![]() Nasy wrote:
Nasy wrote:
Like a princess's Jacket! Love it!
09.12.2010 - 18:52
![]() Sabine wrote:
Sabine wrote:
Sehr romantische lange Jacke, gefällt mir sehr gut!
09.12.2010 - 18:03
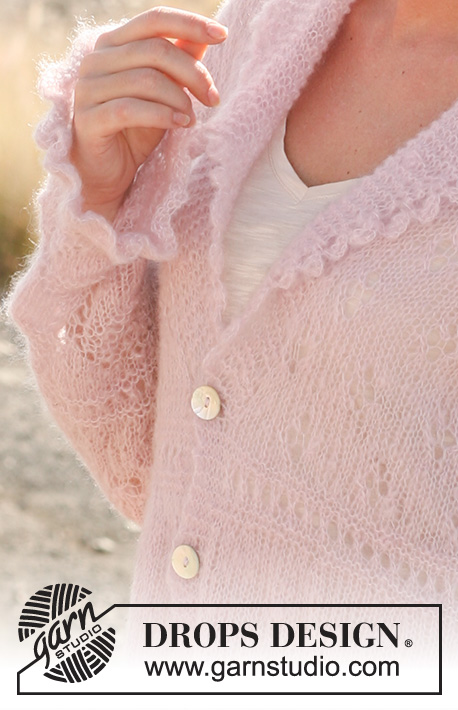
Married By Morning#marriedbymorningcardigan |
|||||||||||||||||||
 |
 |
||||||||||||||||||
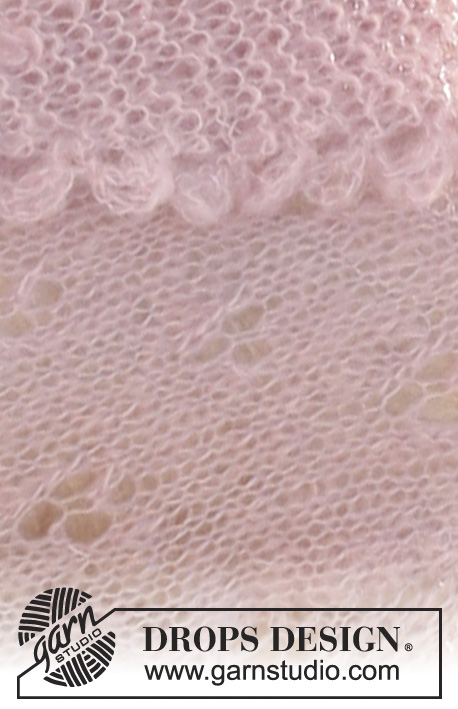
Knitted DROPS asymmetric jacket with bell edge and lace pattern in "Vivaldi". Size: S - XXXL.
DROPS 127-6 |
|||||||||||||||||||
|
GARTER ST (back and forth on needle): K all rows. GARTER ST (in the round on circular needle/double pointed needles): * K 1 round and P 1 round *, repeat from *-*. PATTERN: See diagram M.1 to M.5. The diagram shows the pattern from RS. DECREASE TIP 1 (applies to sides of body): All dec are done from RS! Beg 3 sts before st with marker and work as follows: K 3 tog, 2 YO, K 1 (= st with marker), 2 YO, slip 1 st as if to K, K 2 tog, psso (= 2 sts dec). On next row slip one of the 2 YOs off the needle and P the other. DECREASE TIP 2 (applies to neckline): Dec for neckline on inside of 6 band sts in garter st. All dec are done from RS! Dec as follows after band st: Slip 1 st as if to K, K 1, psso. Dec as follows 2 sts before band st: K 2 tog. INCREASE TIP (applies to collar): Inc 1 st by making 1 YO. On next round K YO twisted, i.e. work in the back loop of st instead of front to avoid holes. BUTTON HOLES: Cast off for button holes on right front band. 1 BUTTON HOLE = K tog 3rd and 4th st from edge and make 1 YO. Cast off for button holes when piece measures: SIZE S: 28, 36 and 44 cm SIZE M: 29, 37 and 45 cm SIZE L: 30, 38 and 46 cm SIZE XL: 32, 40 and 48 cm SIZE XXL: 34, 42 and 50 cm SIZE XXXL: 36, 44 and 52 cm -------------------------------------------------------- JACKET: Worked back and forth on circular needle from mid front. READ ALL OF THE FOLLOWING SECTION BEFORE CONTINUING! Cast on 957-993-1053-1149-1221-1317 sts (incl 6 band sts each side towards mid front) on circular needle size 5 mm with Vivaldi. Work first row from RS as follows: 6 band sts in GARTER ST - see explanation above - * M.1 (= 9 sts), P 3 *, repeat from *-* until 15 sts remain and finish with M.1 and 6 band sts in GARTER ST. Continue with pattern like this - NOTE: the 3 sts between every M.1 is worked K from WS and P from RS. After M.1 325-337-357-389-413-445 sts remain on needle and a bell edge has been worked. Insert 2 markers in the piece; in the 84th-87th-92nd-100th-106th-114th st from each side (= 157-163-173-189-201-217 sts between sts with markers on back piece). Work stocking st with 6 sts in GARTER ST each side while AT THE SAME TIME dec 2 sts at markers in each side - READ DECREASE TIP 1 (= 4 sts dec). Repeat dec on every other row a total of 42-43-44-47-49-52 times upwards = 157-165-181-201-217-237 sts on needle. NOTE: Remember BUTTON HOLES - see explanation above - on right front band and REMEMBER THE KNITTING TENSION! After last dec, the piece measures approx. 40-41-42-44-46-49 cm. Remove the markers in the sides. On next row from RS switch to circular needle size 4 mm. Work M.2 with 6 band sts in each side as before while AT THE SAME TIME on 1st row, dec 16-10-12-16-15-14 sts evenly (do not dec over bands) = 141-155-169-185-202-223 sts. NOTE: On 7th row in M.2 K last st before band. AT THE SAME TIME on last row in M.2 (= from WS) adjust the no of sts to 137-157-167-187-207-227 (do not inc/dec over the bands). Insert 2 markers in the piece after 36-41-46-51-56-61 sts from each side (= 65-75-75-85-95-105 sts between markers on back piece). Switch back to circular needle size 5 mm and work next row from RS as follows: 6 band sts, work M.3 until 6 sts remain and finish with 6 band sts. READ ALL OF THE FOLLOWING SECTION BEFORE CONTINUING: Continue pattern as explained above. AT THE SAME TIME when piece measures 45-46-47-49-51-54 cm, inc 1 st for collar inside first and 1 st inside second band st in each side towards mid front - READ INCREASE TIP! (= 2 sts inc in each side). On next row work 2 rows in garter st only over the outermost 8 sts towards mid front (do not work the other sts on needle). Then work one row over all sts and then work 2 rows garter st only over the outermost 8 sts in the other side. Continue to work over all sts again while AT THE SAME TIME inc 1 st inside the outermost band st in each side as follows: Inc on every other row a total of 4-6-8-8-8-8 times, on every 4th row a total of 6-6-6-6-7-7 times and then on every 8th row a total of 4-4-4-4-5-5 times = a total of 16-18-20-20-22-22 sts inc for collar (= 22-24-26-26-28-28 collar sts). AT THE SAM TIME when piece measures 46-47-48-50-52-55 cm, inc 1 st in the sides on both sides of markers (= 4 sts inc) - work the inc sts in stocking st. Repeat the inc in each side on every other row a total of 4-4-4-3-3-3 times. AT THE SAME TIME when piece measures 48-49-50-52-54-57 cm, dec 1 st for neckline towards mid front - READ DECREASE TIP 2. Repeat dec on every other row a total of 2-2-4-4-5-5 times, on every 4th row a total of 2-2-4-5-5-6 times and then on every 6th row a total of 2-2-3-3-3-3 times. AT THE SAME TIME when piece measures 50-51-52-54-56-59 cm, cast off 6 sts in each side for armholes (i.e. 3 sts on both sides of both markers) and finish each piece separately. BACK PIECE: = 67-77-77-85-95-105 sts. Continue with the pattern as before while AT THE SAME TIME cast off for armhole at beg of every row in each side as follows: 2 sts 1-2-1-3-4-5 times and 1 st 1-3-3-2-4-5 times = 61-63-67-69-71-75 sts. NOTE: work sts that do not fit the pattern in stocking st when casting off for armholes. When piece measures 67-69-71-74-77-81 cm, cast off the middle 15-15-15-17-19-21 sts for neckline and finish each shoulder separately. Continue to cast off 1 st on the next row from the neckline = 22-23-25-25-25-26 sts remain on the shoulder. Continue to work until piece measures 69-71-73-76-79-83 cm and LOOSELY cast off. RIGHT FRONT PIECE: Continue inc for collar and dec for neckline as before while AT THE SAME TIME casting off for armholes at the beg of every row from side as on back piece. After all inc and cast offs are done, there are 44-47-51-51-53-54 sts on needle. When piece measures 69-71-73-76-79-83 cm, cast off the outermost 22-23-25-25-25-26 sts at beg of row from side for shoulder = 22-24-26-26-28-28 sts remain on needle (= collar). Work rest of row. NOW MEASURE PIECE FROM HERE! Work garter st back and forth over collar as follows: * 2 rows in garter st over all sts, 2 rows in garter st only over the outermost 14-16-18-18-20-20 sts *, repeat from *-* until collar measures approx. 7-7-7-8-8-9 cm in the most narrow part (it will then measure approx. 14-14-14-16-16-18 cm at the widest), LOOSELY cast off. LEFT FRONT PIECE: Work as right front piece but reversed. SLEEVE: Worked in the round on double pointed needles. Cast on 110-110-120-120-120-130 sts on double pointed needles size 5 mm with Vivaldi. K 1 round, then work next round as follows: * M.5 (= 7 sts), P 3 *, repeat from *-* the entire round. Continue the pattern like this. After M.5 44-44-48-48-48-52 sts remain on needle and a bell edge has been worked. K 1 round while AT THE SAME TIME adjusting the no of sts to 45-45-47-47-49-51. Insert a marker at beg of round = mid under sleeve. Work next round as follows: 1-1-2-2-3-4 sts in GARTER ST - see explanation above - M.4A (= 6 sts), M.4B over the next 28 sts, M.4C (= 9 sts) and 1-1-2-2-3-4 sts in GARTER ST. Continue the pattern like this. AT THE SAME TIME when piece measures 15-15-15-15-17-16 cm, inc 2 sts mid under sleeve (i.e. 1 st each side of marker). Repeat inc every 6-4½-4-3-2-2 cm a total of 6-7-8-10-12-13 times = 57-59-63-67-73-77 sts. NOTE: Work inc sts in garter st at M.4, in pattern at M.2 and in stocking st at M.3 until they fit the pattern again. AT THE SAME TIME when M.4 has been worked 1½ time vertically, i.e. finish after 12th round in M.4, switch to double pointed needles size 4 mm. Work M.2. NOTE: On 7th round in M.2 K last st on round. After M.2 switch back to double pointed needles size 5 mm. Then work M.3. NOTE: Arrow in diagram marks mid on top of sleeve, count outwards. When piece measures 48-46-46-45-43-42 cm (NOTE! Shorter measurements in the larger sizes because of longer sleeve cap and broader shoulder width), cast off 6 sts mid under sleeve (i.e. 3 sts on each side of marker) and then work sleeve back and forth on needle. Continue with the pattern as before while AT THE SAME TIME casting off at beg of every row in each side as follows: 2 sts 3-2-2-2-2-2 times and 1 st 3-6-6-7-10-11 times. Continue to cast off 2 sts at beg of every row in each side until sleeve measures 55 cm in all size. Then cast off 3 sts at beg of the next 2 rows before casting off all sts, piece measures approx. 56 cm. Knit 1 more sleeve. ASSEMBLY: Sew the shoulder seams. Sew in sleeves. Sew the collar tog mid back, sew edge to edge in front loop of outermost st, make sure the seam is not tight. Sew collar to neckline in the back of neck. Sew on buttons. CROCHET BORDER ALONG COLLAR: Work on hook size 4 mm with Vivaldi. Beg from WS at the bottom of collar on left front piece, work as follows: Work 1 dc in first ridge (2 rows in garter st), * 4 ch, 1 tr in the first of the 4 ch, skip 1 ridge, 1 dc in next ridge *, repeat from *-* along the entire collar. Cut and fasten the thread. |
|||||||||||||||||||
Diagram explanations |
|||||||||||||||||||
|
|||||||||||||||||||
 |
|||||||||||||||||||
 |
|||||||||||||||||||
Have you finished this pattern?Tag your pictures with #dropspattern #marriedbymorningcardigan or submit them to the #dropsfan gallery. Do you need help with this pattern?You'll find 20 tutorial videos, a Comments/Questions area and more by visiting the pattern on garnstudio.com. © 1982-2026 DROPS Design A/S. We reserve all rights. This document, including all its sub-sections, has copyrights. Read more about what you can do with our patterns at the bottom of each pattern on our site. |
|||||||||||||||||||


Post a comment to pattern DROPS 127-6
We would love to hear what you have to say about this pattern!
If you want to leave a question, please make sure you select the correct category in the form below, to speed up the answering process. Required fields are marked *.