
Popular categories
Looking for a yarn?

















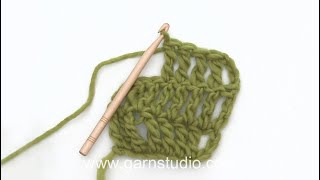









Comments / Questions (53)
 Clara wrote:
Bonjour, Pour le col, les instructions disent de coudre une seule épaule, puis de crocheter le col tout autour de l’encolure. Mais si je commence à l’épaule cousue, j’arrive à l’épaule ouverte et je ne comprends pas comment continuer pour faire le tour complet. Est-ce qu’il faut finalement coudre les deux épaules avant de faire le col ? Merci
26.10.2026 - 00:36DROPS Design answered:
Bonjour Clara, le col se fait ici en allers et retours, lorsque vous ferez la couture de la 2ème épaule, vous ferez également un petit point pour joindre le col. Bonn continuation!
26.10.2026 - 10:59
 Florence wrote:
Hello, the pattern (I'm working size M) says that when I reach 29cm I should cast off making sure the next row is a row of trebles. This is not possible without making it shorter or longer and therefore messing up the measurements. How should I proceed? Thank you
09.09.2026 - 23:19DROPS Design answered:
Hi Florence, The measurements are approximate, so the piece can be slightly longer or shorter than the given measurement. Regards, Drops Team.
10.09.2026 - 06:01
 Sigrid Sandström wrote:
Hur ska jag virka ärmkullen? Jag förstår inte hur virkningen ska göras vid vändningen. Har försökt i två dagar på alla sätt. Det blir en tvär backe i sidorna och fel antal stolpar.
05.09.2026 - 14:36DROPS Design answered:
Hej Sigrid, har du set videoerne som viser hvordan du øger og mindsker og vender. Klik på video i selve mønsteret :)
09.09.2026 - 14:05
 Marie-Ange Daly wrote:
I am having problem with the instruction for the cap sleeve nI need help with the sleeve cap instructions.
25.07.2026 - 16:40DROPS Design answered:
Dear Mrs Daly, can you tell us more so that we can try to help you? Where exactly do you have problems with the cap? Which row? Thanks in advance for your comprehension.
11.08.2026 - 12:55
Aurelie wrote:
Bonjour je ne comprend pas bien l explication est ce que je dois faire 3 premieres bride, ensuite 7 fois le diagrame a1 et ensuite a la suite 7 fois a2 1 bride dans chacune des premières 4-3-6-6-5-6 brides, 6-7-7-8-9-10 fois A.1 au total, A.2 et 1 bride dans chacune des 4-3-6-6-5-6 dernières brides.
22.07.2026 - 16:48DROPS Design answered:
Bonjour Aurélie, en taille M, crochetez ainsi, vu sur l'endroit: 3 brides, 7x A.1, 1 x A.2 et 3 brides. Sur l'envers, crochetez 3 bride, A.2 x 1, A.1 x 7 et 3 brides - pensez à bien lire les diagrammes de gauche à droite sur l'envers. Bon crochet!
04.08.2026 - 13:11
 Marie wrote:
Dobrý den, potřebovala bych poradit postup u modelu Hortense Top, zvolila jsem velikost L. Zasekla jsem se v části návodu - zadní díl: ...Potom uháčkujeme vzor v tomto rozvržení:...nechápu, kdy mám háčkovat vzor A.2. Předem děkuji za odpověď. M. Sloupová
13.07.2026 - 15:00DROPS Design answered:
Dobrý den Marie, vzor A.2 háčkujete vždy za poslední sekvencí vzoru A.1 (ve Vašem případě za 7. sekvencí vzoru A.1). Vzor A.2 je vždy jen 1 sekvence, kterou vzor v řadě ukončujete. Hodně zdaru!
31.07.2026 - 14:34
 Joke Hijwege wrote:
Begrijp het telpatroon niet. 1 stk in de 1e 6 stokjes, A1 in totaal 7 keer , A2 En 1 stokje in elk van de laatste 6 stokjes. Volgens mij komt er om de 7 steken een gaatje. Maar dat is dan niet 7x.
16.06.2026 - 10:42DROPS Design answered:
Dag Joke,
Als je A.1 achter elkaar haakt dan komt er om de 9 steken een gaatje. De 2 laatste stokjes sluiten immers weer aan op de eerste 7 stokjes.
17.06.2026 - 21:06
 Els wrote:
Ik snap iets niet bij de uitleg van de hals. Er staat haak 1 vaste om de eerste toer na de schoudernaad. Wat bedoel je met toer? En ik veronderstel dat je dan voor toer 2 moet keren of gewoon in het rond haken? Het begin van de mouw is ook niet helemaal duidelijk, ik snap de instructies van de rand niet helemaal. Je moet over de steken onder de mouw haken? Alvast bedankt!
27.05.2026 - 07:59DROPS Design answered:
Dag Els,
Je haakt de halsrand rondom en je steekt de naald als eerste om de steek bij de schouder waar de eerste toer na de schouder zit, om vervolgens hier een vaste te haken. Dit is je beginpunt van de halsrand.
27.05.2026 - 13:44
 Monika wrote:
Ich verstehe beim Ärmel das Wenden für die Armkugel nicht: wo soll nach dem Wenden und den 3 Luftmaschen eingestochen werden?
11.05.2026 - 14:29DROPS Design answered:
Liebe Monika, die 3 Luftmaschen häkeln Sie am Anfang jeder Reihe, so nach der Kettmasche der vorigen Reihe, nachdem Sie gewendet haben - und dann sofort 1 Kettmasche in den nächsten Luftmaschenbogen; so sind die nächsten Stäbchen an der richtigen Höhe (wie wenn man in Reihe häkelt, aber hier muss man zuerst eine Kettmasche häkeln, damit der Ärmel am Armloch zusammengehäkelt wird). Viel Spaß beim Häkeln!
11.05.2026 - 16:29
Rosanna wrote:
I am getting confused with the pattern ... am I working with UK terms or US terms?
03.05.2026 - 19:49DROPS Design answered:
Dear Rosanna, click on the scroll down menu to make sure you are reading the appropriate language, either UK- or US-English. Happy crocheting!
04.05.2026 - 14:25
|
|||||||||||||||||||
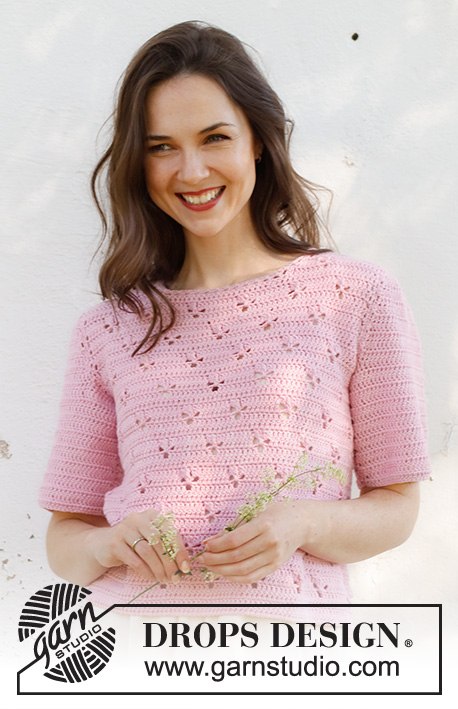
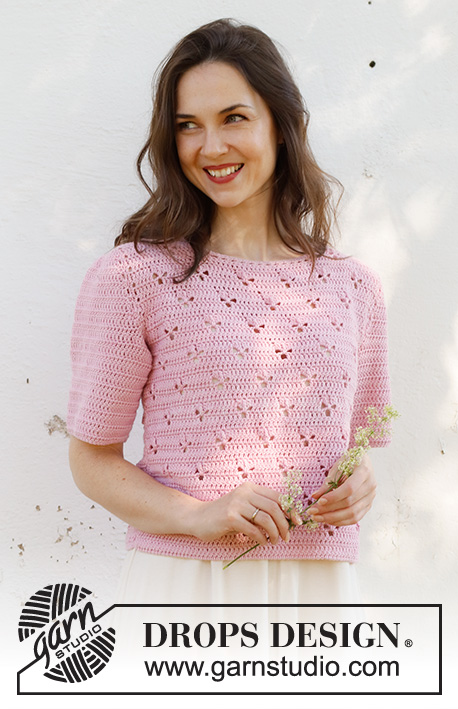
Hortense Top#hortensetop |
|||||||||||||||||||
 |
 |
||||||||||||||||||
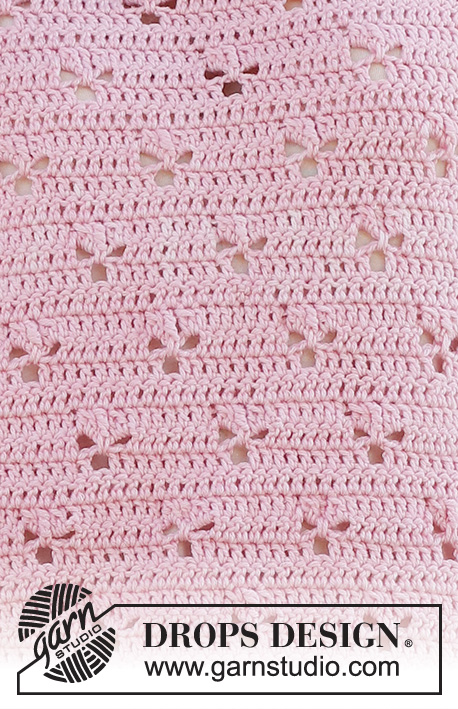
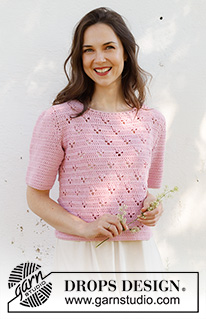
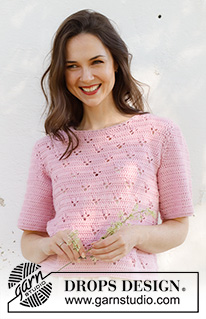
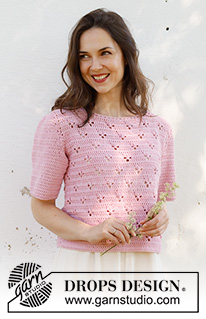
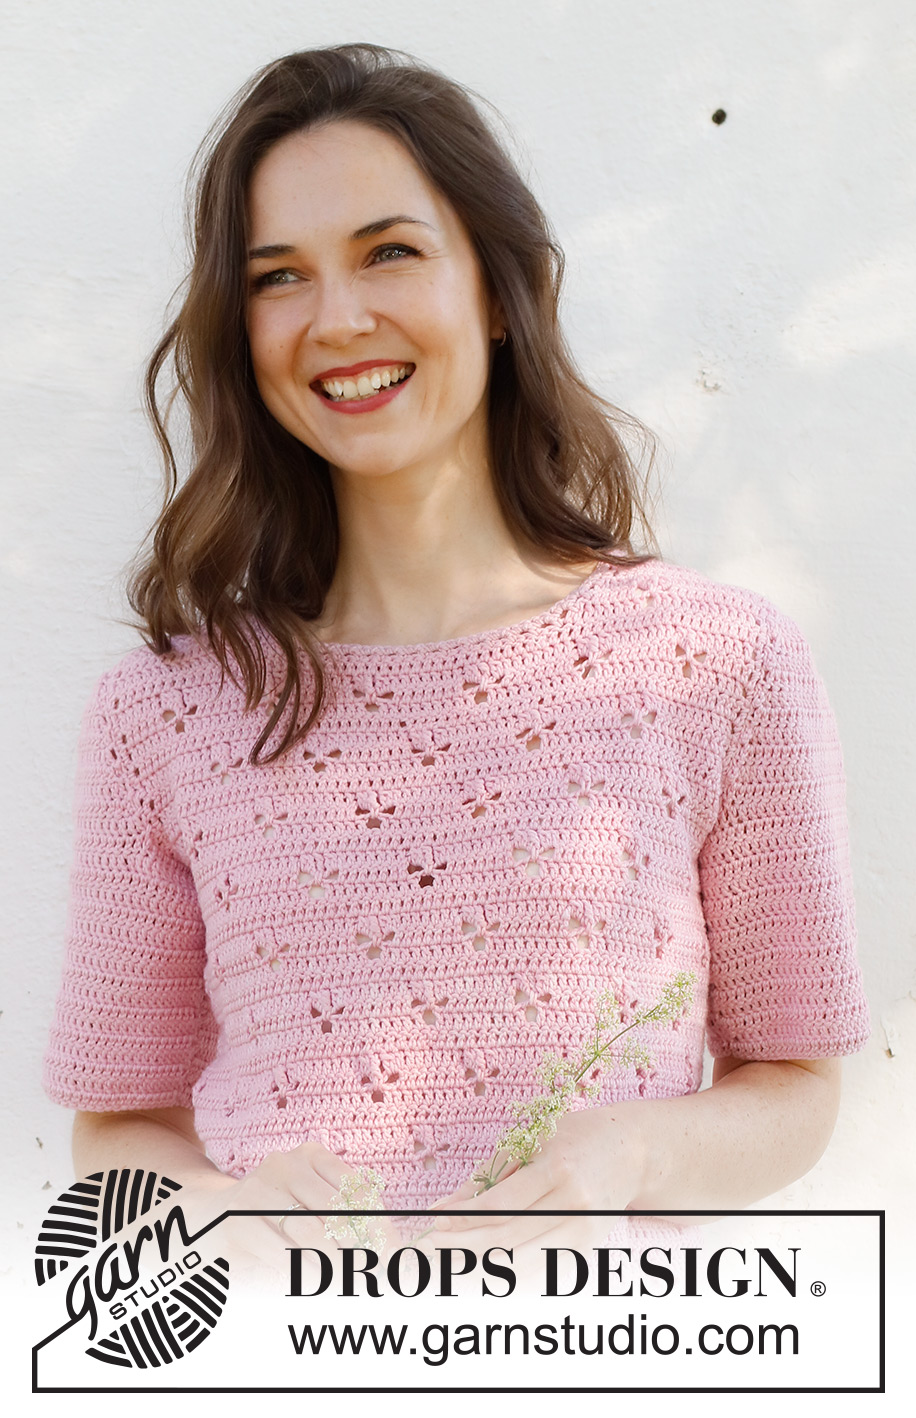
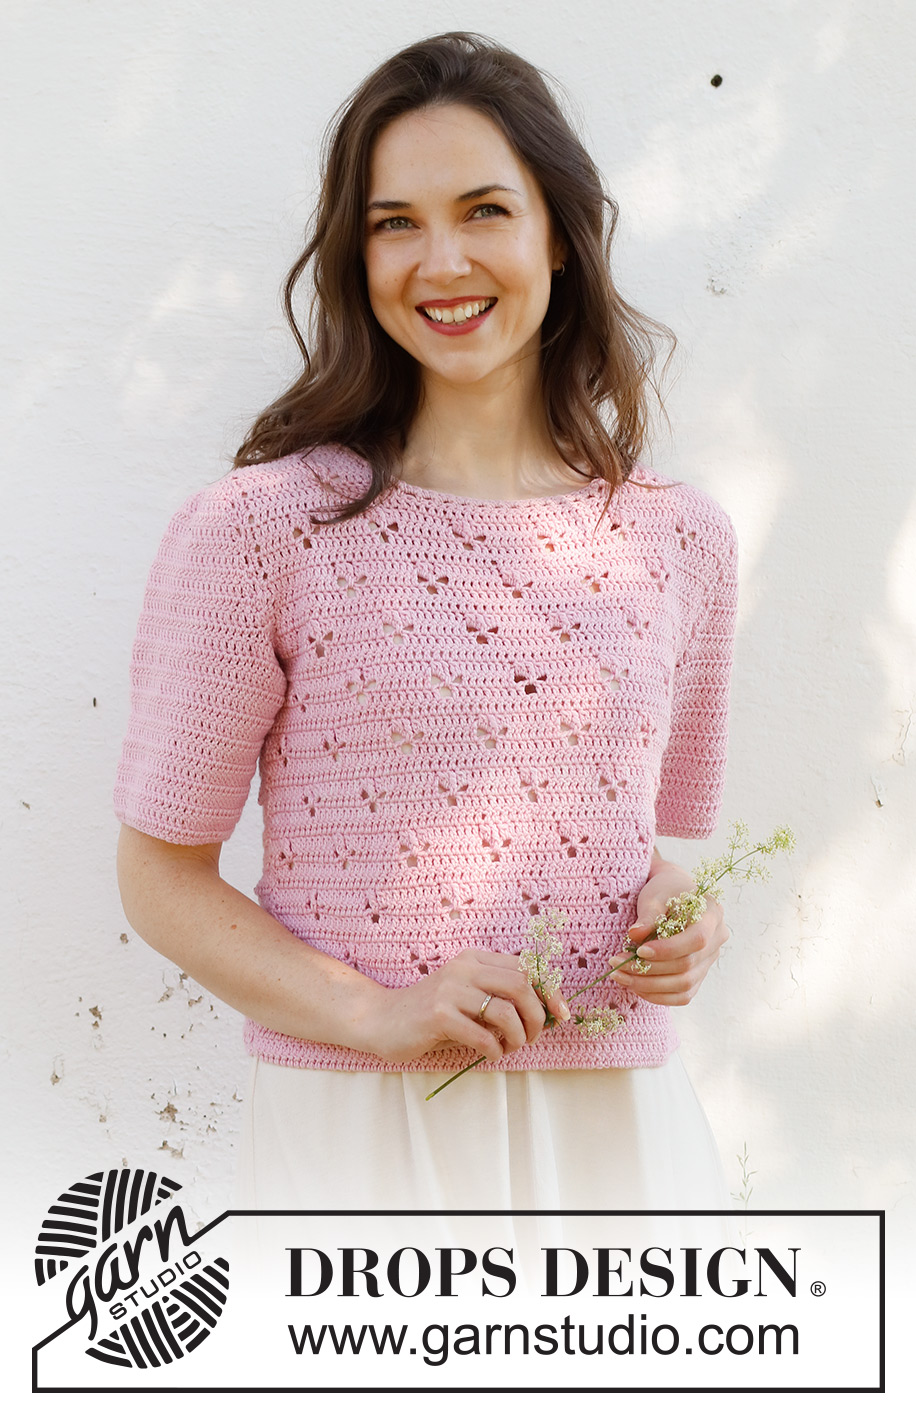
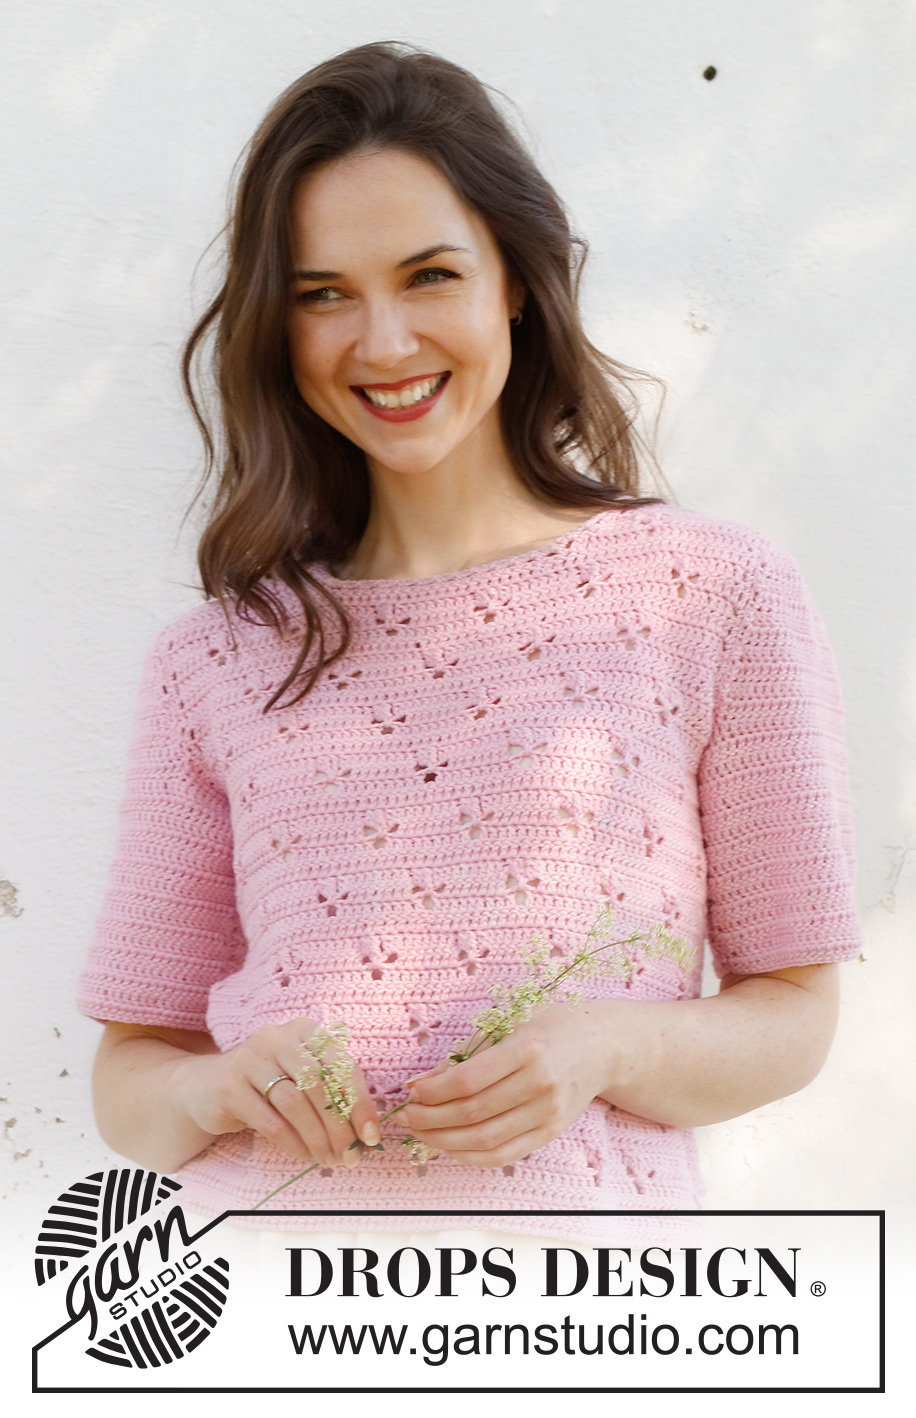
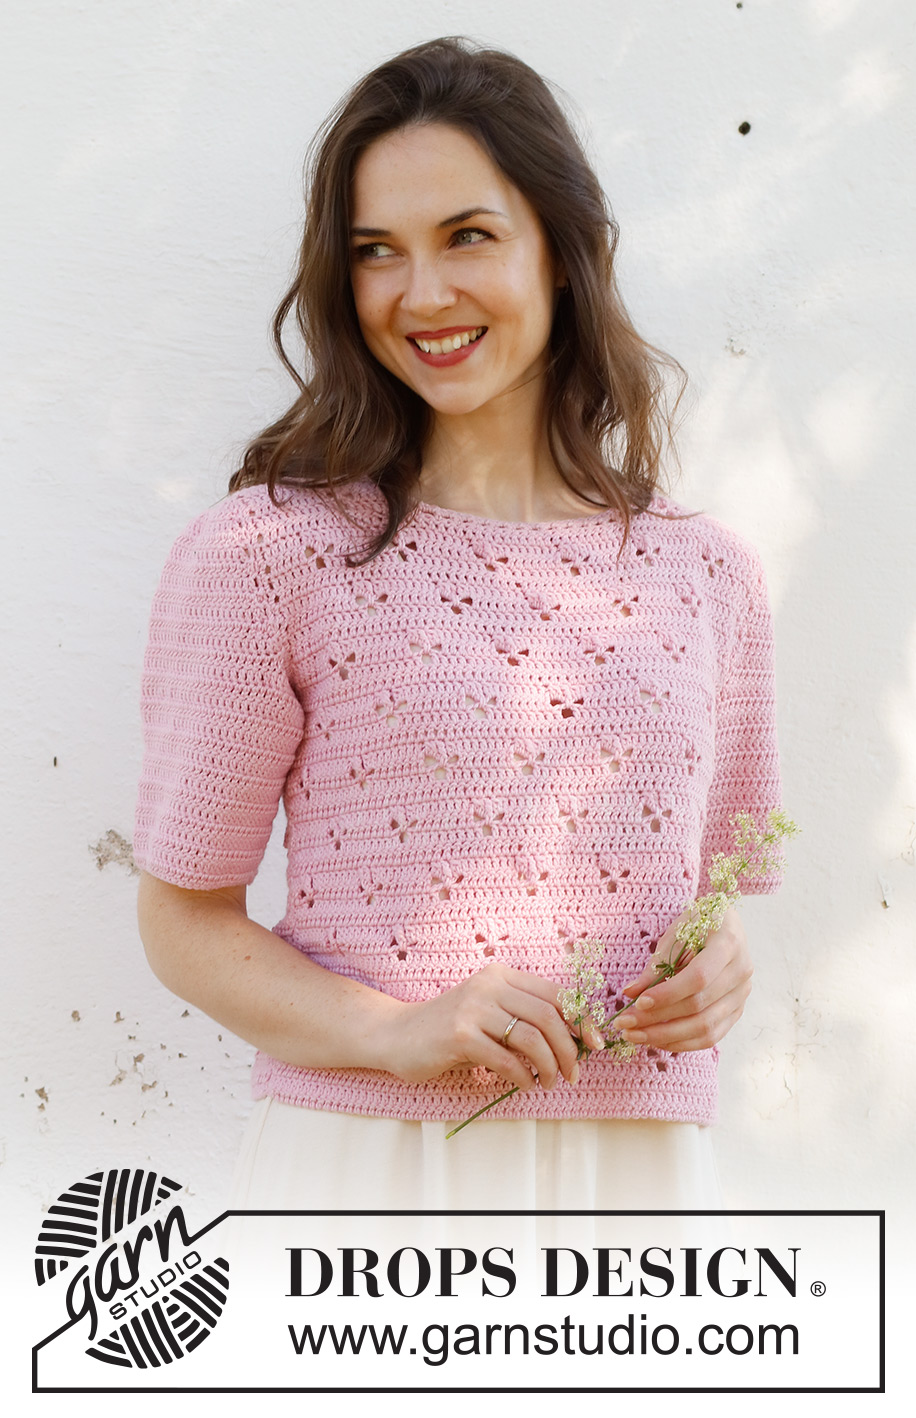
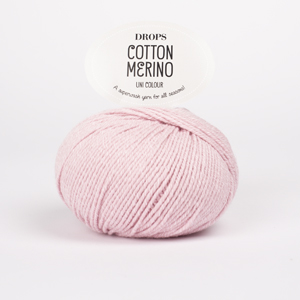
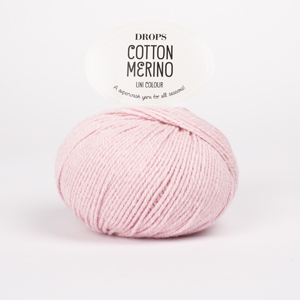
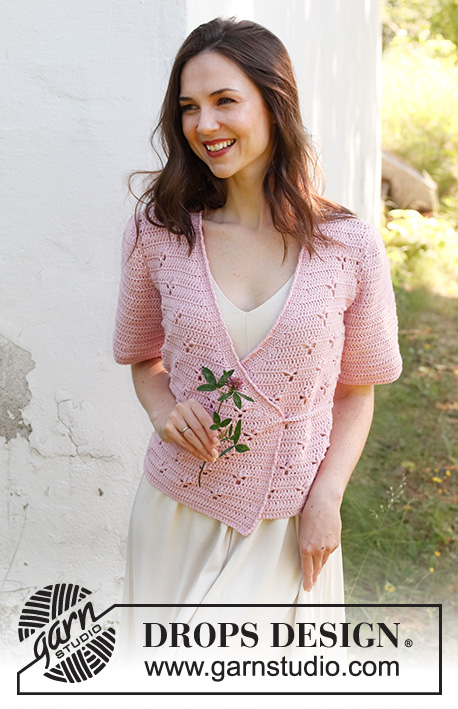
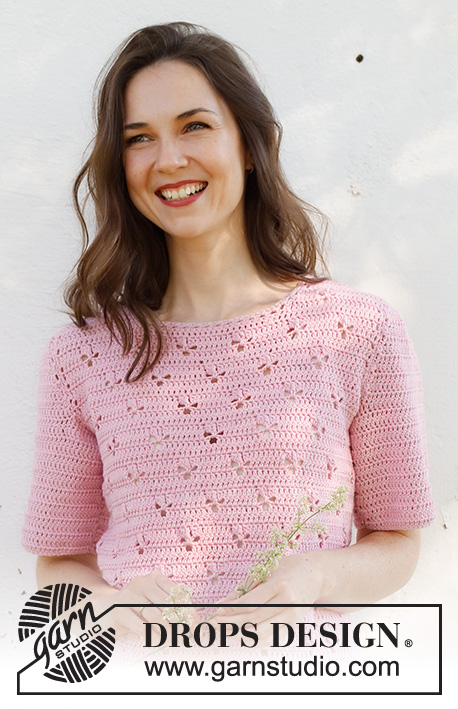
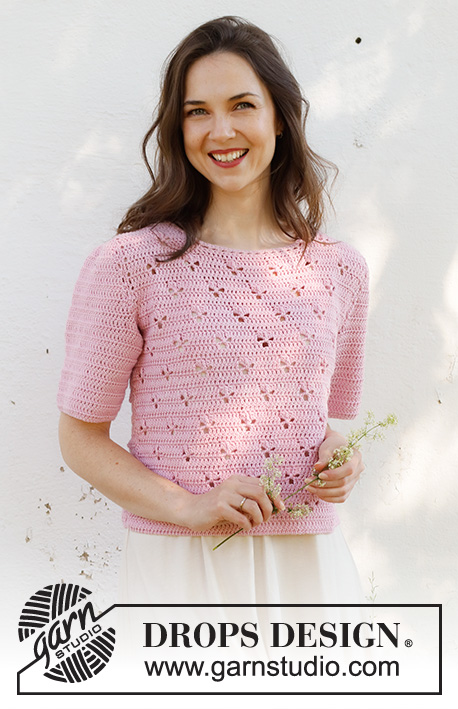
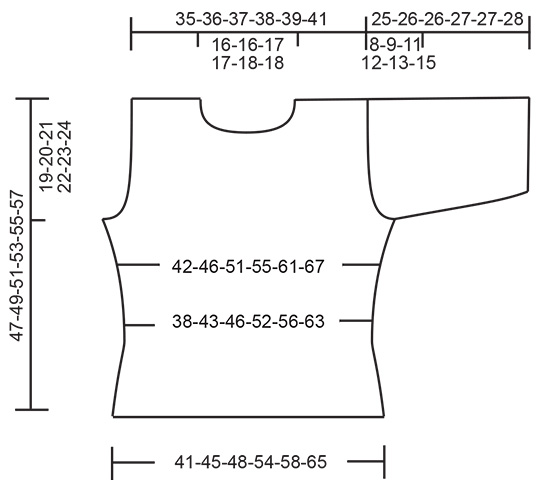
Crocheted short-sleeve jumper in DROPS Cotton Merino. The piece is worked bottom up with lace pattern. Sizes S - XXXL.
DROPS 232-36 |
|||||||||||||||||||
|
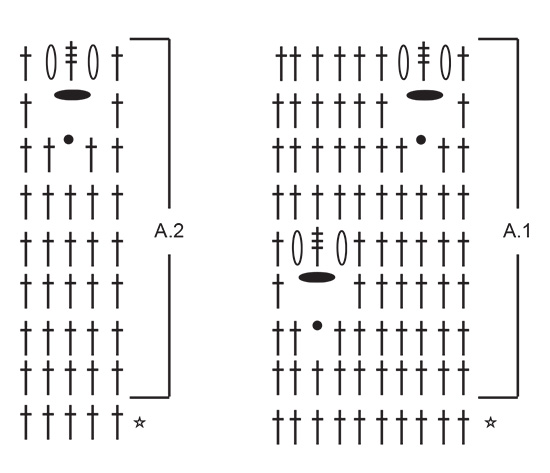
------------------------------------------------------- EXPLANATIONS FOR THE PATTERN: ------------------------------------------------------- CHAIN STITCH: If you work outermost on the hook the chain stitch will often be too tight; 1 chain stitch should be as long as 1 double/treble crochet is wide. PATTERN: See diagrams A.1 and A.2. CROCHET INFORMATION: At the beginning of each row of treble crochets work 3 chain stitches (replaces the first treble crochet), i.e. skip the last stitch on the previous row. Work the last treble crochet of the row in the 3rd chain stitch at the beginning of the previous row. DECREASE TIP: Decrease 1 treble crochet by working 2 treble crochets together: * Make 1 yarn over, insert the hook through the next stitch, pick up the strand, make 1 yarn over and pull it through the first 2 loops on the hook *, work from *-* 1 more time, make 1 yarn over and pull it through all 3 loops on the hook. Decrease 2 treble crochets by working 3 treble crochets together: * Make 1 yarn over, insert the hook through the next stitch, pick up the strand, make 1 yarn over and pull it through the first 2 loops on the hook *, work from *-* 2 more times, make 1 yarn over and pull it through all 4 loops on the hook. INCREASE TIP (for sides): Increase by working 2 treble crochets in the same stitch. The increased stitches are worked in treble crochets. ------------------------------------------------------- START THE PIECE HERE: ------------------------------------------------------- JUMPER – SHORT OVERVIEW OF THE PIECE: The front and back pieces are worked separately, back and forth, then sewn together. Stitches are worked around the armholes, then the sleeves worked back and forth, top down. BACK PIECE: Work 75-83-89-99-107-119 CHAIN STITCHES – read description above, with hook size 4 mm and DROPS Cotton Merino. Work 1 treble crochet in the 4th chain stitch from the hook (2 treble crochets) – read CROCHET INFORMATION, 1 treble crochet in each of the next 71-79-85-95-103-115 chain stitches = 73-81-87-97-105-117 stitches. Work back with 1 treble crochet in each treble crochet. Then work pattern as follows: 1 treble crochet in each of the first 4-3-6-6-5-6 treble crochets, A.1 a total of 6-7-7-8-9-10 times, A.2 and 1 treble crochet in each of the last 4-3-6-6-5-6 treble crochets. Continue this pattern. REMEMBER THE CROCHET TENSION! When the piece measures 8 cm, decrease 1 treble crochet on each side – read DECREASE TIP = 71-79-85-95-103-115 stitches. Repeat the decrease when the piece measures 12 cm = 69-77-83-93-101-113 stitches. When the piece measures 15 cm, increase 1 treble crochet on each side – read INCREASE TIP! Increase like this every 6-6½-4½-7½-5-5 cm a total of 3-3-4-3-4-4 times = 75-83-91-99-109-121 stitches. When the piece measures 28-29-30-31-32-33 cm, cast off for the armholes as described below, cutting the strand and making sure the next row is a row of treble crochets: Skip the first 4-5-5-6-7-9 stitches for the armhole, fasten the strand with 1 slip stitch in the next treble crochet, work 3 chain stitches (first treble crochet), work 2-2-3-3-3-3 treble crochets together, 1 treble crochet in each of the next 8-6-9-7-16-15 treble crochets, A.1 a total of 4-5-5-6-5-6 times, work A.2, 1 treble crochet in each of the next 8-6-9-7-16-15 treble crochets, work 2-2-3-3-3-3 treble crochets together and 1 treble crochet in the last stitch, turn (do not work the last 4-5-5-6-7-9 treble crochets) = 65-71-77-83-91-99 stitches. Continue the pattern back and forth, working 2-2-3-3-3-3 treble crochets together on each side every row a total of 2-4-2-3-5-7 times (including the first decrease when you skipped stitches for the armholes), then work 0-0-2-2-2-2 treble crochets together on each side of each row a total of 0-0-3-3-2-1 times = 63-65-67-69-71-73 stitches. Continue the pattern over the middle stitches and 1 treble crochet in each of the outermost treble crochets on each side. When the piece measures 42-44-46-48-50-52 cm, continue with treble crochets; finish the lace pattern if necessary. When the piece measures 45-47-49-51-53-55 cm, work the neck as follows: 1 treble crochet in each of the first 16-17-17-18-18-19 stitches, work 2 treble crochets together, turn = 17-18-18-19-19-20 stitches on the shoulder. Work 1 treble crochet in each stitch until the piece measures 47-49-51-53-55-57 cm. Cut and fasten the strand. Work the other shoulder as follows: Skip the middle 27-27-29-29-31-31 stitches for the neck, work 2 treble crochets together, 1 treble crochet in each of the last 16-17-17-18-18-19 treble crochets. Work 1 treble crochet in each treble crochet until the piece measures 47-49-51-53-55-57 cm. Cut and fasten the strand. FRONT PIECE: Work in the same way as the back until the piece measures 39-41-42-44-45-47 cm = 63-65-67-69-71-73 stitches. Work the neck as follows: Work as before over the first 19-20-21-22-23-24 stitches (only work lace pattern where it fits in width; the other stitches are worked with treble crochets), work 2 treble crochets together (first decrease for neck) = 20-21-22-23-24-25 stitches. Decrease 1 stitch for the neck on each row 4-4-5-5-6-6 times = 17-18-18-19-19-20 stitches on the shoulder. When the piece measures 42-44-46-48-50-52 cm, continue with treble crochets; finish the lace pattern if necessary. Work 1 treble crochet in each stitch until the piece measures 47-49-51-53-55-57 cm. Cut and fasten the strand. Work the other shoulder in the same way, working the last 21-22-23-24-25-26 stitches from the right side. ASSEMBLY: Sew one shoulder seam and both the side seams. NECK: ROW 1: Work 1 double crochet around the first row after the shoulder seam, work * 2 chain stitches, skip 1 cm, 1 double crochet *, work from *-* around the neck and finish with 1 double crochet around the last row on the shoulder. ROW 2: Work 2 double crochets around each chain-space. Cut and fasten the strand. ASSEMBLY: Sew the other shoulder seam. SLEEVES: Work an edge around the armhole as follows: Fasten the strand with 1 double crochet in the stitch by the side seam, * work 1 chain stitch, skip 1 stitch, 1 double crochet in the next stitch *, work from *-* over the stitches under the sleeve, then work up the armhole as follows: * 1 chain stitch, 1 double crochet around the next row *, work from *-* around the armhole and down to the bottom of the armhole, work the final stitches under the sleeve in the same way as the first stitches. Finish with 1 double crochet in the last stitch. Make sure your work does not tighten the armhole; work extra chain stitches between each double crochet if necessary = approx. 38-41-43-46-49-53 chain-spaces. Cut the strand. The sleeve cap is worked back and forth over more and more chain-spaces until you have worked all the chain-spaces. Work as follows from the right side: Start in the 5th chain stitch from the shoulder seam from the right side, work 1 double crochet around the chain-space, 2 treble crochets around the next chain stitch (up towards the shoulder seam), work 2 treble crochets around each of the next 7 chain stitches and finish with 1 slip stitch around the next chain-space = 16 treble crochets. Turn and work as follows from the wrong side: 3 chain stitches, 1 slip stitch around the next chain-space, 2 treble crochets in each treble crochet and finish with 1 slip stitch around the next chain-space on the other side of the sleeve = 32 treble crochets. Turn. Work 3 chain stitches, 1 slip stitch around the next chain-space, 2 treble crochets in the first treble crochet, 1 treble crochet in each treble crochet until there is 1 treble crochet left, 2 treble crochets in the next treble crochet and finish with 1 slip stitch around the next chain-space = 34 treble crochets. Continue like this and increase 1 treble crochet on each side a total of 5-6-8-9-10-12 times = 42-44-48-50-52-56 stitches. There remain now approx. 16-17-15-16-17-17 chain-spaces. On the next row work alternately 1 and 2 treble crochets around the last chain-spaces down to the side seam. Turn and work 1 treble crochet in each treble crochet and alternately 1 and 2 treble crochets around the remaining chain-spaces on the other side of the sleeve = 66-69-70-74-77-81 treble crochets. On the next row adjust the number of stitches to 62-65-68-74-77-81 stitches. Continue back and forth with 1 treble crochet in each treble crochet. When the sleeve measures 3 cm at the shortest point, decrease 1-1-1-1-0-0 treble crochets on each side. Decrease like this every 3-4-7-0-0-0 cm a total of 4-3-2-1-0-0 times = 54-59-64-72-77-81 stitches. Continue back and forth with 1 treble crochet in each treble crochet until the sleeve measures 15-15-14-14-13-12 cm at the shortest point. Cut and fasten the strand. Work the other sleeve in the same way. Sew the sleeve seams. |
|||||||||||||||||||
Diagram explanations |
|||||||||||||||||||
|
|||||||||||||||||||
 |
|||||||||||||||||||
 |
|||||||||||||||||||
Have you finished this pattern?Tag your pictures with #dropspattern #hortensetop or submit them to the #dropsfan gallery. Do you need help with this pattern?You'll find 12 tutorial videos, a Comments/Questions area and more by visiting the pattern on garnstudio.com. © 1982-2026 DROPS Design A/S. We reserve all rights. This document, including all its sub-sections, has copyrights. Read more about what you can do with our patterns at the bottom of each pattern on our site. |
|||||||||||||||||||






With over 40 years in knitting and crochet design, DROPS Design offers one of the most extensive collections of free patterns on the internet - translated to 17 languages. As of today we count 333 catalogues and 12532 patterns translated into English (UK/cm). 12532
We work hard to bring you the best knitting and crochet have to offer, inspiration and advice as well as great quality yarns at incredible prices! Would you like to use our patterns for other than personal use? You can read what you are allowed to do in the Copyright text at the bottom of all our patterns. Happy crafting!
Post a comment to pattern DROPS 232-36
We would love to hear what you have to say about this pattern!
If you want to leave a question, please make sure you select the correct category in the form below, to speed up the answering process. Required fields are marked *.