Comments / Questions (28)
![]() Kerstin wrote:
Kerstin wrote:
Hallo, ich moechte gern das Wild mint Jacket stricken. Ich habe vor einiger Zeit Baby Alpaca Silk gekauft, die Farbe 6235, aber noch nicht verwendet, und muesste fuer dieses Modell noch Kid Silk dazubestellen. Welche Farbe passt am besten dazu? Vielen Dank fuer Euren Tipp und viele Gruesse!
08.02.2025 - 10:13DROPS Design answered:
Liebe Kerstin, gerne wird Ihnen damit Ihr DROPS Händler - auch per Telefon oder per E-Mail - helfen, und die beste passende Farbe Kid-Silk empfehlen. Viel Spaß beim Stricken!
10.02.2025 - 09:39
![]() Karin Jasper wrote:
Karin Jasper wrote:
Hallo drops team, ich moechte das wild mint jacket stricken. laut anleitung sollen jeweils ein faden brushed alpaca silk und kid silk zusammen verstrickt werden. beim bestellen der garne faellt mir auf, dass ich laut mengenangabe 560 meter brushed alpaca silk uebrig haette. es wuerden, so gesehen, 150g ausreichen. habe ich etwas uebersehen? viele gruesse
15.11.2024 - 15:57DROPS Design answered:
Liebe Frau Jasper, hier wurde die Jacke nicht mit Brushed Alpaca Silk sondern mit Baby Alpaca Silk gestrickt, benutzen Sie den Garnumrechner um die benötigte Garnmenge in der gewünschten Garnalternativ zu finden - dazu wird auch 1 Faden Kid-Silk gestrickt - oder gerne können Sie auch mit 1 Faden der Garngruppe C stricken. Viel Spaß beim Stricken!
15.11.2024 - 17:14
![]() Annette wrote:
Annette wrote:
Short rows are not clear explained. I’m not the only one lost in the pattern. Please could you try to find a better way to write the text?
06.11.2024 - 04:37DROPS Design answered:
Dear Annette, when piece measures 20-25 cm (see size), work as follows, starting from RS: *work the first 9 sts, turn and work these sts from WS, turn and work all stitches as before, turn, work the first 9 sts from WS, turn and work these sts from RS, turn and work the WS row over all stitches.*, work from *-* 2 more times - at the same time, when working these rows the 2nd time, start decreasing for Vneck on row from RS worked over all stitches. Happy knitting!
06.11.2024 - 09:05
![]() Lisa wrote:
Lisa wrote:
Jag förstår inte riktigt hur nackdelen ska stickas efter avmaskning för axel på framdelen. TIA
13.06.2024 - 21:39DROPS Design answered:
Hei Lisa. Når maskene til skulderen er felt av skal du ha 9 masker igjen. Strikk rett frem og tilbake på disse maskene til disse 9 maskene måler ca 7-7-8-8-9-9 cm fra skulderen. Så felles det av 3 masker på begynnelsen av hver pinne fra vrangen totalt 3 ganger. Du er da ferdig med den ene halskanten som skal være bak nakken. Gjør det samme på det andre framstykket. Husk halskanten skal strekkes lett frem til midt bak når den sys til halsringningen i nakken. mvh DROPS Design
24.06.2024 - 10:19
![]() Lisa wrote:
Lisa wrote:
Jag förstår inte riktigt hur nackdelen ska stickas efter avmaskning för axel på framdelen. TIA
10.06.2024 - 23:07
![]() Jill Eddlestone wrote:
Jill Eddlestone wrote:
When it comes to decreasing to shape the V neck and the short rows do you decrease under the arm before you cast off stitches under the arm?
27.12.2023 - 23:12DROPS Design answered:
Dear Jill, you don't decrease under the arm, the short rows are only for the neck edge. Happy knitting!
29.12.2023 - 00:18
![]() Kristin Larsen wrote:
Kristin Larsen wrote:
Hei, jeg forstår ikke hvordan jeg skal strikke erme med diagrammene A.1 og A.2 når erme strikkes rundt. Da strikkes det vel rett hele tiden. Må jeg ikke strikke frem og tilbake for å få til «mønsteret» i diagrammet? Mvh Kristin
06.12.2023 - 23:05DROPS Design answered:
Hei Kristin, Når man strikker rundt, på hver omgang begynner man fra begynnelsen av neste rad i diagrammet (alltid leser diagrammet fra høyre til venstre). Håper dette hjelper og god fornøyelse!
07.12.2023 - 06:41
![]() Christiane Vermeiren wrote:
Christiane Vermeiren wrote:
Ik brei maat large ik zet 185 steken op inclusief de 9 boordsteken volgens de beschrijving.Als ik na de boord mijn steken verdeel 9boordst 49 St (voorpand ) 1 ribbelst 87st rugpand 1 ribbelst 49st ( voorpand ) 9 boordst Als ik dat optel kom ik op 205steken ???
16.05.2023 - 22:08DROPS Design answered:
Dag Christiane,
Je breit 9 kantsteken, dan herhaal je A.1 in de breedte tot er 10 steken over zijn, dan brei je de eerste steek van A.1 en tot slot brei je nog 9 biessteken. A.1 brei je dan dus over (185 -9 -9-1=) 166 steken. Wanneer je een markeerdraad invoegt vanaf de zijkant tel je vanaf de eerste steek op de naald, dus 49 + 49 + 87 = 185 steken.
29.05.2023 - 15:12
![]() Lily wrote:
Lily wrote:
Minder voor de V-hals iedere 2e naald in totaal 6-6-6-6-8-8 keer, iedere 4e naald in totaal 3-3-3-3-4-4 keer en iedere 6e naald in totaal 3-3-3-3-4-4 keer. Kunt u mij uitleggen hoe dit bedoeld is? Zo als ik het lees minder ik elke tweede rij een steek? In totaal 12.Of moet ik 6 steken in een keer afkanten elke 2e, 3 steken elke 4e. Etc?
08.02.2023 - 11:10DROPS Design answered:
Dag LIly,
De reeks getallen slaan steeds op de verschillende maten. Dus stel je voor jat je maat s breit, dan minder je eerst 6 keer iedere 2e naald, dus de ene naald wel ende andere naald niet. Als dat klaar is minder je iedere 4e naald in totaal 3 keer. Tot slot minder je iedere 6e naald 3 keer. Je hebt dan in totaal 12 keer geminderd, maar er komen steeds meer naalden tussen waardoor de V-hals a.h.w. een beetje afbuigt.
12.02.2023 - 18:32
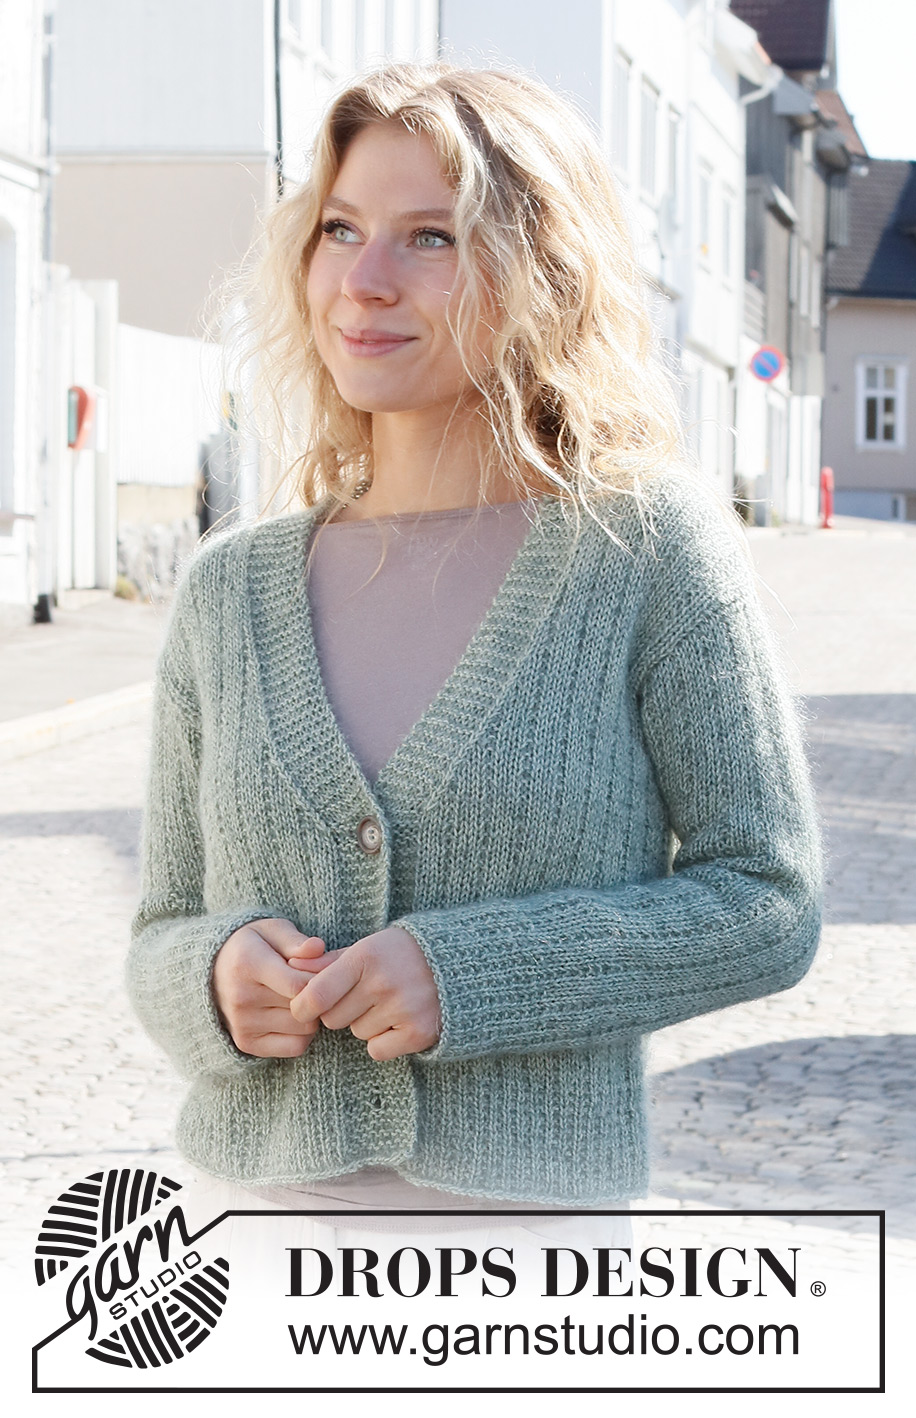
Wild Mint Tea Jacket#wildmintteajacket |
||||||||||
 |
 |
|||||||||
Knitted jacket in DROPS BabyAlpaca Silk and DROPS Kid-Silk. The piece is worked with textured pattern and V-neck. Sizes S - XXXL.
DROPS 227-6 |
||||||||||
|
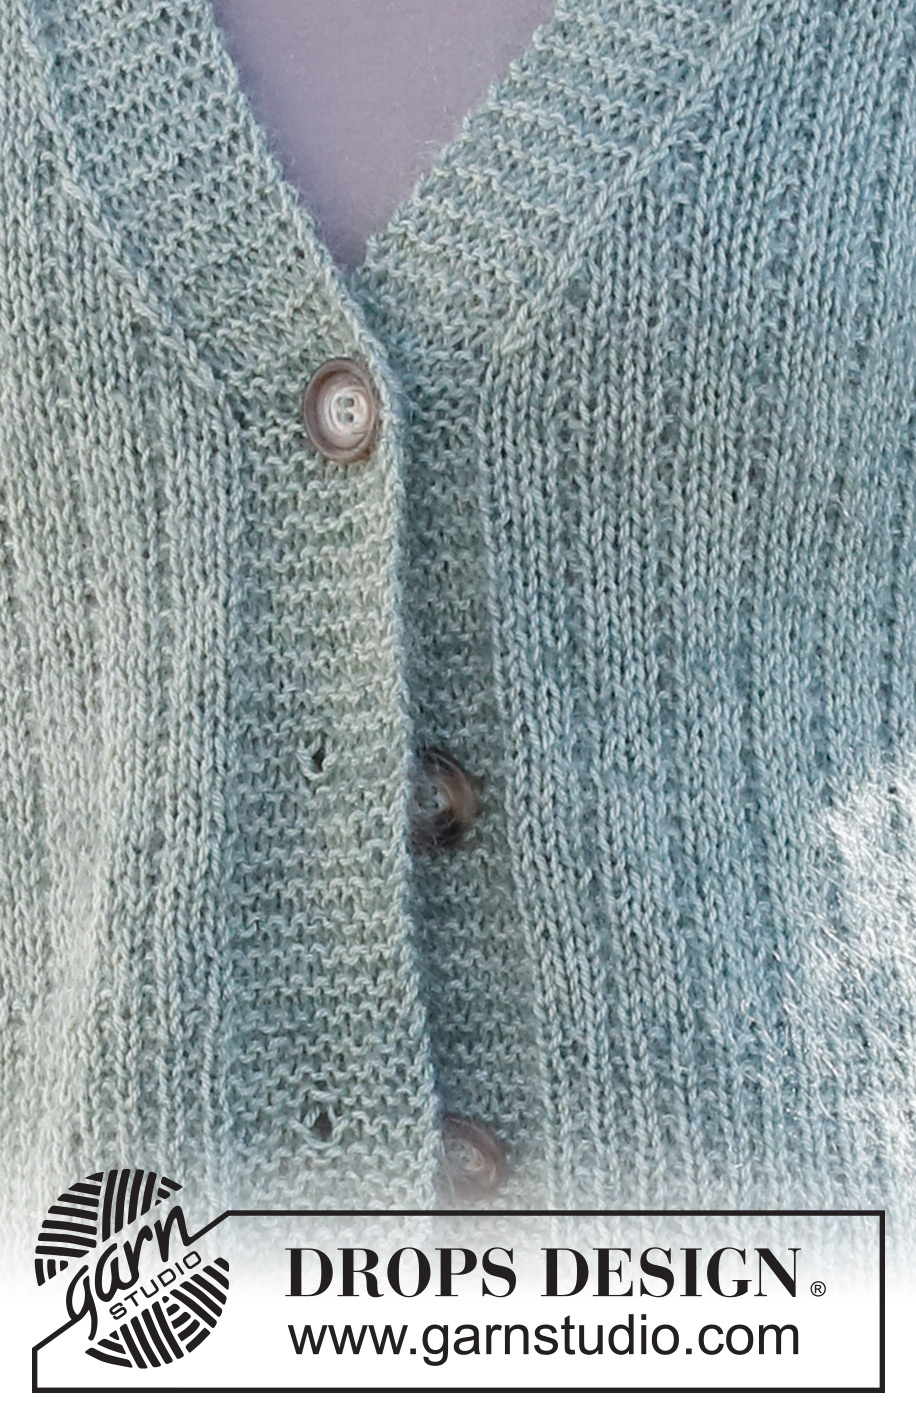
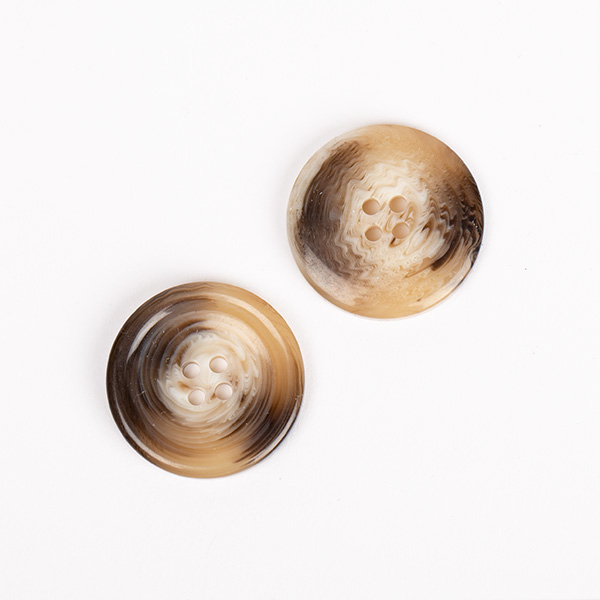
------------------------------------------------------- EXPLANATIONS FOR THE PATTERN: ------------------------------------------------------- RIDGE/GARTER STITCH (worked back and forth): Knit all rows. 1 ridge = knit 2 rows. PATTERN: See diagrams A.1 and A.2. The diagrams show all rows in the pattern from the right side. DECREASE TIP (V-neck): All decreases are worked from the right side! Decrease 1 stitch on the inside of the 9 garter stitches on the bands as follows. AFTER THE 9 GARTER STITCHES: Slip 1 stitch as if to knit, knit 1 and pass the slipped stitch over the knitted stitch (= 1 stitch decreased). BEFORE THE 9 GARTER STITCHES: Work until there are 2 stitches left before the 9 garter stitches and knit 2 together, then work the garter stitches. INCREASE TIP (mid-under sleeve): Increase 1 stitch on each side of the marker-stitch as follows: Work as far as the marker-stitch, 1 yarn over, work the marker-stitch as before, 1 yarn over (2 stitches increased). On the next round knit the yarn overs twisted to avoid holes. Then work the new stitches into A.2. BUTTONHOLES: Work buttonholes on the right band. 1 BUTTONHOLE = knit together the fourth and fifth stitch from the edge and make 1 yarn over. On the next row knit the yarn over to leave a hole. Work the buttonholes when the piece measures: S: 4, 12 and 20 cm M: 5, 13 and 21 cm L: 6, 14 and 22 cm XL: 5, 14 and 23 cm XXL: 6, 15 and 24 cm XXXL: 5, 15 and 25 cm ------------------------------------------------------- START THE PIECE HERE: ------------------------------------------------------- JACKET – SHORT OVERVIEW OF THE PIECE: The body is worked back and forth with circular needle, from mid-front and bottom up as far as the armholes. Then the front and back pieces are finished separately. The sleeves are worked in the round, bottom up, with circular needle/double pointed needles. The sleeve cap is worked back and forth. BODY: Cast on 165-181-185-201-229-245 stitches (including 9 band stitches on each side towards mid-front) with circular needle size 4 mm and 1 strand of each quality (= 2 strands). Purl 1 row (= wrong side). The next row is worked as follows from the right side: 9 band stitches in GARTER STITCH – read description above, work A.1 until there are 10 stitches left, work the first stitch in A.1 so the pattern is symmetrical and finish with 9 band stitches in garter stitch. Continue this pattern back and forth for 8 cm, remember the BUTTONHOLE on the right band – read description above. When the edge is finished, change to circular needle size 5 mm. Insert 1 marker in the 45th-49th-49th-53rd-61st-65th stitch in from each side (inserted in a garter stitch). There are 75-83-87-95-107-115 stitches between the markers on the back piece – the markers mark the sides. The next row is worked as follows, from the right side: 9 band stitches in garter stitch, work A.2 until there are 12 stitches left, work the first 3 stitches in A.2 so the pattern is symmetrical and finish with 9 band stitches in garter stitch. Continue A.2. REMEMBER THE KNITTING TENSION! OVERVIEW OF THE NEXT SECTION: When the piece measures 20-21-22-23-24-25 cm, work short rows over the bands as described below. AT THE SAME TIME start to decrease for the V-neck. Then cast off for the armholes. Read V-NECK and ARMHOLES before continuing. NOTE: The last buttonhole is worked at the same time as you begin the short rows. V-NECK: To give neat bands where the V-neck starts, work short rows 3 times over both bands. This is done at the same time as you begin to decrease for the V-neck as described below. * Start from the right side and work 1 ridge back and forth over the first 9 band stitches (do not work the other stitches; remember to tighten the strand when you turn after the first short row), work 1 row from the right side over all stitches as before, turn, work 1 ridge back and forth over the other 9 band stitches, work 1 row from the wrong side over all stitches as before *, work from *-* a total of 3 times. AT THE SAME TIME when you work a full row from the right side for the 2nd time, begin to decrease for the V-neck on the inside of the 9 band stitches in garter stitch on both sides – always decrease on rows from the right side – read DECREASE TIP. Decrease for the V-neck every 2nd row a total of 6-6-6-6-8-8 times, every 4th row a total of 3-3-3-3-4-4 times and every 6th row a total of 3-3-3-3-4-4 times. ARMHOLES: AT THE SAME TIME when the piece measures 27-28-29-30-30-31 cm, cast off for the armholes on the next row from the wrong side as follows: Work as before until there are 3-4-4-8-11-12 stitches left before the first marker-stitch, cast off 7-9-9-17-23-25 stitches (= marker-stitch + 3-4-4-8-11-12 stitches on each side), work the back piece as before until there are 3-4-4-8-11-12 stitches left before the second marker-stitch, cast off 7-9-9-17-23-25 stitches (= marker-stitch + 3-4-4-8-11-12 stitches on each side), work to the end of the row as before. The front and back pieces are finished separately. RIGHT FRONT PIECE: Start from the right side and work as before, with 9 band stitches in garter stitch towards mid front and 1 edge stitch in garter stitch on the armhole – continue to decrease for the V-neck. After all the decreases to the armhole and V-neck are finished there are 29-32-32-32-33-36 stitches left. Continue working until the piece measures 46-48-50-52-54-56 cm (the armhole measures 19-20-21-22-24-25 cm). On the next row from the wrong side, cast off the first 20-23-23-23-24-27 stitches for the shoulder = 9 garter stitches left for the neck. Continue with garter stitch back and forth over these 9 stitches until the neck measures 7-7-8-8-9-9 cm from the shoulder. There is approx. 2 cm left to finished length – the neck should be stretched slightly to fit the neckline when sewn down. Now cast off 3 stitches at the beginning of each row from the right side a total of 3 times. Cut the strand and pull it through the last stitch. LEFT FRONT PIECE: Start from the right side and work as before with 1 edge stitch in garter stitch on the armhole and 9 band stitches in garter stitch towards mid front – continue to decrease for the V-neck. After all the decreases to armhole and V-neck are finished there are 29-32-32-32-33-36 stitches left. Continue working until the piece measures 46-48-50-52-54-56 cm (the armhole measures 19-20-21-22-24-25 cm). On the next row from the right side, cast off the first 20-23-23-23-24-27 stitches for the shoulder = 9 garter stitches left for the neck. Continue with garter stitch back and forth over these 9 stitches until the neck measures 7-7-8-8-9-9 cm from the shoulder. Now cast off 3 stitches at the beginning of each from the wrong side a total of 3 times. Cut the strand and pull it through the last stitch. BACK PIECE: = 69-75-79-79-85-91 stitches. Continue the pattern as before, with 1 edge stitch in garter stitch on each side. When the piece measures 44-46-48-50-52-54 cm, cast off the middle 27-27-31-31-35-35 stitches for the neck and each shoulder is finished separately. Cast off 1 stitch on the next row from the neck = 20-23-23-23-24-27 stitches on the shoulder. Work until the piece measures 46-48-50-52-54-56 cm. Cast off with knit from the right side. Work the other shoulder in the same way. SLEEVES: Cast on 40-44-44-48-48-52 stitches with double pointed needles size 4 mm and 1 strand of each quality (= 2 strands). Knit 1 round, then work A.1 in the round – start with the 2nd stitch in A.1. When the edge measures 8 cm, change to double pointed needles size 5 mm. Insert 1 marker in the first stitch on the round (in a garter stitch). The marker marks mid-under the sleeve and will be used when increasing. Now work A.2 in the round – start with the last stitch in A.2. When the piece measures 10-10-10-12-13-13 cm, increase 2 stitches mid-under the sleeve – read INCREASE TIP. Increase like this every 3½-3½-3-2½-2-2 cm a total of 12-12-14-14-16-16 times = 64-68-72-76-80-84 stitches. Continue working until the sleeve measures 52-51-51-49-47-45 cm (shorter measurements in larger sizes due to wider shoulders and longer sleeve cap). On the next round cast off the marker-stitch = 63-67-71-75-79-83 stitches. Continue the pattern back and forth with 1 edge stitch in garter stitch on each side until the sleeve measures 54-53-53-54-53-52 cm from the cast-on edge – the sleeve cap measures approx. 2-2-2-5-6-7 cm from the cast-off marker-stitch. Cast off with knit from the right side. Work the other sleeve in the same way. ASSEMBLY: Sew the shoulder seams, inside the cast-off edge. Sew the neck together mid-back and sew the neck to the neckline. Sew the sleeve cap to the armhole, inside the 1 edge stitch. Then sew the split at the top of the sleeve to the bottom of the armhole – see sketch. Sew the buttons onto the left band. |
||||||||||
Diagram explanations |
||||||||||
|
||||||||||
 |
||||||||||
 |
||||||||||
Have you finished this pattern?Tag your pictures with #dropspattern #wildmintteajacket or submit them to the #dropsfan gallery. Do you need help with this pattern?You'll find 29 tutorial videos, a Comments/Questions area and more by visiting the pattern on garnstudio.com. © 1982-2026 DROPS Design A/S. We reserve all rights. This document, including all its sub-sections, has copyrights. Read more about what you can do with our patterns at the bottom of each pattern on our site. |
||||||||||


Post a comment to pattern DROPS 227-6
We would love to hear what you have to say about this pattern!
If you want to leave a question, please make sure you select the correct category in the form below, to speed up the answering process. Required fields are marked *.