
Popular categories
Looking for a yarn?


Comments / Questions (63)
![]() Eva wrote:
Eva wrote:
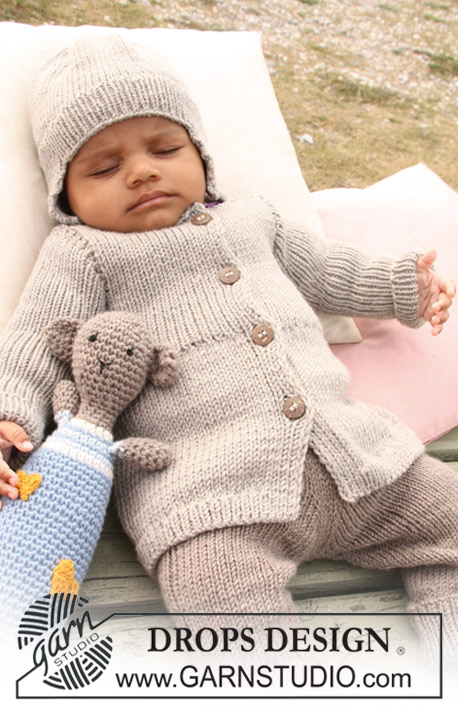
Hello I have a question regarding the placement of the buttons. looking at my version and the one in the photo, it looks as if the buttons are placed differently. - in my one they are much higher up leaving a smaller neck opening. (size 1-3month). Also looking at the first picture with the boy, it seems as if the lower left button is placed in the middle of the shawl... Are there any corrections available for this pattern? thank you
02.10.2014 - 21:25DROPS Design answered:
Hello! All corrections if any are added to the text. NB: measurements for buttonholes have been edited - thank you !
09.10.2014 - 22:40
![]() Eva wrote:
Eva wrote:
Nice design. - so boy! would love to see it in Merino Extra Fine (DK weight) :)
21.09.2014 - 21:37
![]() Peter wrote:
Peter wrote:
Müssten die Knopflöcher nicht weiter unten gearbeitet werden? Auf dem Bild sieht es aus, als wären die oberen Knopflöcher unterhalb der Ärmel.
01.06.2014 - 14:06DROPS Design answered:
Die Knöpfe erscheinen auf dem Bild tatsächlich etwas weiter unten als die cm-Angabe es vermuten lässt. Wenn Ihnen das besser gefällt, können Sie die Knöpfe ja einfach etwas weiter unten ansetzen.
08.06.2014 - 11:52
![]() Nicole wrote:
Nicole wrote:
Het linker voorpand is toch als je op de foto kijkt rechts? Ik heb nl het idee dat de knoopsgaten dan dus op het linker voorpand moet. ???
27.12.2013 - 22:10DROPS Design answered:
Hoi Nicole. Het patroon is correct. De foto is in spiegelbeeld getoond.
13.03.2014 - 16:52
![]() Nicole wrote:
Nicole wrote:
Hoe krijg je de strepen zo gelijk aan de twee kanten als op de foto?
25.11.2013 - 08:38DROPS Design answered:
Hoi Nicole. Dat krijg je door beide panden te beginnen op precies dezelfde punt van de draad (print rapport).
26.11.2013 - 15:27
![]() Dana wrote:
Dana wrote:
Hallo, wie stricke ich das Rückteil? An den beiden Vorderteilen habe ich zum Schluss bis auf die 26 Blendmaschen alle Maschen abgekettet. War das falsch? Bei dem Rückenteil steht, es sind die Maschen vom Vorderteil auf die Nadel zu nehmen, aber ich weiß nicht welche.
09.10.2013 - 21:55DROPS Design answered:
Liebe Dana, da ist unserer damaligen Übersetzerin leider ein Fehler passiert, die Maschen werden nicht abgekettet sondern stillgelegt. Wir korrigieren das gleich und bitte für die Umstände um Entschuldigung.
10.10.2013 - 12:30
![]() Dana wrote:
Dana wrote:
Guten Tag, wo messe ich die Arbeit für die verkürzten Reihen, an der Seite mit den Krausrippen oder an der Seite, an der ich glatt stricke?
20.08.2013 - 08:34DROPS Design answered:
Liebe Dana, nach 4 cm Gesamthöhe (am glatten Teil gemessen) beginnen Sie mit den verkürzten Reihen.
20.08.2013 - 09:25
![]() TALARIE wrote:
TALARIE wrote:
Bonjour, Je suis en train de tricoter ce modèle et j'aimerai connaitre la marche à suivre pour faire les rangs raccourcis du col châle. D'avance merci pour votre aide. Bien cordialement Annette
24.07.2013 - 10:48DROPS Design answered:
Bonjour Mme Talarie, les rangs raccourcis du col se tricotent comme pour ceux des bordures des devants, mais plus souvent : tricotez les 24-24-26 (28-28) m pendant 2 cm (au lieu de 4 cm pour les bordures des devants), puis 2 rangs sur les 12-12-13 (14-14) premières mailles seulement. Bon tricot !
24.07.2013 - 14:41
![]() Carolina wrote:
Carolina wrote:
Seria de mucha ayuda que colgaran videos tutoriales de cómo realizar el patron. Leo las instrucciones y no me doy cuenta si se teje todo con aguja circular o el frente con dos agujas y el resto con circular. tampoco entiendo si se empieza por abajo o arriba. ¿alguien me puede ayudar?
25.08.2012 - 17:01
![]() Kamilla wrote:
Kamilla wrote:
Denne strikka jeg til min sønn da han var ca 3-4 måneder, nå er han 13 måneder og den passer fremdeles! Den ble veldig tøyelig og ypperlig å ha på når han skal sove i vogna. Har brukt den nesten hver dag. Takk for flotte oppskrifter!
12.06.2012 - 22:36
|
|
DROPS Baby 20-11 |
|
 |
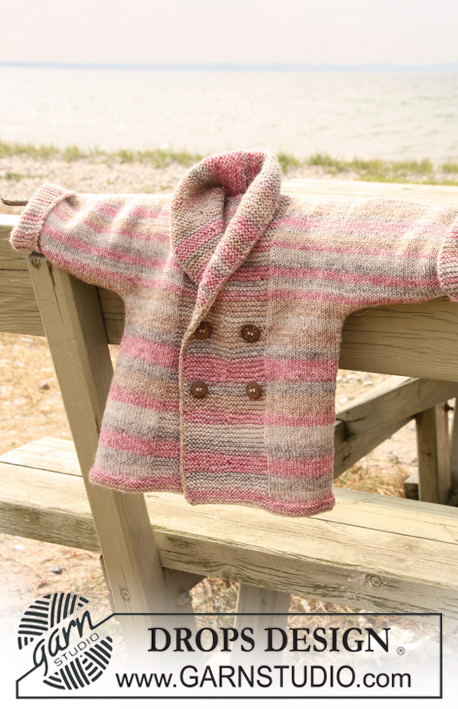 |
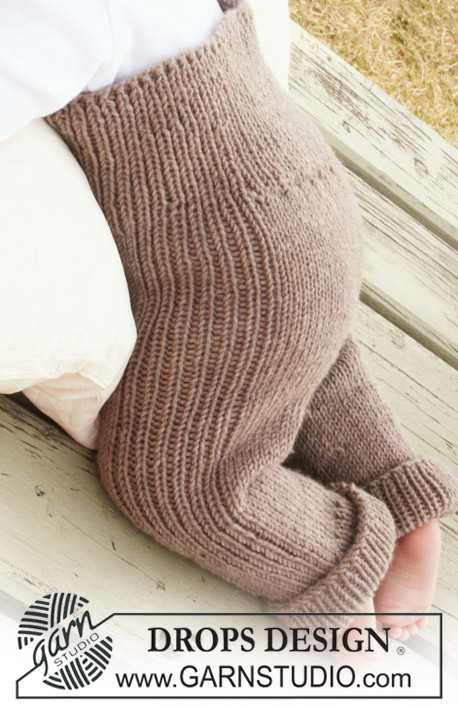
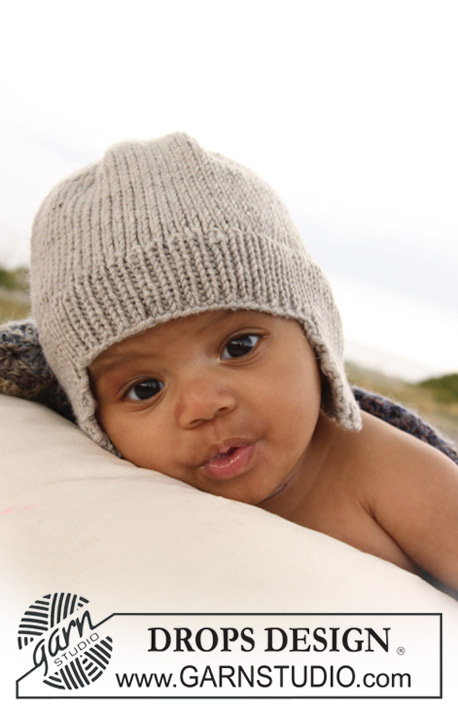
Knitted double breasted jacket with shawl collar for baby and children in DROPS Fabel
DROPS Baby 20-11 |
|
|
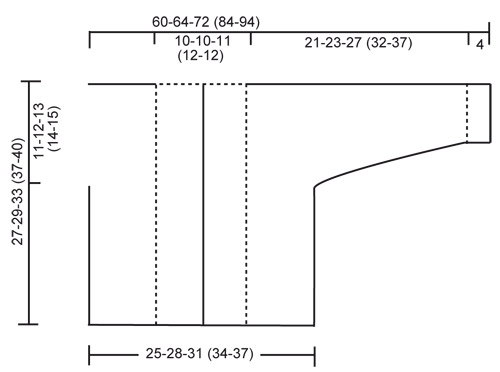
GARTER ST (back and forth on needle): K all rows. SHORTENED ROWS: * Work 2 rows back and forth over 24-24-26 (28-28) front band sts, work 2 rows over the first 12-12-13 (14-14) sts only*. NOTE: When turning in the middle of the work, - slip the first st , tighten the thread and knit back. This is done to avoid a hole in the transition. BUTTONHOLES: The Jacket is double breasted with 4 buttonholes on right front band. 1 BUTTONHOLE = K tog fourth and fifth sts from the edge and make 1 YO. On same row also K tog fourth and fifth LAST sts on front band and make 1 YO. Make 2 buttonholes when piece measures: SIZE 1/3 months: 10 and 14 cm. SIZE 6/9 months: 11 and 15 cm. SIZE 12/18 months: 14 and 18 cm. SIZE 2 years: 17 and 21 cm. SIZE 3/4 years: 19 and 23 cm. -------------------------------------------------------- JACKET: Worked back and forth on circular needle. Start with front piece, inc sts for sleeve and knit up to shoulder. Work the second front piece, put the 2 front pieces tog and knit down the back piece. LEFT FRONT PIECE: READ ALL OF THIS SECTION BEFORE CONTINUING! Cast on 43-47-51 (56-59) sts (includes 1 edge st at the side and 24-24-26 (28-28) front band sts towards front edge) on needle size 2.5 mm with Fabel. Work 6 rows garter st - see explanation above. Change to circular needle size 3 mm and work stocking st, but garter st 24-24-26 (28-28) front band sts towards front edge. When the piece measures 4 cm work SHORTENED ROWS - see above (Row 1 = from WS). Repeat from *-* 1 time every 4 cm until the piece measures 19-21-24 (27-30) cm, then repeat from *-* 1 time every 2 cm to finished measurement. AT THE SAME TIME when piece measures 16-17-20 (23-25) cm cast on new sts at the end of every rows from WS (towards the side for sleeve): 6 sts 2-2-3 (3-3) times, 8 sts 1-1-1 (2-3) times and 21-22-22 (25-26) sts 1 time = 84-89-99 (115-127) sts for shoulder/sleeve. Inc sts are worked in stocking st. When all sts are cast on continue with stocking st and garter sts as before AT THE SAME TIME as the last 10 sts on sleeve also are worked in garter sts. When the piece measures 27-29-33 (37-40) cm insert 1 marker = middle of shoulder. Now slip the 24-24-26 (28-28) front band sts onto a stitch holder. Next cast on 2 new sts at the end of the row from RS (towards neck), repeat the inc on next row towards neck = 64-69-77 (91-103) sts on needle. Work 1 row from WS. Put work aside. RIGHT FRONT PIECE: Cast on and work as left front piece but mirrored. In addition dec for BUTTONHOLES on front band - see above. NOTE! Slip sts onto a thread after the last inc row (i.e. last row = from WS). BACK PIECE: Work left front piece onto the circular needle, cast on 16-16-18 (20-20) new sts (= back of neck) and work right front piece onto circular needle = 144-154-172 (202-226) sts. NOW MEASURE PIECE FROM MARKERS ON SHOULDERS! Continue with stocking st and garter st at end of each sleeve back and forth on needle. When piece measures 8½-9½-10 (10-11) cm beg cast off sleeve sts. Cast off at beg of every row at each side as follows: 21-22-22 (25-26) sts 1 time, 8 sts 1-1-1 (2-3) times and 6 sts 2-2-3 (3-3) times = 62-70-76 (84-90) sts on needle. Work stocking st with 1 edge st each side. When piece measures approx 26-28-32 (36-39) cm – fold piece double at markers on shoulders and see if back piece is the same length as front piece down to garter sts. Change to needle size 2.5 mm and work 6 rows garter sts. Cast off. SHAWL COLLAR: Slip 24-24-26 (28-28) sts from thread on left front piece back on needle. Work garter sts and continue with shortened rows every 2 cm until collar measures 7-7-8 (9-9) cm (measured where shortest). Cast off. Repeat with sts on thread on right front piece. ASSEMBLY: Sew sleeve and side seams inside 1 edge st. Sew on buttons of left front piece. Sew collar tog at back and sew collar to neckline. CROCHET BORDER: Crochet an edge along front band, along the edge of collar and down along front band on other side. Start at bottom of right front piece and crochet with crochet hook size 2 mm as follows: crochet 1 dc, * 1 ch, skip over approx ½ cm, 1 dc in next sts *, repeat from *-*. |
|
 |
|
Have you finished this pattern?Tag your pictures with #dropspattern or submit them to the #dropsfan gallery. Do you need help with this pattern?You'll find 11 tutorial videos, a Comments/Questions area and more by visiting the pattern on garnstudio.com. © 1982-2026 DROPS Design A/S. We reserve all rights. This document, including all its sub-sections, has copyrights. Read more about what you can do with our patterns at the bottom of each pattern on our site. |
|


With over 40 years in knitting and crochet design, DROPS Design offers one of the most extensive collections of free patterns on the internet - translated to 17 languages. As of today we count 324 catalogues and 12290 patterns translated into English (UK/cm). 12290
We work hard to bring you the best knitting and crochet have to offer, inspiration and advice as well as great quality yarns at incredible prices! Would you like to use our patterns for other than personal use? You can read what you are allowed to do in the Copyright text at the bottom of all our patterns. Happy crafting!
Post a comment to pattern DROPS Baby 20-11
We would love to hear what you have to say about this pattern!
If you want to leave a question, please make sure you select the correct category in the form below, to speed up the answering process. Required fields are marked *.