
Popular categories
Looking for a yarn?


Comments / Questions (40)
![]() DROPS Design wrote:
DROPS Design wrote:
I str S starter du med 156 masker og øker 34 underweis (17 x 2)= 190 masker,
29.07.2011 - 14:42
![]() Marthe wrote:
Marthe wrote:
Det må være feil, for problemet er at det skal bli 224 m til slutt. Da trengs det ytterligere 34 m. Jeg økte iallefall begge veier =17 totalt på en økning, og hadde 7r 7vr etter 4. økning. Kragen ser nå helt lik ut den på bildet..
27.07.2011 - 22:35
![]() DROPS Design wrote:
DROPS Design wrote:
Først øker du i alle rette partier (+9) deretter i alle vrang partiere (+8). Igjen i alle rette partier (+9) deretter i alle vrang partiere (+8). Da har du 5 rette og 5 vrange pluss 34 nye masker. Du starter med 156 masker og øker 34 = 190 masker.
24.07.2011 - 17:15
![]() Marthe wrote:
Marthe wrote:
Hei! Ang økingen i siste del av venstre forstk. Etter 3 cm på kragen økes alle 3vr til 4vr - i alt 17 m. ¿ 9 vr i partiene på rettsiden + de motsatte 8 partiene på vrangsiden ? Så kommer jeg til neste 17 m økning, nå i r partier, men disse har jo allerede kommet opp i 4 m, og må dermed økes fra 4 til 5 m for å komme opp i 190 m. Hvordan få 224 m uten at vrangborden til slutt består av 7 r og 7 vr? Marthe :)
23.07.2011 - 21:28
![]() Drops Design wrote:
Drops Design wrote:
Kan det være de 4 m du skulle tage ind efter de 8 cm på ærmet du kan ha glemt... ? Opskriften stemmer så hvis du følger den så får du rigtig antal masker.
22.06.2011 - 08:31
![]() Charlotte wrote:
Charlotte wrote:
Når man lægger udtagningsmaskerne på forstykket sammen - 3 gange udtagninger inden ærmet sættes på - fås et andet antal masker. Der er 4 maskers forskel. Ærmet skal vel sættes på i forlængelse af de - 3 gange - opslåede masker?
21.06.2011 - 16:39
![]() Drops Design wrote:
Drops Design wrote:
Nej da, opskriften stemmer... det er den glatte side som er retsiden. Når vi henviser til venstre side så er det din venstre side når du har jakken på. God fornøjelse!
06.10.2010 - 09:50
![]() Janni wrote:
Janni wrote:
Hey! Syntes det er et fedt mønster men er kommet lidt i tvivl om hvad der er retsiden. jeg troede at retsiden var den "glatte" side af retstrikningen, men hvis det er rigtigt så har I byttet om på hvad der er højre forstykke og hvad der er venstre forstykke. Hilsen Janni
06.10.2010 - 09:34
![]() DROPS Design wrote:
DROPS Design wrote:
Hej Anette, Dom två räta maskorna skall nedåt,allstå längst ned på koftan, du stickar ju sidledes, och du måste alltså öka åt andra hållet, dvs uppåt, mot ärmhålan, för att få längden på koftan. Lycka till!
08.01.2010 - 13:54
![]() Anette Andersson wrote:
Anette Andersson wrote:
Hej! Vad betyder det att man ska lägga upp maskor på motsatta sidan av de 2 rätstickade maskorna? Lägger man upp dem i slutet på det räta varvet? M.v.h. Anette
04.01.2010 - 15:43
|
|||||||
Regina#reginacardigan |
|||||||
|
|
|||||||
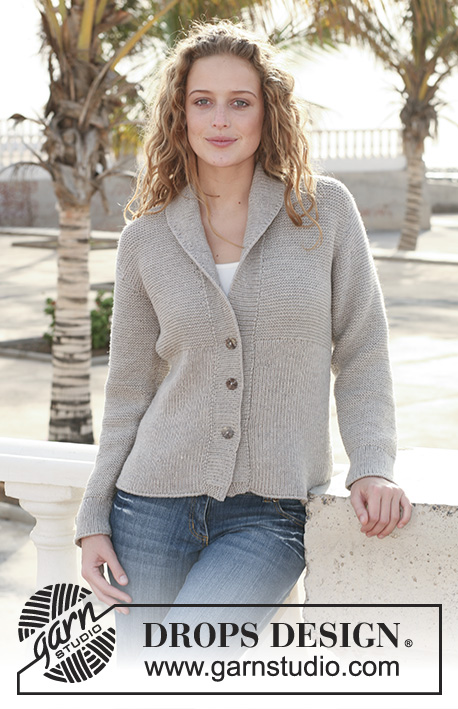
DROPS jacket with collar and wide front bands in 2 threads in ”Alpaca”. Size S - XXXL.
DROPS 112-35 |
|||||||
|
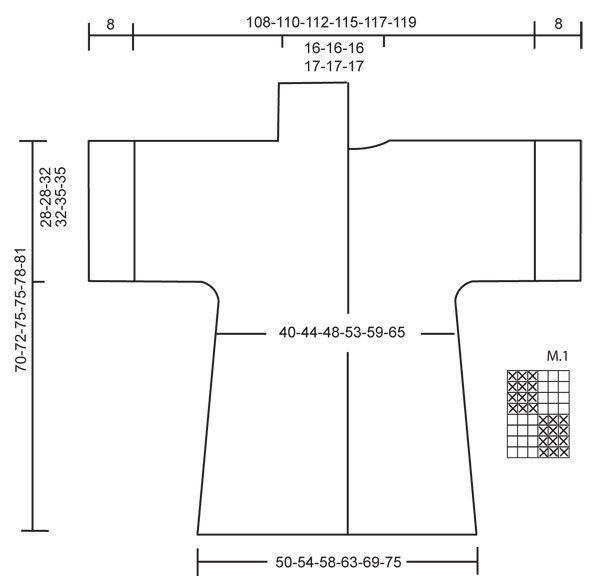
PATTERN: See diagram M.1. GARTER ST (back and forth on needle): K all rows. INCREASING TIP: Inc 1 st by making 1 YO. Work YO into back of loop on return row to avoid a hole. -------------------------------------------------------- JACKET: Worked from side to side, in 4 pieces, back and forth on circular needle. LEFT FRONT PIECE: Sleeve: Cast on 56-56-62-62-68-68 sts (includes 1 edge st each side) for sleeve on circular needle size 4 mm with 2 threads Alpaca. Work 1 row stocking st and continue in PATTERN – see above – with 1 garter st each side until piece measures 8 cm (adjust to after row 4 or 8 in diagram). Change to needle size 5 mm and continue in stocking with 1 edge st each side, AT THE SAME TIME dec 3-3-4-4-5-5 sts evenly on first row = 53-53-58-58-63-63 sts. REMEMBER THE KNITTING TENSION! When piece measures 34-33-32-31-29-27 cm cast off 1 edge st on the left side of piece (as seen from RS) and slip the remaining 52-52-57-57-62-62 sts on a stitch holder. Put piece aside. NOW READ ALL OF THE FOLLOWING SECTION BEFORE CONTINUING! Body piece: Cast on 16 sts for all sizes on circular needle size 5 mm with 2 threads (= bottom edge of jacket). P 1 row (=WS), then K 1 row (RS) with 2 garter sts at the end of row (= towards bottom edge of jacket, worked in garter st throughout). P 1 row (WS) and cast on 13-14-14-14-14-15 new sts at the end of row (opposite the 2 garter sts) = 29-30-30-30-30-31 sts. Now cast on 13-14-14-14-14-15 new sts on every other row at the same side a total of 3 times = 68-72-72-72-72-76 sts. Slip the sts from sleeve back on needle = 120-124-129-129-134-138 sts. (NOTE! Sleeve is now on the right side of body piece, as seen from RS). Insert a marker in piece. Continue in stocking st until piece measures 14-15-16-17-19-20 cm from marker - adjust so that next row is from WS. Work 1 row stocking st, AT THE SAME TIME inc 15-14-12-15-16-15 sts evenly – see increasing tip = 135-138-141-144-150-153 sts. SIZE S-M-L: Change to circular needle size 4 mm. Work front band as follows: Pattern on the bottom 105-105-108 sts, and rib, P3/K3, on the remaining 30-33-33 sts (collar). Now cast on 21-21-21 new sts for neckline at the end of row = 156-159-162 sts. Incorporate the new sts in rib. Continue in pattern and rib like this for 3 cm. SIZE XL-XXL-XXXL: Change to circular needle size 4 mm. Work pattern on all 144-150-153 sts until piece measures 18-21-24 cm from marker. Adjust so that next row is from RS. Cast on 24-24-24 new sts for neckline = 168-174-177 sts. Now work rib, K3/P3, on the top 57-57-60 sts (collar) and continue in pattern on the bottom 111-117-117 sts. Continue like this until collar measures 3 cm. ALL SIZES: When collar measures 3 cm inc all P3 to P4(NOTE! Only inc in the P-sections on collar). When collar measures 6 cm inc all K3 to K4. When collar measures 9 cm inc all P4 to P5. When collar measures 12 cm inc all K4 to K5 = 190-195-198-206-212-217 sts. Continue with K5/P5 until collar measures 15-15-15-16-16-16 cm(adjust to after row 4 or 8 in pattern). Cast off in rib. RIGHT FRONT PIECE: Sleeve: Like left sleeve, but mirrored. Body piece: Cast on 16 sts for all sizes on circular needle size 5 mm with 2 threads Alpaca (= bottom edge of jacket). P 1 row with 2 garter sts at the end of row, then K 1 row. Cast on sts and continue as described for left front piece, but mirrored. LEFT BACK PIECE: Sleeve and the beg of body piece as described for right front piece. When sleeve and body piece are slipped on the same needle work stocking st on all sts until piece measures 46-47-48-49-50-51 cm from cast on row for sleeve. On next row from WS cast off 4 sts for neckline (includes 1 edge st) = 116-120-125-125-130-134 sts. Continue in stocking st until neckline measures 7-7-7-7.5-7.5-7.5 cm. Now work 4 rows garter st on all sts and cast off. Piece measures approx 54-55-56-57.5-58.5-59.5 cm. RIGHT BACK PIECE: Like left back piece, but mirrored. ASSEMBLY: Sew back pieces tog with the rows of garter st meeting mid back. Sew shoulder seams inside 1 edge st. Sew under arm and side seams inside 1 edge st. Sew collar tog mid back and sew to neckline. BUTTONHOLE LOOPS: Place the loops as follows, measured from the bottom edge of jacket: Size S-M: approx 33 and 43 cm SIZE L-XL: approx 34 and 44 cm SIZE XXL-XXXL: approx 35 and 45 cm Crochet 2 buttonhole loops on right front band with crochet hook size 4 mm and 2 threads Alpaca as follows: 1 dc, 8 ch, 1 sl st in dc. Sew buttons on left front piece. TIE STRINGS: Crochet 2 tie strings on the inside of jacket as follows: Work 2 ch-strings measuring approx 20 cm each and attach them with a sl st. Place 1 string on the inside of left front band towards front edge and place 1 string on the inside of right front band towards the jacket, both in line with the top button. |
|||||||
Diagram explanations |
|||||||
|
|||||||
 |
|||||||
Have you finished this pattern?Tag your pictures with #dropspattern #reginacardigan or submit them to the #dropsfan gallery. Do you need help with this pattern?You'll find 23 tutorial videos, a Comments/Questions area and more by visiting the pattern on garnstudio.com. © 1982-2026 DROPS Design A/S. We reserve all rights. This document, including all its sub-sections, has copyrights. Read more about what you can do with our patterns at the bottom of each pattern on our site. |
|||||||


With over 40 years in knitting and crochet design, DROPS Design offers one of the most extensive collections of free patterns on the internet - translated to 17 languages. As of today we count 324 catalogues and 12290 patterns translated into English (UK/cm). 12290
We work hard to bring you the best knitting and crochet have to offer, inspiration and advice as well as great quality yarns at incredible prices! Would you like to use our patterns for other than personal use? You can read what you are allowed to do in the Copyright text at the bottom of all our patterns. Happy crafting!
Post a comment to pattern DROPS 112-35
We would love to hear what you have to say about this pattern!
If you want to leave a question, please make sure you select the correct category in the form below, to speed up the answering process. Required fields are marked *.