
Popular categories
Looking for a yarn?








































Comments / Questions (18)
 Helle wrote:
Kan man ikke starte med ribkanten i halsen og så fortsætte med raglan-udtagningerne/bærestykket, i stedet for at strikke ribben på til slut?
23.09.2026 - 15:55DROPS Design answered:
Hej Helle,, ja det kan du gøre :)
24.09.2026 - 09:23
Helle wrote:
Fin sweater
23.09.2026 - 15:53
 Alice wrote:
Wieso wird dieser Pullover in einem gestrickt und dann in Reihen, Pullover werden doch Rund gestrickt von oben nach unten, nur Jacken in Hin und Rückreihe
16.09.2026 - 13:31DROPS Design answered:
Liebe Alice, der Pullover wird zuerst in Hin- und Rückreihen gestrickt, mit Zunahmen für Raglan und gleichzeitig zunahmen für Halssauchnitt am Vorderteil (= beidseitig werden neue Maschen angeschlagen) bis den Halsausschnitt fertig ist = 6 Reihen. Dann strickt man die nächste Hinreihe mit Raglanzunahmen (A.1 und A.2) und am Ende dieser Reihe wird man die mittleren Maschen für Halsauschnitt Vorderteil anschlagen und ab jetzt in der Runde stricken. Viel Spaß beim Stricken!
17.09.2026 - 09:00
Andrea wrote:
Vielen Dank für die schnelle Antwort. Ich verstehe es aber leider trotzdem nicht. Sie schreiben, dass A1 und A2 insgesamt 12 Mal gestrickt werden. Das sind aber doch nur 24 Maschen zusätzlich oder muss die Maschenzunahme in der 3. Reihe von A1 und A2 auch noch gemacht werden? Hier ist nur von der linken Seite die Rede und nicht vom stricken in Runden. Deshalb dachte ich, diese wird in Runden nicht gestrickt.
15.09.2026 - 20:03DROPS Design answered:
Liebe Andrea, die Zunahmen der 3. Reihe A.1 und A.3 sollen immer gestrickt werden, die gehören zur Raglanzunahmen, so jedesmal Sie die 6 Reihen A.1/A.2 stricken, dann haben Sie für Raglan 2 Maschen zugenonmmen (1 M im Zopf bei der 1. Reihe + 1 M am Ende A.1/am Anfang A.2). Diese Zunahmen sollen immer gestrickt werden, entweder in Reihen (am Anfang) dann in Runden (nach Halsausschnitt). Viel Spaß beim Stricken!
16.09.2026 - 07:49
Andrea wrote:
Ich stricke Größe S. Bei Beginn der Passe in Runden sind pro Ärmel 26 Maschen vorhanden. Danach wird je 1 Masche an beiden Seiten des Ärmels in jeder 6. Runde zugenommen. Das soll insgesamt 12 Mal = 24 Maschen gemacht werden. 24 + 26 ist aber 50 und nicht 68 (sie schreiben, dass nach den Ärmelzunahmen 68 Maschen pro Ärmel sind). Wo ist mein Fehler?
14.09.2026 - 21:53DROPS Design answered:
Liebe Andrea, siehe auch unten - beachten Sie daß die insgesamt 24 Zunahmen sind einschl. die ersten Zunahmen, so die Maschenanzahl am Anfang für den Ärmel ist 20 Maschen (A.1, 12 M glatt rechts, A.2). Viel Spaß beim Stricken!
15.09.2026 - 10:23
Andrea wrote:
Ich stricke Größe S. Bei Beginn der Passe in Runden sind pro Ärmel 26 Maschen vorhanden. Danach wird je 1 Masche an beiden Seiten des Ärmels in jeder 6. Runde zugenommen. Das soll insgesamt 12 Mal = 24 Maschen gemacht werden. 24 + 26 ist aber 50 und nicht 68 (sie schreiben, dass nach den Ärmelzunahmen 68 Maschen pro Ärmel sind). Wo ist mein Fehler?
14.09.2026 - 21:47DROPS Design answered:
Liebe Andrea, ganz am Anfang sind es nur 20 Maschen für den Ärmel zwischen den Markierungen: 4 M A.1 + 12 M glatt rechts + 4 M A.2; dann nehmen Sie insgesamt 24 Mal 2 Maschen = 48 Zunahmen + die 20 Maschen = 68 Maschen für den Ärmel zwischen den Maschen mit den Markierungen. Viel Spaß beim Stricken!
15.09.2026 - 10:22
 Kari wrote:
Når man øker på første pinne, så økes det totalt med 6 masker. Men økningen i antallet viser jo til at det økes med 10 masker den runden. Hva er rett her?
11.09.2026 - 12:26DROPS Design answered:
Hei Kari. På 1. pinne økes det 4 masker ved raglan (for og bakstykket) + de 2 nye maskene som legges opp på slutten av pinnen = 6 økte masker. Man strikker også etter diagrammene (A.1 og A.2) og da økes det også masker 1 maske hver gang diagrammene strikkes (= 4 ganger = 4 økte masker) = 6+4 = 10 økte masker. Husk å lese diagramforklaringen til diagramikonene. mvh DROPS Design
14.09.2026 - 13:30
Harry wrote:
Det stemmer vel ikke at halsen er glattstrikk? Er den ikke tydelig vrangbord?
04.09.2026 - 08:15DROPS Design answered:
Hei Harry. Ja det stemmer. Halsen strikkes sist och den strikkes i vrangbord (se under HALSKANT). Mvh DROPS Design
04.09.2026 - 13:58
|
||||||||||||||||
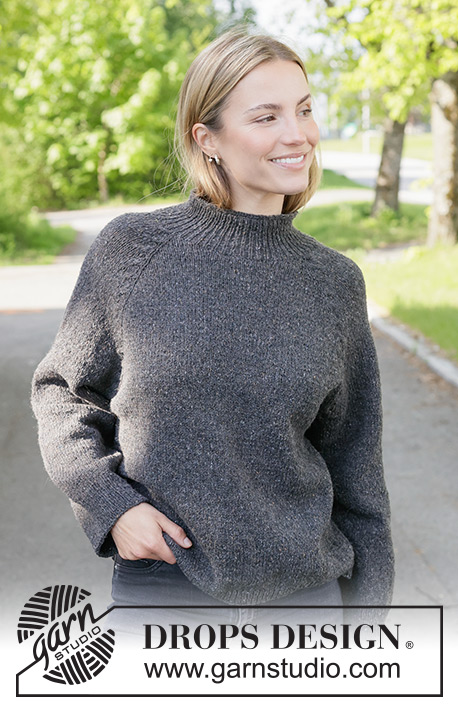
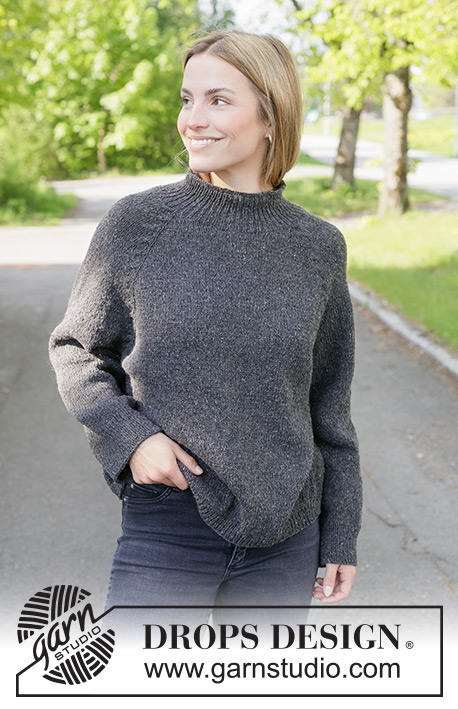
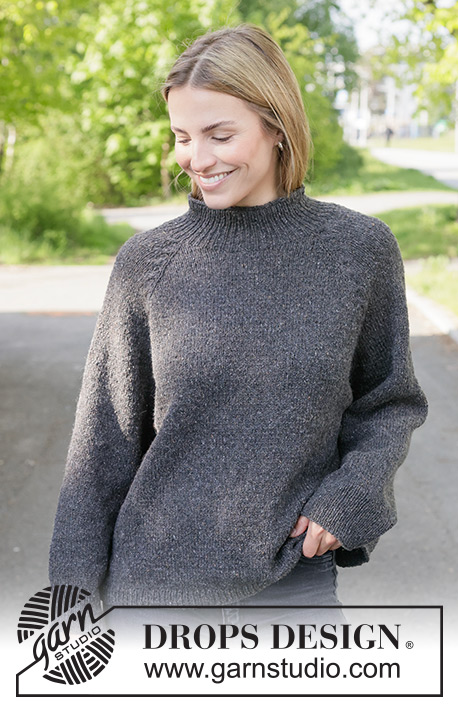
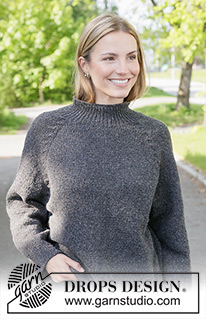
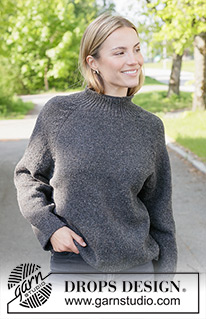
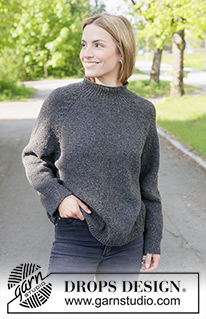
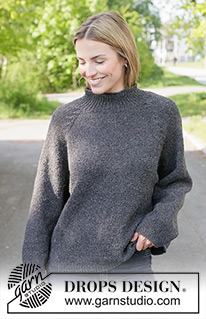
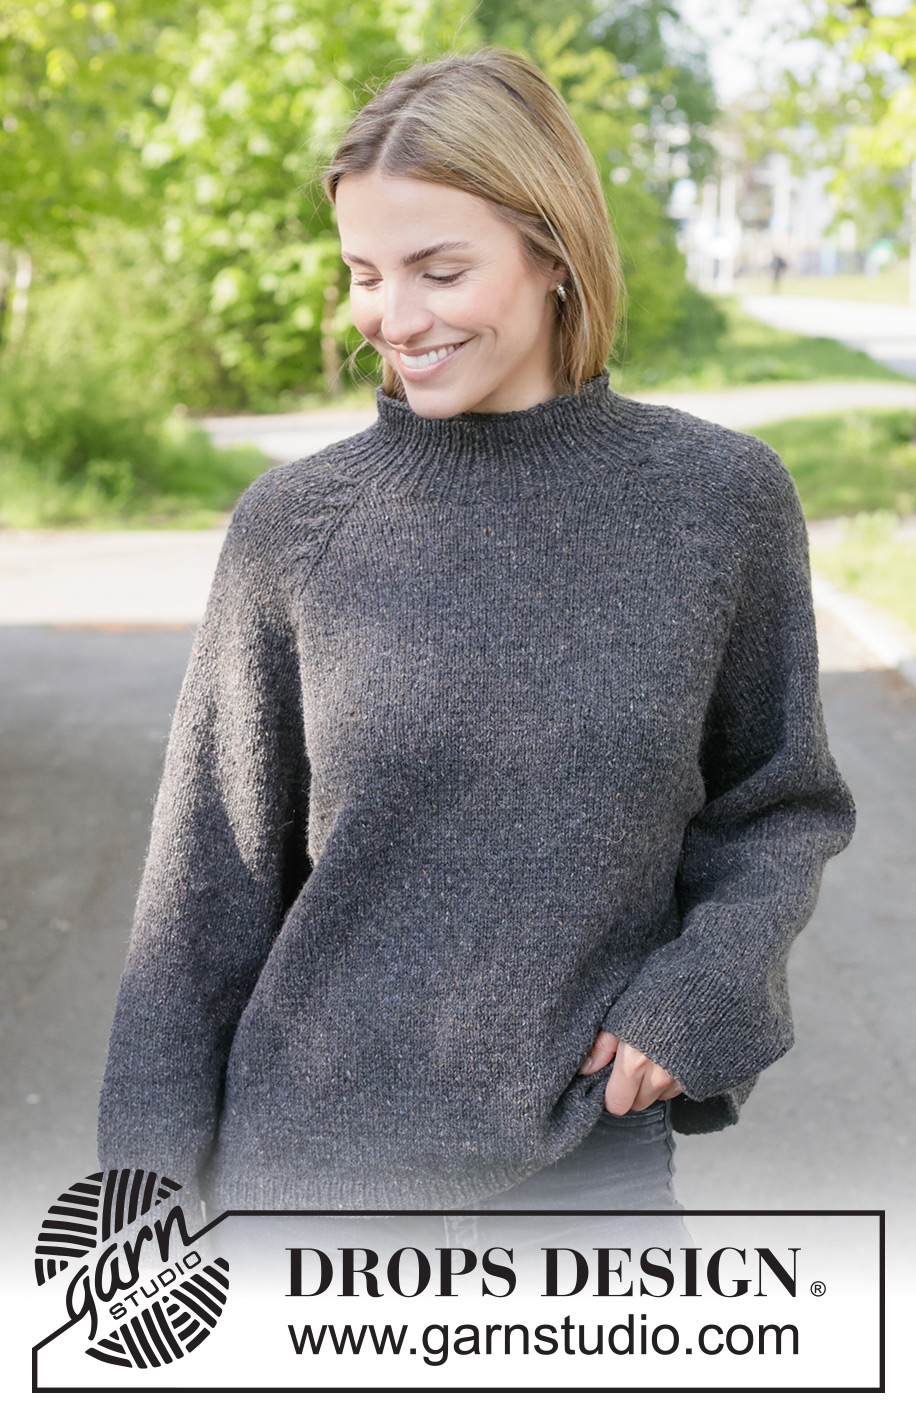
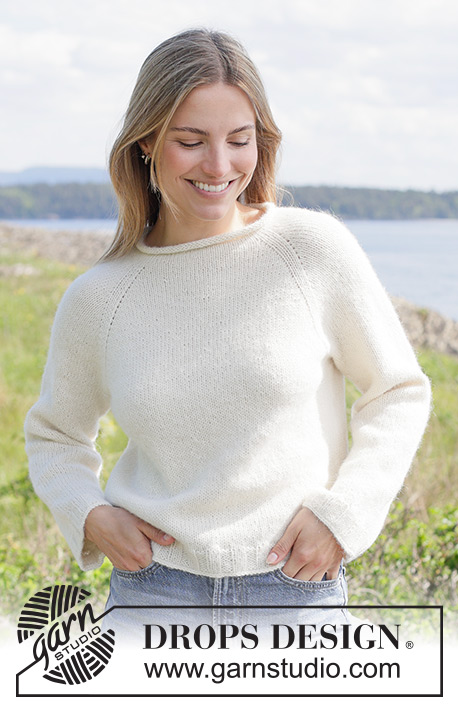
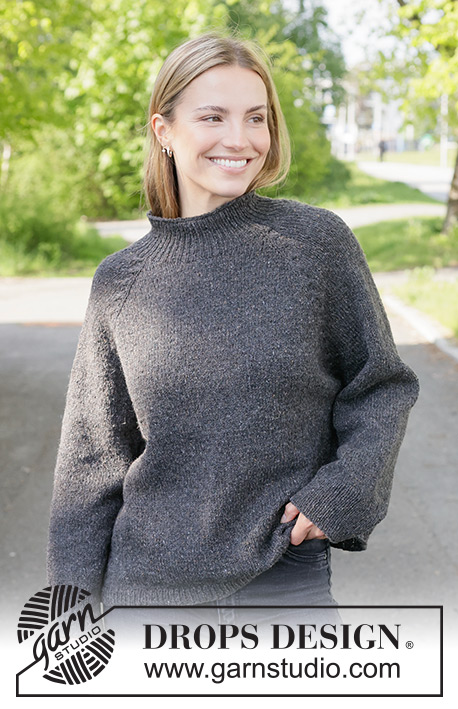
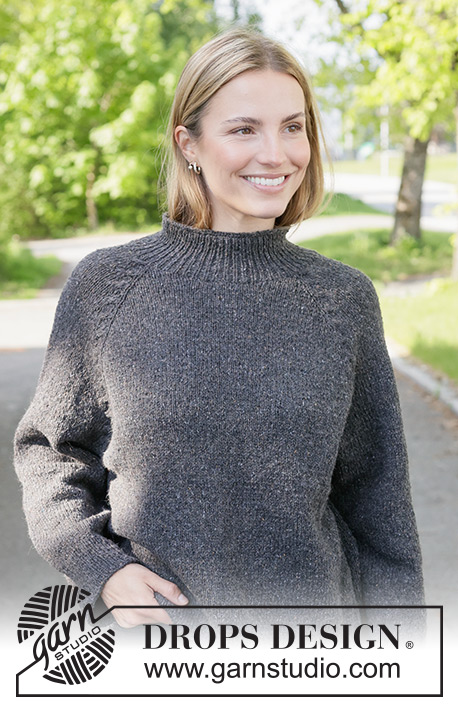
Evening Secret Sweater#eveningsecretsweater |
||||||||||||||||
 |
 |
|||||||||||||||
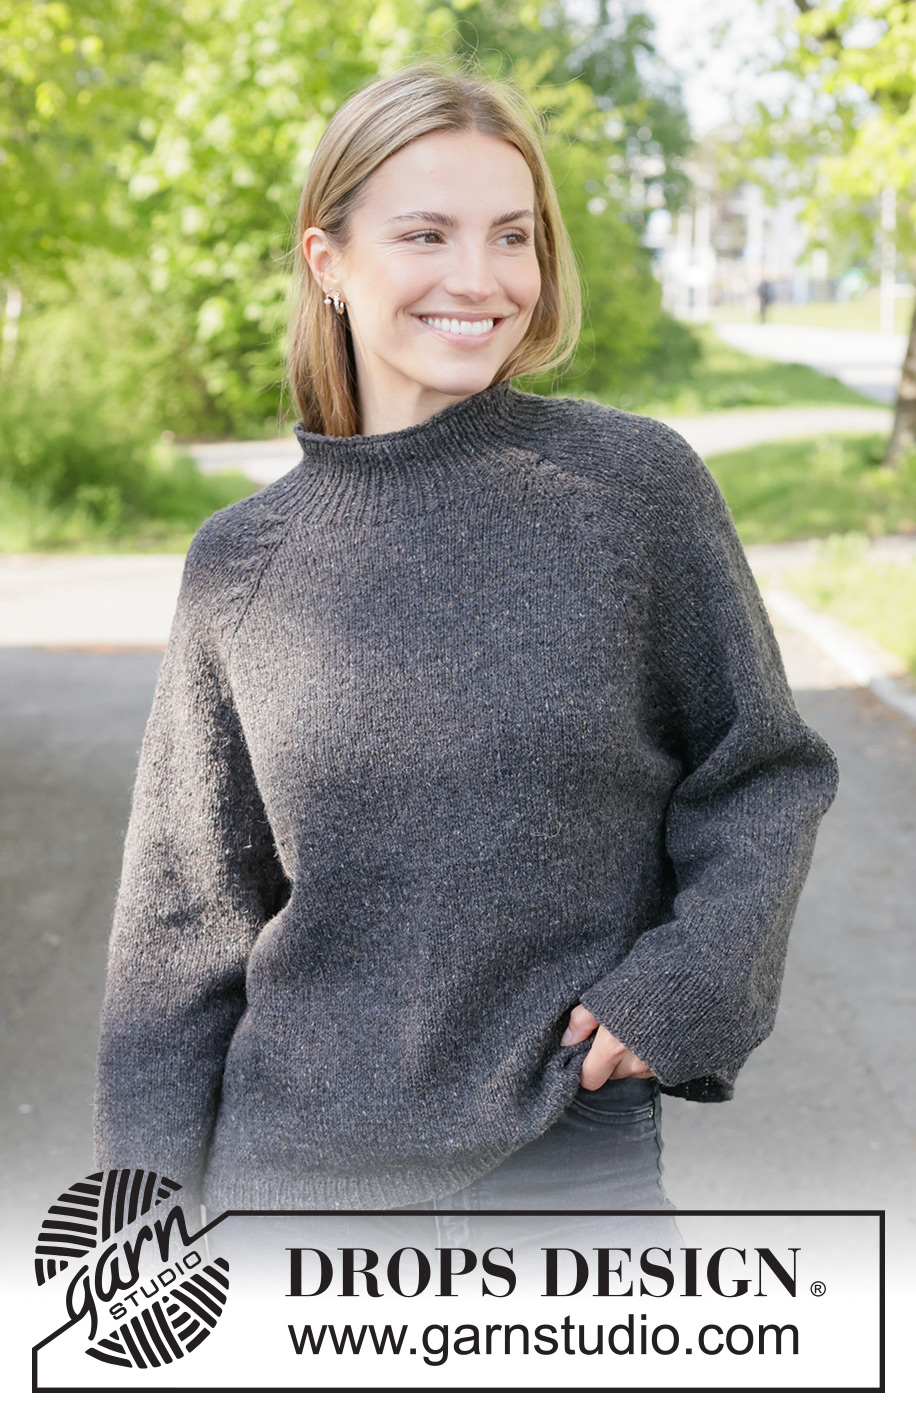
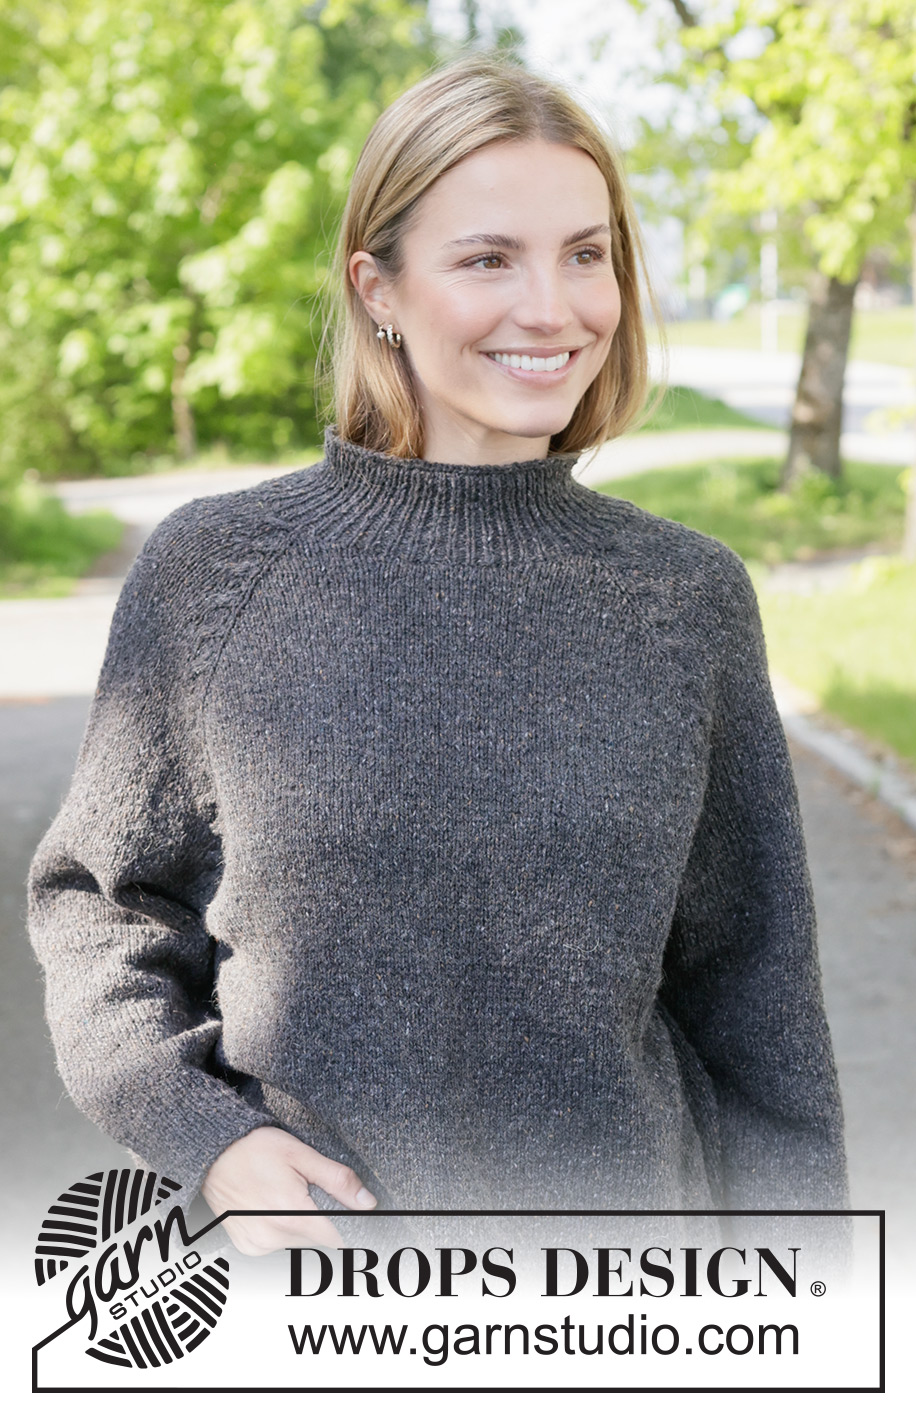
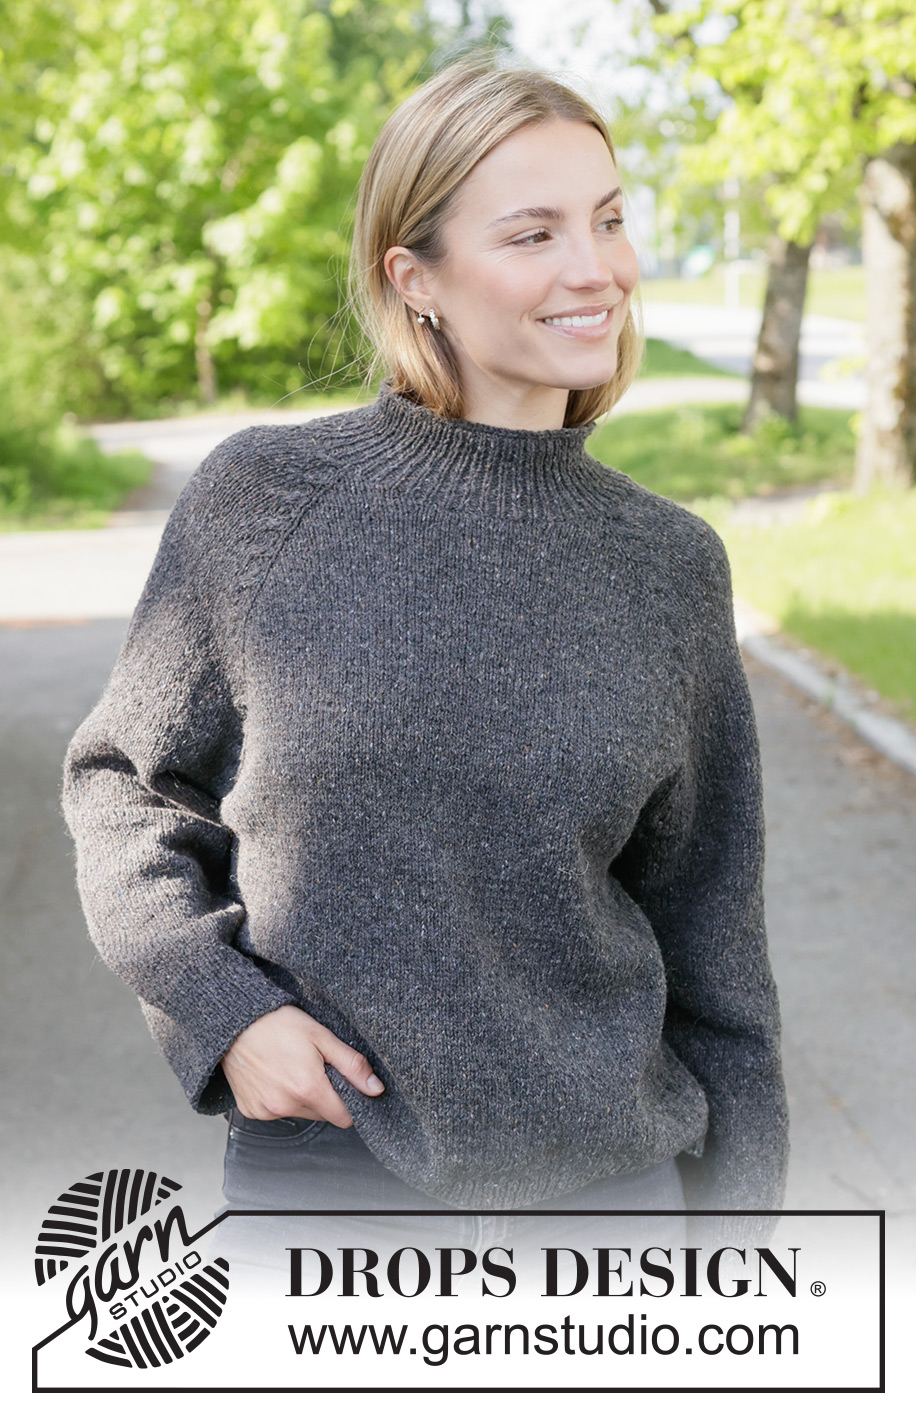
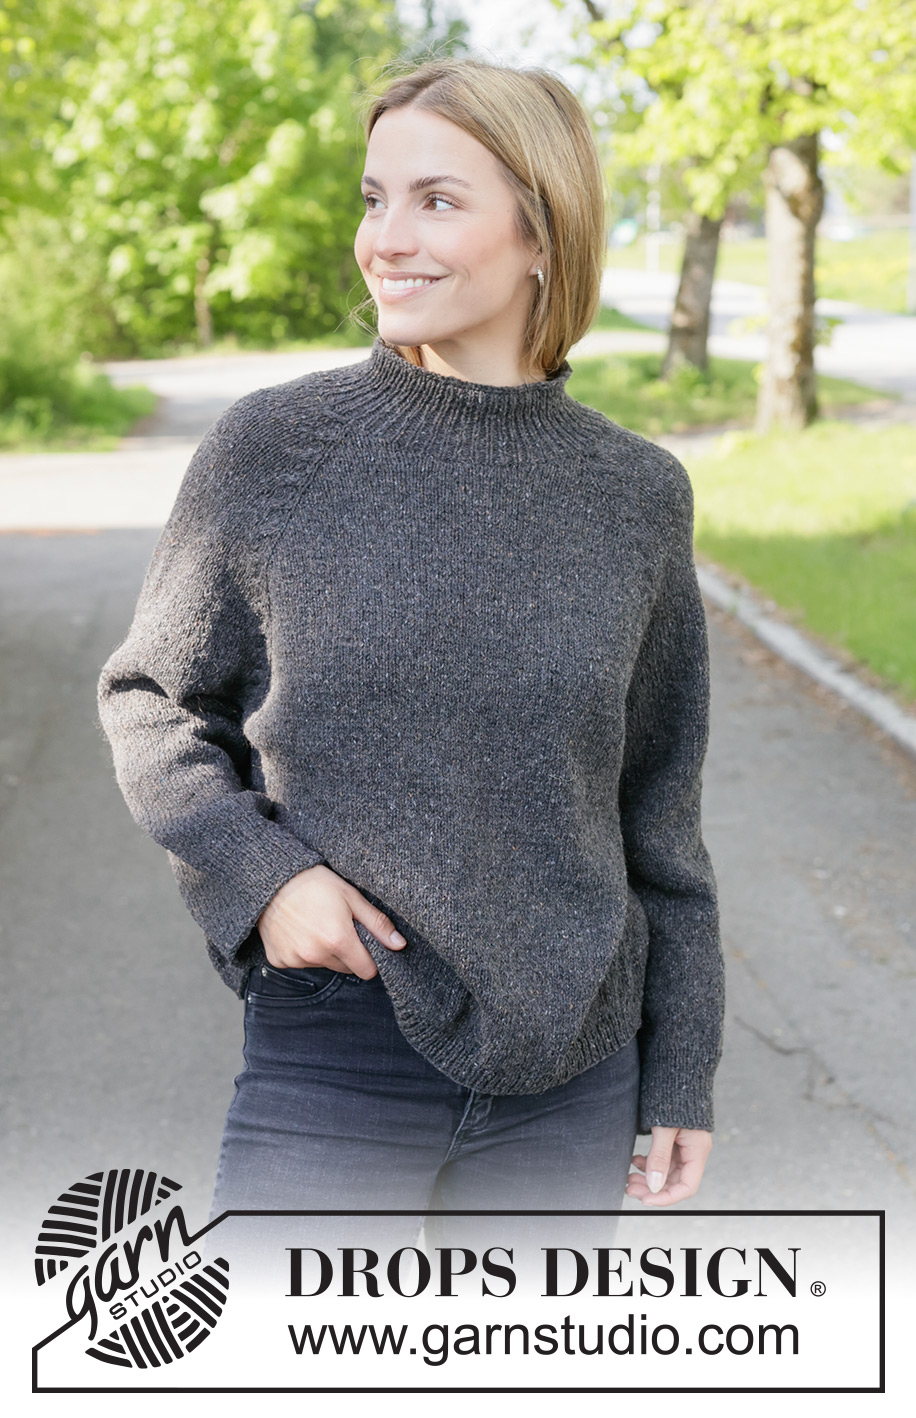
Knitted, oversized jumper in DROPS Soft Tweed. Piece is knitted top down with stocking stitch, raglan and cables. Size XS – XXXL.
DROPS 271-23 |
||||||||||||||||
|
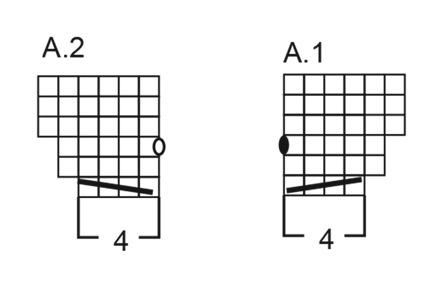
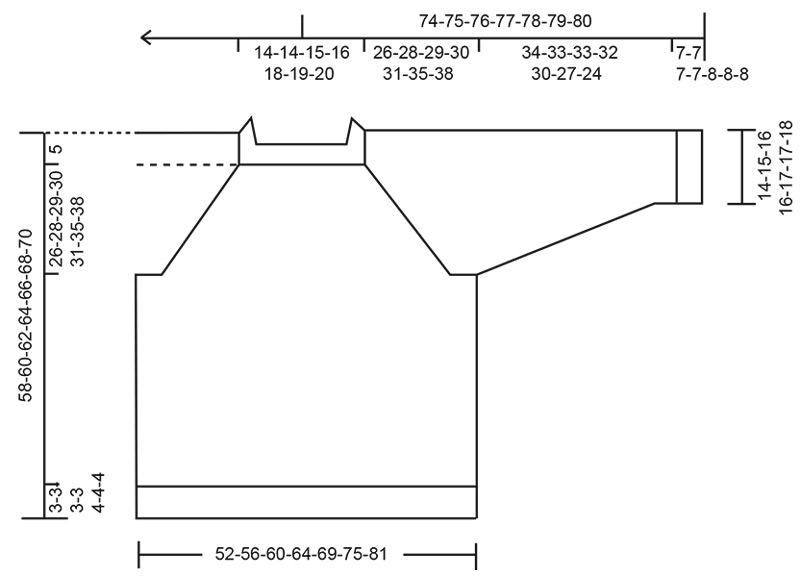
---------------------------------------------------------- EXPLANATION FOR THE PATTERN: ---------------------------------------------------------- RAGLAN – when working back and forth: Increase 1 stitch by making 1 yarn over from right side. On next row work yarn overs as explained below: BEFORE RAGLAN STITCH: Purl yarn overs in back loop of stitches to avoid holes. Work the new stitches in stocking stitch. AFTER RAGLAN STITCH: Slip yarn over off left needle and slip it back on left needle but the opposite way (insert left needle from behind when slipping it back on needle). Purl yarn overs in front loop of stitches to avoid holes. Work the new stitches in stocking stitch. RAGLAN – when working in the round: Increase 1 stitch by making 1 yarn over. On next round work yarn overs as explained below: BEFORE RAGLAN STITCH: Slip yarn over off left needle and put it back on left needle but the opposite way (insert left needle in from behind when slipping it back on needle). Knit yarn overs in front loop of stitches to avoid holes. Work the new stitches in stocking stitch. AFTER RAGLAN STITCH: Knit yarn overs in back loop of stitch - to avoid holes. Work the new stitches in stocking stitch. PATTERN: See diagrams A.1 and A.2. Read the diagram from right to left when working from right side and from left to right when working from wrong side. SLEEVE TIP: When picking up stitches mid under sleeve, there will be a small hole in the transition between stitches on body and sleeves. The holes can be closed by picking up the strand between two stitches - work this strand twisted together with the first stitch between body and sleeve to close the hole. DECREASE TIP: Decrease 1 stitch on each side of marker as follows: Work until 3 stitches remain before marker, knit 2 together, knit 2 (marker thread is between these 2 stitches) slip 1 stitch knitwise, knit 1, pass slipped stitch over stitch worked (= 2 stitches decreased). ---------------------------------------------------------- START THE PIECE HERE: ---------------------------------------------------------- JUMPER - SHORT OVERVIEW OF THE PIECE: In this pattern needles of different length have been used, begin with fitting length for number of stitches and switch as needed. Worked top down. Cast on stitches for neck and work back and forth on circular needle with increases in raglan – AT THE SAME TIME cast on stitches in each side of row until correct number of stitches and the neck is done. Then work the yoke in the round on circular needle top down. When yoke is done, divide piece for body and sleeves. Work body downwards in the round on circular needle while putting the sleeves aside. Then work sleeves downwards in the round on needle. Finish by picking up stitches around the neck and work a neck edge in the round. NECKLINE: Cast on 74-74-76-78-82-84-86 stitches on circular needle size 4 mm with DROPS Soft Tweed. Purl 1 row from wrong side. Insert 4 markers in piece while working next row, insert markers in a stitch, these stitches are called raglan stitches and increase is done for raglan on each side of raglan stitches. On front pieces and back piece increase by making 1 yarn over on every row from right side - read RAGLAN. On the sleeves work and increase according to diagram A.1/A.2. ROW 1 (= from right side): Knit 1, make 1 yarn over, knit 1 and insert 1 marker in this stitch (= raglan stitch), A.1 (=4 stitches), knit 12 (= sleeve), A.2 (= 4 stitches), knit 1 and insert 1 marker in this stitch (= raglan stitch), make 1 yarn over, knit 28-28-30-32-36-38-40 (= back piece), make 1 yarn over, knit 1 and insert 1 marker in this stitch (= raglan stitch), A.1, knit 12 (= sleeve), A.2, knit 1 and insert 1 marker in this stitch (= raglan stitch), make 1 yarn over, knit 1 and cast on 2 new stitches at the end of row = 84-84-86-88-92-94-96 stitches. ROW 2 (= from wrong side): Purl over all stitches (remember to work yarn overs as explained in RAGLAN and as explained in A.1/A.2), cast on 2 new stitches at the end of row = 86-86-88-90-94-96-98 stitches. ROW 3 (= from right side): Work in stocking stitch and A.1/A.2 and increase for raglan on front pieces and back piece as before, cast on 2 new stitches at the end of row = 96-96-98-100-104-106-108 stitches. ROW 4 (= from wrong side): Purl over all stitches, cast on 2 new stitches at the end of row = 98-98-100-102-106-108-110 stitches. ROW 5 (= from right side): Work in stocking stitch and A.1/A.2 and increase for raglan on front pieces and back piece, there are no increases in A.1/A.2 on this row, cast on 2 new stitches at the end of row = 104-104-106-108-112-114-116 stitches. ROW 6 (= from wrong side): Purl over all stitches, cast on 2 new stitches at the end of row = 106-106-108-110-114-116-118 stitches. Remember to follow the knitting tension! 3 increases for raglan have been done on front pieces and back piece, 2 times in each side of each sleeve and 6 new stitches have been cast on in each side for neck. Then work as follows from right side: Work in stocking stitch and increase for raglan as explained above (sleeves work first row in A.1, knit 16, first row in A.2), cast on 14-14-16-18-22-24-26 new stitches at the end of row = 128-128-132-136-144-148-152 stitches. Continue working yoke in the round over all stitches as explained below. Work 1 round in stocking stitch over all stitches. There are now 36-36-38-40-44-46-48 stitches on back piece / front piece, 26 stitches on each sleeve and 1 stitch in each raglan line. Continue in stocking stitch and increase for raglan on each side of raglan stitches. On sleeves increase with A.1 at beginning of sleeve and A.2 at the end of sleeve (= 2 stitches increased in each side every 6th round). On front pieces and back piece increase with yarn overs on every other round. Continue until 20-24-26-26-28-28-30 increases have been done on sleeves (including increases when the neck was formed), A.1 and A.2 have been worked 10-12-13-13-14-14-15 times in total vertically. Increases on sleeves are now done, cables are done, continue in stocking stitch. Continue increases on front piece and back piece as before until 36-39-41-42-44-49-53 increases have been done (including increases when the neck was formed) = 324-352-372-380-404-428-456 stitches on needle. There are now 60-68-72-72-76-76-80 stitches on each sleeve, 100-106-112-116-124-136-146 stitches on back piece/front piece and 4 raglan stitches. Now divide yoke for body and sleeves. DIVIDING FOR BODY AND SLEEVES: AT THE SAME TIME as next round is worked divide yoke for body and sleeves as follows: Work to and with the first raglan stitch (= belongs to front piece), slip the next 60-68-72-72-76-76-80 stitches on a thread for sleeve, cast on 8-10-12-16-18-20-22 new stitches on needle (= in the side mid under sleeve), work 102-108-114-118-126-138-148 stitches in stocking stitch (= back piece), slip the next 60-68-72-72-76-76-80 stitches on a thread for sleeve, cast on 8-10-12-16-18-20-22 new stitches on needle (= in the side mid under sleeve), and work the last stitches from front piece (= 102-108-114-118-126-138-148 stitches on front piece). Finish body and sleeves separately. BODY: = 220-236-252-268-288-316-340 stitches. Work in stocking stitch until piece measures 50-52-54-56-57-59-61 cm from cast-on edge mid back. Switch to circular needle size 3 mm, work rib (= knit 1 and purl 1) while AT THE SAME TIME increasing 24-24-26-28-28-30-32-34 stitches evenly on 1st round = 244-260-278-296-318-348-374 stitches. When rib measures 3-3-3-3-4-4-4 cm, cast off with knit and purl over purl. Jumper measures approx. 53-55-57-59-61-63-65 cm from mid back and 58-60-62-64-66-68-70 cm from the shoulder. SLEEVES: Slip 60-68-72-72-76-76-80 sleeve stitches from one thread on to circular needle size 4 mm and pick in addition up 1 stitch in each of the 8-10-12-16-18-20-22 stitches cast on under sleeve– read SLEEVE TIP = 68-78-84-88-94-96-102 stitches. Insert 1 marker in the middle of the 8-10-12-16-18-20-22 new stitches under sleeve - round begins at the marker thread. Work stocking stitch in the round on needle - AT THE SAME TIME on first round after division decrease mid under sleeve – read DECREASE TIP and decrease as follows: Decrease 2 stitches every 3-3-2½-2½-2-2-1½ cm 5-7-9-10-12-12-14 times in total = 58-64-66-68-70-72-74 stitches. Work until sleeve measures 34-33-33-32-30-27-24 cm from division. Switch to double pointed needles size 3 mm and work rib (= knit 1 and purl 1) while AT THE SAME TIME increasing 12-12-14-14-14-14-14 stitches evenly on 1st round = 70-76-80-82-84-86-88 stitches. When rib measures 7-7-7-7-8-8-8 cm, cast off with knit over knit and purl over purl. Sleeve measures approx. 41-40-40-39-38-35-32 cm from division. NECK EDGE: Use circular needle size 3 mm. Begin from right side at right shoulder at the back, pick up approx. 100 to 124 stitches around the neck, number of stitches must be divisible by 2. Work rib in the round (= knit 1 and purl 1) for 8-8-8-8-9-9-9 cm. Knit 1 round and loosely cast off by knitting. |
||||||||||||||||
Diagram explanations |
||||||||||||||||
|
||||||||||||||||
 |
||||||||||||||||
 |
||||||||||||||||
Have you finished this pattern?Tag your pictures with #dropspattern #eveningsecretsweater or submit them to the #dropsfan gallery. Do you need help with this pattern?You'll find 23 tutorial videos, a Comments/Questions area and more by visiting the pattern on garnstudio.com. © 1982-2026 DROPS Design A/S. We reserve all rights. This document, including all its sub-sections, has copyrights. Read more about what you can do with our patterns at the bottom of each pattern on our site. |
||||||||||||||||






With over 40 years in knitting and crochet design, DROPS Design offers one of the most extensive collections of free patterns on the internet - translated to 17 languages. As of today we count 333 catalogues and 12532 patterns translated into English (UK/cm). 12532
We work hard to bring you the best knitting and crochet have to offer, inspiration and advice as well as great quality yarns at incredible prices! Would you like to use our patterns for other than personal use? You can read what you are allowed to do in the Copyright text at the bottom of all our patterns. Happy crafting!
Post a comment to pattern DROPS 271-23
We would love to hear what you have to say about this pattern!
If you want to leave a question, please make sure you select the correct category in the form below, to speed up the answering process. Required fields are marked *.