
Popular categories
Looking for a yarn?

































Comments / Questions (12)
 Dominique wrote:
Bonjour pouvez vous expliquer " monter 10 mailles milieu sous la manche"? 10 mailles à partir d'où ? Comment les répartir dans les 61 en attente ? Merci pour vos conseils
25.10.2026 - 16:50DROPS Design answered:
Bonjour Dominique, ces 10 mailles vont venir remplacer les 61 mailles des manches que vous avez mises en attente, retrouvez cette étape à partir de la photo 9 ici, ou bien à partir du time code 07:00 dans cette vidéo. Bon tricot!
26.10.2026 - 10:53
 Melanie wrote:
Toll, dass Ihr nun eine Alternative für die Halsblende in dieses Muster eingebaut habt! Vielen Dank, dass Ihr so flott auf meine Anmerkung reagiert habt. Für meinen Pulli ist es zu spät, aber andere können nun selbst entscheiden!
25.10.2026 - 09:55DROPS Design answered:
Liebe Melanie, vielen Dank für Ihre freundliche und aufmerksame Rückmeldung zur Halsblende! Bedauerlich, dass es bei Ihrem Pullover nun nicht so geworden ist, wie Sie es sich erhofft haben. Aber wenn Ihnen die abgesetzte Halsblende so gut gefällt und Sie Lust und Energie haben, einen neuen Versuch zu starten :-), dann schauen Sie sich gerne die neuesten Anleitungen an, hier finden Sie einige Pullover mit sehr dekorativer Halsblenden-Borte. Viel Spaß beim Stricken!
25.10.2026 - 12:43
Melanie wrote:
Die Halsblende im Modellfoto muss im Nachhinein angestrickt worden sein, weshalb es eine schöne "Kante" zwischen Halsblende und Rumpf gibt und weshalb die rechten Maschen im Foto nicht auf dem Kopf stehen. Ich habe mir die Anleitung wegen der schönen Halsblende ausgesucht und finde es nicht so toll, dass Anleitung und Foto nicht übereinstimmen.
18.10.2026 - 13:15
AGNES wrote:
Bonjour, pourriez-vous intégrer des rangs raccourcis pour remonter le dos dans ce modèle et vos prochains patrons ?
03.02.2026 - 22:39DROPS Design answered:
Bonjour Agnès, nous ne sommes malheureusement pas en mesure de pouvoir adapter chacun de nos modèles à chaque demande, vous pouvez toutefois vous inspirer d'un modèle similaire avec rangs raccourcis. Merci pour votre compréhension. Bon tricot!
04.02.2026 - 17:27
Brigitte wrote:
Merci mille fois pour votre réponse Claire et précise, j’avais procédé comme vous l’indiquez, et me suis arrêtée d’augmenter une fois le nombre de mailles atteint. Merci encore
03.02.2026 - 13:47
Brigitte wrote:
Bonjour, je tricote la taille L et ne comprends pas comment compter les augmentations pour la manche marteau. Par rang ou par augmentations? Vous indiquez d’augmenter 14 fois, mais 14 fois la série de 6 rangs ? Ou 14 augmentations au total?par série de 6 rangs on augmente 12 fois c’est bien ça?= + 16 mailles (rg1: 4m; rg3: +4m; rang 6:+ 8m)? Le total de mailles (72) augmentées n’est pas juste 72/16=4,5.. merci d’avance pour votre aide. Cordialement. Brigitte France
02.02.2026 - 12:11DROPS Design answered:
Bonjour Brigitte, lorsque vous augmentez pour les épaules/manches marteau, vous n'augmentez que pour le devant et le dos, soit 4 augmentations aux tours 1 et 3 et 8 augmentations (on augmente 2 m au début + 2 m à la fin du dos/devant) au tour 5. Vous tricotez 28 tours d'augmentations au total, vous allez ainsi tricoter 4 fois les tours 1 à 6 (4 x 16 augm par série de 6 tours) + 1 x les tours 1 à 4 (2 x 4 augm par tour) = 100+(4x16)+(1x4)=172 mailles. Bon tricot!
02.02.2026 - 17:13
 Paula wrote:
Inmiddels bij meerderingen voor de pas. Brei tot 2 steken voor de eerste markeerder, meerder 1 steek richting rechts, 2 recht, verplaats de markeerder naar de rechter naald, meerder 1 steek richting links, brei recht tot de volgende markeerder, meerder 1 steek richting rechts, verplaats de markeerder naar de rechter naald, 2 recht, meerder 1 steek richting links. Daarna moet dit nog een keer bij de andere mouw. Echter vroeg ik me af ik het dan in spiegelbeeld moet doen of juist exact hetzelfde?
26.11.2025 - 13:39
Paula wrote:
Hallo, inmiddels ben ik bij de mouwmeerderingen. Er staat de volgende zin in de tekst: :Meerder zo iedere 2e naald'. Bedoelt u dat ik eerst een hele naald recht brei, daarna ga meerderen en dan weer recht etc.?
22.11.2025 - 18:33DROPS Design answered:
Dag Paula,
Met iedere 2e naald wordt bedoeld de ene naald wel en de andere naald niet. Dus om de naald.
24.11.2025 - 21:00
Paula wrote:
Beste meneer/mevrouw, wat een fantastisch patroon. Ik loop vast op dit stuk bij meerderingen voor de zadelschouders: brei van *-* 1 keer, brei recht tot het EINDE VAN DE NAALD (= 4 gemeerderde steken). ik hoop dat u mij kunt uitleggen wat hiermee bedoelt wordt. mvg
11.11.2025 - 19:08DROPS Design answered:
Dag Paula,
Wat tussen de sterretjes staat brei je nog een keer en daarna brei je recht tot het einde van de naald. Je hebt dan 4 steken gemeerderd in totaal over die naald.
12.11.2025 - 10:38
 Marina Cicala wrote:
SUGGERIMENTO PER GLI AUMENTI-2: AUMENTARE 2 MAGLIE VERSO SINISTRA: AUMENTARE 2 MAGLIE VERSO DESTRA non mi trovo su questi aumenti, possibile che ci sia un errore?
04.11.2025 - 20:49DROPS Design answered:
Hi Marina, you increase new stitches like in the video HERE but you knit each new stitch twice, first through the back loop without slipping the stitch off the left needle, then through the front loop of the same stitch (2 increased stitches). Happy knitting!
27.11.2025 - 22:24
|
|
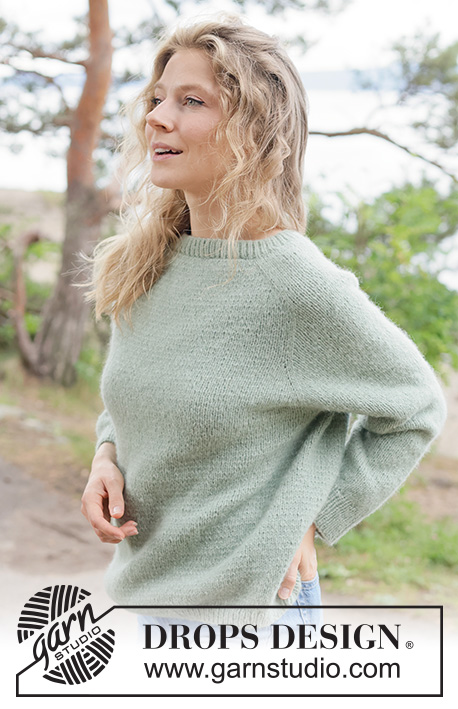
Sage Whisper Sweater#sagewhispersweater |
|
 |
 |
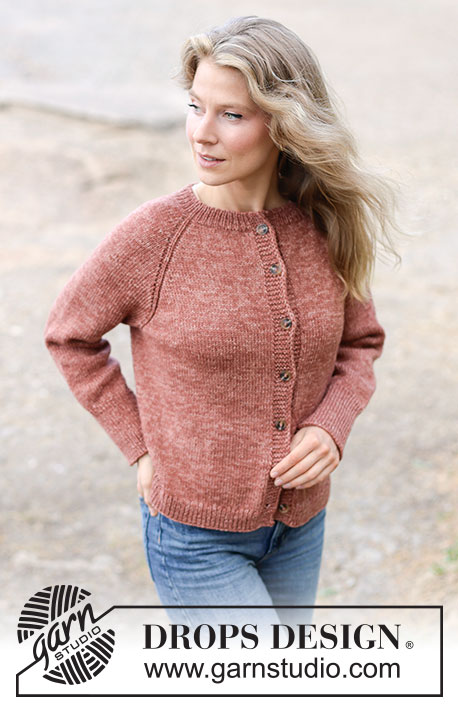
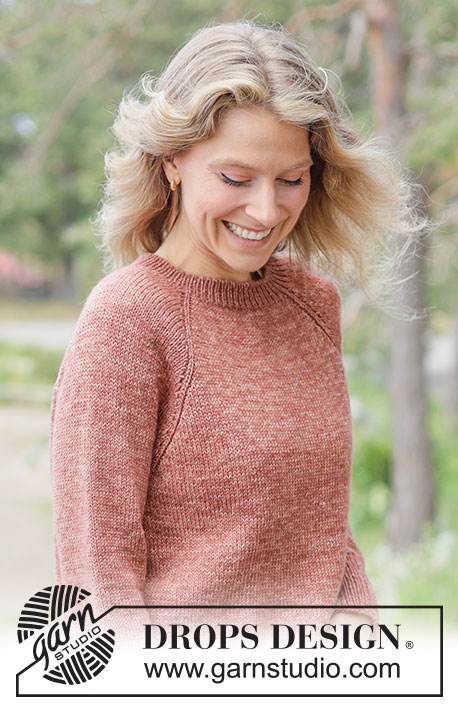
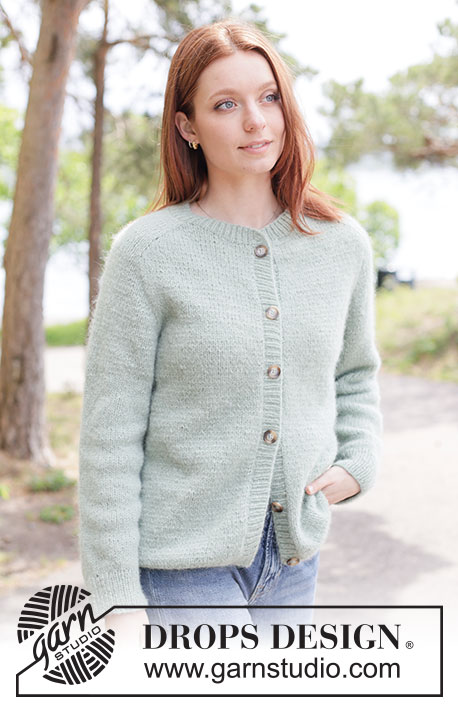
Knitted jumper in DROPS Air. The piece is worked top down in stocking stitch with saddle shoulders. Sizes XS - XXXL.
DROPS 263-16 |
|
|
------------------------------------------------------- EXPLANATIONS FOR THE PATTERN: ------------------------------------------------------- INCREASE TIP-1: INCREASE ONE STITCH TOWARDS THE LEFT: Use the left needle to pick up the front strand between 2 stitches from the previous row and knit through the back loop. INCREASE ONE STITCH TOWARDS THE RIGHT: Use the left needle to pick up the back strand between 2 stitches from the previous row and knit through the front loop. INCREASE TIP-2: INCREASE TWO STITCHES TOWARDS THE LEFT: Use the left needle to pick up the front strand between 2 stitches from the previous row and knit through the back loop without slipping the stitch off the left needle. Knit 1 more stitch through the front loop of the same stitch (2 increased stitches). INCREASE TWO STITCHES TOWARDS THE RIGHT: Use the left needle to pick up the back strand between 2 stitches from the previous row and knit through the front loop without slipping the stitch off the left needle. Knit 1 more stitch through the back loop of the same stitch (2 increased stitches). SLEEVE TIP: When knitting up stitches under the sleeve, you can get a small hole in the transition between stitches on the body and sleeve. This hole can be closed by picking up the strand between 2 stitches and working this strand twisted together with the first stitch between body and sleeve. DECREASE TIP: Decrease 1 stitch on each side of the marker thread as follows: Work until there are 3 stitches left before the marker thread, knit 2 together, knit 2 (marker thread sits between these 2 stitches) slip 1 stitch knit-wise, knit 1 and pass the slipped stitch over the knitted stitch (= 2 stitches decreased). ------------------------------------------------------- START THE PIECE HERE: ------------------------------------------------------- JUMPER – SHORT OVERVIEW OF THE PIECE: The pattern uses both long and short needles; start with the length which fits the number of stitches and change when necessary. The yoke and / or the neck are worked in the round with circular needle, top down and from mid-back. When the yoke is finished, it is divided for the body and sleeves and the body continued in the round, while the sleeves wait. The sleeves are worked top down, in the round. Finally stitches can be picked up around the neck and a neck edge is worked. NECK: If the pattern is worked starting with the neckline, follow the instructions below; if you prefer to add the neckline at the end, begin with the YOKE as described in the next section. Cast on 88-92-96-96-100-104-108 stitches with circular needle size 4 mm and DROPS Air. Work rib in the round (knit 1, purl 1) for 3-3-3-3-3½-3½-3½ cm. Insert 1 marker at the beginning of the round (mid-back). Knit 1 round and increase 4 stitches evenly on the round = 92-96-100-100-104-108-112 stitches. YOKE: If you are working the version with the neckline worked last, cast on 92-96-100-100-104-108-112 stitches on circular needle size 5 using DROPS Air. Insert 4 markers which will be used when increasing for the saddle shoulders. Use circular needle size 5 mm and work as follows: Knit 14-15-16-16-17-18-19 (= approx. half the back piece), insert marker-1 here. Knit 19 (= shoulder-stitches), insert marker-2 here. Knit 27-29-31-31-33-35-37 (= front piece), insert marker-3 here. Knit 19 (= shoulder-stitches), insert marker-4 here. Knit the last 13-14-15-15-16-17-18 stitches (= approx. half the back piece). INCREASES FOR SADDLE SHOULDERS: ROUND 1: * Knit to the next marker, increase 1 stitch towards the right – read INCREASE TIP-1, move the marker onto the right needle, knit 19, move the marker onto the right needle, increase 1 stitch towards the left *, work from *-* 1 more time, knit to end of row (= 4 increased stitches). ROUND 2: Knit. ROUND 3: Work ROUND 1 (= 4 increased stitches). ROUND 4: Knit. ROUND 5: * Knit to the next marker, increase 2 stitches towards the right – read INCREASE TIP-2, move the marker onto the right needle, knit 19, move the marker onto the right needle, increase 2 stitches towards the left *, work from *-* 1 more time, knit to end of row (= 8 increased stitches). ROUND 6: Knit. Work ROUNDS 1 to 6 until you have worked 24-26-26-28-28-26-26 rounds (a total of 12-13-13-14-14-13-13 increases in height and 64-68-68-72-72-68-68 increased stitches) = 156-164-168-172-176-176-180 stitches. Remember to maintain the knitting tension. There are 19 stitches on each shoulder and 59-63-65-67-69-69-71 stitches on the front and back pieces. Now increase for the sleeves as follows. SLEEVE-INCREASES: Continue with stocking stitch. AT THE SAME TIME increase 4 stitches on the round as follows: Increase 1 stitch towards the left AFTER markers 1 and 3, and 1 stitch towards the right BEFORE markers 2 and 4 – remember INCREASE TIP-1. You are only increasing on the sleeves and the stitch count on the body remains the same. Increase like this every 2nd round a total of 8-9-9-8-7-4-1 times = 188-200-204-204-204-192-184 stitches. YOKE-INCREASES: Continue with stocking stitch. AT THE SAME TIME increase 8 stitches on the round, increasing before and after each marker as follows - remember INCREASE TIP-1: * Work until there are 2 stitches before the first marker, increase 1 stitch towards the right, knit 2, move the marker onto the right needle, increase 1 stitch towards the left, knit to the next marker, increase 1 stitch towards the right, move the marker onto the right needle, knit 2, increase 1 stitch towards the left *, work from *-* one more time, knit to end of round. Increase like this every 2nd round a total of 9-10-11-13-16-20-24 times = 260-280-292-308-332-352-376 stitches. The piece measures approx. 21-23-24-25-27-28-29 cm from outermost on the shoulder (= 6 cm saddle shoulder depth + 15-17-18-19-21-22-23 cm sleeve-increases). Now divide for the body and sleeves. DIVIDE FOR BODY AND SLEEVES: Knit 39-42-44-47-51-55-60 (= approx. half the back piece), place the next 53-57-59-61-65-67-69 stitches on a thread/stitch holder for the sleeve, cast on 4-6-8-10-10-12-12 stitches (mid-under the sleeve), knit 77-83-87-93-101-109-119 (= front piece), place the next 53-57-59-61-65-67-69 stitches on a thread/stitch holder for the sleeve, cast on 4-6-8-10-10-12-12 stitches (mid-under the sleeve), knit the last 38-41-43-46-50-54-59 stitches (= approx. half the back piece). The body and sleeves are finished separately. BODY: = 162-178-190-206-222-242-262 stitches. Insert 1 marker in the middle of the 4-6-8-10-10-12-12 cast-on stitches under one sleeve. Knit to the marker. The round starts here. Continue stocking stitch in the round for a further 32-32-33-34-33-34-35 cm. Change to circular needle size 4 mm. Work rib (knit 1, purl 1), AT THE SAME TIME increase 20-20-22-26-26-28-30 stitches evenly on the first round = 182-198-212-232-248-270-292 stitches. When the rib measures 3-3-3-3-4-4-4 cm, cast off with rib. The jumper measures approx. 56-58-60-62-64-66-68 cm from outermost on the shoulder. SLEEVES: Place the 53-57-59-61-65-67-69 sleeve-stitches from one thread/stitch holder on circular needle size 5 mm and knit up 1 stitch in each of the 4-6-8-10-10-12-12 stitches cast on under the sleeve – read SLEEVE TIP = 57-63-67-71-75-79-81 stitches. Insert a marker-thread in the middle of the 4-6-8-10-10-12-12 stitches under the sleeve- the round starts by the marker-thread. Work stocking stitch in the round. AT THE SAME TIME, when the sleeve measures 1 cm from the division, decrease mid-under the sleeve – read DECREASE TIP as follows: Decrease 2 stitches every 6-4½-4-3½-3-2½-2½ cm a total of 6-8-9-10-11-12-12 times = 45-47-49-51-53-55-57 stitches. Continue working until the sleeve measures 36-34-34-33-31-31-31 cm from the division. Change to double pointed needles size 4 mm. Work rib (knit 1, purl 1), AT THE SAME TIME increase 7-7-7-7-7-7-7 stitches evenly on the first round = 52-54-56-58-60-62-64 stitches. When the rib measures 6-6-6-6-6-6-6 cm, cast off with rib. The sleeve measures approx. 42-40-40-39-37-37-37 cm from the division. NECK EDGE: If you are working a neck edge at the end, work it along the neck as follows: Use circular needle size 4 mm. Start in the mid back and pick up approx. 92-96-100-100-104-108-112 stitches around the neck; the number of stitches must be divisible by 2. Work in rib (=knit 1, purl 1) for 3-3-3-3-3½-3½-3½ cm. Cast off loosely, with knit over knit and purl over purl. |
|
 |
|
Have you finished this pattern?Tag your pictures with #dropspattern #sagewhispersweater or submit them to the #dropsfan gallery. Do you need help with this pattern?You'll find 20 tutorial videos, a Comments/Questions area and more by visiting the pattern on garnstudio.com. © 1982-2026 DROPS Design A/S. We reserve all rights. This document, including all its sub-sections, has copyrights. Read more about what you can do with our patterns at the bottom of each pattern on our site. |
|






With over 40 years in knitting and crochet design, DROPS Design offers one of the most extensive collections of free patterns on the internet - translated to 17 languages. As of today we count 333 catalogues and 12532 patterns translated into English (UK/cm). 12532
We work hard to bring you the best knitting and crochet have to offer, inspiration and advice as well as great quality yarns at incredible prices! Would you like to use our patterns for other than personal use? You can read what you are allowed to do in the Copyright text at the bottom of all our patterns. Happy crafting!
Post a comment to pattern DROPS 263-16
We would love to hear what you have to say about this pattern!
If you want to leave a question, please make sure you select the correct category in the form below, to speed up the answering process. Required fields are marked *.