
Popular categories
Looking for a yarn?


Comments / Questions (81)
![]() Fasujevic Hélène wrote:
Fasujevic Hélène wrote:
J'adore déjà la couleur, le modèle me paraît léger et printanier
08.02.2023 - 10:02
![]() Fasujevic Hélène wrote:
Fasujevic Hélène wrote:
Merci, pour tous vos jolis modèles que vous faites partager. Pour le moment, je me concentré sur la layette. mais déjà de nouveaux modèles me tentent
08.02.2023 - 10:00
![]() Tracey St Clair wrote:
Tracey St Clair wrote:
Is the pattern correct for increase tip wrong side? As right side is left leaning after marker and right leaning before marker wouldn’t the wrong side be opposite? So right leaning after marker and left leaning before marker to keep increase leans in the same direction on the right side. The pattern reads opposite
08.02.2023 - 04:49DROPS Design answered:
Dear Mrs St Clair, sure it is correct, just note that the stitches should be towards left/right seen from RS - see also this video, first row from wrong side is at approx. 01:50. Happy knitting!
08.02.2023 - 09:19
![]() Bente Solskinn Vollstad wrote:
Bente Solskinn Vollstad wrote:
Har det skjedd en forskyvelse på omg 5 i diagram A9?
07.02.2023 - 23:23DROPS Design answered:
Hej Bente, den skal forskydes, så indtagningen skal være mellem de 2 andre udtagninger :)
08.02.2023 - 07:25
![]() Hanne Elena Rørbech wrote:
Hanne Elena Rørbech wrote:
Skal der på alle pinde i starten strikkes 3 masker ret før mønsteret i opskriften begynder ?altså på ret pindene og selvfølgelig vrang på vrangpindene ?
07.02.2023 - 15:16DROPS Design answered:
Hej Hanne, ja de yderste 3 masker strikkes i glatstrik. Se de 3 videoer vi har lavet til Europæisk skulder :)
08.02.2023 - 07:22
![]() Anne Christensen wrote:
Anne Christensen wrote:
Mangler der mon ikke et omslag i diagram A9 række 7?
05.02.2023 - 10:58DROPS Design answered:
Hei Anne. Jo, ser slik ut. Det skal vi få ordnet, takk for at du gjorde oss oppmerksom på det. mvh DROPS Design
06.02.2023 - 11:26
![]() Tracey wrote:
Tracey wrote:
I’ve cast on 35 stitches. Row 2-After marker 1, make 1 then work schematic A1, A2 over 24 stitches then A3. A3 is one purl stitch only. (Total 25 stitches). I’m left with 4 stitches inside the left market. What do I do with these? Thankyou
05.02.2023 - 02:30DROPS Design answered:
Dear Tracey, in row 2 you have: 3 stitches in stocking stitch, marker 1, make 1, A.1 (= 4 stitches), A.2 over 24 stitches, A.3 (= 1 stitch), make 1, marker 2, 3 stitches in stocking stitch. That is: 35 stitches + 2 increases. Happy knitting!
05.02.2023 - 23:29
![]() Ellen wrote:
Ellen wrote:
Summer breeze
22.01.2023 - 22:00
![]() Alice wrote:
Alice wrote:
Sommerbris
22.01.2023 - 20:19
![]() Alice wrote:
Alice wrote:
Sommerbris
22.01.2023 - 20:17
|
||||||||||||||||||||||||||||
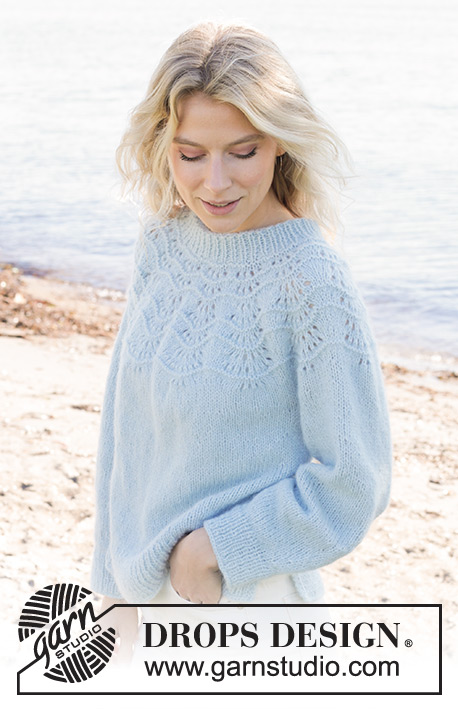
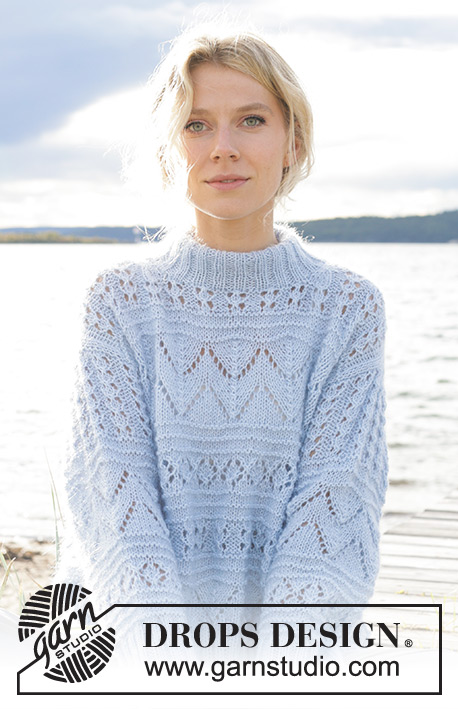
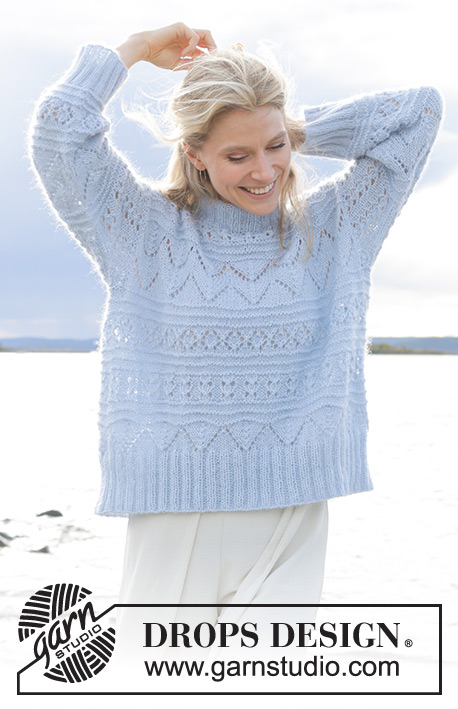
Blue Porcelain#blueporcelainsweater |
||||||||||||||||||||||||||||
 |
 |
|||||||||||||||||||||||||||
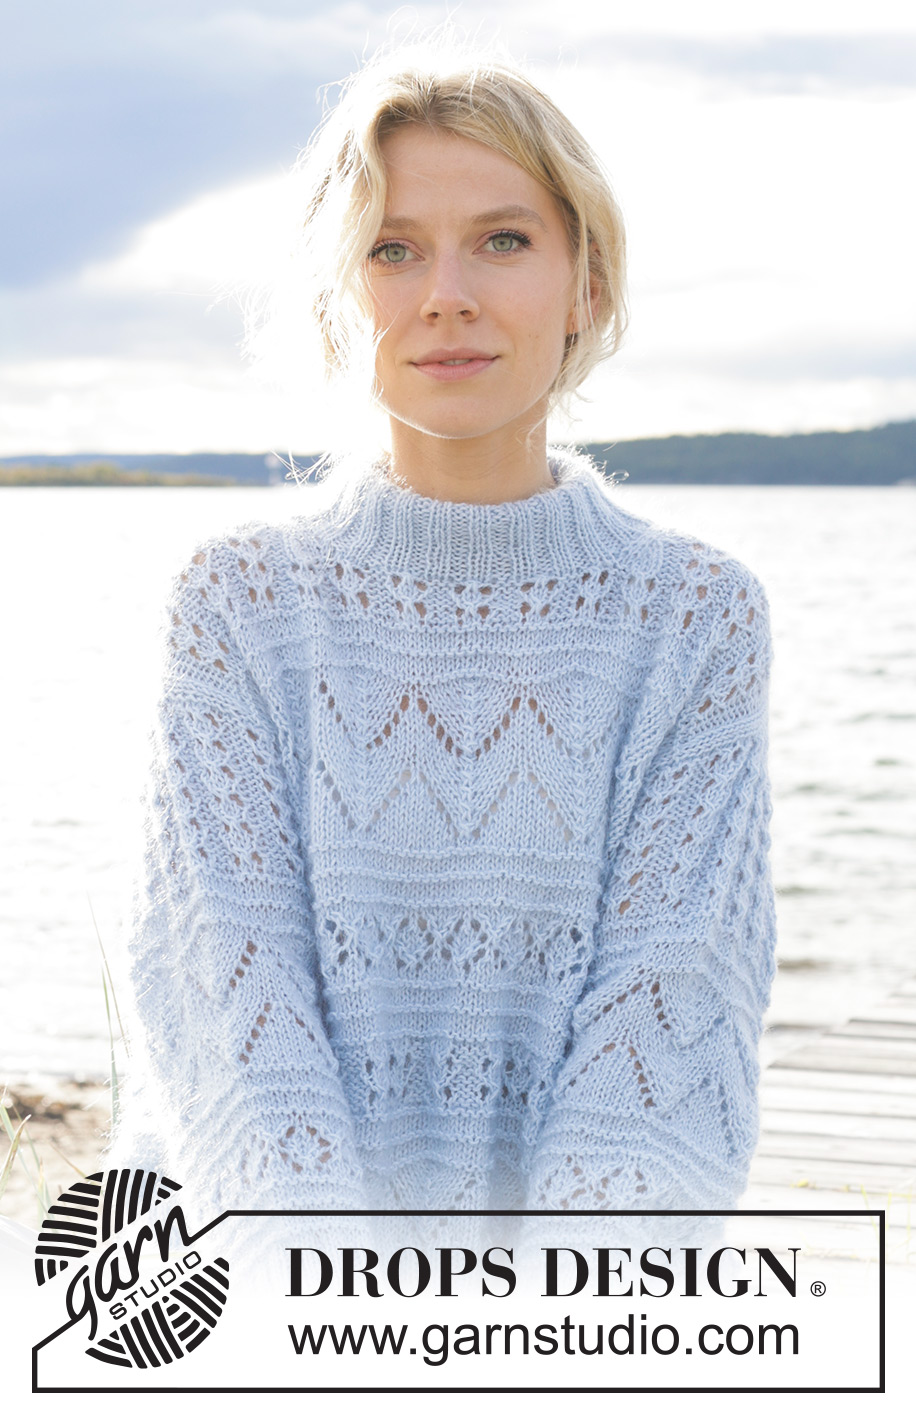
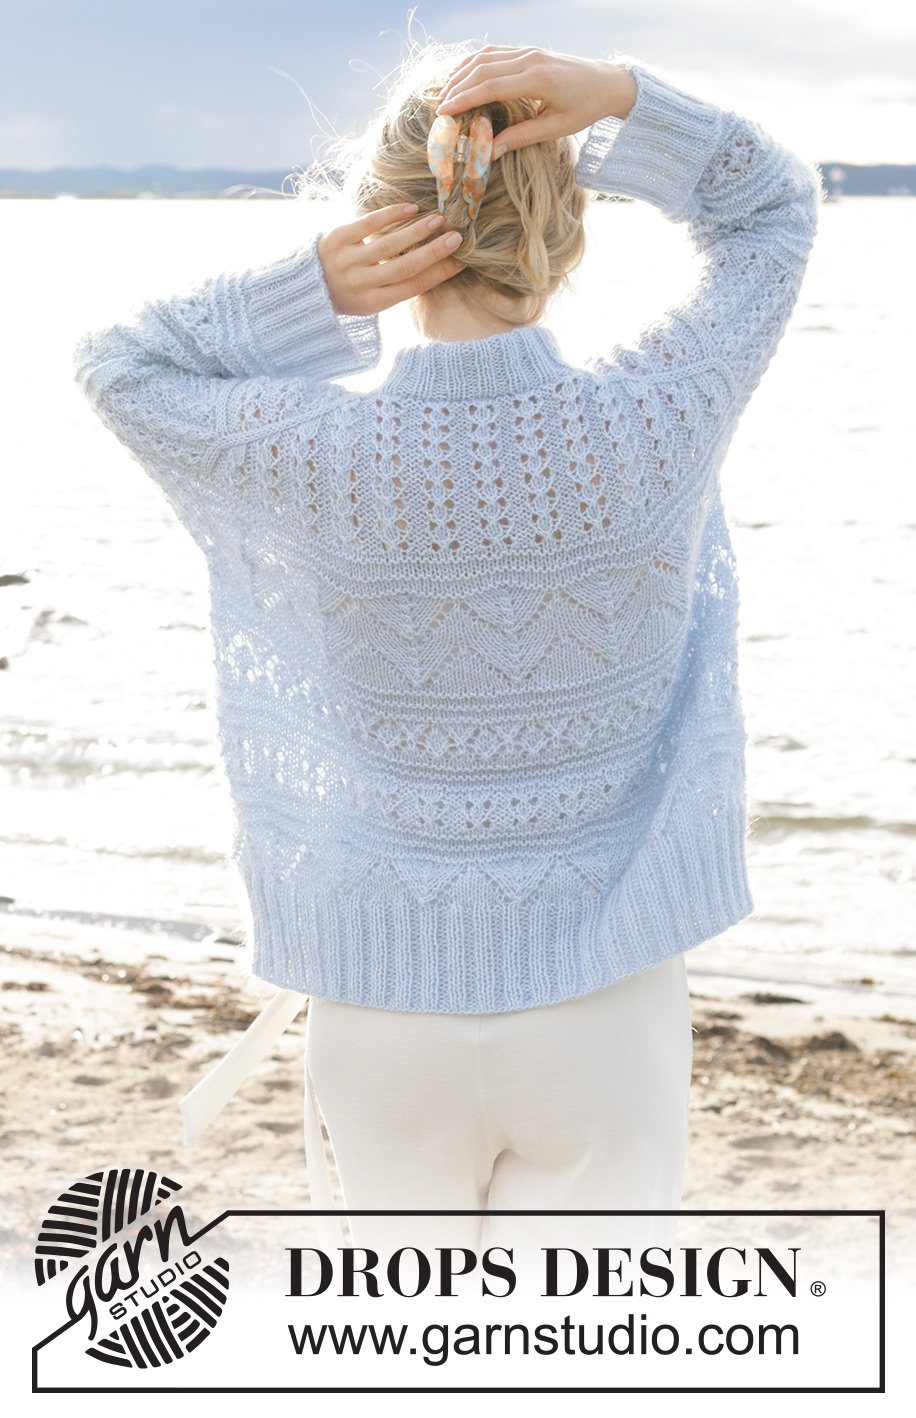
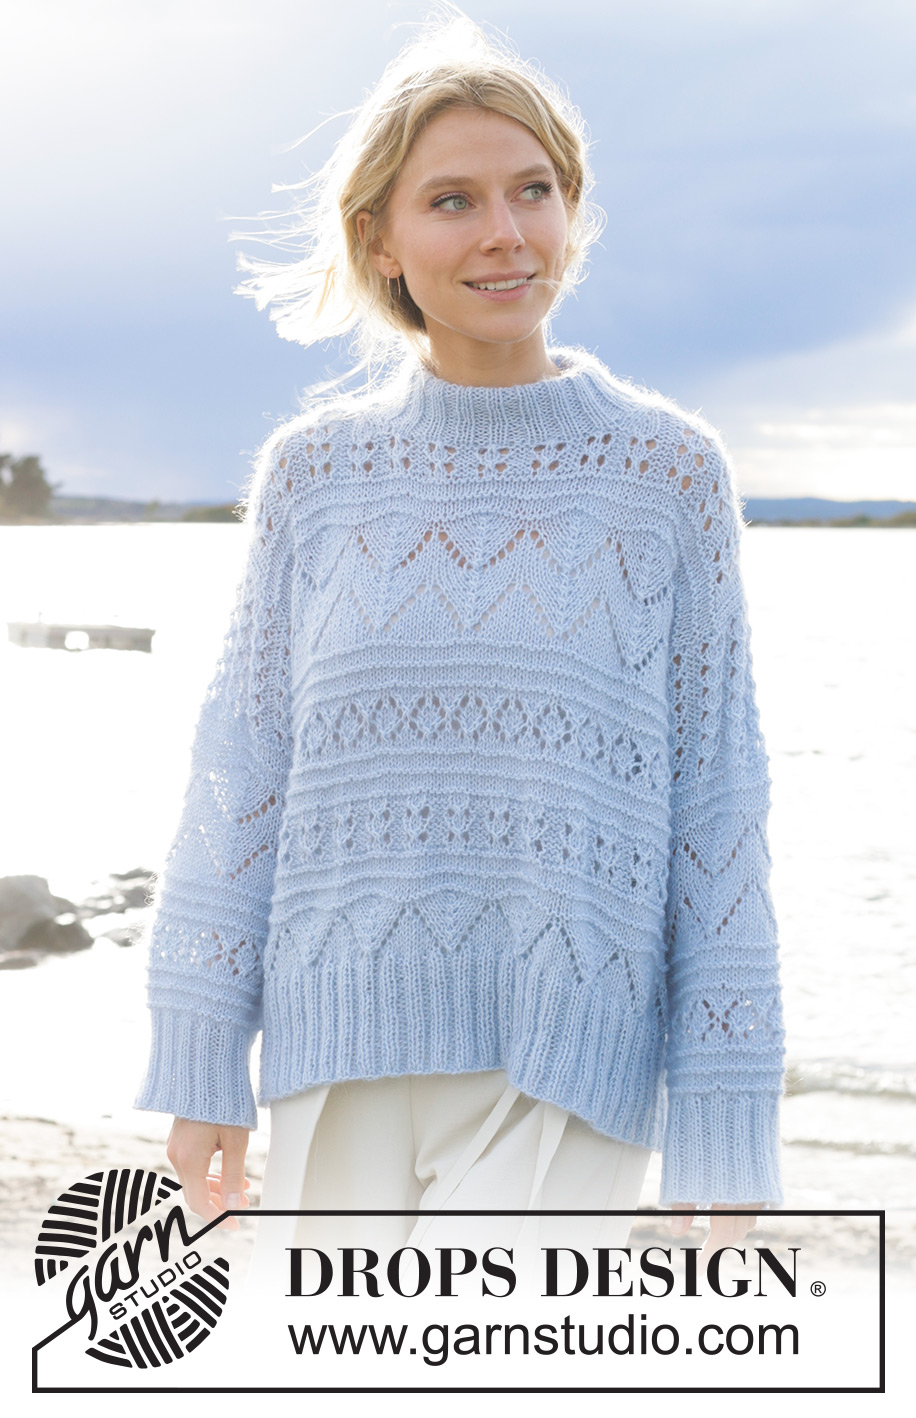
Knitted jumper in DROPS BabyMerino and DROPS Kid-Silk. The piece is worked top down with European/diagonal shoulders and lace pattern. Sizes S - XXXL.
DROPS 241-1 |
||||||||||||||||||||||||||||
|
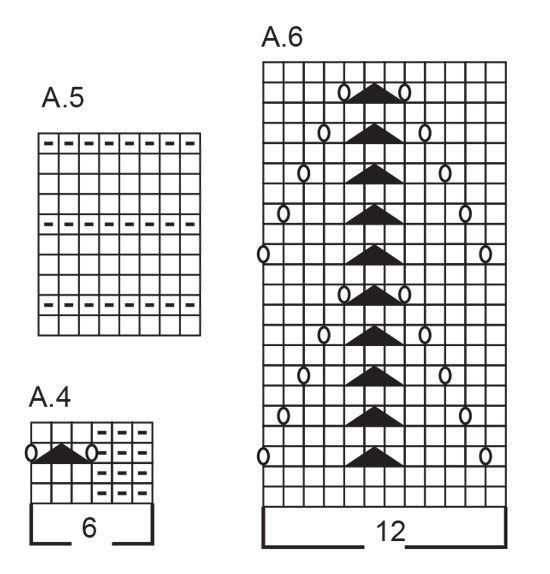
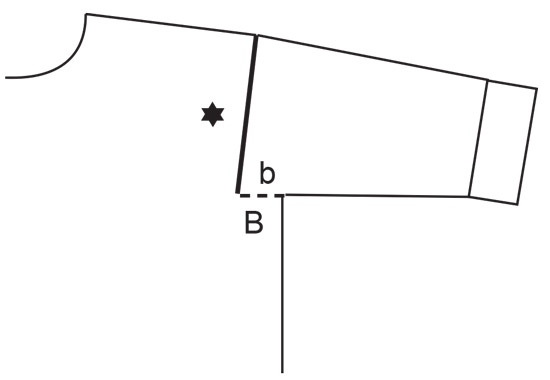
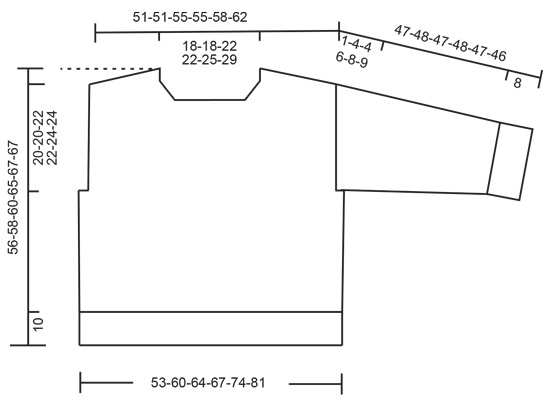
------------------------------------------------------- EXPLANATIONS FOR THE PATTERN: ------------------------------------------------------- INCREASE TIP FROM THE RIGHT SIDE: Increase towards the left AFTER MARKER: Use left needle to pick up yarn between 2 stitches from row below, pick up yarn from the front and knit in the stitch loop that is on the back of the needle. Increase towards the right BEFORE MARKER: Use left needle to pick up yarn between 2 stitches from row below, pick up yarn from the back and knit in the stitch loop that is on the front side of the needle. INCREASE TIP FROM THE WRONG SIDE: Increase towards the right AFTER MARKER: Use left needle to pick up yarn between 2 stitches from row below, pick up yarn from the back and purl in the stitch loop that is on the front side of the needle. Increase towards the left BEFORE MARKER: Use left needle to pick up yarn between 2 stitches from row below, pick up yarn from the front and purl in the stitch loop that is on the back side of the needle. DECREASE TIP (for sleeves): Decrease 1 stitch on either side of the marker-thread mid under sleeve as follows: Work until there are 3 stitches left before the marker-thread, knit 2 together, knit 2 (marker-thread sits between these 2 stitches), slip 1 stitch as if to knit, knit 1 and pass the slipped stitch over the knitted stitch. PATTERN SLEEVE: NOTE! When working A.9 and A.6, the marker-thread on top of the sleeve matches the middle stitch in the repeat of the pattern. Work A.4 for 10 cm. Work A.5 Work A.6. Work A.5 Work A.9. Work A.5 Work stocking stitch until the sleeve measures 39-40-39-40-39-38 cm. ------------------------------------------------------- START THE PIECE HERE: ------------------------------------------------------- JUMPER – SHORT OVERVIEW OF THE PIECE: The top of the back piece is worked back and forth on circular needle as far as the armholes. Stiches are knitted up along each shoulder, increases made for the neck and the front piece worked back and forth on circular needle as far as the armholes. The front and back pieces are joined and the body is continued in the round on circular needle. Stiches are knitted up around the armholes and the sleeves worked back and forth to start with, then continued in the round with short circular needle/double pointed needles. The neck is worked in the round to finish. BACK PIECE: Cast on 35-35-41-41-47-53 stitches with circular needle size 5 mm and 1 strand of each quality (2 strands). Purl 1 row from the wrong side. Insert 1 marker, inside 3 stitches on each side. Keep them inside these 3 stitches as working onwards. Work as follows from the right side: 3 stocking stitches, increase towards the left AFTER the marker at the beginning of the row - read INCREASE TIP FROM THE RIGHT SIDE, work A.1, A.2 over the next 24-24-30-30-36-42 stitches, A.3, increase to the right BEFORE the marker at the end of the row - remember INCREASE TIP FROM THE RIGHT SIDE, 3 stocking stitches. On the next row (wrong side) increase in the same way – read INCREASE TIP FROM THE WRONG SIDE. Continue the pattern and increase both from the right and wrong side a total of 26 times in all sizes. The increased stitches are shown in A.1 and A.3. REMEMBER THE KNITTING TENSION! After the last increase there are 87-87-93-93-99-105 stitches and the piece measures approx. 12 cm from cast-on edge. Insert 1 marker here (see arrow in diagram A.1). The piece is now measured from here! Finish A.1, A.2 and A.3 (with 3 stocking stitches on each side). Now work as follows from the right side: 3 stocking stitches, A.4 until there are 6 stitches left on the row, work the first 3 stitches in A.4, so the pattern is symmetrical and 3 stocking stitches. Work A.4 1-1-2-2-3-3 times in height. Work A.5 over all stitches 1 time in height. Continue as follows from the right side: 1-1-4-4-1-4 stocking stitches, work A.6 until there are 2-2-5-5-2-5 stitches left, 2-2-5-5-2-5 stocking stitches. Work A.6 1 time in height. The piece measures approx. 16-16-18-18-20-20 cm, measured from the marker by the arrow in A.1, down the armhole. Cut the yarn, put stitches on a thread or on an extra needle and work the front piece. FRONT PIECE: Start on the left shoulder (when the garment is worn). Wind out approx. 50 cm cm yarn-end and use it to knit up stitches (this way you can pick up stitches from right side and then continue working from right side without cutting the strand afterwards). Knit up 26 stitches inside the outermost stitch (knit up 1 stitch in each stitch) along left shoulder on back piece. Work the first row from the right side as follows: 3 stocking stitches, insert 1 marker here, work A.7. Continue this pattern. On row 9 in the diagram begin to increase for the neck at the beginning of each row from the right side – remember INCREASE TIP FROM THE RIGHT SIDE, increasing after the 3 stocking stitches. Increase 1 stitch 4 times = 30 stitches. Finish A.7 (last row is from the wrong side). Cut the yarn, put stitches on a thread or on an extra needle. Work right shoulder as explained below. Wind out approx. 50 cm cm yarn-end and use it to knit up stitches. Knit up 26 stitches along the right shoulder on the back piece, inside the outermost stitch (knit up 1 stitch in each stitch). Work the first row from the right side as follows: A.8, insert 1 marker here, 3 stocking stitches. Continue this pattern. On row 9 in the diagram begin to increase for the neck at the end of each row from the right side – remember INCREASE TIP FROM THE RIGHT SIDE, increasing before the 3 stocking stitches. Increase 1 stitch 4 times = 30 stitches. Finish A.8 (last row is from the wrong side). Work the next row as follows from the right side (continue the pattern as before but now working A.4 over A.7 and A.8): Work pattern over the 30 stitches from the right front piece, cast on 27-27-33-33-39-45 stitches for the neck and work pattern over the 30 stitches from the left front piece = 87-87-93-93-99-105 stitches. Work 1 row back from the wrong side; the new stitches are worked in A.4. Work as follows from the right side: 3 stocking stitches, continue A.4 until there are 6 stitches left on the row, work the first 3 stitches in A.4, 3 stocking stitches. Work A.4 a total of 2-2-3-3-4-4 times in height. Now work A.5 over all stitches 1 time in height. Continue as follows from the right side: 1-1-4-4-1-4 stocking stitches, A.6 until there are 2-2-5-5-2-5 stitches left, 2-2-5-5-2-5 stitches in stocking stitch. Work A.6 1 time in height. The piece measures approx. 24-24-26-26-28-28 cm, measured down the armhole. Now join the back and front pieces as follows: BODY: Work the 87-87-93-93-99-105 front piece stitches on the needle and cast on 3-12-12-21-27-30 stitches at the end of the row (side), work stocking stitch over the 87-87-93-93-99-105 stitches from the back piece, cast on 3-12-12-21-27-30 stitches at the end of the row = 180-198-210-228-252-270 stitches. Work A.5 in the round (starting on round 2 as round 1 has already been worked). After A.5 work A.9 over all stitches. When A.9 is finished in height, work A.5. When A.5 is finished in height work A.4 over all stitches. Work A.4 two times in height. Work A.5; on the last round in A.5 increase 0-6-6-0-0-6 stitches evenly spaced = 180-204-216-228-252-276 stitches. Work A.6 over all stitches, finishing after either a complete or a half repeat in height, when the piece measures approx. 48-48-50-55-57-57 cm measured from the top of the shoulder. Knit 1 round and increase 60-68-76-76-84-92 stitches evenly spaced = 240-272-292-304-336-368 stitches. Change to circular needle size 4 mm. Work rib (knit 2, purl 2) for 8-10-10-10-10-10 cm. Cast off. The jumper measures approx. 56-58-60-65-67-67 from the top of the shoulder. LEFT SLEEVE: Use circular needle size 5 mm and knit up 40-40-44-44-48-48 stitches from the right side, from the bottom of the armhole up to the shoulder along the front piece then 28-28-30-30-32-32 stitches from the shoulder down to the bottom of the armhole on the back piece = 68-68-74-74-80-80 stitches. Insert 1 marker-thread in the middle of the round – it is used when working out where to start the pattern. Work back and forth as follows: 1 stocking stitch, A.4 until there is 1 stitch left, 1 stocking stitch. Continue this pattern for 1-4-4-6-8-9 cm. Now join the piece and continue in the round with short circular needle/double pointed needles size 5 mm. Insert a marker-thread mid under sleeve. Start the round at the marker-thread mid under the sleeve and work PATTERN SLEEVES. NOTE! When working patterns A.9 and A.6, the marker-thread matches the middle stitch in the pattern. When the sleeve measures 2 cm, decrease 2 stitches under the sleeve – read DECREASE TIP. NOTE! The pattern will not always fit under the sleeve when decreasing; the stitches which do not fit are worked in stocking stitch. Decrease like this every 5½-6-4½-5-3-3 cm a total of 7-6-8-7-10-9 times = 54-56-58-60-60-62 stitches. Continue working until the sleeve measures 39-40-39-40-39-38 cm. There is approx. 8 cm left. Try the jumper on and work to desired length. Knit 1 round and increase 14-16-14-16-16-18 stitches evenly spaced = 68-72-72-76-76-80 stitches. Change to double pointed needles size 4 mm and work rib (knit 2, purl 2) for 8 cm. Cast off a little loosely. The sleeve measures approx. 47-48-47-48-47-46 cm from where the stitches were picked up. RIGHT SLEEVE: Work in the same way as the left sleeve but knit up 28-28-30-30-32-32 stitches from the bottom of the armhole and up the back piece to the shoulder, then 40-40-44-44-48-48 stitches from the shoulder and down the front piece to the bottom of the armhole. Sew the bottom of each armhole – see sketch. NECK: Start on one shoulder and knit up from the right side, inside 1 edge stitch, 88 to 128 stitches with short circular needle size 4 mm. The stitch-number must be divisible by 4. Work rib in the round (knit 2, purl 2) for 10 cm. Cast off a little loosely. Fold the neck to the inside and fasten with a stitch in each side. |
||||||||||||||||||||||||||||
Diagram explanations |
||||||||||||||||||||||||||||
|
||||||||||||||||||||||||||||
 |
||||||||||||||||||||||||||||
 |
||||||||||||||||||||||||||||
 |
||||||||||||||||||||||||||||
 |
||||||||||||||||||||||||||||
 |
||||||||||||||||||||||||||||
Have you finished this pattern?Tag your pictures with #dropspattern #blueporcelainsweater or submit them to the #dropsfan gallery. Do you need help with this pattern?You'll find 33 tutorial videos, a Comments/Questions area and more by visiting the pattern on garnstudio.com. © 1982-2026 DROPS Design A/S. We reserve all rights. This document, including all its sub-sections, has copyrights. Read more about what you can do with our patterns at the bottom of each pattern on our site. |
||||||||||||||||||||||||||||


With over 40 years in knitting and crochet design, DROPS Design offers one of the most extensive collections of free patterns on the internet - translated to 17 languages. As of today we count 324 catalogues and 12290 patterns translated into English (UK/cm). 12290
We work hard to bring you the best knitting and crochet have to offer, inspiration and advice as well as great quality yarns at incredible prices! Would you like to use our patterns for other than personal use? You can read what you are allowed to do in the Copyright text at the bottom of all our patterns. Happy crafting!
Post a comment to pattern DROPS 241-1
We would love to hear what you have to say about this pattern!
If you want to leave a question, please make sure you select the correct category in the form below, to speed up the answering process. Required fields are marked *.