
Popular categories
Looking for a yarn?


Comments / Questions (93)
![]() Morera wrote:
Morera wrote:
Je ne comprends pas pour suivre le point fantaisie de la manche lorsque l'on fait les diminutions, merci de m'expliquer
20.06.2025 - 18:20DROPS Design answered:
Bonjour Mme Morera, le point fantaisie ne tombe plus juste au milieu sous la manche lorsque l'on commence à diminuer, continuez juste à tricoter les mailles comme auparavant: les mailles jersey toujours à l'endroit et les mailles point mousse 1 tour à l'endroit, 1 tour à l'envers pour conserver les côtes. Bon tricot!
23.06.2025 - 07:04
![]() Lina wrote:
Lina wrote:
Bonjour. J’essaie de faire ce pull . Mais au départ on dois monter 120 mailles. Par la suite on divise le travail pour faire les manches raglan. On indique de tricoter 9 mailles puis 37, puis 9 et enfin 37. Cela donne 92 mailles mailles qu’arrive-t-il au 28 mailles restantes. Où s’en vont-elles. Merci de m’indiquer les bonnes mesures ou indications pour réaliser ce joli pull.
25.05.2025 - 00:23DROPS Design answered:
Bonjour Lina, vous avez oublié toutes les mailles de A.1 (raglans), raison pour laquelle vous ne tombez pas juste, autrement dit, vous allez tricoter ces 120 mailles ainsi: A.1 (= 7 m), A.2 au-dessus des 9 mailles suivantes, A.1 (= 7 m), A.2 au-dessus des 37 m suivantes, A.1 (= 7 m), A.2 au-dessus des 9 mailles suivantes, A.1 (= 7m), A.2 au-dessus des 37 m suivantes soit: 7+9+7+37+7+9+7+37=120 mailles. Bon tricot!
26.05.2025 - 09:17
![]() Maria wrote:
Maria wrote:
Hi, ich bin fast am Ende des Rumpfes angekommen, wo die X Maschen gleichmäßig zugenommen werden sollen (=ca alle 5 M eine M). Bis hierher habe ich JEDE zweite Masche rechts gestrickt. Jetzt würde sich dieses Muster immer wieder verschieben. Soll das so? Oder sollen die Zunahmen immer im "Doppelpack" erfolgen, damit die rechten Maschen übereinander bleiben? Und sehe ich das richtig, dass für die Ärmelbündchen KEINE Zunahmen gestrickt werden?
22.05.2025 - 22:11DROPS Design answered:
Liebe Maria, die Bündchen vom unteren Kanten werden nicht das Muster passen, damit der Umfang immer noch stimmt mit Bündchen und kleineren Nadeln wird man zunehmen und dann 1 M re, 1 M li (und nicht mehr Muster) stricken. Das Rippenmuster vom A.2 wird nicht fortsetzen mit Bündchen. Viel Spaß beim Stricken!
23.05.2025 - 08:54
![]() Ute Ortland wrote:
Ute Ortland wrote:
Hallo, ich stricke Gr. XXL mit 136 M. Nach 4 cm Rippenmuster soll ich einen Markierer nach der 46. M setzen, als vordere Mitte. Das wäre aber die 34. M, oder verstehe ich das falsch? Und dann ist der Rundenbeginn der Passe im Übergang zwischen Rücken und rechten Ärmel. Sehe ich den rechten Ärmel, wenn ich den Pullover vor mir liegen habe, oder wenn ich ihn anhätte? Vielen Dank für Ihre Hilfe
04.05.2025 - 12:35DROPS Design answered:
Liebe Frau Ortland, die Markierung soll in der Mitte von den 45 M für den Vorderteil eingesetzt werden: 7 M A.1 + 9 M A.2 + 7 M A.1 + 23 M A.2 (in der mittleren Maschen von den 45 Maschen für den Vorderteil). Viel Spaß beim Stricken!
05.05.2025 - 08:03
![]() Belinda wrote:
Belinda wrote:
Thank you for the help, I can see that there are a few questions about this, wouldn't it be easier for all if the pattern was amended? Thank you again, Belinda
29.04.2025 - 02:02
![]() Belinda wrote:
Belinda wrote:
Drops 232-16 I have cast on 128 stitches for the 3rd size. To divide at the yoke stitch 9 stitch 41 Stitch 9 Stitch 41. Total 100 what do I do with 28 stitches leftover? I appreciate any help. Thank you, Belinda
28.04.2025 - 11:00DROPS Design answered:
Dear Belinda, are you missing the 7 sts A.1? Work the first row on yoke as follows: A.1 (7 sts), A.2 (9 sts), A.1 (7 sts), A.2 (41 sts), A.1 (7 sts), A.2 (9 sts), A.1 (7 sts), A.2 (41 sts) = 7+9+7+41+7+9+7+41=128 sts. These 7 sts A.1 are each for raglan lines, you will increase on each side of these 7 sts for raglan. Happy knitting!
28.04.2025 - 13:36
![]() Camilla wrote:
Camilla wrote:
Hej. En fråga. Jag stickar denna i large. Och har stickat halskanten = 128 maskor. Då jag sedan börjar på ok’et står det att man ska sticka 9 + 41 + 9 + 41 =100. Vad gör jag med de resterande 28? Blir bakstycket så mycket bredare än framstycket?
05.03.2025 - 07:21DROPS Design answered:
Hej Camilla. Du har inte räknat med att du ska sticka A.1 (=7 maskor). Du stickar A.1 (=7 maskor), A.2 över 9 maskor, A.1 (= 7 maskor), A.2 över 41 maskor... osv. Mvh DROPS Design
05.03.2025 - 14:42
![]() CARRÉE Sylviane wrote:
CARRÉE Sylviane wrote:
Bonjour, J’ai des difficultés à comprendre l’empiècement. Vous dites de tricoter en A1A2 au-dessus des 9 mailles suivantes ? Mais ces 9 mailles suivent quoi ?
30.01.2025 - 18:19DROPS Design answered:
Bonjour Mme Carrée, vous tricotez d'abord les 7 mailles de A.1, puis les 9 mailles suivantes en tricotant A.2 (soit 4 fois les 2 mailles de A.2 puis la 1ère maille pour que le motif soit symétrique, et ainsi de suite. Bon tricot!
31.01.2025 - 08:12
![]() Sylvie wrote:
Sylvie wrote:
Suite à ma question d’hier, je viens de constater que j’inversais A 1 avec A2 quand je faisais le calcul pour le tricot du chandail . Je m’excuse c’est vraiment mon erreur .
28.01.2025 - 15:55
![]() Rosa wrote:
Rosa wrote:
Hola de nuevo. La pregunta es : donde empieza el ranglan ; nada más terminar los 4cm del cuello ? Y como reparto los 120 p. entre delantero , espalda y ambas mangas ? Muchísimas gracias por vuestra ayuda. Un saludo. Quiero decir entre los 7p. Del ranglan delantero y los 7p. del ranglan de la espalda. Cuántos puntos van ahí ? Gracias
21.01.2025 - 12:57DROPS Design answered:
Hola Rosa, los aumentos para el raglán comienzan en el inicio del canesú, después de terminar los 4cm del cuello. Trabajas una vuelta según el patrón, incorporando las rayas y los diagramas; en la siguiente vuelta comienzas con los aumentos. A.1 es la línea del raglán y está en la transición entre cada sección del cuerpo (delantero y espalda) y las mangas. La vuelta comienza en la transición entre la espalda y la manga derecha: A.1 (línea del raglán), 9 pts de A.2 (manga derecha), A.1 (línea del raglán), 37 pts de A.2 (delantero), A.1 (línea del raglán), 9 pts de A.2 (manga izquierda), A.1 (línea del raglán), 37 pts de A.2 (espalda).
25.01.2025 - 17:21
|
|||||||
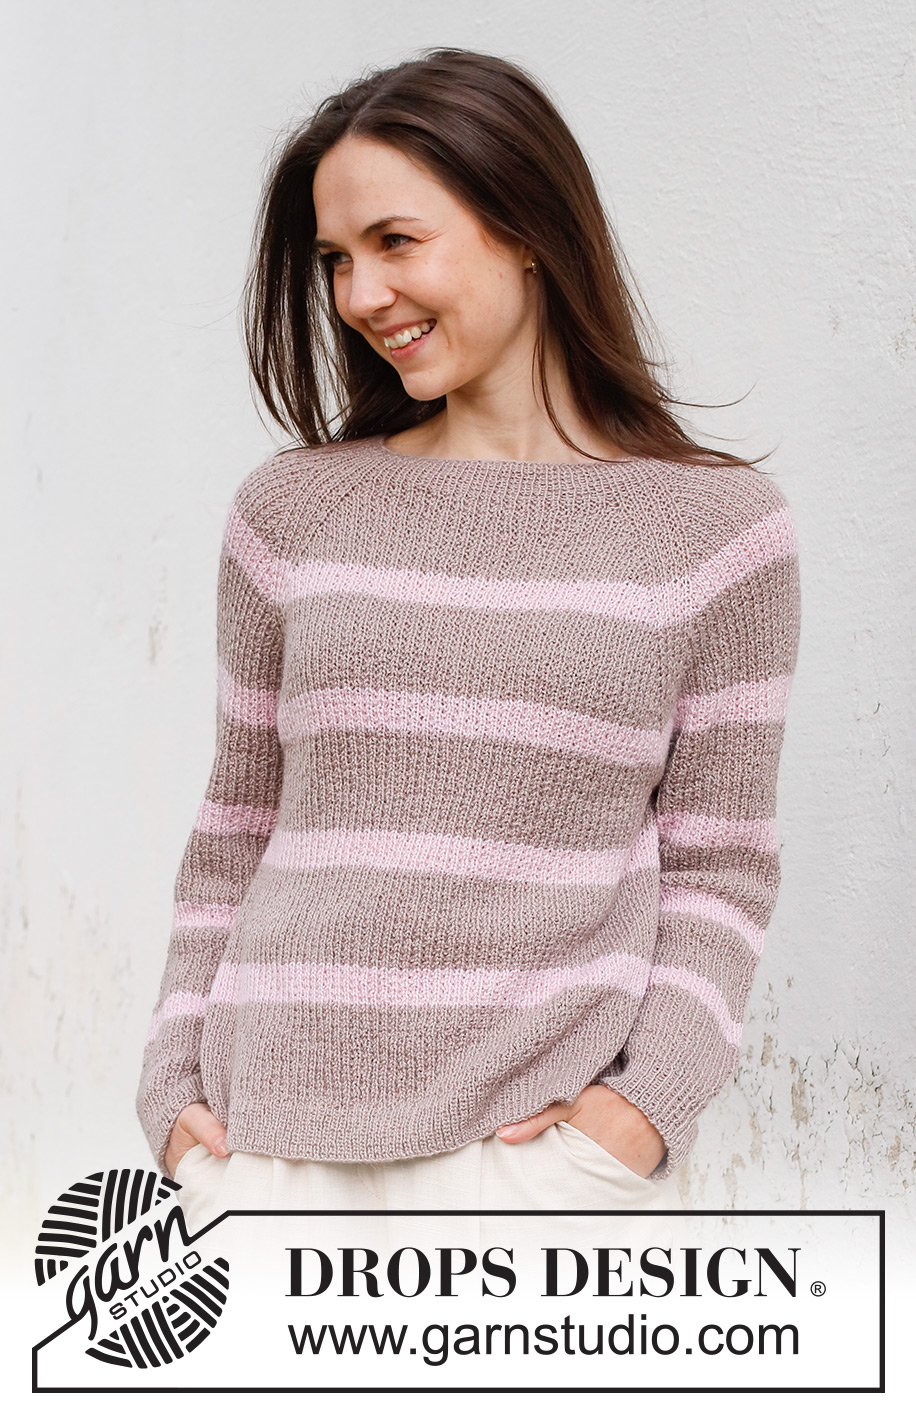
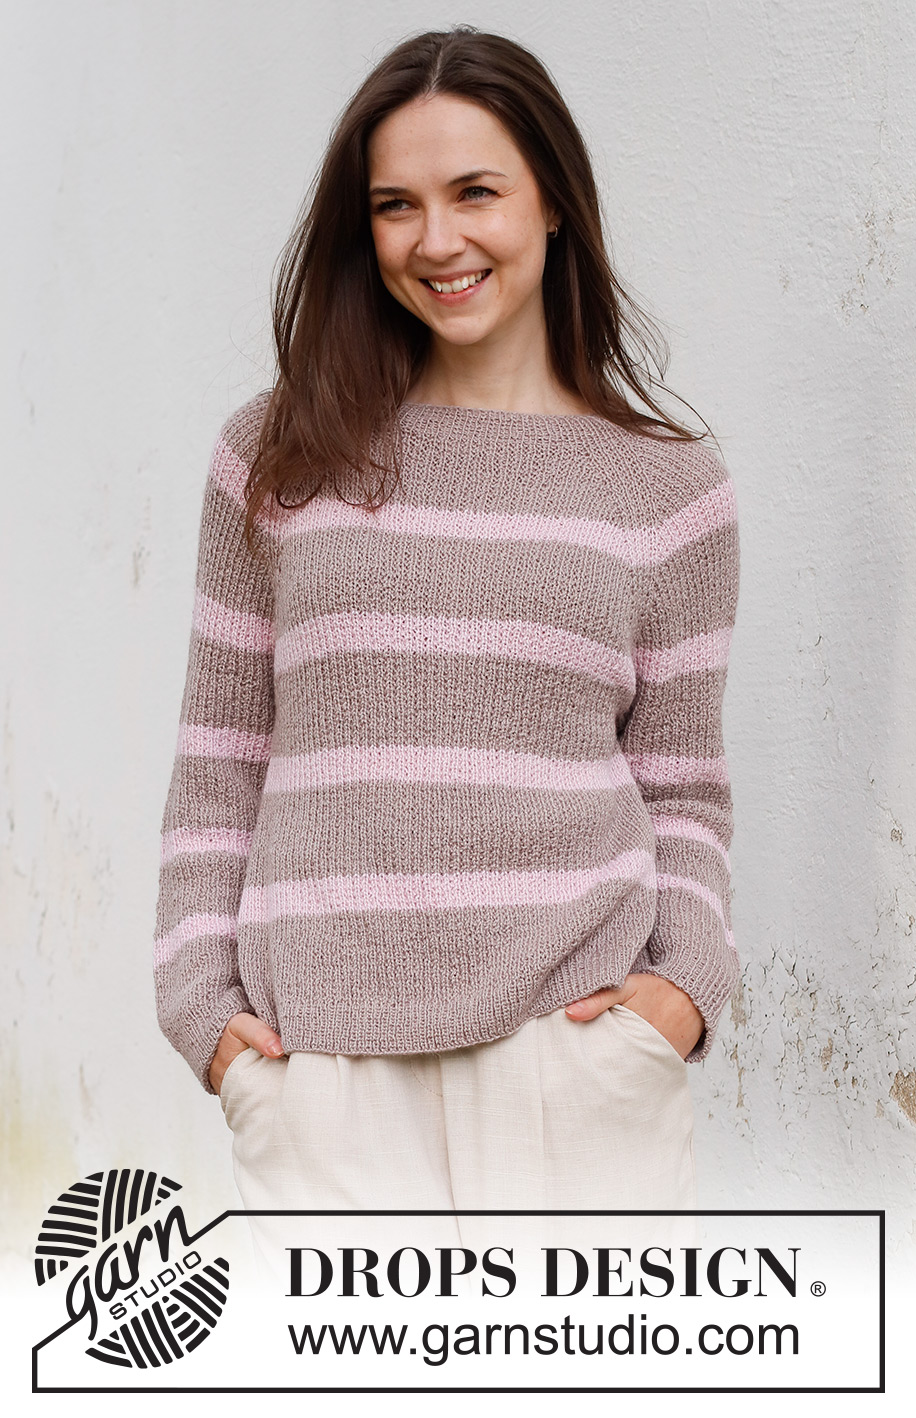
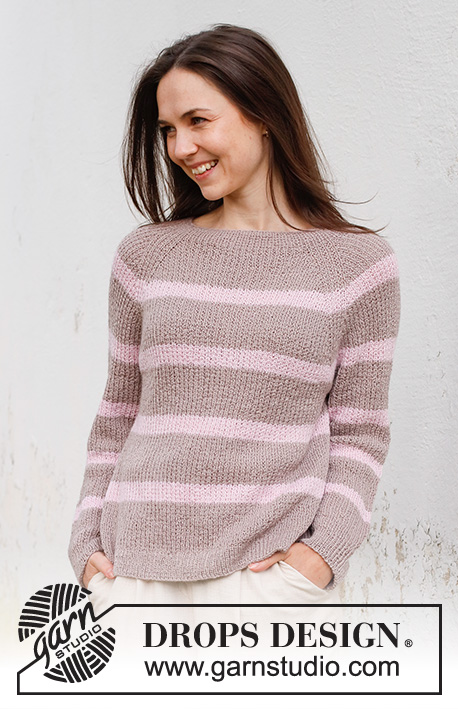
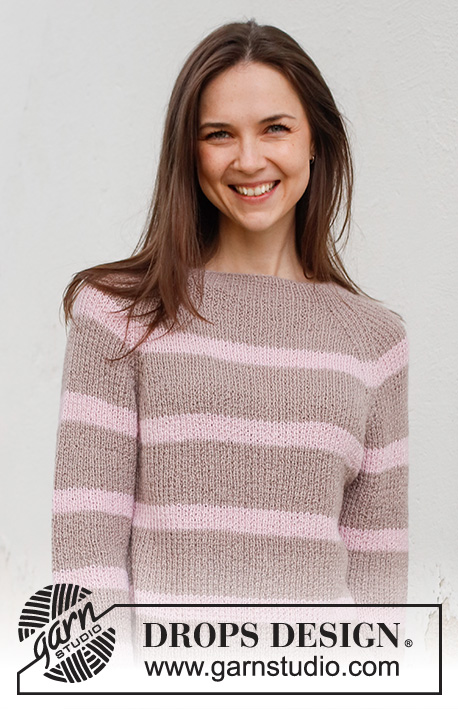
Desert Mirage#desertmiragesweater |
|||||||
 |
 |
||||||
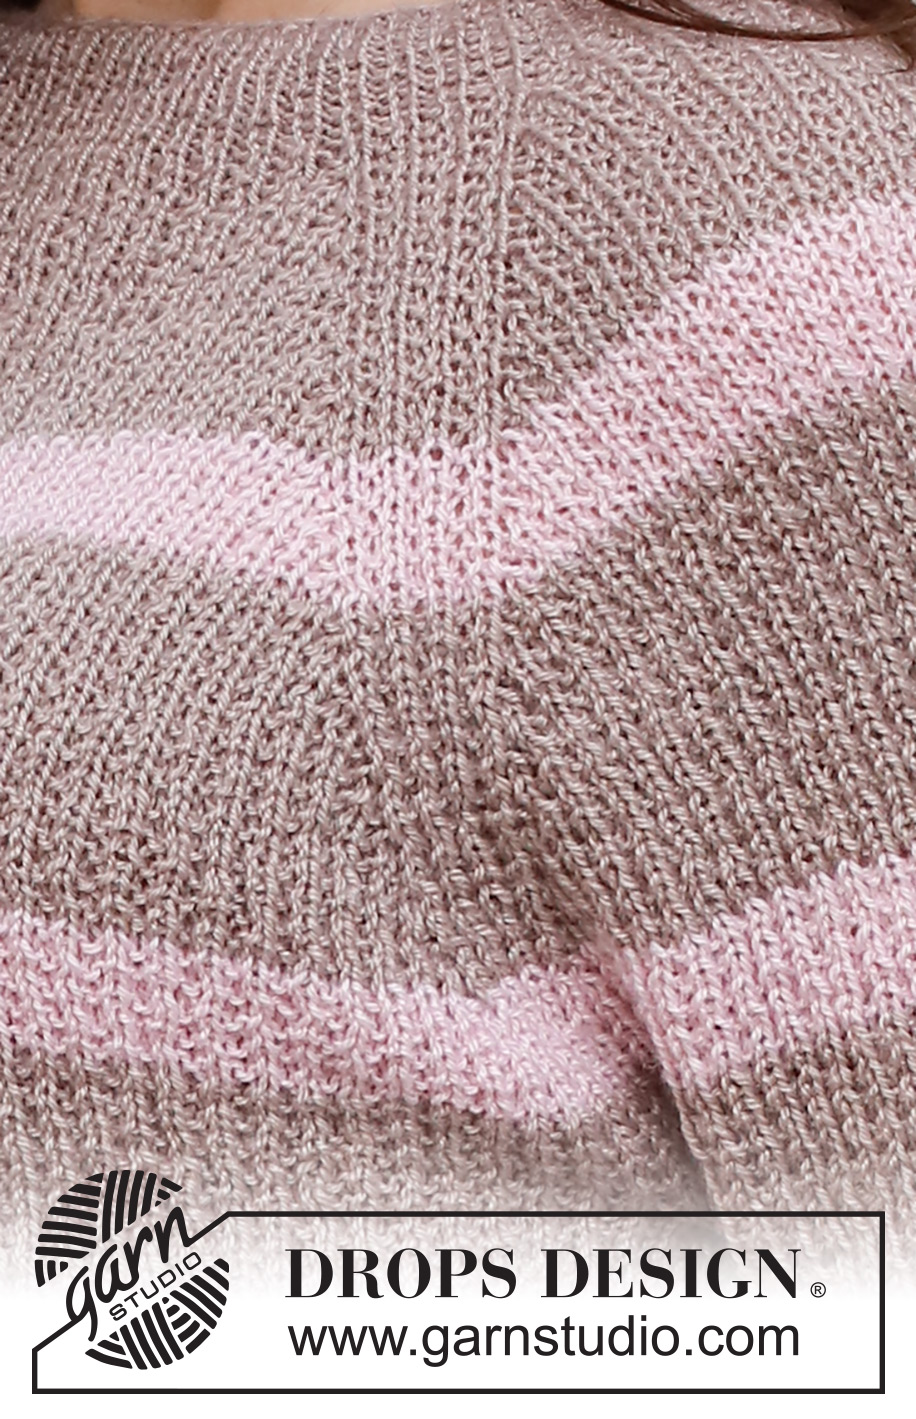
Knitted jumper in DROPS Nord with raglan. Piece is knitted top down with broken rib and stripes. Size: S - XXXL
DROPS 232-16 |
|||||||
|
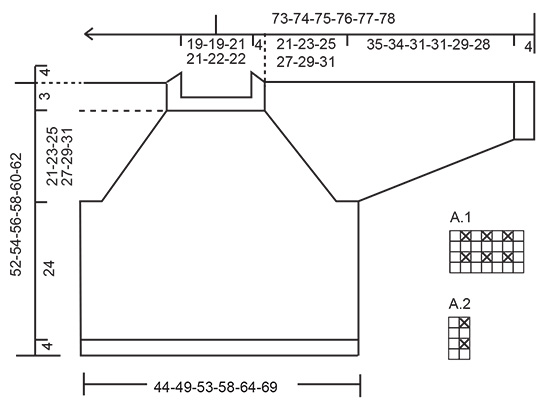
---------------------------------------------------------- EXPLANATION FOR THE PATTERN: ---------------------------------------------------------- PATTERN: See diagrams A.1 and A.2. STRIPES: * Work 7-7-7-8-8-8 cm with colour light beige, work 3 cm with colour powder pink *, work from *-*. RAGLAN: Increase 1 stitch in each side of 7 stitches (= A.1) in every transition between body and sleeves (= 8 stitches increased on round). Increase 1 stitch by making 1 yarn over. On next round work yarn overs twisted to avoid holes. Then work the new stitches in pattern A.2. DECREASE TIP (applies to sleeves): Decrease 1 stitch on each side of marker thread as follows: Work until 3 stitches remain before marker thread and knit 2 together, knit 2 (marker thread is between these 2 stitches), slip 1 stitch knitwise, knit 1, pass slipped stitch over stitch worked. ---------------------------------------------------------- START THE PIECE HERE: ---------------------------------------------------------- JUMPER - SHORT OVERVIEW OF THE PIECE: Neck edge and yoke are worked in the round on circular needle, top down. Now divide yoke for body and sleeves. Work the body in the round on circular needle. Work sleeves in the round on double pointed needles/a short circular needle. NECK EDGE: Cast on 120-120-128-128-136-136 stitches on circular needle size 2.5 mm with colour light beige in DROPS Nord. Knit 1 round. Then work rib (knit 1/purl 1). Work until rib measures 4 cm. Insert 1 marker after approx. 41-41-44-44-46-46 stitches (approx. mid front). Measure yoke from this marker. Work STRIPES - see explanation above. The 4 cm in the neck edge are not counted with the stripes (i.e. work 11-11-11-12-12-12 cm in total with colour light beige before first stripe with colour powder pink). YOKE: The beginning of round is in transition between back piece and right sleeve. Switch to circular needle size 3 mm, and work as follows: A.1, A.2 over the next 9 stitches, A.1, A.2 over the next 37-37-41-41-45-45 stitches, A.1, A.2 over the next 9 stitches, A.1, A.2 over the next 37-37-41-41-45-45 stitches. Continue this pattern, on next round begin increase for RAGLAN – read explanation above (8 stitches increased). Increase like this every other round 26-32-34-40-44-50 times in total = 328-376-400-448-488-536 stitches. REMEMBER THE KNITTING TENSION! Work without increase until piece measures 21-23-25-27-29-31 cm from marker thread. Now divide yoke for body and sleeves: Work the first 4 stitches (back piece), slip the next 67-79-83-95-103-115 stitches on a thread for sleeve and cast on 9-9-11-11-13-13 new stitches on needle (in the side under sleeve), work the next 97-109-117-129-141-153 stitches (front piece), slip the next 67-79-83-95-103-115 stitches on a thread for sleeve and cast on 9-9-11-11-13-13 new stitches on needle (in the side under sleeve), work the next 93-105-113-125-137-149 stitches (back piece). BODY: = 212-236-256-280-308-332 stitches. Work A.2 in the round. Continue with stripes when 4 stripes have been worked in total with colour powder pink, finish the piece with colour light beige. Work until piece measures 24 cm from division. 4 cm remain until finished measurements. Knit 1 round while increasing 46-50-54-58-64-70 stitches evenly = 258-286-310-338-372-402 stitches. Switch to circular needle size 2.5 mm. Work rib (= knit 1/purl 1). Continue rib like this for 4 cm. Cast off. Jumper measures approx. 52-54-56-58-60-62 cm from shoulder and down. SLEEVE: Slip the 67-79-83-95-103-115 stitches from thread in one side of piece back on a short circular needle/double pointed needles size 3 mm, and pick in addition up 1 stitch in each of the 9-9-11-11-13-13 stitches cast on under sleeve = 76-88-94-106-116-128 stitches. Insert a marker thread in the middle of the new stitches. Work pattern as before and continue with stripes. When 5 stripes have been worked in total with colour powder pink, finish the piece with colour light beige. AT THE SAME TIME when piece measures 3-3-3-2-2-3 cm, decrease 2 stitches under sleeve - READ DECREASE TIP. Decrease like this approx. every 6-3-2½-2-1½-1 cm 6-10-10-14-18-22 times in total = 64-68-74-78-80-84 stitches. Continue until piece measures 35-34-31-31-29-28 cm from division. Switch to double pointed needles size 2.5 mm. Work rib (knit 1/purl 1) for 4 cm. Cast off. Sleeve measures approx. 39-38-35-35-33-32 cm from division. Work the other sleeve the same way. |
|||||||
Diagram explanations |
|||||||
|
|||||||
 |
|||||||
Have you finished this pattern?Tag your pictures with #dropspattern #desertmiragesweater or submit them to the #dropsfan gallery. Do you need help with this pattern?You'll find 29 tutorial videos, a Comments/Questions area and more by visiting the pattern on garnstudio.com. © 1982-2026 DROPS Design A/S. We reserve all rights. This document, including all its sub-sections, has copyrights. Read more about what you can do with our patterns at the bottom of each pattern on our site. |
|||||||


With over 40 years in knitting and crochet design, DROPS Design offers one of the most extensive collections of free patterns on the internet - translated to 17 languages. As of today we count 324 catalogues and 12290 patterns translated into English (UK/cm). 12290
We work hard to bring you the best knitting and crochet have to offer, inspiration and advice as well as great quality yarns at incredible prices! Would you like to use our patterns for other than personal use? You can read what you are allowed to do in the Copyright text at the bottom of all our patterns. Happy crafting!
Post a comment to pattern DROPS 232-16
We would love to hear what you have to say about this pattern!
If you want to leave a question, please make sure you select the correct category in the form below, to speed up the answering process. Required fields are marked *.