
Popular categories
Looking for a yarn?


Comments / Questions (69)
![]() Clawur wrote:
Clawur wrote:
Ich hab meinen Fehler schon erkannt, wer beim lesen mitdenkt ist klar im Vorteil!!!
20.11.2016 - 13:50
![]() Clawur wrote:
Clawur wrote:
In der Anleitung für den Rumpf steht das die Arbeit in Größe 3/4 bei einer Länge von 24cm abgekettet werden soll. Jedoch steht das die Knopflöcher bei 2, 8, 14, 22 und 28cm gemacht werden soll. Wie lange soll die Arbeit nun gestrickt werden?
19.11.2016 - 23:04DROPS Design answered:
Liebe Frau Clawur, für die Knopflöcher müssen Sie ab den Anschlagrand entlang der Blende messen, beim Rumpfteil wird von dem neu angeschlagenen Maschen unter den Ärmel gemessen. Viel Spaß beim stricken!
21.11.2016 - 09:51
![]() Margit Olesen Damkjer wrote:
Margit Olesen Damkjer wrote:
Svar vedr ærmevidde: har strikket trøjen i tre størrelser. Min strikkefasthed passer nøjagtigt. Ved alle tre trøjer har jeg samlet ekstra masker op til ærme, så at fx den lille størrelse starter med en vidde på 20 cm.
08.11.2016 - 11:13
![]() Margit Olesen Damkjer wrote:
Margit Olesen Damkjer wrote:
Er der andre end mig, der synes opskriftens ærmer er meget smalle fra begyndelsen?
06.11.2016 - 11:30DROPS Design answered:
Hej Margit. Tjek din strikkefasthed. Nu ved jeg ikke hvilken str du laver, men f.eks. den mindste str (3/4 aar) skal vaere ca. 18 cm i omkreds ved start.
07.11.2016 - 12:19
![]() Margit Olesen Damkjer wrote:
Margit Olesen Damkjer wrote:
Hvorfor står der under "montering", at åbningerne under armen skal syes sammen? (Ved ærmets begyndelse skal man samle masker op)
02.11.2016 - 11:39DROPS Design answered:
Hej Margit. Ja, det skal selvfölgelig ikke staa der. Vi sletter. Tak.
02.11.2016 - 12:09
![]() Christina wrote:
Christina wrote:
Det er gjort en rettelse til den opprinnelige oppskriften, der maskeantallet er justert fra 87 til 65 når man legger opp - men hvordan justerer man fordelingen av masker videre i oppskriften? Hvor mange masker er forstykke osv?
15.10.2016 - 08:43DROPS Design answered:
Hej Christina. Maskeantallet passer i resten af mönstret. F.eks mindste str. Du starter med 87 og efter A.2 (17 m per gentagelse i sidste pind) har du 11x17 = 187 + 5 rille m i hver side = 197 m.
18.10.2016 - 15:03
![]() Chelo wrote:
Chelo wrote:
Podrias explicarme como aumentar los puntos ? no lo entiendo
02.10.2016 - 11:07DROPS Design answered:
Hola Chelo. Los pts en el modelo se aumentan trabajando una HEB (lazada), es decir, cuando llegas a 1 pt antes de MP (marcapuntos) hacer una lazada, trabajar los 2 pts de derecho (el MP esta entre estos 2 pts) y hacer otra lazada = 2 pts aum.
07.10.2016 - 16:39
![]() Helle wrote:
Helle wrote:
Hei, en ymmärä sitä, että kun luo 65 s, miten kaavaA.2 kuviota pystyy toistamaan 11 kertaa. Kiitos
09.09.2016 - 20:12DROPS Design answered:
Hei! Piirroksen A.2 ensimmäisellä kerroksella on 5 s. Neulot 5 s ainaoikeaa 11 x A.5 (= 55 s), 5 s ainaoikeaa.
12.09.2016 - 14:36
![]() Ilaria wrote:
Ilaria wrote:
Ho avviato il modello con i ferri 3.5 come indicato. Nelle spiegazioni non viene detto quando passare ai ferri numero 4. Forse alla fine si A1? Grazie
04.09.2016 - 23:02DROPS Design answered:
Buonasera Ilaria, i ferri n° 4 mm vengono usati sul corpo e sulle maniche, non sullo sprone. Buon lavoro!
04.09.2016 - 23:31
|
|||||||||||||||||||
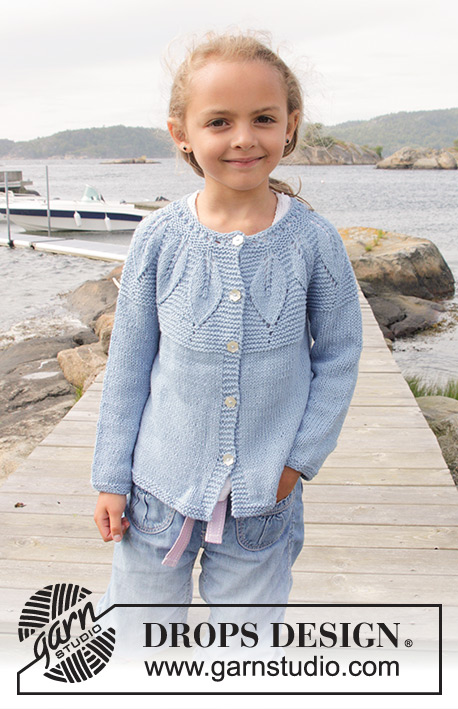
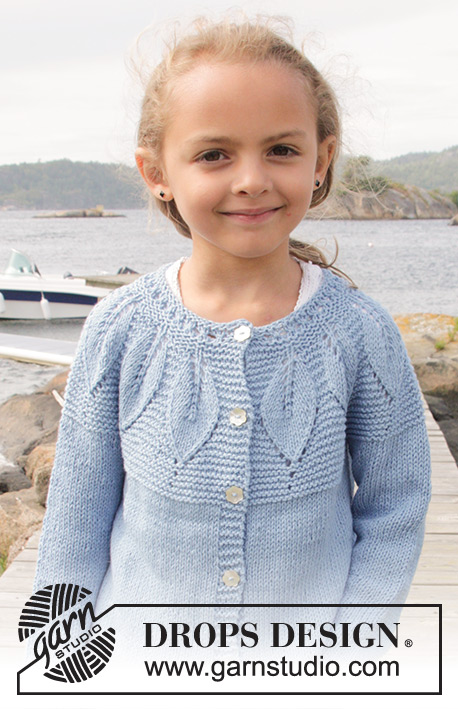
Sweet Bay Jacket#sweetbayjacket |
|||||||||||||||||||
 |
 |
||||||||||||||||||
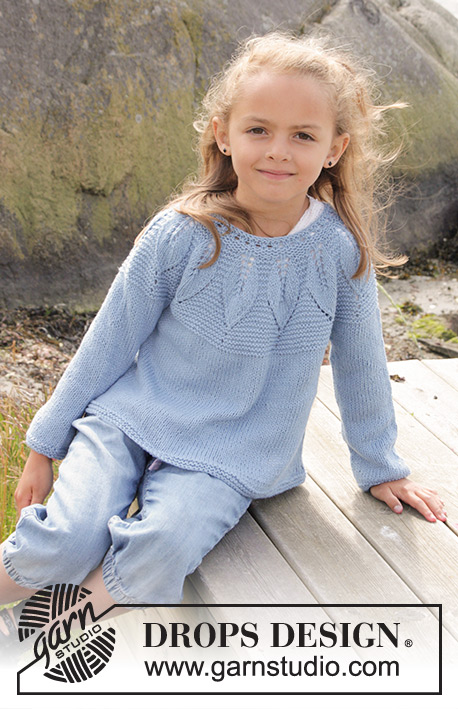
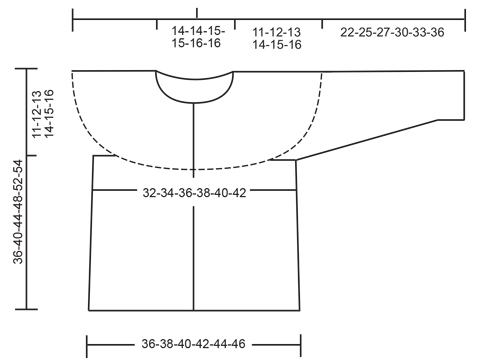
Knitted cardigan in garter st with leaf pattern and round yoke, worked top down in DROPS Belle. Size children 3 - 14 years
DROPS Children 27-24 |
|||||||||||||||||||
|
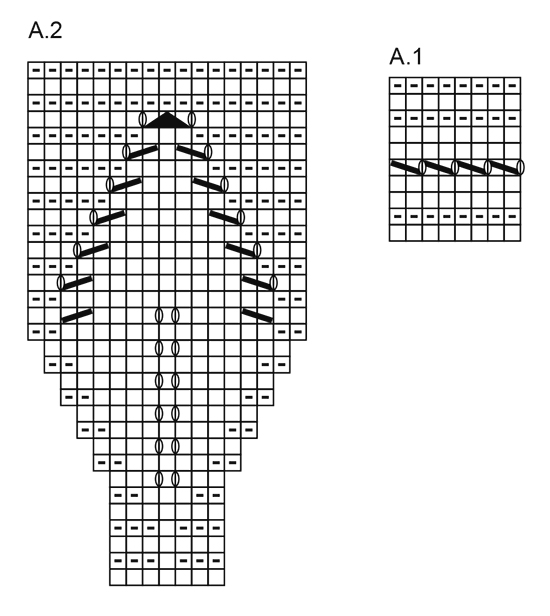
GARTER ST (back and forth): K all rows. 1 ridge = 2 rows K. GARTER ST (worked in the round): 1 ridge = 2 rounds. * K 1 round and P 1 round *, repeat from *-*. PATTERN: See diagrams A.1 and A.2. The diagrams show all rows in pattern seen from RS. INCREASE TIP: Inc 1 sts on each side of every marker (= 4 inc sts). Beg 1 st before marker and work as follows: 1 YO, K 2 (marker is between these 2 sts), 1 YO. On next row work YO twisted to avoid holes. BUTTONHOLES: Dec for buttonholes on right band (i.e. band at the end of row seen from RS). 1 buttonhole = K tog third and fourth st from edge and make 1 YO. Dec for buttonholes when piece measures (from cast-on edge and along the band): SIZE 3/4: 2, 8, 14, 22 and 28 cm SIZE 5/6: 2, 8, 14, 22 and 28 cm SIZE 7/8: 2, 8, 14, 22, 28 and 36 cm. SIZE 9/10: 2, 8, 14, 22, 28 and 36 cm. SIZE 11/12: 2, 8, 14, 22, 28, 36 and 42 cm SIZE 13/14: 2, 8, 14, 22, 28, 36 and 42 cm ---------------------------------------------------------- JACKET: Worked back and forth on circular needle, top down. YOKE: Cast on 87-87-94-94-101-101 sts on circular needle size 3.5 mm with Belle. Dec for BUTTONHOLES on right band - see explanation above. Work 5 sts in GARTER ST - see explanation above (= band), A.1 until 5 sts remain, 5 sts in garter st (= band). On row with YOs in A.1 finish with 1 st K before band. When A.1 has been worked 1 time vertically, continue as follows: 5 sts in garter st, A.2 (= 7 sts), repeat A.2 11-11-12-12-13-13 times in total, finish with 5 sts in garter st. REMEMBER THE KNITTING TENSION When A.2 has been worked 1 time vertically there is 197-197-214-214-231-231 sts on needle and piece measures approx. 10 cm. Continue with garter st, AT THE SAME TIME inc 1 st in the middle of every repetition (= 11-11-12-12-13-13 sts inc), inc with YO, K YO on next row to make holes. Repeat inc every 1-1-1½-1½-2-2 cm 0-1-1-2-1-2 more times = 208-219-238-250-257-270 sts. K 1 row while adjusting the no of sts to 210-222-234-250-262-276. Continue in garter st until piece measures 11-12-13-14-15-16 cm. Continue to work as follows (from RS): Work the first 36-38-40-42-44-45 sts (= front piece), slip the next 38-40-42-46-48-52 sts on a stitch holder (= sleeve), cast on 6 new sts under sleeve, work the next 62-66-70-74-78-82 sts (= back piece), slip the next 38-40-42-46-48-52 sts on a stitch holder (= sleeve), cast on 6 new sts under sleeve, work the remaining 36-38-40-42-44-45 sts (= front piece). BODY: There are now 146-154-162-170-178-184 sts for body. Insert a marker in each side of body where new sts were cast on under sleeve (= 3 new sts on each side of marker). NOW MEASURE THE PIECE FROM HERE. Switch to circular needle size 4 mm. Continue in stocking st and garter st on bands. When piece measures 4 cm, inc 1 st on each side of each marker (= 4 sts inc) - READ INCREASE TIP! Repeat inc every 5-6-7-8-9-10 cm 3 more times = 162-170-178-186-194-200 sts. Continue in stocking st and garter st until piece measures 24-27-30-33-36-37 cm, work 3 ridges. Cast off. SLEEVE: Slip sts from stitch holder back on double pointed needles size 4 mm (= 38-40-42-46-48-52 sts). Pick up 1 st in each of the 6 sts cast on under sleeve = 44-46-48-52-54-58 sts. Insert 1 marker mid under sleeve. Now measure the piece from here. Work in stocking st. When piece measures 3 cm dec 1 st on each side of marker, repeat dec every 7-5-5-4-4-4 cm 2-3-3-5-5-7 more times = 38-38-40-40-42-42 sts. Continue in stocking st until sleeve measures 21-24-26-29-32-35 cm, work 3 ridges and cast off. ASSEMBLY: Sew the buttons on to left front piece. |
|||||||||||||||||||
Diagram explanations |
|||||||||||||||||||
|
|||||||||||||||||||
 |
|||||||||||||||||||
 |
|||||||||||||||||||
Have you finished this pattern?Tag your pictures with #dropspattern #sweetbayjacket or submit them to the #dropsfan gallery. Do you need help with this pattern?You'll find 25 tutorial videos, a Comments/Questions area and more by visiting the pattern on garnstudio.com. © 1982-2026 DROPS Design A/S. We reserve all rights. This document, including all its sub-sections, has copyrights. Read more about what you can do with our patterns at the bottom of each pattern on our site. |
|||||||||||||||||||


With over 40 years in knitting and crochet design, DROPS Design offers one of the most extensive collections of free patterns on the internet - translated to 17 languages. As of today we count 324 catalogues and 12290 patterns translated into English (UK/cm). 12290
We work hard to bring you the best knitting and crochet have to offer, inspiration and advice as well as great quality yarns at incredible prices! Would you like to use our patterns for other than personal use? You can read what you are allowed to do in the Copyright text at the bottom of all our patterns. Happy crafting!
Post a comment to pattern DROPS Children 27-24
We would love to hear what you have to say about this pattern!
If you want to leave a question, please make sure you select the correct category in the form below, to speed up the answering process. Required fields are marked *.