
Popular categories
Looking for a yarn?


Comments / Questions (69)
![]() Barbara wrote:
Barbara wrote:
The correction for English UK (updated 7/10/16) is not right. For size 7/8 it says to cast on 84 sts, while 94 is the correct number, as shown in English US and German. I have not checked other languages. It seems that the 5 garter sts for band must start right away.
31.03.2019 - 01:37DROPS Design answered:
Dear Barbara, you are right, text under correction is wrong (will be edited), but pattern is right and was already edited into the right number of sts. Thank you. Happy knitting!
01.04.2019 - 16:08
![]() Marie wrote:
Marie wrote:
Hei ,jeg er ferdig med A1, men hvordan skal jeg økes for å bli fra 94 til 214 det har ikke forklaring til ,og hva dere mente A2(=7m)gjente .takk på forhånd
01.03.2019 - 20:58DROPS Design answered:
Hei Marie, Når du er ferdig med A.1, begynner du med A.2 (med 5 masker rille på begge sider). A.2 er gjentatt 12 ganger i bredden og økningene på bærestykket er inkludert i A.2. Hver A.2 øker 10 masker i løpet av høyden og siden du har 12 gjentagelser i bredden, blir det en økning på 120 masker totalt. Da har du 214 masker på pinnen. God fornøyelse!
02.03.2019 - 09:55
![]() Marie wrote:
Marie wrote:
Hei ,jeg er ferdig med A1, men hvordan skal jeg økes for å bli fra 94 til 214 det har ikke forklaring til ,og hva dere mente A2(=7m)gjente .takk på forhånd
01.03.2019 - 20:57DROPS Design answered:
Hei Marie. A.2 går over 7 masker på den første raden i diagrammet. Det er det (=7 masker) betyr. Du skal ha 214 masker på pinnen når A.2 er ferdig (ikke A.1). Om du ser på diagram A.2 ser du at det økes 2 masker på omgang 7, 9, 11, 13 og 15 (med kast på midten). Det økes derfor totalt 10 masker i hver rapport av A.2, og A.2 skal gjentas 12 ganger på omgangen. Når du er ferdig med A.2 har du derfor økt 12 x 10 masker = 120 masker økt. 94 + 120 = 214 masker på pinnen. God fornøyelse
04.03.2019 - 13:03
![]() Anette Sväd wrote:
Anette Sväd wrote:
Efter A2 så får jag det till 187 maskor och det blir bara 10 löv. Jag gör storlek 5-6 år. ??????
24.02.2019 - 10:47DROPS Design answered:
Hej. Du ska sticka A.2 11 gånger på ett varv . När A.2 har stickats 1 gång på höjden har det totalt ökats 110 m. (Du ökar på varv 8,10,12,14,16, dvs 22 m (=2x11) ökade per varv på dessa varv.) Lycka till!
08.03.2019 - 08:31
![]() Susana Jourdan wrote:
Susana Jourdan wrote:
Bonjour, J'ai perdu beaucoup de temps avant de comprendre que la grille est à l'envers! Il faut commencer par la partie du bas. C'est normal que la grille soit à l'envers? Merci pour ce site magnifique qui m'a donné envie de reprendre le tricot après 15 ans! Susana
11.02.2019 - 08:45DROPS Design answered:
Bonjour Mme Jourdan, tout à fait, on tricote le gilet de haut en bas, et on lit toujours les diagrammes de bas en haut = on commence avec moins de mailles (côté col) et on augmente pour l'empiècement (= haut du diagramme). Bon tricot!
11.02.2019 - 11:42
![]() Denise Eichstädt wrote:
Denise Eichstädt wrote:
Ups, zu schnell abgeschickt, auch waren die angegebenen Abnahmen an den Ärmeln viel zu eng, ich habe schon 2 weniger gemacht und es passt kein dünnes Sweatshirt mehr drunter ( und Mei. Kind ist sehr schlank)
04.02.2019 - 14:47
![]() Denise Eichstädt wrote:
Denise Eichstädt wrote:
Habe mich genau an die Wolle, Nadeln und Maße gehalten, und trotzdem reichten 250g Wolle nicht, brauchte 300g. Habe die Größe 7/8 gestrickt.
04.02.2019 - 14:43Aliya Adrus wrote:
Hi! Thank you for your reply.. can you tell me what is 1.Stocking stitch 2. WS 3. P 4. psso 5. K/P Thank you!
09.11.2018 - 15:50DROPS Design answered:
Dear Mrs Adrus, this video shows how to work stocking st back and forth and this one how to work in the round. WS = wrong side of piece (RS = right side of piece). psso is explained here and there - P4 means purl 4 stitches. K = knit 1 stitch, P = purl 1 stitch. Happy knitting!
12.11.2018 - 08:03Aliya Adrus wrote:
Hi! I'm from Malaysia. I'm interested to learn how to crochet the Sweet bay jacket (leaf jacket cardigan) for girls. I'm only the beginner, so I don't understand how to read the diagram. If you have a full tutorial how to make the leaf jacket cardigan, can you email it to me? Thank you and have a nice day!
09.11.2018 - 06:33DROPS Design answered:
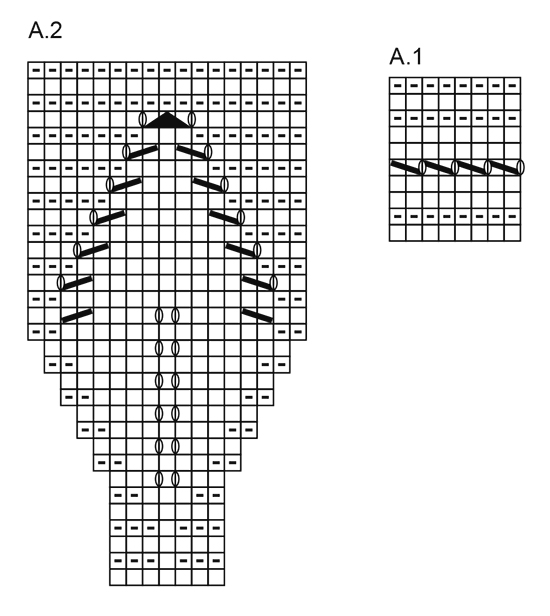
Dear Mrs Adrus, start reading diagram from the bottom corner on the right side towards the left from RS (= row 1 in A.1 = K all sts / row 1 in A.2 = white square = K from RS) and read the WS rows from the left towards the right (= row 2 in A.1 = K all sts from WS - row 2 in A.2 = K3, P1, K3). Happy knitting!
09.11.2018 - 09:00
![]() Betty wrote:
Betty wrote:
Bonjour ! Je désire réaliser ce modèle en 5/6, mais mon fil est plus gros que requis (gr C). Est-il possible de diminuer la largeur du motif, de 2 m, par exemple, en utilisant des broches circulaires 5 et 5,5, ce qui donnerait un motif de feuille plus mince et avec combien de mailles devrais-je débuter A.1 pour avoir 11 x le motif en A.2 ? Merci !
30.07.2018 - 18:35DROPS Design answered:
Bonjour Betty, ce modèle est prévu pour un fil du groupe B et 21 m x 28 rangs jersey = 10 x 10 cm, nous ne sommes malheureusement pas en mesure de pouvoir ajuster chacun de nos modèles à chaque demande, n'hésitez pas à demander de l'aide auprès du magasin où vous avez acheté votre laine. Bon tricot!
31.07.2018 - 09:48
|
|||||||||||||||||||
Sweet Bay Jacket#sweetbayjacket |
|||||||||||||||||||
 |
 |
||||||||||||||||||
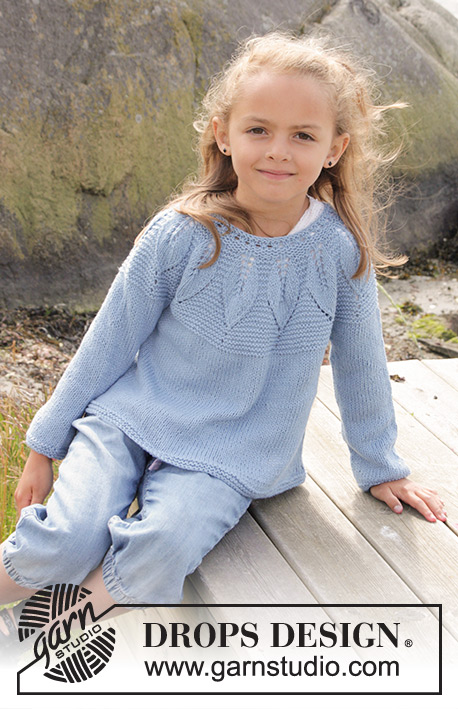
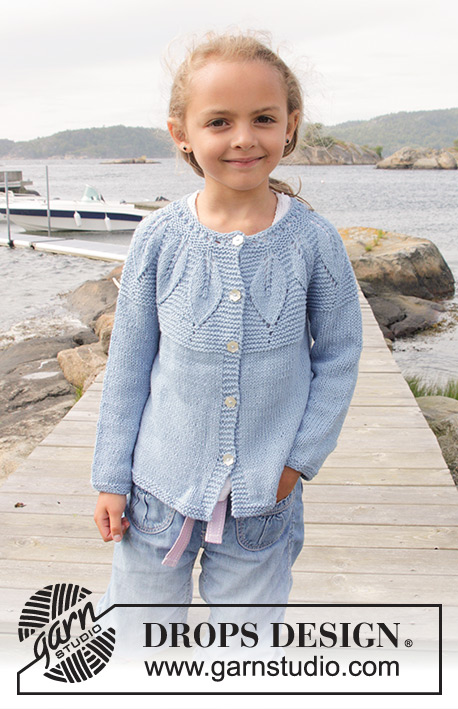
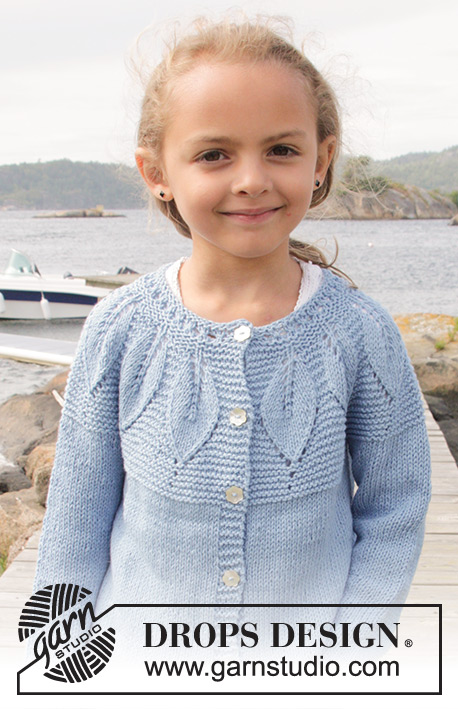
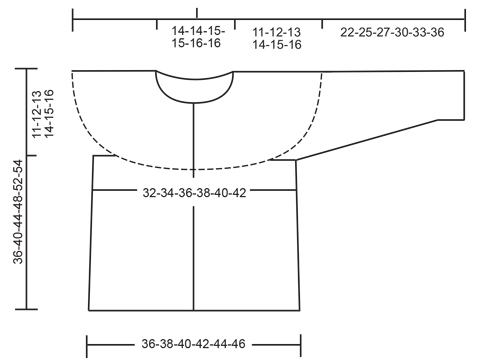
Knitted cardigan in garter st with leaf pattern and round yoke, worked top down in DROPS Belle. Size children 3 - 14 years
DROPS Children 27-24 |
|||||||||||||||||||
|
GARTER ST (back and forth): K all rows. 1 ridge = 2 rows K. GARTER ST (worked in the round): 1 ridge = 2 rounds. * K 1 round and P 1 round *, repeat from *-*. PATTERN: See diagrams A.1 and A.2. The diagrams show all rows in pattern seen from RS. INCREASE TIP: Inc 1 sts on each side of every marker (= 4 inc sts). Beg 1 st before marker and work as follows: 1 YO, K 2 (marker is between these 2 sts), 1 YO. On next row work YO twisted to avoid holes. BUTTONHOLES: Dec for buttonholes on right band (i.e. band at the end of row seen from RS). 1 buttonhole = K tog third and fourth st from edge and make 1 YO. Dec for buttonholes when piece measures (from cast-on edge and along the band): SIZE 3/4: 2, 8, 14, 22 and 28 cm SIZE 5/6: 2, 8, 14, 22 and 28 cm SIZE 7/8: 2, 8, 14, 22, 28 and 36 cm. SIZE 9/10: 2, 8, 14, 22, 28 and 36 cm. SIZE 11/12: 2, 8, 14, 22, 28, 36 and 42 cm SIZE 13/14: 2, 8, 14, 22, 28, 36 and 42 cm ---------------------------------------------------------- JACKET: Worked back and forth on circular needle, top down. YOKE: Cast on 87-87-94-94-101-101 sts on circular needle size 3.5 mm with Belle. Dec for BUTTONHOLES on right band - see explanation above. Work 5 sts in GARTER ST - see explanation above (= band), A.1 until 5 sts remain, 5 sts in garter st (= band). On row with YOs in A.1 finish with 1 st K before band. When A.1 has been worked 1 time vertically, continue as follows: 5 sts in garter st, A.2 (= 7 sts), repeat A.2 11-11-12-12-13-13 times in total, finish with 5 sts in garter st. REMEMBER THE KNITTING TENSION When A.2 has been worked 1 time vertically there is 197-197-214-214-231-231 sts on needle and piece measures approx. 10 cm. Continue with garter st, AT THE SAME TIME inc 1 st in the middle of every repetition (= 11-11-12-12-13-13 sts inc), inc with YO, K YO on next row to make holes. Repeat inc every 1-1-1½-1½-2-2 cm 0-1-1-2-1-2 more times = 208-219-238-250-257-270 sts. K 1 row while adjusting the no of sts to 210-222-234-250-262-276. Continue in garter st until piece measures 11-12-13-14-15-16 cm. Continue to work as follows (from RS): Work the first 36-38-40-42-44-45 sts (= front piece), slip the next 38-40-42-46-48-52 sts on a stitch holder (= sleeve), cast on 6 new sts under sleeve, work the next 62-66-70-74-78-82 sts (= back piece), slip the next 38-40-42-46-48-52 sts on a stitch holder (= sleeve), cast on 6 new sts under sleeve, work the remaining 36-38-40-42-44-45 sts (= front piece). BODY: There are now 146-154-162-170-178-184 sts for body. Insert a marker in each side of body where new sts were cast on under sleeve (= 3 new sts on each side of marker). NOW MEASURE THE PIECE FROM HERE. Switch to circular needle size 4 mm. Continue in stocking st and garter st on bands. When piece measures 4 cm, inc 1 st on each side of each marker (= 4 sts inc) - READ INCREASE TIP! Repeat inc every 5-6-7-8-9-10 cm 3 more times = 162-170-178-186-194-200 sts. Continue in stocking st and garter st until piece measures 24-27-30-33-36-37 cm, work 3 ridges. Cast off. SLEEVE: Slip sts from stitch holder back on double pointed needles size 4 mm (= 38-40-42-46-48-52 sts). Pick up 1 st in each of the 6 sts cast on under sleeve = 44-46-48-52-54-58 sts. Insert 1 marker mid under sleeve. Now measure the piece from here. Work in stocking st. When piece measures 3 cm dec 1 st on each side of marker, repeat dec every 7-5-5-4-4-4 cm 2-3-3-5-5-7 more times = 38-38-40-40-42-42 sts. Continue in stocking st until sleeve measures 21-24-26-29-32-35 cm, work 3 ridges and cast off. ASSEMBLY: Sew the buttons on to left front piece. |
|||||||||||||||||||
Diagram explanations |
|||||||||||||||||||
|
|||||||||||||||||||
 |
|||||||||||||||||||
 |
|||||||||||||||||||
Have you finished this pattern?Tag your pictures with #dropspattern #sweetbayjacket or submit them to the #dropsfan gallery. Do you need help with this pattern?You'll find 25 tutorial videos, a Comments/Questions area and more by visiting the pattern on garnstudio.com. © 1982-2026 DROPS Design A/S. We reserve all rights. This document, including all its sub-sections, has copyrights. Read more about what you can do with our patterns at the bottom of each pattern on our site. |
|||||||||||||||||||


With over 40 years in knitting and crochet design, DROPS Design offers one of the most extensive collections of free patterns on the internet - translated to 17 languages. As of today we count 324 catalogues and 12290 patterns translated into English (UK/cm). 12290
We work hard to bring you the best knitting and crochet have to offer, inspiration and advice as well as great quality yarns at incredible prices! Would you like to use our patterns for other than personal use? You can read what you are allowed to do in the Copyright text at the bottom of all our patterns. Happy crafting!
Post a comment to pattern DROPS Children 27-24
We would love to hear what you have to say about this pattern!
If you want to leave a question, please make sure you select the correct category in the form below, to speed up the answering process. Required fields are marked *.