
Popular categories
Looking for a yarn?


Comments / Questions (26)
![]() Jose Munster wrote:
Jose Munster wrote:
Staat er een fout in de tips voor minderen bij de raglan? De zin begint met brei 2 steken samen en dan 3 st voor de markeerde enz
23.10.2025 - 13:02
![]() Maite wrote:
Maite wrote:
Al leer el patrón aparece en el apartado OJALES : “Rem” para ojales y en el apartado cuerpo: rem 5 pta en cada lado para la sisa. Qué significa Rem? Gracias
21.03.2024 - 11:00DROPS Design answered:
Hola Maite, rem = rematar o cerrar puntos. Como cuando cierras para terminar la prenda.
24.03.2024 - 22:39
![]() Alana wrote:
Alana wrote:
I am knitting the jumper and have got stuck in the yoke section (without buttons). Casting off towards the neck, what do you mean by 2st 1 time and 1st 2 times? Some clarification would be great! And for how many rows/ to what length? Just continue until there are 45 st left?
04.12.2022 - 21:18DROPS Design answered:
Hi Alana, These decreases are for the neck (after placing the mid-front stitches on a thread). You decrease, working back and forth, first 2 stitches on each side of the neck one time, work 1 row without decreasing, then 1 stitch on each side of the neck on each of the next 2 rows. A total of 8 stitches decreased. This leaves you with 45 stitches. Happy knitting!
05.12.2022 - 06:58
![]() Helle Pedersen wrote:
Helle Pedersen wrote:
Hej ang. trøjen der mangler indtagning vejledning til den side man syr knappen på
25.04.2022 - 11:00DROPS Design answered:
Hei Helle. Du feller av i knappestolpen i "raglanlinjen" / der du har lagt opp ekstra masker. Les avsnittet: BÆRESTK MED KNAPP i oppskriften og henvisningene i det avsnittet. mvh DROPS Design
25.04.2022 - 14:27
![]() Rikke wrote:
Rikke wrote:
Ang buksen. Først står det: Når benet måler 28-34-37 (43-49) cm byttes det til settp 3,5…. Videre står det: Når benet måler 18-22-25 (28-35) cm (buksen skal da måle 36-42-46 (52-59) cm fra livet) Det går jo ikke?
10.02.2022 - 18:56DROPS Design answered:
Hei Rikke. Her burde det stå:.....Når buksen måler 28-34-37 (43-49) cm byttes det til settp 3,5.... og ikke benet. Da stemmer det også med målskissen til oppskriften. Takk for at du gjorde oss oppmerksom på dette. mvh DROPS Design
14.02.2022 - 10:38
![]() Ranveig Gruner wrote:
Ranveig Gruner wrote:
Står helt fast,har kommet der hals er ferdig felt der det var 13 masker tatt av,men jeg skjønner ikke hvor jeg skal ta opp di 27 masker,er det på begge sider der di 13 maskene er tatt av?og skal det virkelig være bare 49 masker igjen når man begynner og strikke halsen?har problemer der på grunn av at jeg har over 100 nå når jeg er ferdig felt hals og bare 3felling på armene?
04.05.2021 - 09:59DROPS Design answered:
Hei Ranveig. Vi skal hjelpe deg så godt vi kan, men hvilken størrelse strikker du? Og strikker du halskant med eller uten knapp? mvh DROPS design
10.05.2021 - 08:30
![]() Francine wrote:
Francine wrote:
Bonjour,j’essaie de comprendre les diminutions raglan sans boutonnage.C’est écrit 2 mailles ensemble que je fais au début du tour,puis je fais 2 diminutions par marqueur et une dernière à 4 mailles de la fin du tour?Ça fait 6 diminutions,est-ce que j’ai bien compris? Merci 🙏
30.03.2021 - 03:01DROPS Design answered:
Bonjour Francine, vous diminuez 2 mailles pour chaque de 4 raglans (8 mailles diminuees par tour). Rappelez-vous que le debut du tour (la ou vous commencez les DIMINUTIONS RAGLAN SANS BORDURE DE BOUTONNAGE) se trouve une maille apres le premier marqueur. Bon tricot!
30.03.2021 - 12:09
![]() Gaylene Newton wrote:
Gaylene Newton wrote:
Re pants pattern, at point to insert marker in middle st front & back of pants denotes placing them at 47sts between...with 96 sts should this not be 48? Should there then be extra sts at beginning of round? Mathematically this doesn’t add up...where exactly do you start counting sts to find a 47st divide? Thanks
01.02.2021 - 20:54DROPS Design answered:
Dear Mrs Newton, you should insert the marker in the middle stitch of mid front + mid back, so that you will have: 47 sts, 1 st with marker, 47 sts, 1 st with marker = 96 sts. Happy knitting!
02.02.2021 - 09:59
![]() Nicole wrote:
Nicole wrote:
Jag förstår inte från steget där man ska lägga upp mittersta 13 maskorna. Jag. har jämt antal i mellan minskningar till ranglan. Gör det något att den är lite förskjuten. Verkar bli rätt antal när jag räknar ändå. Sen undrar jag om det inte blir en liten öppning när man bara minskar på "bakstycket" och varför minskar man när man sen ska plocka upp maskor. Förstår inte slutet.
19.11.2020 - 20:38DROPS Design answered:
Hej Nicole. Nej det kommer inte att synas att halsen blir lite förskjuten. Du avmaskar vid halsen för att skapa en rund halsringning (eftersom du gör det på vartannat varv och inte allt på en gång), det är därför du maskar av för att sedan plocka upp maskor igen. Mvh DROPS Design
20.11.2020 - 11:02
![]() Nicole wrote:
Nicole wrote:
Det står att man ska sätta de mittersta 13 på en tråd, men jag har totalt 18 mellan minskningarna. Gör det något att det är ojämnt? med 2 på ena. sidan och 3 på andra? Sen undrar jag också om det inte bli några hål eftersom man stickar några maskor 3 varv mer än dom man har satt på tråd. Varför minskar man om man ändå ska plocka upp sen? Får inte alls ihop de sista stegen från att man ska börja sätta 13 maskor på en tråd.
17.11.2020 - 18:02DROPS Design answered:
Hej Nicole. Nej det ska inte bli några hål, om du stickar utan knapp så börjar du att att sticka arbetet fram och tillbaka istället för runt efter att du satt de 13 maskorna på 1 tråd. Efter det så avmaskar du vid halsen för att skapa en rundare halsringning. Efter det plockar du upp maskor för att sticka halskanten som senare viks dubbel. Mvh DROPS Design
20.11.2020 - 10:58
|
|
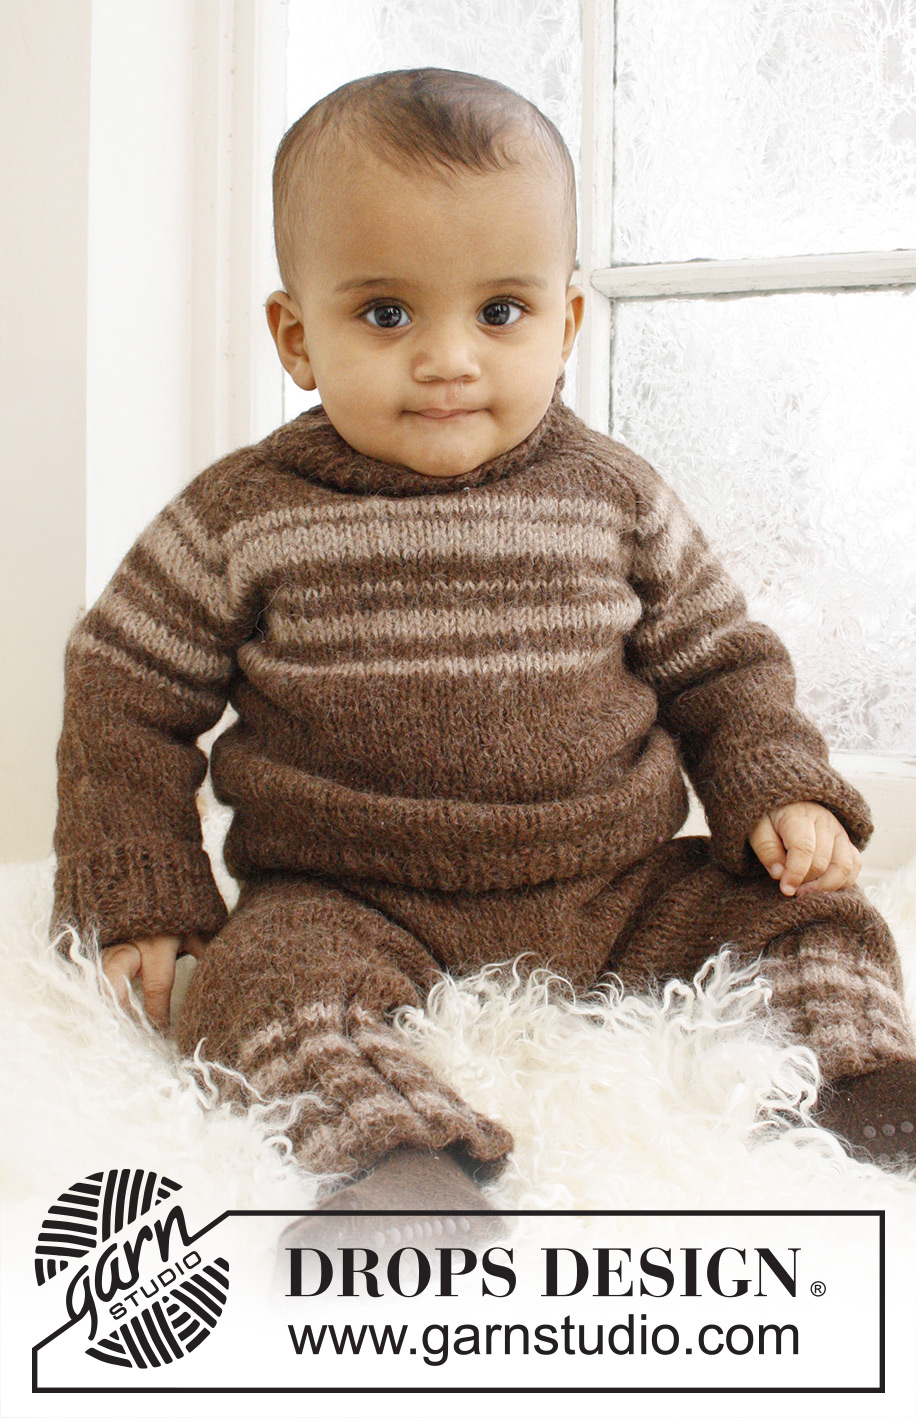
Little William#littlewilliamset |
|
|
|
|
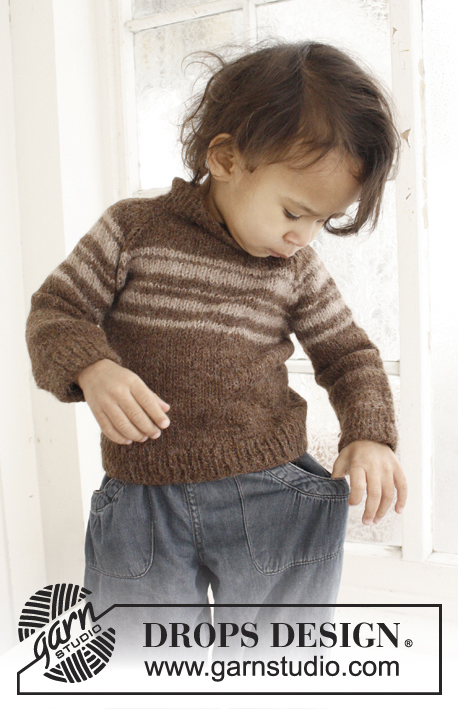
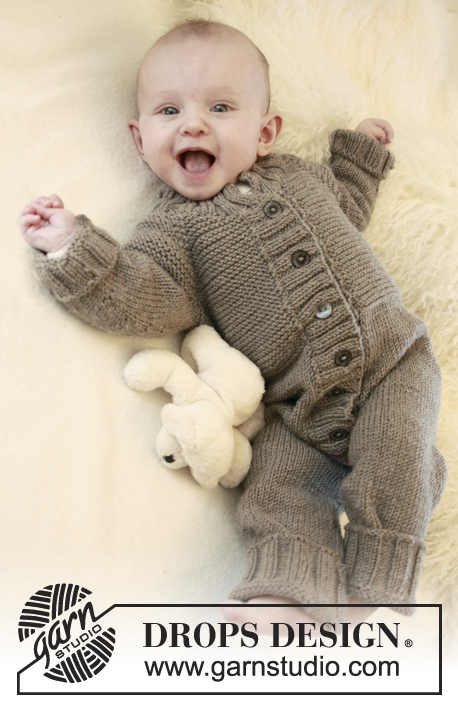
Set of knitted pants and jumper with raglan and stripes for baby and children in DROPS Lima
DROPS Baby 21-30 |
|
|
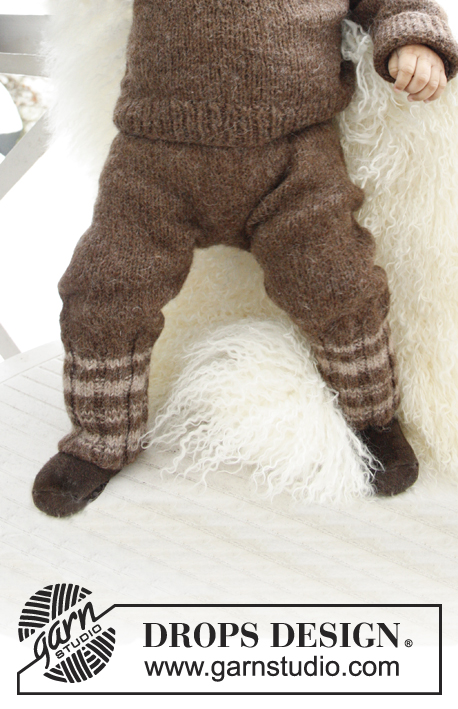
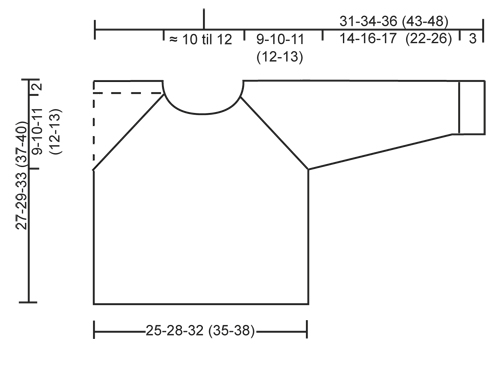
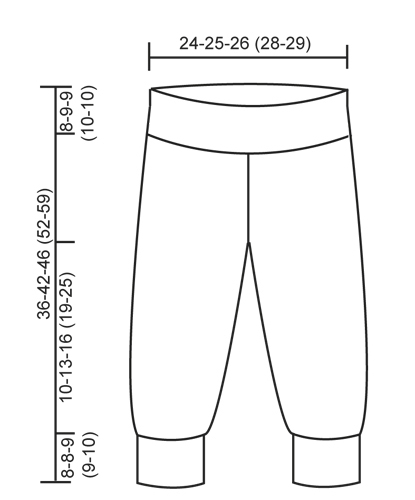
JUMPER: RIB: * K 1, P 1 *, repeat from *-*. STRIPES-A: 2 rounds light brown, 3 rounds brown, 3 rounds light brown, 2 rounds brown, 1 round light brown, 3 rounds brown, 4 rounds light brown, 1 round brown, 2 rounds light brown. DECREASE TIP FOR RAGLAN WITHOUT BUTTON BAND: K 2 tog. * Work until 3 sts remain before next marker, slip 1 st as if to K, K 1, psso, K 2, K 2 tog *, repeat from *-* at the next 2 markers, work until 4 sts remain on needle, slip 1 st as if to K, K 1, psso, K 2. DECREASE TIP FOR RAGLAN WITH BUTTON BAND: DEC AS FOLLOWS FROM RS: Work 4 band sts in garter st, K 2 tog. * Work until 3 sts remain before next marker, slip 1 st as if to K, K 1, psso, K 2, K 2 tog *, repeat from *-* at the next 2 markers, work until 6 sts remain on needle, slip 1 st as if to K, K 1, psso, work 4 band sts in garter st. DEC AS FOLLOWS FROM WS: Work 4 band sts in garter st, P 2 tog, * Work until 3 sts remain before next marker, P 2 twisted tog (i.e. work in back loop of st instead of front), P 2, P 2 tog *, repeat from *-* at the next 2 markers, work until 6 sts remain on needle, P 2 twisted tog, work 4 band sts in garter st. NOTE: Make sure that the sts lay in the correct direction from RS. GARTER ST (back and forth on needle): K all rows. BUTTON HOLES: Cast off for button holes on the raglan band which is on the sleeve part – assess if this is needed in the larger sizes. Make holes as follows: K 1, K 2 tog, 1 YO, K 1. Cast off for button holes when band measures: Size 1/3 months: 2, 5 and 8 cm Size 6/9 months: 3, 6 and 9 cm Size 12/18 months: 3, 7 and 10 cm Size 2 years: 3, 7 and 11 cm Size 3/4 years: 4, 8 and 12 cm -------------------------------------------------------- JUMPER: Worked in the round on circular needle from bottom up. BODY: Cast on 102-114-126 (138-150) sts on circular needle size 3.5 mm with brown Lima. Work 1 round in stocking st, then continue with RIB for 3 cm - see explanation above. Switch to circular needle size 4.5 mm and work 1 round in stocking st. Work next round as follows: Insert a marker in the 1st st (= beg of round), work 50-56-62 (68-74) sts in stocking st, insert a marker (= mid in the side) in next st, work 50-56-62 (68-74) sts in stocking st. When piece measures 14-15-18 (21-23) cm, work STRIPES-A - see explanation above. AT THE SAME TIME when piece measures 16-17-20 (23-25) cm, cast off 5 sts in each side for armholes (= st with marker + 2 sts on each side of this) = 92-104-116 (128-140) sts. Put piece aside and knit the sleeves. SLEEVE: Cast on 30-30-36 (36-36) sts on double pointed needles size 3.5 mm with brown Lima. Work 1 round in stocking st, continue with rib for 3 cm. Switch to double pointed needles size 4.5 mm, continue in stocking st. Insert a marker in the 1st st on round, AT THE SAME TIME when piece measures 6 cm, inc 2 sts mid under sleeve on each side of marker every 3-2-3 (2.5-2.5) cm a total of 4-6-5 (7-9) times = 38-42-46 (50-54) sts. When piece measures 15-17-18 (23-27) cm work STRIPES-A. When piece measures 17-19-20 (25-29) cm (adjust so that same no stripes has been worked as on body), cast off 5 sts mid under sleeve = 33-37-41 (45-49) sts. Put piece aside and knit another sleeve. YOKE: Slip sleeves on to same circular needle as body where armholes were cast off = 158-178-198 (218-238) sts. Insert a marker in every transition between body and sleeves. Then continue the piece with or without button holes – see explanation below. YOKE WITH BUTTONS: Then the piece is worked back and forth from right "raglan seam" at the front. Cast on 4 extra sts on the front piece part (= button band) = 162-182-202 (222-242) sts. Read all of the following section before continuing! Continue in stocking st and with stripes as well as 4 sts in GARTER ST at beg and end of row (for button band). At the same time dec for raglan – see DECREASE TIP – dec on every other row: 11-11-12 (12-13) times and then on every row: 1-3-4 (6-7) times. NOTE: Also cast off for BUTTON HOLES - see explanation above. At the same time when piece measures 23-25-29 (32-35) cm, slip the middle 13-13-13 (15-15) sts on a stitch holder for neck. Continue to cast off towards the neck on every other row: 2 sts 1 time and 1 st 2-2-2 (3-3) times. After all dec for raglan and cast offs for neck, 45-49-53 (53-57) sts remain on needle. YOKE WITHOUT BUTTONS: Then work in the round. Continue in stocking st and with stripes. At the same time dec for raglan – see DECREASE TIP – dec on every other row: 11-11-12 (12-13) times and then on every row: 1-3-4 (6-7) times. At the same time when piece measures 23-25-29 (32-35) cm, slip the middle 13-13-13 (15-15) sts on a stitch holder for neck. Continue to cast off towards the neck on every other row: 2 sts 1 time and 1 st 2-2-2 (3-3) times. After all dec for raglan and cast offs for neck, 41-45-49 (49-53) sts remain on needle. NECK: Knit up approx. 23 to 27 sts at the front of neck (incl sts on stitch holder) with brown = 68 to 84 sts. Slip all sts on double pointed needles size 3.5 mm – work 1 round in stocking st while at the same time dec/inc sts evenly to 64-76 sts. Work rib K 2/P 2 for 8 cm, loosely cast off – fold the edge double towards WS and fasten with stitches. ASSEMBLY: Sew the openings under the sleeves tog. If button band has been worked: Place button bands on top of each other with the button holes part at the top and fasten in the bottom edge from WS. Sew on buttons. -------------------------------------------------------- PANTS: STRIPES-A: 2 rounds light brown, 3 rounds brown, 3 rounds light brown, 2 rounds brown, 1 round light brown, 3 rounds brown, 4 rounds light brown, 1 round brown, 2 rounds light brown. STRIPES-B: 4 rounds brown, 2 rounds light brown, 4 rounds brown, 4 rounds light brown, 4 rounds brown, 1 round light brown, 1 round brown, 1 round light brown, 4 rounds brown, 3 rounds light brown, 1 round brown, 1 round light brown, 2 round brown. DECREASE TIP: Dec as follows before marker: K 2 tog. Dec as follows after marker: Slip 1 st as if to K, K1, psso. -------------------------------------------------------- PANTS: Worked in the round from the waist down. Cast on 108-112-116 (128-132) sts on circular needle size 3.5 mm with brown. Work rib = K 2/P 2 in STRIPES-A - see explanation above. Work until piece measures 8-9-9 (10-10) cm. Switch to circular needle size 4.5 mm and work in stocking st while at the same time dec to 96-100-104 (112-116) sts evenly on round. Insert a marker in the middle st at the front and a marker in the middle st at the back of pants (= 47-49-51 (55-57) sts between sts with markers). Continue in the round in stocking st - REMEMBER THE KNITTING TENSION - When piece measures 11-13-14 (16-17) cm, inc 1 st on each side of the 3 middle sts in the back - inc by picking up st from previous round and K this st. Repeat inc on every other round a total of 9-9-9 (10-10) times = 114-118-122 (132-136) sts. On next round cast off the 3 middle sts at the front and the 3 middle sts at the back (i.e. st with marker and 1 st on each side of this st) and finish each leg separately. The piece measures approx. 18-20-21 (23-24) cm. Slip the 54-56-58 (63-65) sts for one leg on a stitch holder and the 54-56-58 (63-65) sts for the other leg on double pointed needles size 4.5 mm. LEG: Continue the leg in stocking st in the round – insert a marker at beg of round = inside of leg. When the leg measures 2-2-2 (3-3) cm, dec 1 st on each side of marker – SEE DECREASE TIP! Repeat dec every 2-3-3½ (4-5½) cm a total of 5 times = 44-46-48 (53-55) sts. Switch to double pointed needles size 3.5 mm when pant measures 28-34-37 (43-49) cm. Work 1 round in stocking st while AT THE SAME TIME inc evenly to 48-48-54 (54-60) sts. Then work rib: K 3/P 3 in the round over all sts in STRIPES-B – see explanation above. When the leg measures 18-22-25 (28-35) cm (the pants should measure 36-42-46 (52-59) cm from the waist), LOOSELY cast off with K over K and P over P. Work the other leg the same way. ASSEMBLY: Sew tog the opening between the legs. |
|
 |
|
 |
|
Have you finished this pattern?Tag your pictures with #dropspattern #littlewilliamset or submit them to the #dropsfan gallery. Do you need help with this pattern?You'll find 23 tutorial videos, a Comments/Questions area and more by visiting the pattern on garnstudio.com. © 1982-2026 DROPS Design A/S. We reserve all rights. This document, including all its sub-sections, has copyrights. Read more about what you can do with our patterns at the bottom of each pattern on our site. |


With over 40 years in knitting and crochet design, DROPS Design offers one of the most extensive collections of free patterns on the internet - translated to 17 languages. As of today we count 324 catalogues and 12290 patterns translated into English (UK/cm). 12290
We work hard to bring you the best knitting and crochet have to offer, inspiration and advice as well as great quality yarns at incredible prices! Would you like to use our patterns for other than personal use? You can read what you are allowed to do in the Copyright text at the bottom of all our patterns. Happy crafting!
Post a comment to pattern DROPS Baby 21-30
We would love to hear what you have to say about this pattern!
If you want to leave a question, please make sure you select the correct category in the form below, to speed up the answering process. Required fields are marked *.