
Popular categories
Looking for a yarn?


Comments / Questions (5)
![]() Axelle wrote:
Axelle wrote:
Bonjour, je viens de crocheter 2 jolis bonnets (drop air + Silk) Par contre je ne comprends pas pourquoi malgré tous mes efforts et le respect du patron, on voit une démarcation à chaque changement de rang . Je termine par une MC et commence par 3 ML qui me servent de fausse bride puis 1 B dans la 2ème B du rg précédent.
19.12.2020 - 22:12DROPS Design answered:
Bonjour Axelle, les 3 mailles en l'air remplacent la 1ère bride mais ne seront jamais exactement comme elle, donc il est possible qu'elles soient visibles - cette vidéo montre comment crocheter des brides en rond et vous permettra peut-être de visualiser comment on procède pour comparer à vos bonnets. En cas de doute, n'hésitez pas à montrer votre bonnet à votre magasin (même en photo par mail) ce sera plus facile d'avoir une assistance personnalisée. Bon crochet!
21.12.2020 - 07:40Mireya wrote:
Gracias por contestar, aclarado ese punto, otra duda que tengo es donde dice para la delantera "Ahora trabajar punto elástico con un punto de orillo y punto derecho a cada lado" y en la espalda "comenzar y terminar el punto elástico con punto de orillo y punto revés" ¿Qué finalidad tiene hacer ese punto derecho y revés?
31.03.2016 - 18:54DROPS Design answered:
Hola Mireya. El pt orillo lo usamos para la costura al terminar el trabajo. En el delantero se empieza/termina con 1 pt orillo seguido/precedido de 1 d. y la espalda empieza/termina con un pt orillo seguido/precedido de 1 r. Así el dibujo es continuo al pasar de espalda a delantero
02.04.2016 - 14:01Mireya Miranda wrote:
Hola, donde dice "cuando la labor mida 12 y luego 24 cm haga 1 aumento de cada lado" y mi talla es la M (47 puntos montados y dos puntos de orillo= 49) ¿entonces debo hacer un aumento cuando mida 12 (50 puntos) y luego otro aumento cuando mida 24 (51 puntos) o debe ser sin contar los puntos de orillo o sea hacer aumento por derecha e izquierda cuando la labor mida 12cm (49 puntos) y luego otros dos cuando mida 24cm(51) ?espero haberme dado a entender.
26.03.2016 - 06:23DROPS Design answered:
Hola Mirey. Los 47 pts incluyen ya 1 pt orillo a cada lado, no son 49. Los aumentos se trabajan cuando la labor mide 12 cm y de nuevo cuando mide 24 cm, es decir 2 pts (uno a cada lado) la primera vez + 2 pts la segunda vez (47 + 2 + 2 = 51 pts)
30.03.2016 - 10:31
![]() Amanda wrote:
Amanda wrote:
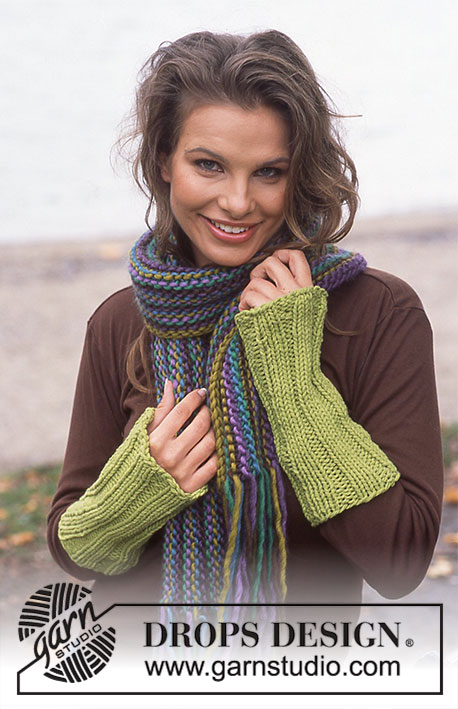
I beskrivningen står det att det ska vara tre olika färger på halsduken, men på bilden är det minst fem färger. Vilka är de övriga?
09.09.2013 - 13:28DROPS Design answered:
Hej Amanda. Du har ret - der mangler et par. Det skal vaere: 03 brun, 06 oliven, 04 lilla, 20 lilla-melert, 05 turkis og 25 gressgrønn. Vi retter mönstret. Tak for det.
11.09.2013 - 15:21
![]() Kari L wrote:
Kari L wrote:
Hvilken metode brukes for å legge opp, slik at man får den fine kanten nederst?
22.01.2011 - 16:01
|
|
DROPS Extra 0-387 |
|
|
|
|
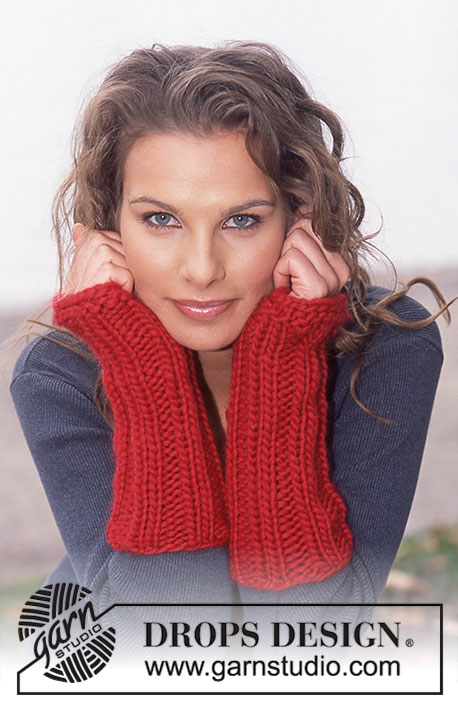
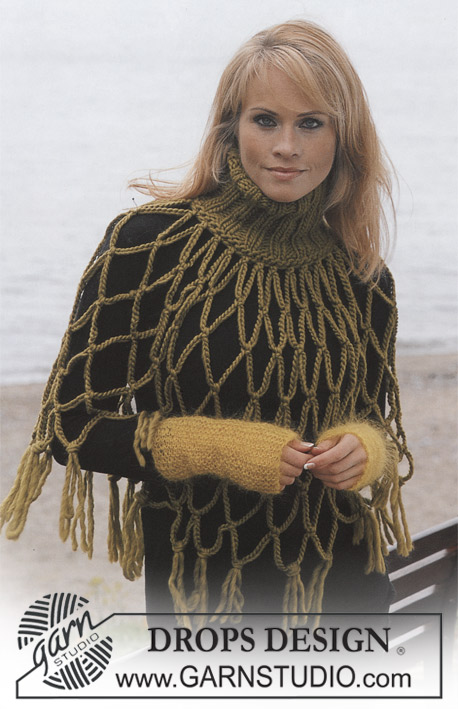
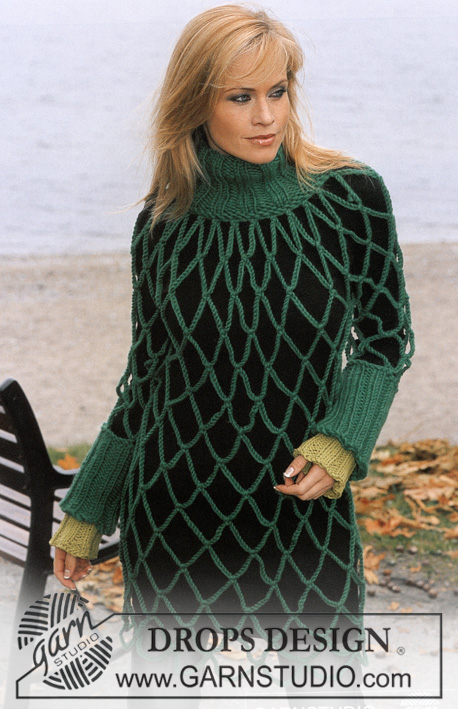
Trendy sweater, hat and scarf in ”Snow”
DROPS Extra 0-387 |
|
|
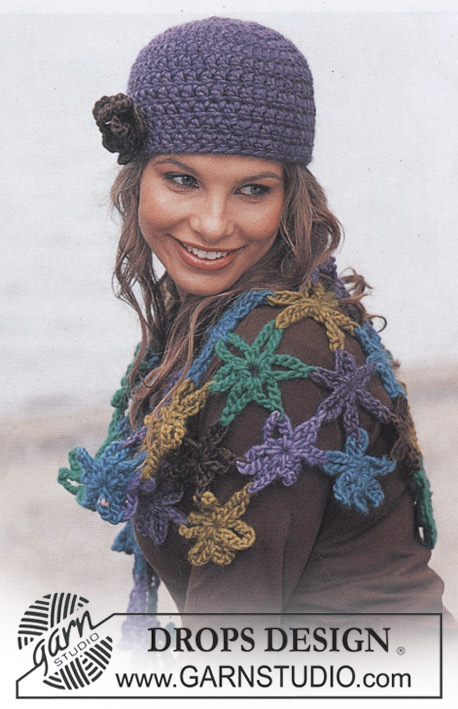
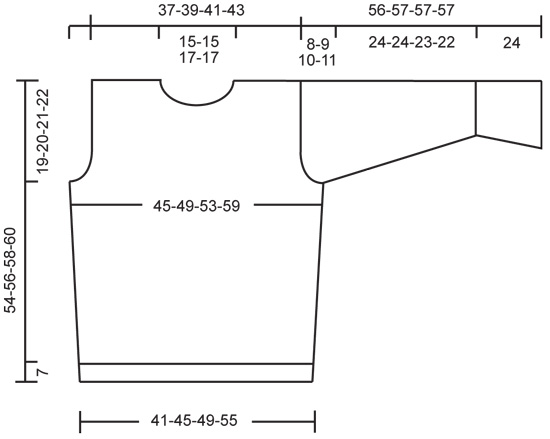
Rib: * K1, P1 *, repeat *-*. Front piece: Cast on 43-47-51-57 sts (includes 1 edge st each side) on needle size 9 mm with 1 strand Snow. P1 row on WS, Then work rib with 1 edge st and K1 in each side. When piece measures 7 cm continues in stocking sts. Remember to check your knitting tension! When piece measures 12 cm and then 24 cm inc 1 st each side = 47-51-55-61 sts. When piece measures 35-36-37-38 cm cast off for armholes each side on every other row: 3 sts 1 time, 2 sts 0-0-1-2 times and 1 st 2-3-2-2 times = 37-39-41-43 sts. When piece measures 47-49-51-53 cm cast off center 7-7-9-9 sts for neck. Continue to cast off in side towards neck on every other row: 2 sts 1 time and 1 sts 2 times = 11-12-12-13 sts rem on each shoulder. Cast off when piece measures 54-56-58-60 cm. Back piece: Cast on and knit as front piece but start and end rib with 1 edge st and P1 each side. Cast off for armholes as on front piece and continue until piece measures 52-54-56-58 cm. Now cast off center 13-13-15-15 sts for neck. On next row cast off additional 1 st towards neck = 11-12-12-13 sts left on each shoulder. Cast off when piece measures 54-56-58-60 cm. Sleeve: Cast on 28-28-32-32 sts (incl 1 edge st each side) on needle size 9 mm with 2 strands Snow. P 1 row on WS, Then workt rib with 1 edge st each side. When piece measures 24 cm remove one strand and continue in stocking sts and 1 strand. At the same time after rib inc 1 st each side every 7-5-7-4 cm a total of 4-5-4-6 times = 36-38-40-44 sts. When sleeve measures 48-48-47-46 cm cast off for top shaping each side on every other row: 3 sts 1 time, 2 sts 1 time and 1 st 1-2-2-3 times, then cast off 2 sts each side until piece measures 55-56-56-56 cm, at last cast off 3 sts 1 time each side. Cast off the remaining sts, piece measures approx 56-57-57-57 cm. Assembly: Sew right shoulder seam. Collar: Pick up approx 40-48 sts (divisible with 2) around neckline on needle size 9 mm with 1 strand Snow. K1 row on WS and K1 row from RS, then continue in rib (= K1/ P1). When the collar measures approx 12 cm K 1 row from RS, and then cast off loosely with P sts on WS. Sew left shoulder seam and continue up along the collar – sew the collar in the outermost stitch loops so that seam doesn’t get bulky. Sew in sleeves. Sew sleeve- and side seams in one within 1 edge st. ________________________________________ HAT Size: One-size Materials: DROPS Snow, from Garnstudio 100 g colour no. 20, purple-mix + en remainder brown, e.g. no 3 (for flower) DROPS Crochet hook size 7 mm. Crochet tension: Hook size is only recommended! 9 tr x 6,5 rows with hook 7 mm = 10 x 10 cm. Crochet tip: First tr on every row substitutes with 3 ch. Every row ends with 1 sl st in 3rd ch in the beg of row. Hat: Crochet 5 ch with hook 7 mm and purple-mix and form a ring with 1 sl st in first ch. Read Crochet tip! 1st row: Crochet 12 tr in ring. 2nd row: Crochet 2 tr in every tr = 24 tr 3rd row: * 1 tr in first tr, 2 tr in following tr *, repeat *-* around = 36 tr. 4th row: * 1 tr in first 2 tr, 2 tr in following tr*, repeat *-* around = 48 tr. After 4th row piece measures approx 14 cm in diameter. Now crochet 7 rounds with tr and without inc. Cut and fasten threads. Flower: Crochet with hook 7 mm and Snow as follows: Crochet 4 ch and form a ring with 1 sl st in first ch. 1st row: * 8 ch, 1 dc in ring *, repeat *-* a total of 6 times. Cut the thread, and fasten flower on hat. ________________________________________ SCARF Measure:ca 16 x 140 cm + fringes (ca 25 cm in each side) Materials: DROPS Snow, from Garnstudio 50 g colour no. 3, brown 50 g colour no. 4, purple 50 g colour no. 5, turquoise 50 g colour no. 6, olive 50 g colour no. 20, plum 50 g colour no. 25, green DROPS Needle size 9 mm. Tension: Needle size is only recommended! 10 sts x 20 rows on needle size 9 mm and garter stitches = 10 x 10 cm. Garter sts: Knit all sts on every row. Fringe tip: Important - Leave approx 25 cm of the strands in each side at every colour changee - these ends = the fringes. Scarf: Read fringe tip above before you knit! Cast on 140 sts on 2 needles size 9 mm with purple Snow, so that cast on edge becomes loose. Pull out one needle and work garter sts in stripes as follows: * 1 row plum, 1 row brown, 1 row olive, 1 row turquoise, 1 row green, 1 row purple *, repeat *-*. When scarf measures approx 16 cm in width, cast off loosely. |
|
 |
|
Have you finished this pattern?Tag your pictures with #dropspattern or submit them to the #dropsfan gallery. Do you need help with this pattern?You'll find 26 tutorial videos, a Comments/Questions area and more by visiting the pattern on garnstudio.com. © 1982-2026 DROPS Design A/S. We reserve all rights. This document, including all its sub-sections, has copyrights. Read more about what you can do with our patterns at the bottom of each pattern on our site. |


With over 40 years in knitting and crochet design, DROPS Design offers one of the most extensive collections of free patterns on the internet - translated to 17 languages. As of today we count 324 catalogues and 12290 patterns translated into English (UK/cm). 12290
We work hard to bring you the best knitting and crochet have to offer, inspiration and advice as well as great quality yarns at incredible prices! Would you like to use our patterns for other than personal use? You can read what you are allowed to do in the Copyright text at the bottom of all our patterns. Happy crafting!
Post a comment to pattern DROPS Extra 0-387
We would love to hear what you have to say about this pattern!
If you want to leave a question, please make sure you select the correct category in the form below, to speed up the answering process. Required fields are marked *.