
Popular categories
Looking for a yarn?


































Comments / Questions (14)
 Domenica wrote:
Buonasera, se volessi fare un’alzatina dopo il collo per renderlo più confortevole, come devo procedere con gli aumenti del raglan? Grazie.
26.10.2026 - 17:49DROPS Design answered:
Buonasera Domenica, in questa sede non riusciamo a fornire un'assistenza così personalizzata. Buon lavoro!
26.10.2026 - 23:38
 Maria wrote:
Beskrivningen för ränder 1 verkar inte korrekt. På bilderna på Ravelry där stickare följt detta så blir det en lila rand. Den syns inte på bilden ni har tagit här. Ska det inte bara vara en gradient från aprikos till rosa? Sedan stickas ju rosa med en gradient till lila.
08.07.2026 - 09:15DROPS Design answered:
Hei Maria. Genseren strikkes ovenfra og ned og i oppskriften starter man med 12 cm med 3 trådar i färgen Light Peach og man avslutter genseren med 3 trådar i färgen Light Lavender. Kan kun se at det er elenasmaragd på Ravelry som har strikket geneseren i lignende farger og på bildet på Ravelry ser det ut som det er brukt fargen Lavender og ikke Light Lavender (noe som hen også skriver) , og derfor har fått en litt annen versjon av den orginale genseren. mvh DROPS Design
09.07.2026 - 06:59
 Lara wrote:
Is there a mistake with the stripes? After three strands of peach, it’s supposed to continue with two strands of peach and one strand of lavender. Wouldn’t it make more sense if it faded into the pink there? So two strands of peach and one strand of pink? And then it happens again in the next stripe where it says two strands of pink and one strand of lavender. Shouldn’t it be two strands of pink and one strand of peach before it continues into three strands of pink?
18.05.2026 - 20:10DROPS Design answered:
Dear Lara, Light Peach and Pink Pastel are quite similar so, to make a prettier contrast, we add a strand of lavender, so that the transition might be more noticeable. And we add it both with the 2 strands of Light Peach and the 2 strands of Pastel Pink. Otherwise, with the 2 strands of Light Peach and 1 strand of Pastel Pink, the transition would be barely noticeable, so it would look like a continuation of the stripe with 3 strands of the same colour. Happy knitting!
27.05.2026 - 11:53
 Sabine wrote:
Hallo, ich finde diesen Pulli mit Farbverlauf wunderschön. Gibt es ein Sommergarn, das ich anstelle von Kid Silk verwenden kann?
15.05.2026 - 16:26DROPS Design answered:
Liebe Sabine, versuchen Sie den Garnumrechner um die Alternative zu finden (sowie die passende Garnmenge), gern kann Ihnen auch Ihr DROPS Händler das beste passende Garn auch per Mail oder Telefon empfehlen. Viel Spaß beim Stricken!
18.05.2026 - 07:43
 Ingebjørg wrote:
Hei. Er der sjekket opp om det er riktig antall med garn med pastellrosa.? Skal starte på armene nå men absolutt ikke nok. Måtte sende etter to nye bunter i dag. Kjedelig
07.05.2026 - 15:30
Janina wrote:
Ten. 1 Markierer nach den ersten 25-26-26-29-29-30-30 Maschen der Runde anbringen (= ca. vordere Mitte), die Arbeit wird nun ab diesem Markierer gemessen. Ich bin bei der Halsblende. Muss ich bis zur ersten Markierung Stricken oder nur den ersten Maschenmarkierer anbringen? Lieben Dank und ich schreibe bestimmt häufiger. Lg Janina
01.04.2026 - 18:23DROPS Design answered:
Liebe Janina, stricken Sie nicht diese Maschen, zählen Sie einfach die Maschenanzahl, ohne die Maschen zu stricken, dann bringen Sie den Markierer an. Viel Spaß beim Stricken!
07.04.2026 - 16:39
 Charlotte wrote:
Jeg strikker blusen i XL og alle mål passer med opskriften. Er nu i gang med ærmerne, men kommer til at mangle pastelrosa. Til gengæld har jeg 57 gram ferskenfarvet tilbage. Er I helt sikre på at I har skrevet rigtigt mht farverne i stribe-opskrifterne? Det kan ikke passe at jeg har næsten halvdelen af den ferskenfarvede tilbage samtidig med at jeg kommer til at mangle pastelrosa til ærmerne. Der er noget galt i jeres opgørelse af farver og garnforbrug.
12.03.2026 - 15:12DROPS Design answered:
Hei Charlotte. Takk for din tilbakemelding, oppskriften er oversendt til Design avd. slik at de kan dobbeltsjekke garnmengden. mvh DROPS Design
27.03.2026 - 12:54
Francesca wrote:
Va bene, grazie, ma è giusto cominciare a mettere i 4 segnapunti partendo dall'inizio del giro?......non ci sto capendo niente, non capisco la sequenza, forse è meglio lasciar perdere!!! 😀😀
07.03.2026 - 01:26DROPS Design answered:
Buongiorno Francesca, il primo segnapunti va messo nella 1° maglia. Buon lavoro!
07.03.2026 - 09:00
Francesca wrote:
No, non le avevo considerate, in effetti...che tonta! Ho inserito prima il marcapunti che dovrebbe segnare il centro davanti, dopo 29 maglie dall'inizio del ferro e ho fatto partire il conteggio dei 4 marcapunti da lì. E' giusto così? grazie mille della risposta!😀
04.03.2026 - 15:47DROPS Design answered:
Buonasera Francesca, il 1° segnapunti che viene inserito sul collo serve per le misurazioni. Può utilizzare dei segnapunti di colore diverso per indicare i passaggi tra le maniche e il corpo sullo sprone. Buon lavoro!
04.03.2026 - 22:49
Francesca wrote:
Ma c'è per caso un errore? Sto lavorando la taglia XL, le maglie da montare sono 84, ma quando distribuisco i marcapunti la prima volta, il 1 dopo la 15esima maglia, il 2 dopo la 25esima, il terzo dopo la 15esima e l'ultimo dopo la 25esima avanzano 4 maglie.....??!!! quindi dovrebbero essere 80 m da montare all'inizio? :/
03.03.2026 - 00:58DROPS Design answered:
Buonasera Francesca, ha considerato le maglie in cui deve inserire i segnapunti? Probabilmente sono quelle le 4 maglie che le mancano. Buon lavoro!
03.03.2026 - 22:55
|
|
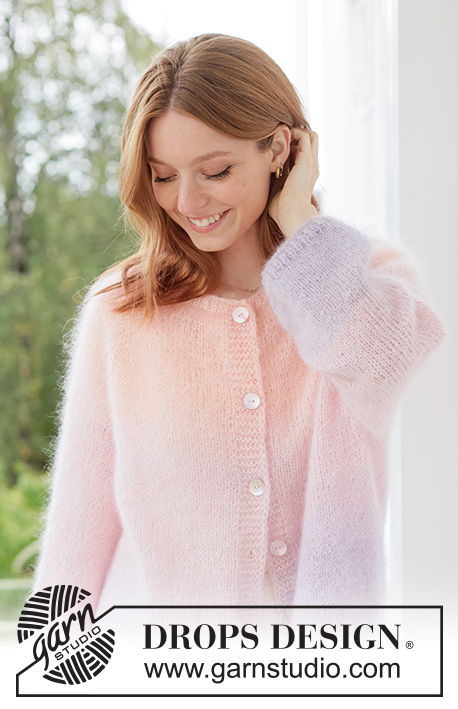
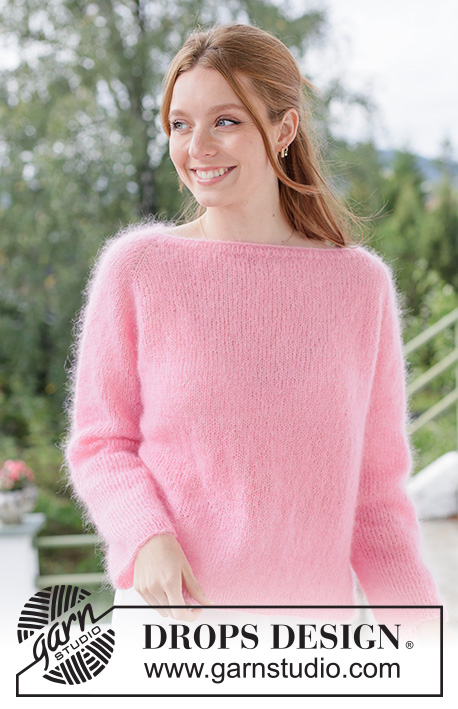
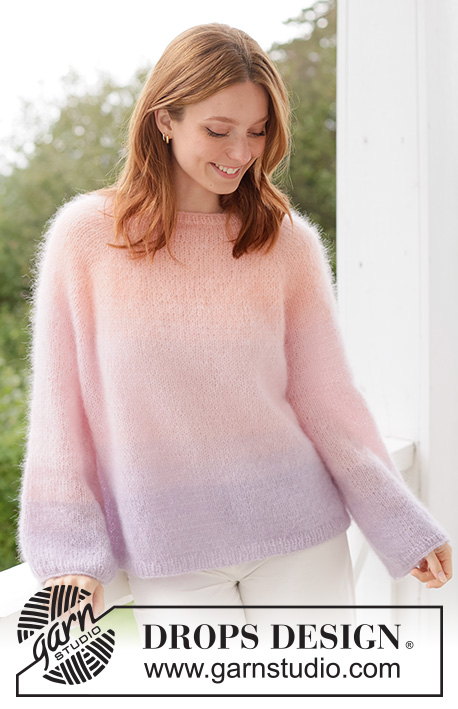
Sunset Sorbet Sweater#sunsetsorbetsweater |
|
 |
 |
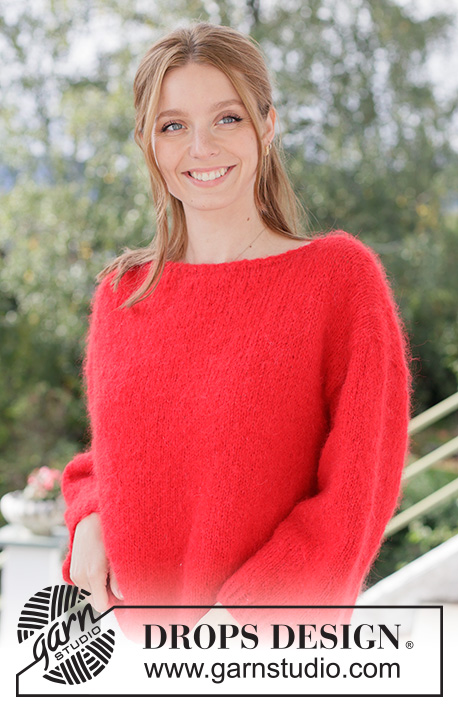
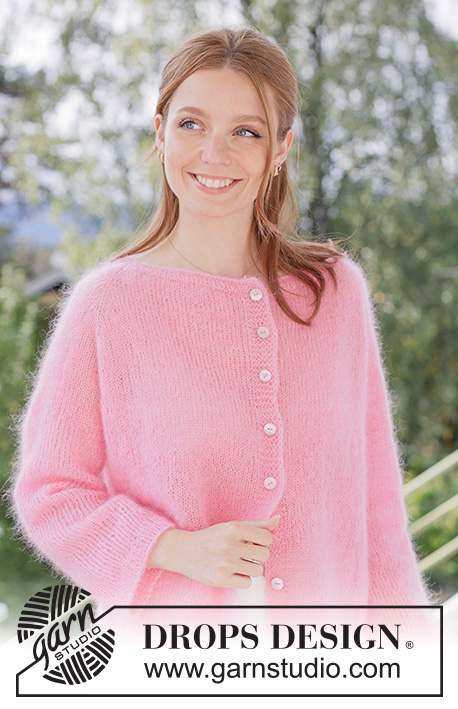
Knitted over-sized jumper in 3 strands DROPS Kid-Silk. The piece is worked top down in stocking stitch with raglan and tone-on-tone stripes. Sizes XS - XXXL.
DROPS 267-17 |
|
|
------------------------------------------------------- EXPLANATIONS FOR THE PATTERN: ------------------------------------------------------- STRIPES-1 (yoke and body): The stripes are worked in stocking stitch with 3 strands DROPS Kid-Silk in the following colours: 12 cm with 3 strands colour Light Peach, 4 cm with 2 strands colour Light Peach + 1 strand colour Light Lavender, 4 cm with 2 strands colour Pastel Pink + 1 strand colour Light Lavender, 12-14-16-17-19-21-23 cm with 3 strands colour Pastel Pink (dividing for body and sleeves is worked in this stripe), 4 cm with 2 strands colour Pastel Pink + 1 strand colour Light Lavender, 4 cm with 2 strands colour Light Lavender + 1 strand colour Pastel Pink, work to finished length with 3 strands colour Light Lavender. STRIPES-2 (sleeves): Continue the stripe from the yoke, i.e. 3 strands colour Pastel Pink, until the sleeve measures 24-23-22-23-23-21-22 cm from the division, 4 cm with 2 strands colour Pastel Pink + 1 strand colour Light Lavender, 4 cm with 2 strands colour Light Lavender + 1 strand colour Pastel Pink, work to finished length with 3 strands colour Light Lavender. RAGLAN: Increase 1 stitch by making 1 yarn over which is worked as follows on the next round: BEFORE RAGLAN-STITCH (twists to right): Slip the yarn over purl-wise from the left to the right needle, then replace it by inserting the left needle through the back (the yarn over is the other way around). Knit through the stitch-loop which lies on the front of the needle to avoid a hole. Then work the new stitch in stocking stitch. AFTER RAGLAN-STITCH (twists to left): Knit through the stitch-loop which lies on the back of the needle to avoid a hole. Then work the new stitch in stocking stitch. INCREASE TIP: When increasing evenly on the first round of rib, it is important to increase in the stitches that will subsequently be purled, so the knitted stitches continue neatly from the stocking stitch. SLEEVE TIP: When knitting up stitches under the sleeve, you can get a small hole in the transition between stitches on the body and sleeve. This hole can be closed by picking up the strand between 2 stitches and working this strand twisted together with the first stitch between body and sleeve. DECREASE TIP: Decrease 1 stitch on each side of the marker-thread as follows: Work until there are 3 stitches left before the marker-thread, knit 2 together, knit 2 (marker-thread sits between these 2 stitches), slip 1 stitch knit-wise, knit 1 and pass the slipped stitch over the knitted stitch (2 stitches decreased). ------------------------------------------------------- START THE PIECE HERE: ------------------------------------------------------- JUMPER – SHORT OVERVIEW OF THE PIECE: The pattern uses both long and short needles; start with the length which fits the number of stitches and change when necessary. The neck and yoke are worked in the round with circular needle top down and from the right back shoulder, while increasing for raglan. When the yoke is finished, it is divided for the body and sleeves and the body is continued in the round, while the sleeves wait. The sleeves are worked top down, in the round. NECK: Cast on 72-76-76-84-84-88-88 stitches with circular needle size 4 mm and 3 strands colour Light Peach DROPS Kid-Silk. Knit 1 round, then work rib in the round (knit 1, purl 1) for 2-2-2-2-3-3-3 cm. The round begins on the right back shoulder. Insert 1 marker after the first 25-26-26-29-29-30-30 stitches (approx. mid-front), the piece is now measured from here YOKE: Change to circular needle size 5.5 mm. Insert 4 markers without working the stitches and each marker inserted in a knitted stitch (the raglan-stitches which you then increase on each side of), as follows: Insert marker-1 in the first stitch, count 13-13-13-15-15-15-15 stitches (= sleeve), insert marker-2 in the next stitch, count 21-23-23-25-25-27-27 stitches (= front piece), insert marker-3 in the next stitch, count 13-13-13-15-15-15-15 stitches (= sleeve), insert marker-4 in the next stitch, there are 21-23-23-25-25-27-27 stitches left after the last marker (= back piece). Work stocking stitch, STRIPES-1 and increase for RAGLAN on each side of the raglan-stitches – read explanations above, as follows: ROUND 1: Knit and work STRIPES-1, increasing for raglan on each side of the raglan-stitches (8 increased stitches). NOTE: At the beginning of the round, increase after marker-stitch-1 and at the end of the round increase before marker-stitch-1. ROUND 2: Knit and work stripes (remember to work the yarn overs as described under RAGLAN). Work ROUNDS 1 and 2 a total of 6-5-5-9-14-14-16 times (12-10-10-18-28-28-32 rounds worked) = 120-116-116-156-196-200-216 stitches. Remember to maintain the knitting tension. Now increase as follows: ROUND 1: Knit and work stripes, increasing for raglan on each side of the raglan-stitches (8 increased stitches). ROUND 2: Knit and work stripes. ROUND 3: Knit and work stripes, increasing for raglan on the front and back pieces, i.e., after markers 2 and 4 and before markers 3 and 1; do not increase across the sleeves (4 increased stitches). ROUND 4: Knit and work stripes. Work ROUNDS 1 to 4 a total of 8-9-10-8-6-7-7 times (32-36-40-32-24-28-28 rounds worked: 8-9-10-8-6-7-7 increases in height on the sleeve and 16-18-20-16-12-14-14 increases in height on the front and back pieces) = 216-224-236-252-268-284-300 stitches. All increases for raglan are finished. A total of 22-23-25-25-26-28-30 increases in height on the front and back pieces and 14-14-15-17-20-21-23 increases in height on the sleeve. The yoke measures approx. 23-24-26-26-27-29-29 cm from the marker mid-front. Now divide for the body and sleeves. DIVIDE FOR BODY AND SLEEVES: When dividing, the raglan-stitches will end up on the front and back pieces. Knit 1-1-1-2-3-4-5 (these stitches belong to the back piece), place the next 41-41-43-47-51-51-53 stitches on a stitch holder for the sleeve, cast on 8-10-12-14-16-18-20 stitches (mid-under the sleeve), knit 67-71-75-79-83-91-97 (= front piece), place the next 41-41-43-47-51-51-53 stitches on a stitch holder for the sleeve, cast on 8-10-12-14-16-18-20 stitches (mid-under the sleeve), knit the last 66-70-74-77-80-87-92 stitches (= back piece). The body and sleeves are finished separately. BODY: = 150-162-174-186-198-218-234 stitches. Insert 1 marker in the middle of the 8-10-12-14-16-18-20 cast-on stitches under 1 sleeve. Begin at the marker and continue in the round with stocking stitch and STRIPES-1. Work until the piece measures 50-52-54-55-56-58-60 cm from the marker mid-front. Change to circular needle size 4 mm and work rib (knit 1, purl 1), AT THE SAME TIME increase 30-32-34-36-38-40-46 stitches evenly on the first round – read INCREASE TIP = 180-194-208-222-236-258-280 stitches. When the rib measures 2-2-2-2-3-3-3 cm, change to circular needle size 5.5 mm, knit 1 round, then cast off with knit. The jumper measures approx. 52-54-56-57-59-61-63 cm from the marker mid-front and 56-58-60-62-64-66-68 cm from the shoulder. SLEEVES: Place the 41-41-43-47-51-51-53 sleeve-stitches from one stitch holder onto circular needle size 5.5 mm and knit up 1 stitch in each of the 8-10-12-14-16-18-20 stitches cast on under the sleeve – read SLEEVE TIP = 49-51-55-61-67-69-73 stitches. Insert a marker-thread in the middle of the 8-10-12-14-16-18-20 stitches under the sleeve. The round starts by the marker-thread. Work stocking stitch and STRIPES-2 in the round. AT THE SAME TIME, after the first round, decrease mid-under the sleeve – read DECREASE TIP as follows: Decrease 2 stitches 2-2-2-3-5-4-4 times every 2nd round = 45-47-51-55-57-61-65 stitches. Continue working until the sleeve measures 42-41-40-41-40-38-39 cm from the division – remember the stripes. Change to double pointed needles size 4 mm. Work rib (knit 1, purl 1), AT THE SAME TIME increase 9-9-9-9-11-11-13 stitches evenly on the first round - remember INCREASE TIP = 54-56-60-64-68-72-78 stitches. When the rib measures 2-2-2-2-3-3-3 cm, change to double pointed needles size 5.5 mm, knit 1 round, then cast off with knit. The sleeve measures approx. 44-43-42-43-43-41-42 cm from the division. |
|
 |
|
Have you finished this pattern?Tag your pictures with #dropspattern #sunsetsorbetsweater or submit them to the #dropsfan gallery. Do you need help with this pattern?You'll find 18 tutorial videos, a Comments/Questions area and more by visiting the pattern on garnstudio.com. © 1982-2026 DROPS Design A/S. We reserve all rights. This document, including all its sub-sections, has copyrights. Read more about what you can do with our patterns at the bottom of each pattern on our site. |
|






With over 40 years in knitting and crochet design, DROPS Design offers one of the most extensive collections of free patterns on the internet - translated to 17 languages. As of today we count 333 catalogues and 12532 patterns translated into English (UK/cm). 12532
We work hard to bring you the best knitting and crochet have to offer, inspiration and advice as well as great quality yarns at incredible prices! Would you like to use our patterns for other than personal use? You can read what you are allowed to do in the Copyright text at the bottom of all our patterns. Happy crafting!
Post a comment to pattern DROPS 267-17
We would love to hear what you have to say about this pattern!
If you want to leave a question, please make sure you select the correct category in the form below, to speed up the answering process. Required fields are marked *.