
Popular categories
Looking for a yarn?






































Comments / Questions (39)
 Bruel wrote:
Bonsoir, J’ai acheté trop de laine pour faire ce modèle. La reprenez-vous?
01.11.2026 - 22:07DROPS Design answered:
Bonjour Mme Bruel, contactez le magasin où vous avez acheté votre laine, vous retrouverez ses coordonnées sur le mail de votre commande ou bien ici, dans la liste des magasins. Bon tricot!
02.11.2026 - 09:59
 Magdalene wrote:
Hallo, nun habe ich das erste Vorderteil fertig und stelle fest, dass das Rückenteil bis zum fertigen Armausschnitt viel kürzer ist,was habe ich falsch gemacht?
27.10.2026 - 18:45DROPS Design answered:
Liebe Magdalene, das ist ja richtig, bei solchen Modellen ist das Armloch kürzer beim Rücken als beim Vorderteil. So z.B. in die 1. Größe is das Armloch 17 cm beim Rückenteil und 29 cm beim Vorderteil: (17+29)/2=23 cm Armloch wie in der Skizze. Schauen Sie mal unter Tab "Videos oder Lektionen" oben, links von "Anleitung", dort finden Sie Videos/Lektionnen für Modellen mit solchen Schulter. Viel Spaß beim Stricken!
28.10.2026 - 08:07
Maren wrote:
Liebes Drops Team, nach dem Rückenteil schreibt ihr bei Zunahme für die Armausschnitte die 4 ersten Maschen wie zuvor? Welche 4Maschen? Ich habe wie im Rückenteil angegeben immer 3Maschen gestrickt, dann die Zunahmen, bezw vor den 3Maschen die Zunahmen gestrickt. Ist es ein Schreibfehler oder muss ich jetzt 4Maschen vor den Zunahmen stricken? Vielen Dank für Ihre Hilfe und Bemühungen! Liebe Grüße!
23.10.2026 - 09:05DROPS Design answered:
Liebe Maren, die 4 ersten und letzten Maschen der Hinreihe striken Sie wie zuvor, dh 2 I-Cord + 2 glattrechts am Anfang und 2 glattrechts + 2 I-cord am Ende der Reihe. Viel Spaß beim Stricken!
23.10.2026 - 16:05
 Iwona wrote:
Jaka powinna być przerwa na kark w rozmiarze M pomiędzy lewym a prawym ramieniem z tyłu. Przerobiłam wg wzoru i ramiona stykają się z tyłu nie wiem dlaczego. 76 oczek - 26 lewego ramienia i 76 prawego powinno mi dać 24 oczka przerwy i w tym miejscu miejsce na kark. Moje ramiona się stykają z tyłu. Jaka powinna być przerwa na tyle u góry?
14.10.2026 - 23:57DROPS Design answered:
Witaj Iwono, na tył nabierasz 24 oczka, a następnie z każdej ich strony dodajesz oczka na ramiona. Gdy Twoja próbka jest zgodna z tą podaną we wzorze, te 24 oczka dają jakieś 15 cm na kark/dekolt tyłu. Pozdrawiamy!
15.10.2026 - 08:48
 Susanne Lose wrote:
Jeg strikker woodworker vest. Skal forstykkerne være længere end bagstykket, når man samler ryg og forstykker?
14.10.2026 - 17:16DROPS Design answered:
Hej Susanne, nej ikke ifølge opskriften, men det kan du gøre hvis du vil :)
16.10.2026 - 08:18
Bruel wrote:
Bonjour Je voudrais savoir si 1. ce modèle est difficile à tricoter 2. Savoir si les laines proposées ont une bonne tenue et m’en conseiller d’autres si ce n’est pas le cas. Cordialement Élisabeth Bruel
05.10.2026 - 19:16DROPS Design answered:
Bonjour Mme Bruel, lisez attentivement les explications, consultez éventuellement les vidéos et les leçons relatives à ce modèle sous les onglets du même nom (à droite de l'onglet Explications). Pour toute assistance au choix d'une laine, n'hésitez pas à contacter votre magasin DROPS, même par mail ou téléphone, qui saura vous conseiller en fonction de ce que vous recherchez. Bon tricot!
06.10.2026 - 08:38
 Annika Pettersson wrote:
Jag har stickat många tröjor/västar i mitt liv men aldrig träffat på ett så komplicerat mönster som detta. Går det inte att göra ett mönster enklare?
11.09.2026 - 16:06DROPS Design answered:
Hei Annika. Husk å hake av for Spørsmål om du ønsker svar. Sendes det inn et Spørsmål som Kommentarer blir det ikke besvart / kan ta tid. Dette er en vest der det skjer mye når det strikkes, den har både europeisk skulder / skrå skulder, v-hals og i-cord. Vi har mange hjelpevideo du ha ta en titt på for å få en bedre forståelse på Europeisk skulder, v-hals og I-cord. Og er det noe du lurer på, kan du fint sende inn spørsmål. Bare husk å oppgi hvilken str. du strikker, hvor i oppskriften du er og et kort og nøyaktig spørsmål på hva du lurer på :) mvh DROPS Design
28.09.2026 - 11:28
 Hanne wrote:
Ik zie in de patroonbeschrijving niet terug waar ik de knoopsgaten in de rechter bies moet maken, of zie ik dat over het hoofd?
06.09.2026 - 15:02DROPS Design answered:
Dag Hanne,
Dit staat bovenaan bij de instructies aangegeven onder het kopje 'KNOOPSGATEN'.
11.09.2026 - 17:25
 Lieve wrote:
Hoeveel wol zou ik nodig hebben om dit model met 3 draden alpaca boucle te maken? Dank u
18.08.2026 - 20:14DROPS Design answered:
Dag Lieve,
We hebben een artikel op de site staan waarin uitgelegd wordt hoe je garen kunt vervangen door een ander garen en hoe je dit uitrekent. Zie hier.
19.08.2026 - 09:42
Marjan wrote:
Linker voorbies en dan linker voorpand: ik snap de regel niet, neem 1 steek op in elke gebreide naald over de linkerschouder achter, a d binnenkant v d buitenste steek 28 st worden dan 36?, En hoe dan met die 7,5 cm bies wat apart gebreid is. de halslijn is meer dan 15 cm. ik ben grneigd de bies later in zijn geheel op te nemen. Heb dit stuk 6 x uitgehaald, met de rechterkant vergeleken, kom er niet uit. Ben geen beginner…?
04.08.2026 - 17:37DROPS Design answered:
Dag Marjan,
Je breit eerst de 8 voorbiessteken en gelijk daarachteraan neem je steken op langs de schoudernaad. Als je in de 28 steken opneemt heb je in totaal 36 steken op de naald (inclusief de 8 voorbiessteken).
05.08.2026 - 09:53
|
|
Woodworker Vest#woodworkervest |
|
 |
 |
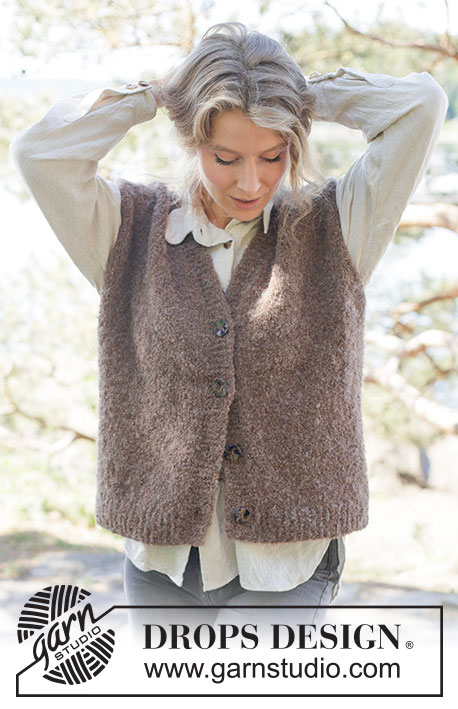
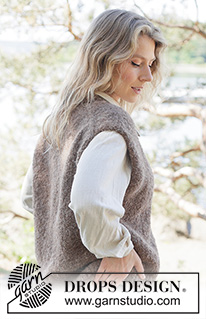
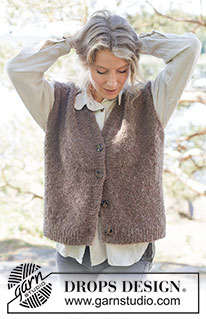
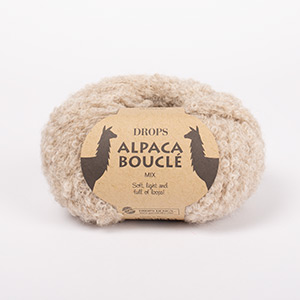
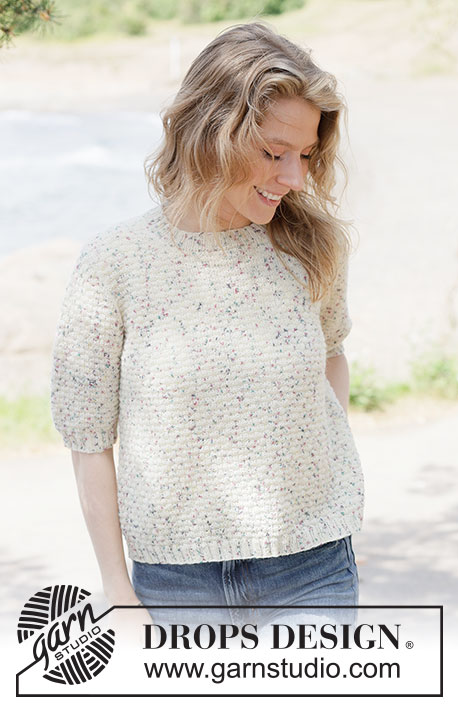
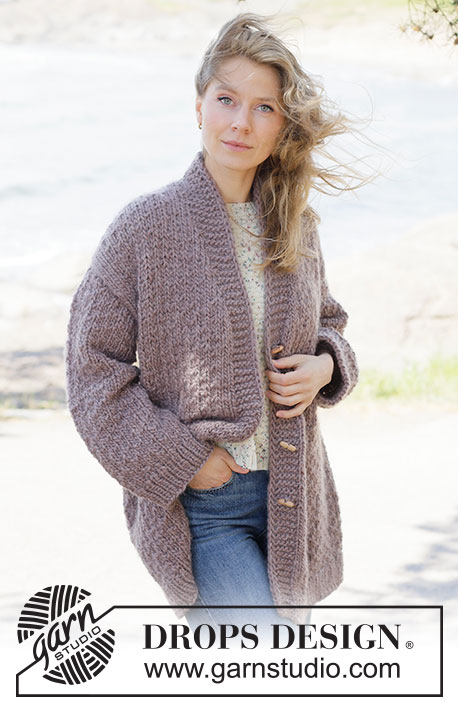
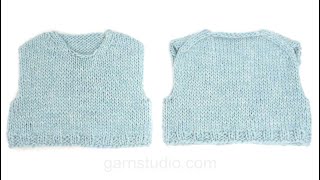
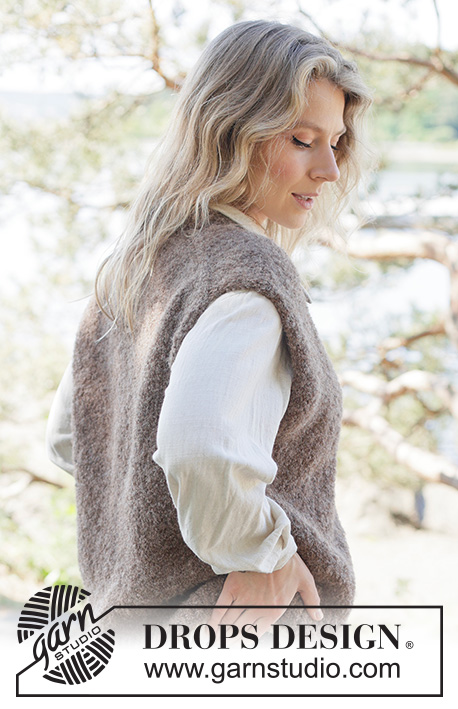
Knitted vest in DROPS Alpaca Bouclé and DROPS Alpaca. The piece is worked top down with European/diagonal shoulders, V-neck and I-cord. Sizes XS - XXXL.
DROPS 262-34 |
|
|
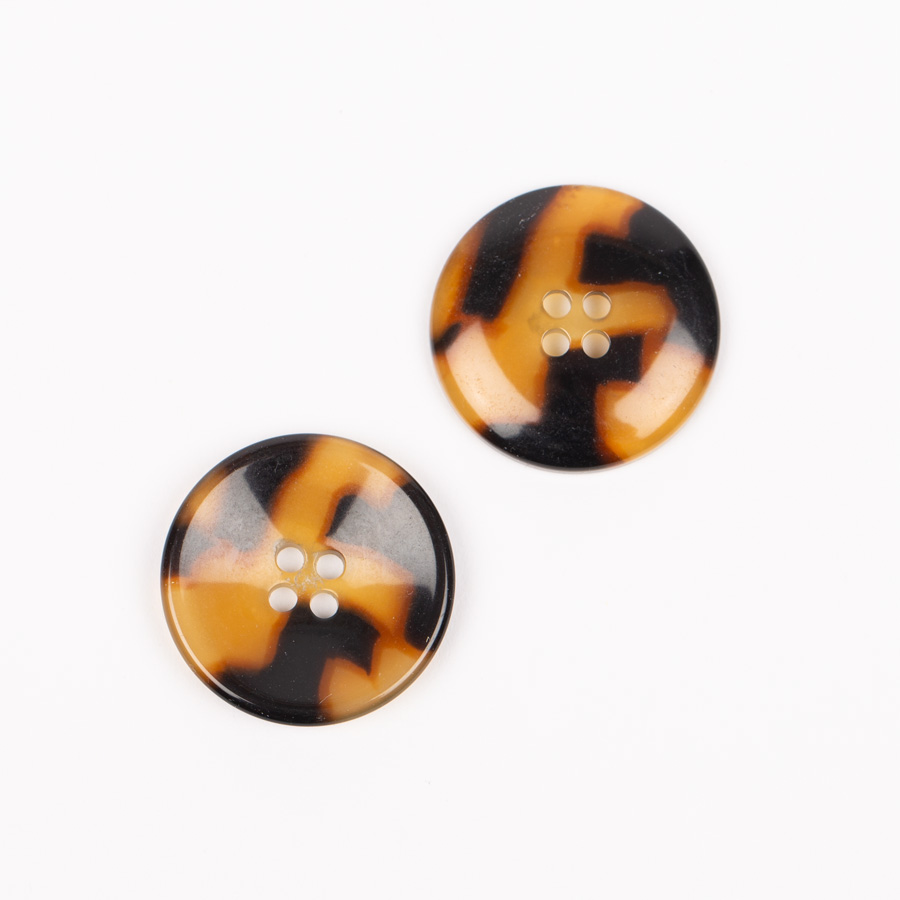
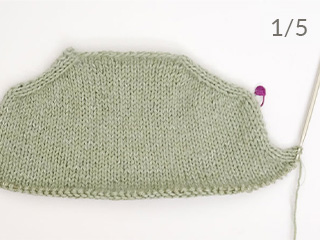
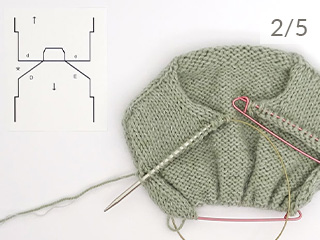
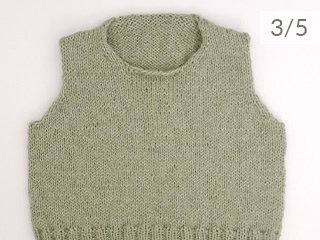
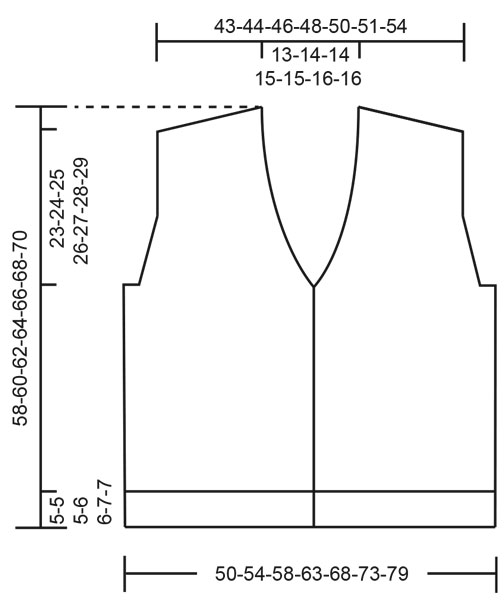
------------------------------------------------------- EXPLANATIONS FOR THE PATTERN: ------------------------------------------------------- INCREASE TIP-1: INCREASE 1 STITCH TOWARDS THE LEFT - from RIGHT SIDE: Use left needle to pick up yarn between 2 stitches from row below, pick up yarn from the front and knit in the stitch loop that is on the back of the needle. INCREASE 1 STITCH TOWARDS THE RIGHT - from RIGHT SIDE: Use left needle to pick up yarn between 2 stitches from row below, pick up yarn from the back and knit in the stitch loop that is on the front side of the needle. . INCREASE TIP-2: INCREASE 1 STITCH TOWARDS THE RIGHT - from WRONG SIDE: Use left needle to pick up yarn between 2 stitches from row below, pick up yarn from the back and purl in the stitch loop that is on the front side of the needle. INCREASE 1 STITCH TOWARDS THE LEFT - from WRONG SIDE: Use left needle to pick up yarn between 2 stitches from row below, pick up yarn from the front and purl in the stitch loop that is on the back side of the needle. 2 EDGE STITCHES I-CORD: RIGHT SIDE: Slip 1 stitch purl-wise with the strand in front of the piece, knit 1. WRONG SIDE: Slip 1 stitch purl-wise with the strand in front of the piece, knit 1. GARTER STITCH (worked back and forth): Knit all rows, from both the right and wrong side. 1 ridge in height = knit 2 rows. LEFT BAND WITH I-CORD: RIGHT SIDE: Slip 1 stitch purl-wise with yarn in front, knit 1, work 6 garter stitches. WRONG SIDE: Work 6 garter stitches, slip 1 stitch purl-wise with yarn in front, knit 1. RIGHT BAND WITH I-CORD: RIGHT SIDE: Work 6 garter stitches, slip 1 stitch purl-wise with yarn in front, knit 1. WRONG SIDE: Slip 1 stitch purl-wise with yarn in front, knit 1, work 6 garter stitches. BUTTONHOLES: Work the buttonholes on the right band (when the garment is worn) from the right side, when there are 6 stitches left on the row as follows: ROW 1 (right side): Make 1 yarn over, knit 2 together, knit 2, slip 1 purl-wise with strand in front, knit 1. ROW 2 (wrong side): Work the band as before, knit the yarn over to leave a hole. The first buttonhole is worked on the first row from the right side after the V-neck is finished. Then work the other 3 buttonholes with 9-9-9½-9½-9½-9½-10 cm between each one. Adjust so the bottom buttonhole is worked in the transition between the stocking stitch and rib. ------------------------------------------------------- START THE PIECE HERE: ------------------------------------------------------- VEST – SHORT OVERVIEW OF THE PIECE: Start by casting on stitches for the back of the neck. The back piece is then worked back and forth, top down, increasing on each side to the correct stitch count for the shoulders and giving slightly diagonal shoulders. Continue working down to the armholes. Now the back piece waits while the front pieces are worked. The band is worked first (they are sewn together mid-back of neck to finish). Stitches are knitted up along one back shoulder and the front piece is worked top down as far as the armhole, at the same time as increasing for the V-neck. This is repeated on the other shoulder. At the armholes, the back piece and 2 front pieces are joined and the body is continued back and forth. The 2 bands are sewn together mid-back and then sewn to the neckline. BACK PIECE: Cast on 22-24-24-26-26-28-28 stitches with circular needle size 5 mm, 1 strand DROPS Alpaca Bouclé and 1 strand DROPS Alpaca (= 2 strands). ROW 1 (wrong side): Purl. ROW 2 (right side): Read INCREASE TIP-1. Knit 3, increase 1 stitch towards the left, knit until there are 3 stitches left on the row, increase 1 stitch towards the right, knit 3. ROW 3 (wrong side): Read INCREASE TIP -2. Purl 3, increase 1 stitch towards the right, purl until there are 3 stitches left on the row, increase 1 stitch towards the left, purl 3. Work ROWS 2 and 3 a total of 12-12-13-13-14-14-15 times (24-24-26-26-28-28-30 rows worked) = 70-72-76-78-82-84-88 stitches. Insert 1 marker outermost on one side; the piece is now measured from here! Continue with stocking stitch and 2 EDGE STITCHES I-CORD on each side – read description above. Remember to maintain the knitting tension. Work until the piece measures 14-14-13-12-11-10-8 cm, measured from the marker and along the armhole. Now increase for the armholes. INCREASE FOR ARMHOLES: ROW 1 (right side): Remember INCREASE TIP -1. Work the first 4 stitches as before, increase 1 stitch towards the left, knit until there are 4 stitches left, increase 1 stitch towards the right, work the last 4 stitches as before. ROW 2 (wrong side): Work 2 edge stitches I-cord, purl until there are 2 stitches left, work 2 edge stitches I-cord. Work ROWS 1 and 2 a total of 3-4-5-7-8-10-12 times (6-8-10-14-16-20-24 rows worked) = 76-80-86-92-98-104-112 stitches. The piece measures approx. 17-18-18-19-19-20-20 cm, measured from the marker along the armhole. Finish after a row from the right side. Cut the strand and place the stitches on a stitch holder. Work the left band and front piece as follows: LEFT BAND: Cast on 8 stitches with circular needle size 5 mm and 1 strand of each quality (= 2 strands). Work LEFT BAND WITH I-CORD – read explanation above, until the band measures 6-6½-6½-7-7-7½-7½ cm, finish after a row from the right side. Now work the left front piece as follows: LEFT FRONT PIECE: Find the left back shoulder as follows: Lay the back piece flat, right side up, with the stitch holder towards you; left side of piece = left shoulder. Knit up stitches along the left back shoulder, working from the right side from the neck towards the shoulder as follows: Work the 8 band-stitches as before from the right side, knit up 1 stitch in each worked row along the left back shoulder, inside the outermost stitch (24-24-26-26-28-28-30 stitches) = 32-32-34-34-36-36-38 stitches. All length-measurements on the front piece are taken from this knitted-up row. ROW 1 (wrong side): Work 2 edge stitches I-cord, purl until there are 8 stitches left, work 8 band-stitches as before. ROW 2 (right side): Work 8 band-stitches as before, knit until there are 2 stitches left, 2 edge stitches I-cord. Repeat ROWS 1 and 2 until the piece measures 12-11-13-12-14-13-15 cm from the knitted-up row. OVERVIEW OF THE NEXT SECTION: You now increase for the V-neck, then subsequently increase for the armhole. The increases for the armhole are started before the increases for the V-neck are finished –read the next 2 sections before continuing. INCREASE FOR V-NECK: ROW 1 (right side): Work the 8 band stitches as before, increase 1 stitch towards the left - remember INCREASE TIP-1, knit until there are 2 stitches left, work 2 edge stitches I-cord. ROW 2 (wrong side): Work 2 edge stitches I -cord, purl until there are 8 stitches left, work the 8 band-stitches as before. Increase like this every 3 cm a total of 3-3-3-3-3-3-3 times, then every 2 cm 5-6-6-7-7-8-8 times. You have worked a total of 8-9-9-10-10-11-11 increases in height for the V-neck. Approx. 3-3-4-4-5-5-5 cm of the neck-height will be positioned on the back piece when the garment is worn. INCREASE FOR ARMHOLE: AT THE SAME TIME, when the piece measures 26-26-27-26-27-26-26 cm, increase for the armhole as follows: ROW 1 (right side): Work the 8 band stitches as before, knit until there are 4 stitches left, increase 1 stitch towards the right - remember INCREASE TIP -1, work the last 4 stitches as before (= 2 stocking stitches and 2 edge stitches I-cord). ROW 2 (wrong side): Work 2 edge stitches I, purl until there are 8 stitches left, work the 8 band stitches as before. Work ROWS 1 and 2 a total of 3-4-5-7-8-10-12 times (6-8-10-14-16-20-24 rows worked). When all the increases for the V-neck and armhole are finished, there are 43-45-48-51-54-57-61 stitches and the piece measures approx. 29-30-32-33-35-36-38 cm from the knitted up row – finish after a row from the right side. Cut the strand and place the stitches on a stitch holder. Work the right band and front piece as follows. RIGHT BAND: Cast on 8 stitches with circular needle size 5 mm and 1 strand of each quality (= 2 strands). Work RIGHT BAND WITH I-CORD – read explanation above, until the band measures 6-6½-6½-7-7-7½-7½ cm, finish after a row from the wrong side. Cut the yarn and put stitches on another needle, the right band will be worked after the new stitches for right front piece have been picked up. RIGHT FRONT PIECE: Knit up stitches along the right back shoulder, from the right side and working from the armhole towards the neck as follows: Knit up 1 stitch in each worked row inside the outermost stitch (24-24-26-26-28-28-30 stitches from the back piece), work the 8 band-stitches as before from the right side = 32-32-34-34-36-36-38 stitches. All length-measurements on the front piece are taken from this knitted-up row. ROW 1 (wrong side): Work 8 band-stitches as before, purl until there are 2 stitches left, work 2 edge stitches I-cord. ROW 2 (right side): Work 2 edge stitches I-cord, knit until there are 8 stitches left, work 8 band-stitches as before. Repeat ROWS 1 and 2 until the piece measures 12-11-13-12-14-13-15 cm. OVERVIEW OF THE NEXT SECTION: You now increase for the V-neck, then subsequently increase for the armhole. The increases for the armhole are started before the increases for the V-neck are finished –read the next 2 sections before continuing. INCREASE FOR V-NECK: ROW 1 (right side): Work 2 edge stitches I-cord, knit until there are 8 stitches left, increase 1 stitch towards the right - remember INCREASE TIP-1, work the 8 band stitches as before. ROW 2 (wrong side): Work the 8 band-stitches as before, purl until there are 2 stitches left, work 2 edge stitches I-cord. Increase like this every 3 cm a total of 3-3-3-3-3-3-3 times, then every 2 cm 5-6-6-7-7-8-8 times. You have worked a total of 8-9-9-10-10-11-11 increases in height for the V-neck. Approx. 3-3-4-4-5-5-5 cm of the neck-height will be positioned on the back piece when the garment is worn. INCREASE FOR ARMHOLE: When the piece measures 26-26-27-26-27-26-26 cm from the knitted-up row, increase for the armhole as follows: ROW 1 (right side): Work 2 edge stitches I-cord, knit 2, increase 1 stitch towards the left - remember INCREASE TIP -1, knit until there are 8 stitches left, work the 8 band-stitches as before. ROW 2 (wrong side): Work 8 band-stitches as before, purl until there are 2 stitches left, work 2 edge stitches I-cord. Work ROWS 1 and 2 a total of 3-4-5-7-8-10-12 times (6-8-10-14-16-20-24 rows worked). When all the increases for the V-neck and armhole are finished, there are 43-45-48-51-54-57-61 stitches. Continue working until the piece measures approx. 29-30-32-33-35-36-38 cm from the knitted up row – finish after a row from the right side. Do not cut the strand. The pieces are now joined for the body and all further measurements are taken from here! BODY: Work the first row from the wrong side, starting with the right front piece as follows: Work the 8 band stitches as before, purl the remaining 35-37-40-43-46-49-53 stitches, cast on 4-6-6-8-10-12-14 stitches (= side under the sleeve), purl the 76-80-86-92-98-104-112 stitches on the back piece, cast on 4-6-6-8-10-12-14 stitches (= side under the sleeve), purl the first 35-37-40-43-46-49-53 stitches on the left front piece and work the 8 band stitches as before = 170-182-194-210-226-242-262 stitches. Work back and forth with stocking stitch and the bands as before and until the body measures 27-28-29-29-30-30-30 cm from the join. On the next row from the right side begin the rib, AT THE SAME TIME increase 31-35-37-41-59-47-49 stitches evenly on this row (do not increase across the bands) = 201-217-231-251-269-289-311 stitches, working as follows: Change to circular needle size 3.5 mm, work the band as before, work rib (knit 1 twisted, purl 1 – remember the increases) until there are 9 stitches left, knit 1 twisted, work the band as before. When the rib measures 5-5-5-6-6-7-7 cm, cast off with rib. The vest measures approx. 58-60-62-64-66-68-70 cm, measured innermost by the neck. ASSEMBLY: Sew the buttons onto the left band. Sew the bands from each front piece together mid-back, then sew the bands to the neckline. |
|
 |
|
Have you finished this pattern?Tag your pictures with #dropspattern #woodworkervest or submit them to the #dropsfan gallery. Do you need help with this pattern?You'll find 21 tutorial videos, a Comments/Questions area and more by visiting the pattern on garnstudio.com. © 1982-2026 DROPS Design A/S. We reserve all rights. This document, including all its sub-sections, has copyrights. Read more about what you can do with our patterns at the bottom of each pattern on our site. |
|






With over 40 years in knitting and crochet design, DROPS Design offers one of the most extensive collections of free patterns on the internet - translated to 17 languages. As of today we count 333 catalogues and 12532 patterns translated into English (UK/cm). 12532
We work hard to bring you the best knitting and crochet have to offer, inspiration and advice as well as great quality yarns at incredible prices! Would you like to use our patterns for other than personal use? You can read what you are allowed to do in the Copyright text at the bottom of all our patterns. Happy crafting!
Post a comment to pattern DROPS 262-34
We would love to hear what you have to say about this pattern!
If you want to leave a question, please make sure you select the correct category in the form below, to speed up the answering process. Required fields are marked *.