Comments / Questions (16)
![]() Knitter wrote:
Knitter wrote:
Summer flowers
19.01.2024 - 21:47
![]() Mariana wrote:
Mariana wrote:
Rose hip
19.01.2024 - 20:01
![]() Anne-Pia wrote:
Anne-Pia wrote:
Den her strikket kjole er utrolig smuk, den har mange flotte detaljer og er strikket i en rigtig smuk farve. Farven minder mig om valmuer, så jeg syntes navnet Valmue kjole, vil være et rigtig smukt navn til strikkeopskriften.
19.01.2024 - 14:54
![]() Patrycja Młynarska wrote:
Patrycja Młynarska wrote:
Poppy Summer Dress
19.01.2024 - 09:20
![]() Patricia Bell wrote:
Patricia Bell wrote:
What a delightful summer dress. ‘Lead Actress’
18.01.2024 - 22:17
![]() Claudia wrote:
Claudia wrote:
My rose garden dress
18.01.2024 - 16:23
Proserpina Dress#proserpinadress |
||||||||||||||||||||||
 |
 |
|||||||||||||||||||||
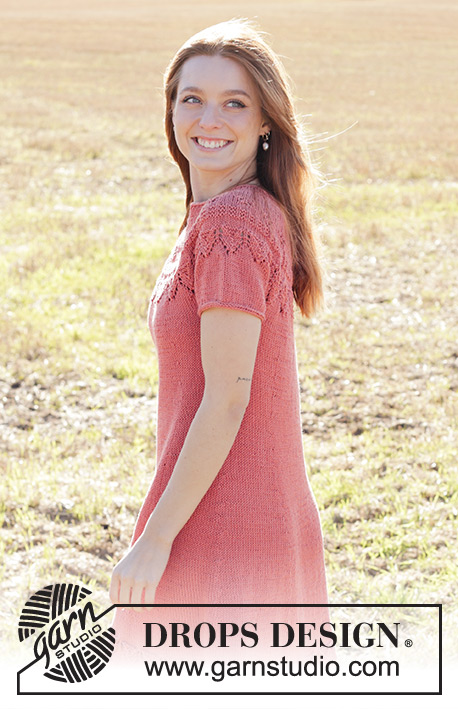
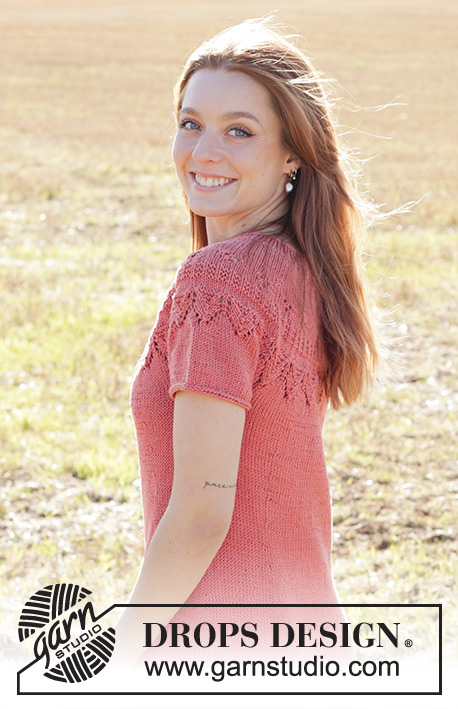
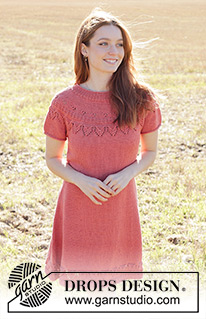
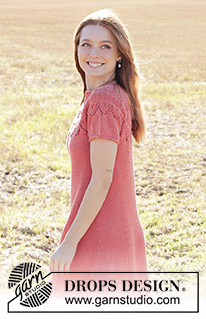
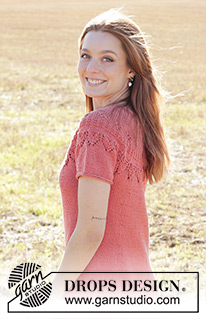
Knitted short-sleeved dress in DROPS Muskat. The piece is worked top down with round yoke, lace pattern and I-cord. Sizes S - XXXL.
DROPS 248-36 |
||||||||||||||||||||||
|
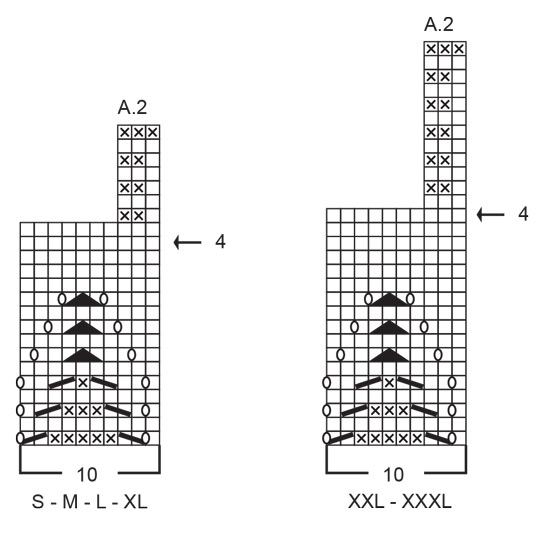
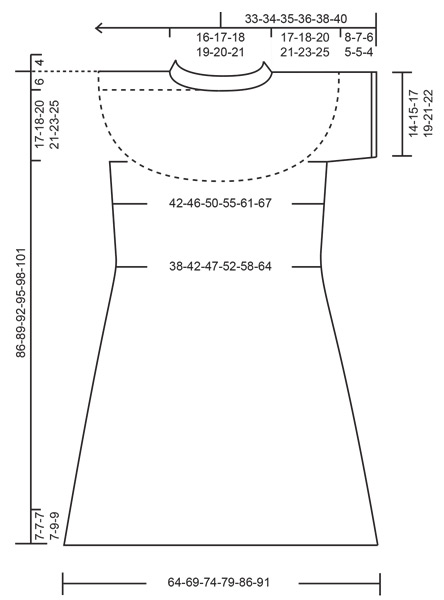
------------------------------------------------------- EXPLANATIONS FOR THE PATTERN: ------------------------------------------------------- PATTERN: See diagrams A.1 and A.2. Choose diagram for your size. INCREASE TIP-1 (for round yoke): To work out how to increase evenly, count the total number of stitches on the needle (e.g., 118 stitches) and divide by the number of increases to be made (e.g., 32) = 3.7. In this example, increase by making 1 yarn over after approx. each 4th stitch. On the next round work the yarn overs twisted to avoid holes. INCREASE TIP-2 (for incisions on body): Increase 1 stitch before marker-threads-1 and 3 and after marker-threads-2 and 4 as follows. BEFORE MARKER-THREAD: Work to the marker-thread, knit 1 in the strand of the stitch lying 2 rounds below outermost stitch on the right needle. AFTER MARKER-THREAD: Knit 1 in the loop lying around the outermost stitch on the left needle (i.e., stitch from previous round). INCREASE TIP-3 (for sides of body): Increase in the same way as described under INCREASE TIP-2, increasing alternately before and after the marker, i.e., 1 stitch increased each time (do not increase on each side of the marker). DECREASE TIP-1 (for incisions on body): Decrease 1 stitch after marker-threads-1 and 3 and before marker-threads-2 and 4 as follows. BEFORE MARKER-THREAD: Slip 1 stitch knit-wise, knit 1, pass the slipped stitch over the knitted stitch. AFTER MARKER-THREAD: Work until there are 2 stitches left before the marker-thread, knit 2 together. I-CORD: At the end of the round, after the last stitch has been worked: Cast on 3 new stitches on right needle from the right side. Slip the 3 new stitches from the right to the left needle, with the working strand 3 stitches in on the left needle (when working, tighten the strand to form a small tube). ROW 1 (right side): Knit 2, knit the next 2 stitches twisted together. ROW 2 (right side): Pass the 3 stitches from the right needle onto the left needle, knit 2, knit the next 2 stitches twisted together. Repeat ROW 2 until there are 3 stitches left on the right needle. Slip the 3 stitches from the right needle onto the left needle. Cast off. Sew a small stitch to join the beginning and end of the I-cord. ------------------------------------------------------- START THE PIECE HERE: ------------------------------------------------------- DRESS - SHORT OVERVIEW OF THE PIECE: The pattern uses both long and short circular needles; start with the length which fits the number of stitches and change when necessary. The neck and yoke are worked in the round with circular needle, from mid back and top down. The yoke is divided for body and sleeves and the body is continued in the round. The sleeves are worked in the round. NECK: Cast on 118-122-126-130-134-138 stitches with circular needle size 4 mm and DROPS Muskat. Change to circular needle size 3 mm (casting on with a larger needle size gives an elastic cast-on edge). Knit 4 rounds (rolled-edge). Work rib in the round (knit 1, purl 1) for 4 cm. Insert 1 marker at the beginning of the round (mid-back). The yoke is measured from this marker. YOKE: Change to circular needle size 4 mm. Knit 1 round and increase 32-34-36-40-44-46 stitches evenly spaced – read INCREASE TIP-1 = 150-156-162-170-178-184 stitches. Continue with stocking stitch. REMEMBER THE KNITTING TENSION! When the yoke measures 3-4-5-5-6-7 cm from the marker, increase 34-36-38-46-54-64 stitches evenly spaced – remember INCREASE TIP-1 = 184-192-200-216-232-248 stitches. Work until the yoke measures 4-5-6-6-7-8 cm from the marker. Now work PATTERN – read description above, with A.1 worked a total of 23-24-25-27-29-31 times on the round. Continue this pattern, AT THE SAME TIME on each round marked with an arrow in A.1, increase as follows – remember INCREASE TIP-1. Arrow-1: Increase 32-39-46-51-56-58 stitches evenly spaced = 216-231-246-267-288-306 stitches. Arrow-2: Increase 34-39-44-53-62-64 stitches evenly spaced = 250-270-290-320-350-370 stitches. Arrow-3: Increase 26-30-38-44-38-50 stitches evenly spaced = 276-300-328-364-388-420 stitches. When A.1 is finished the yoke measures approx. 15-16-17-17-20-21 cm from the marker. Continue with stocking stitch until the yoke measures 17-18-20-21-23-25 cm. Now divide for the body and sleeves: Knit 40-44-48-53-58-64 (half back piece), place the next 58-62-68-76-78-82 stitches on 1 thread for the sleeve, cast on 8-8-10-10-12-12 stitches (in side under sleeve), knit 80-88-96-106-116-128 (front piece), place the next 58-62-68-76-78-82 stitches on 1 thread for the sleeve, cast on 8-8-10-10-12-12 stitches (in side under sleeve), knit the last 40-44-48-53-58-64 stitches (half back piece). The body and sleeves are finished separately. The piece is now measured from here! BODY: = 176-192-212-232-256-280 stitches. Insert 1 marker in each side, in the middle of the 8-8-10-10-12-12 stitches cast on under each sleeve. In addition, insert 4 marker-threads (start by one of the markers): Count 16-19-23-28-33-38 stitches, insert marker-thread-1 before the next stitch, count 56-58-60-60-62-64 stitches, insert marker-thread-2 before the next stitch, count 32-38-46-56-66-76 stitches, insert marker-thread-3 before the next stitch, count 56-58-60-60-62-64 stitches, insert marker-thread-4 before the next stitch. There are 16-19-23-28-33-38 stitches left on the round after marker-thread-4. Allow the markers and marker-threads to follow your work onwards – they are used when decreasing and increasing. Start by one marker and work stocking stitch in the round. When the body measures 3-3-3-4-4-4 cm from the division, decrease 1 stitch after marker-threads-1 and 3 and before marker-threads-2 and 4 – read DECREASE TIP-1 (4 stitches decreased). Decrease like this every 2½-2½-3-4-4-4 cm a total of 4-4-4-3-3-3 times = 160-176-196-220-244-268 stitches. When the body measures 16-16-17-17-18-18 cm from the division, increase 1 stitch before marker-threads-1 and 3 and after marker-threads-2 and 4 – read INCREASE TIP-2 (4 increased stitches). In addition, increase 1 stitch by the markers in each side – read INCREASE TIP-3 (2 stitches increased). A total of 6 increased stitches. Increase like this every 2-2-2-2½-2-2½ cm a total of 18-19-19-18-19-18 times = 268-290-310-328-358-376 stitches. Continue with stocking stitch until the body measures 56-58-59-61-60-61 cm from the division. Knit 1 round and increase 2-0-0-2-2-4 stitches evenly spaced = 270-290-310-330-360-380 stitches. Work A.2, 27-29-31-33-36-38 times around the body. AT THE SAME TIME on the round marked with arrow-4 increase 0-1-2-0-0-1 stitches evenly spaced = 270-291-312-330-360-381 stitches. Cast off. The dress measures approx. 86-89-92-95-98-101 cm from the shoulder. SLEEVES: Place the 58-62-68-76-78-82 stitches from the thread on one side of the piece on circular needle/double pointed needles size 4 mm and knit up 1 stitch in each of the 8-8-10-10-12-12 stitches cast-on under the sleeve = 66-70-78-86-90-94 stitches. Insert 1 marker in the middle of the 8-8-10-10-12-12 stitches under the sleeve. Start by the marker and work stocking stitch in the round for 7-6-5-4-4-3 cm. Knit 1 round and decrease 8-8-6-6-2-0 stitches evenly spaced = 58-62-72-80-88-94 stitches. Cast off with I-CORD – read description above. |
||||||||||||||||||||||
Diagram explanations |
||||||||||||||||||||||
|
||||||||||||||||||||||
 |
||||||||||||||||||||||
 |
||||||||||||||||||||||
 |
||||||||||||||||||||||
Have you finished this pattern?Tag your pictures with #dropspattern #proserpinadress or submit them to the #dropsfan gallery. Do you need help with this pattern?You'll find 29 tutorial videos, a Comments/Questions area and more by visiting the pattern on garnstudio.com. © 1982-2025 DROPS Design A/S. We reserve all rights. This document, including all its sub-sections, has copyrights. Read more about what you can do with our patterns at the bottom of each pattern on our site. |
||||||||||||||||||||||








Post a comment to pattern DROPS 248-36
We would love to hear what you have to say about this pattern!
If you want to leave a question, please make sure you select the correct category in the form below, to speed up the answering process. Required fields are marked *.