
Popular categories
Looking for a yarn?


Comments / Questions (13)
![]() Karin wrote:
Karin wrote:
Lt. FOTO ist die Halsblende ebenso wie die Blende am Rumpfteil unten im Muster 2 M. re/2 M. li gestrickt, in der Anleitung steht jedoch bei der Halsblende: 1 M re/2 M li !!! Glaube, es handelt sich hier um einen Tippfehler! Liebe Grüße
28.03.2026 - 18:02DROPS Design answered:
Liebe Karin, die Halsblende wird ja mit 2 M re, 2 M links gestrickt, aber die Runde beginnt mit 1 Masche rechts, so stricken Sie: (1 M re, 2 M li, 1 M re) und von (bis) wiederholen, so sind es Bündchen 2 re, 2 li, die in der Mitte von 2 M rechts beginnen. Viel Spaß beim Stricken!
07.04.2026 - 09:55
![]() Claudette Podunavac wrote:
Claudette Podunavac wrote:
Bonjour, je travaille ce modèle en taille L et j'en suis à 126 mailles. J'ai donc placé les fils marqueurs. Je démarre les augmentations des raglans sur l'épaule droite et je dois donc (sur la manche de 22 mailles) faire ma 1ère aumgmentation en avançant une maille de la fin du devant pour pouvoir faire les deux augmentation ou bien dois-je faire cette première augmentation à la fin du tour devant. Ce stade du travail est très important. J'attends votre conseil merci CDT
27.03.2026 - 19:52DROPS Design answered:
Bonjour Mme Podunavac, dans les 22 m des manches entre les fils marqueurs sont comprises les mailles des raglans de chaque côté de la manche, autrement dit, tricotez le 1er tour comme indiqué: 1 m end (raglan), augmentez 1 m pour la manche, tricotez les 20 m suivantes, augmentez 1 m pour la manche, 1 m endroit (maille du raglan), tricotez la 2ème manche ainsi et, en même temps, tricotez A.1, A.2 et A.3 pour le devant et le dos et augmentez de la même façon après 1 m end après le fil marqueur au début du devant/dos et avant 1 m end avant le fil marqueur à la fin du dos/devant. Bon tricot!
07.04.2026 - 08:16
![]() Olga wrote:
Olga wrote:
Hallo! Ik snap niet de volgende: na meerderen van 20 keer langs reglan lijnen moeten er nog 4 meeredeingen op rug en voorpand en 2 meerderingen op de mouwen gedaan worden. Maar is dat ook als eerder in elke 2e toer, dus in 8 toeren of in in 4 toeren? Ik brei maat S.
11.03.2026 - 12:51DROPS Design answered:
Dag Olga,
Na de 20 meerderingen meerder je nog 4 keer op dezelfde manier op de panden en op de mouwen minder je in plaats van 4 keer 2 keer door iedere 4e naald te minderen in plaats van iedere 2e naald.
11.03.2026 - 19:41
![]() Cecilia wrote:
Cecilia wrote:
Hi on page 4, at the beginning of the Body section, what does it mean by 'inserting 1 market thread in each side, in the middle of the 6 stitches cast on under each sleeve.'? I don't understand what does it mean to insert 1 market thread in each side, and also don't understand in the middle of the 6 stitches cast on under each sleeve... Would be great if you could help. thanks!
16.01.2026 - 20:29DROPS Design answered:
Hi Cecilia, these marker threads are for marking the sides of your jumper. In the middle of the 6 stitches cast on under each sleeve means that you put the marker after 3 first stitches under the sleeve (between 3rd and 4th stitch). Happy knitting!
16.01.2026 - 21:30
![]() Betina Nielsen wrote:
Betina Nielsen wrote:
Fejl i mønsteret Hvor der stå fortsæt udtagning i raglan, der står der skal udtages 16 masker men så har du 4 masker for meget
04.09.2025 - 20:02
![]() Unni Mossestad wrote:
Unni Mossestad wrote:
Hvilken størrelse er det på modellgenseren?
04.01.2025 - 21:57DROPS Design answered:
Hei Unni. S eller M. Men se på målene på målskissen til toppen og velg den størrelsen du syns passer best til deg. mvh DROPS Design
07.01.2025 - 15:02
![]() Susana Araujo wrote:
Susana Araujo wrote:
Hey there, do you happen to have a video with the instructions for the "triangle " on the diagram, please? I don't understand the instructions. Thank you.
21.07.2024 - 18:03DROPS Design answered:
Dear Susana, this technique is called a knot; you can see a video on this here: https://www.garnstudio.com/video.php?id=1327&lang=en. Happy knitting!
22.07.2024 - 01:34
![]() May-Brit Hjelén Isaksen wrote:
May-Brit Hjelén Isaksen wrote:
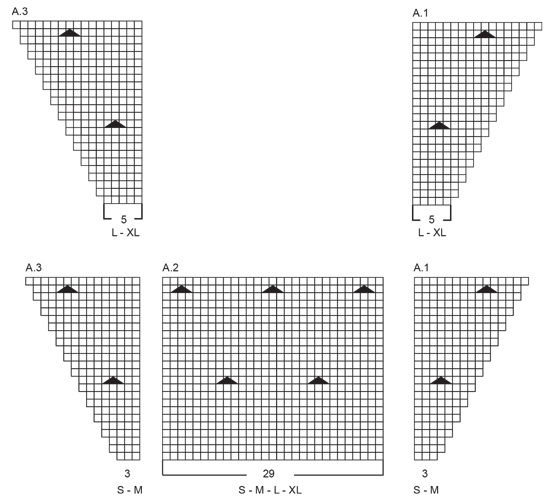
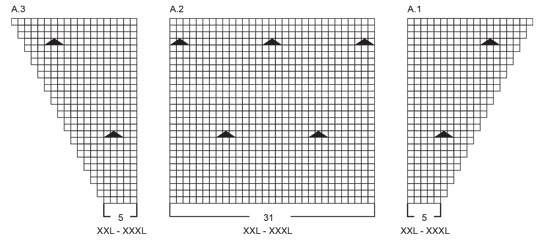
Jeg strikker i str L. I mønsteret er det 9 m mellom hver knute, men mellom A3 og A1 er det 10 m. Betyr dette at mønster A1, A2 og A3 skal strikkes kun 1 gang, dvs at det ikke er mer enn hhv 4 og 5 knuter pr mønsteromgang på bolen? På bildet ser det ut som det er flere. Etter en rapport står det bare at man fortsetter å strikke mønster. Hva vil det si? Synes mønsteret er dårlig forklart i oppskriften.
03.07.2024 - 15:51DROPS Design answered:
Hei May-Brit. Du strikker overfra og ned og på forstykket / bakstykket strikker du A.1 + A.2 + A.3, så 1.gang (11.rad) du strikker knuten er det 1 knute i A.1 og A.3, men 2 knuter når A.2 strikkes = 4 knuter. Samme antall knuter man ser på bildet. 2. gang det skal strikkes knuter (23.rad) strikkes det også 1 knute i A.1 og A.3 , men nå er det 3 knuter i A.2 = 5 knuter, som man også ser på bildet. Når du har strikket diagrammene 1 gang i høyden fortsetter mønstret på samme måte, men du har også økt masker (raglan), slik at nå strikkes A.2 over flere masker = flere knuter. mvh DROPS Design
08.07.2024 - 08:17
![]() Ellen Thomsen wrote:
Ellen Thomsen wrote:
Jeg forstår ikke .strik m vrang sammen uden at slippe og strik de samme 3 ret sammen og derefter vrang sammen en gang til. Når man strikker tre sammen har man da kun en på pinden og så kan jeg ikke strikke tre igen og igen
12.04.2024 - 22:01DROPS Design answered:
Hei Ellen. Ta en titt på hjelpevideoen: Hvordan strikkes en knude over 3 masker. Du finner oversikten over VIDEOER til høyre / eller under bildet. mvh DROPS Design
15.04.2024 - 13:17
![]() Asia wrote:
Asia wrote:
Cornfield picnic
22.01.2024 - 11:43
|
|||||||
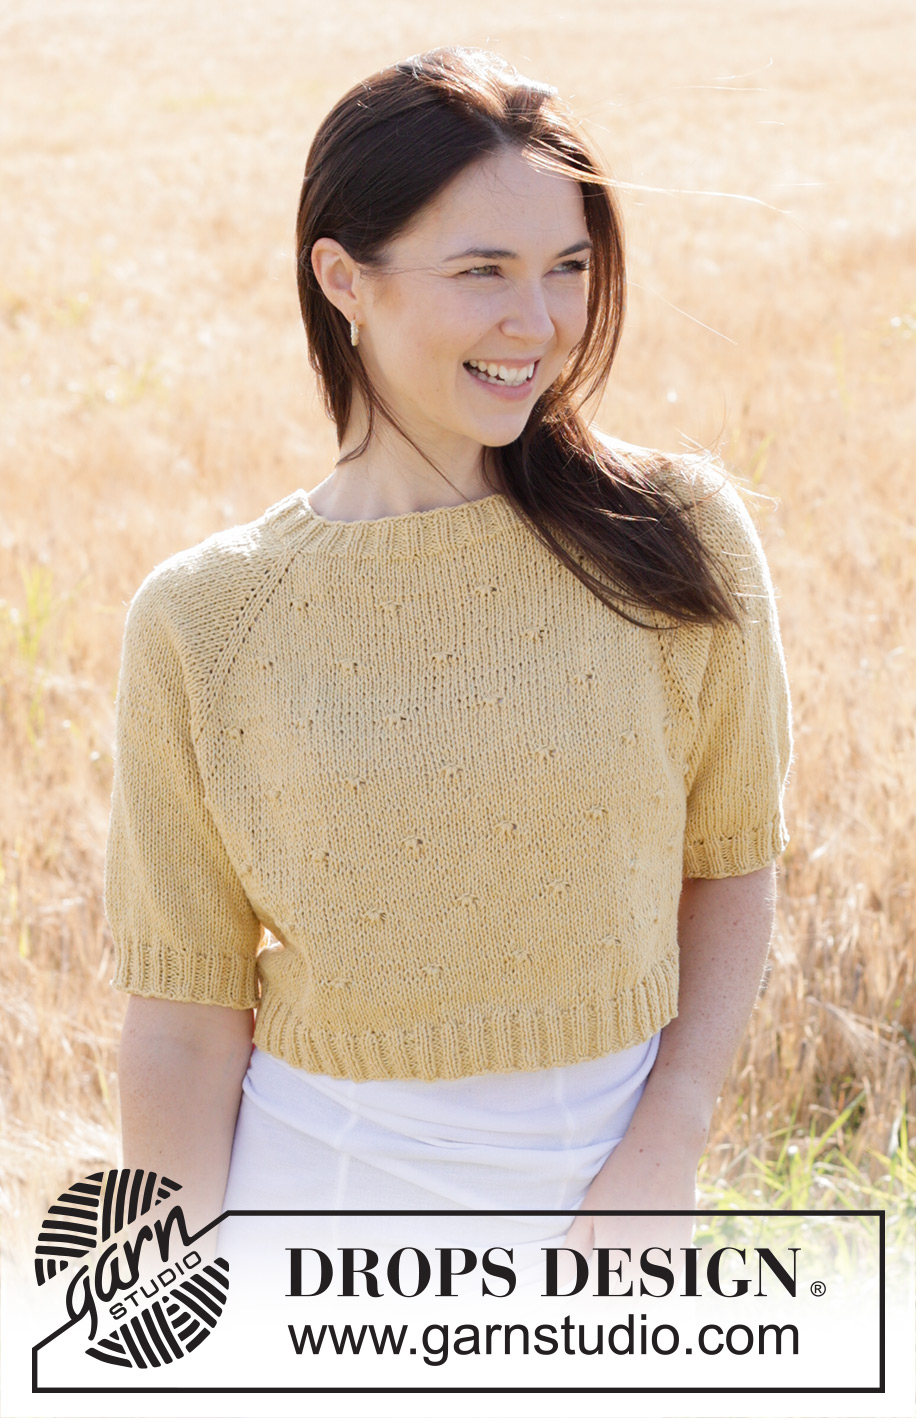
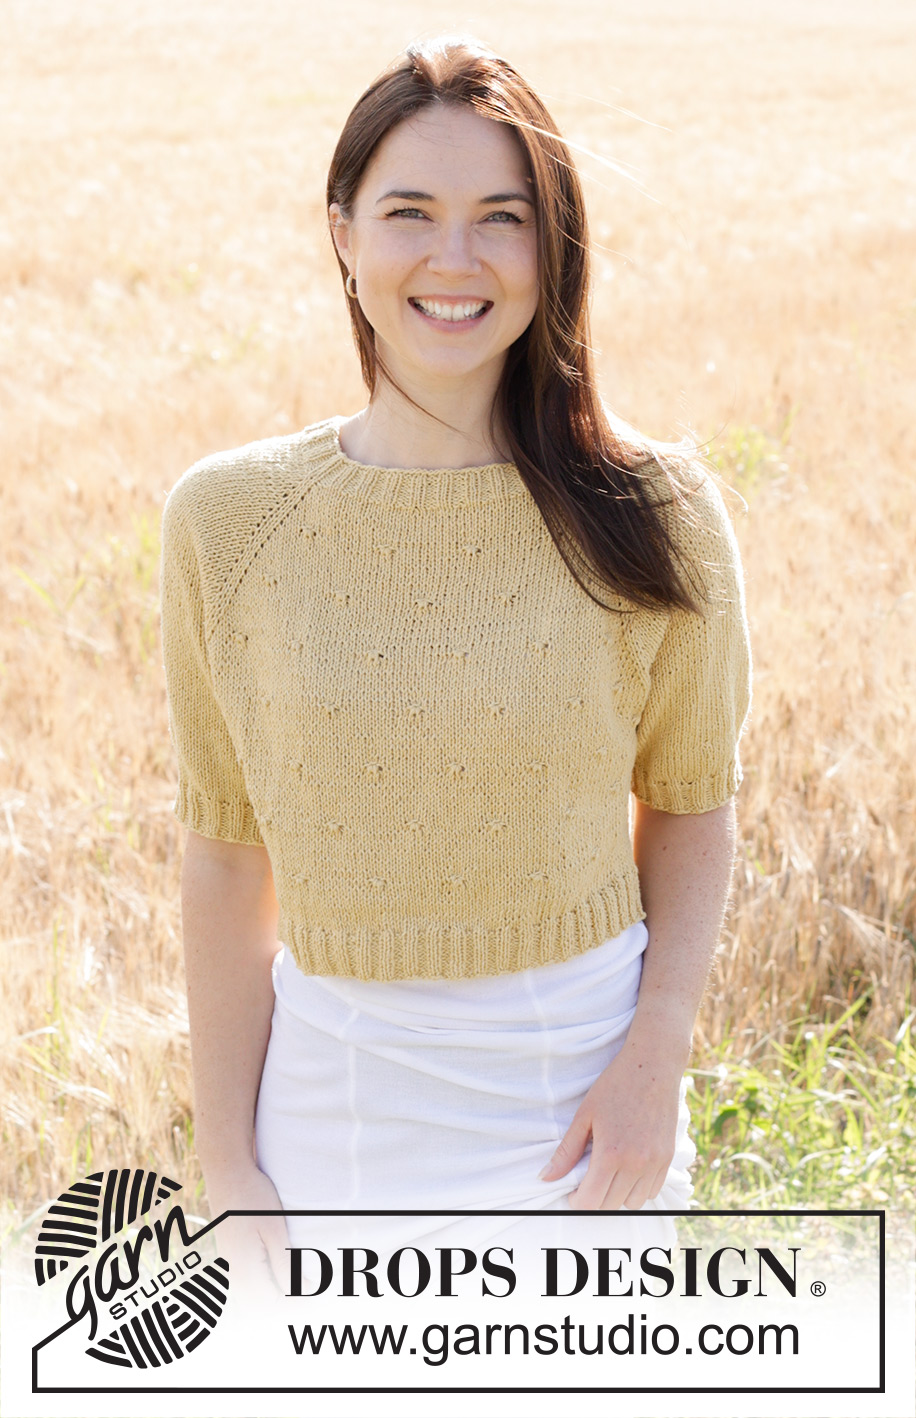
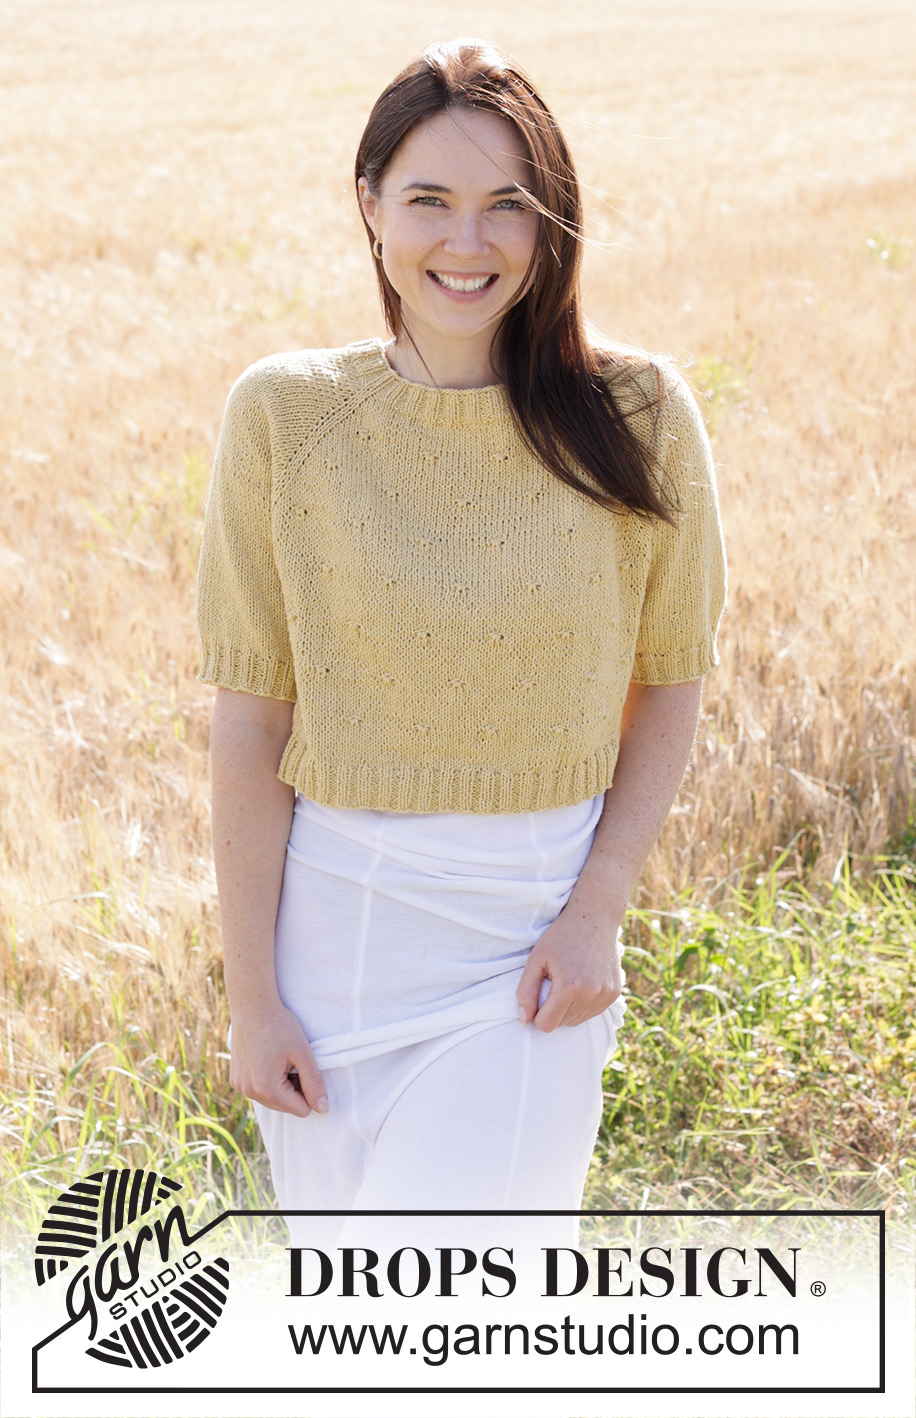
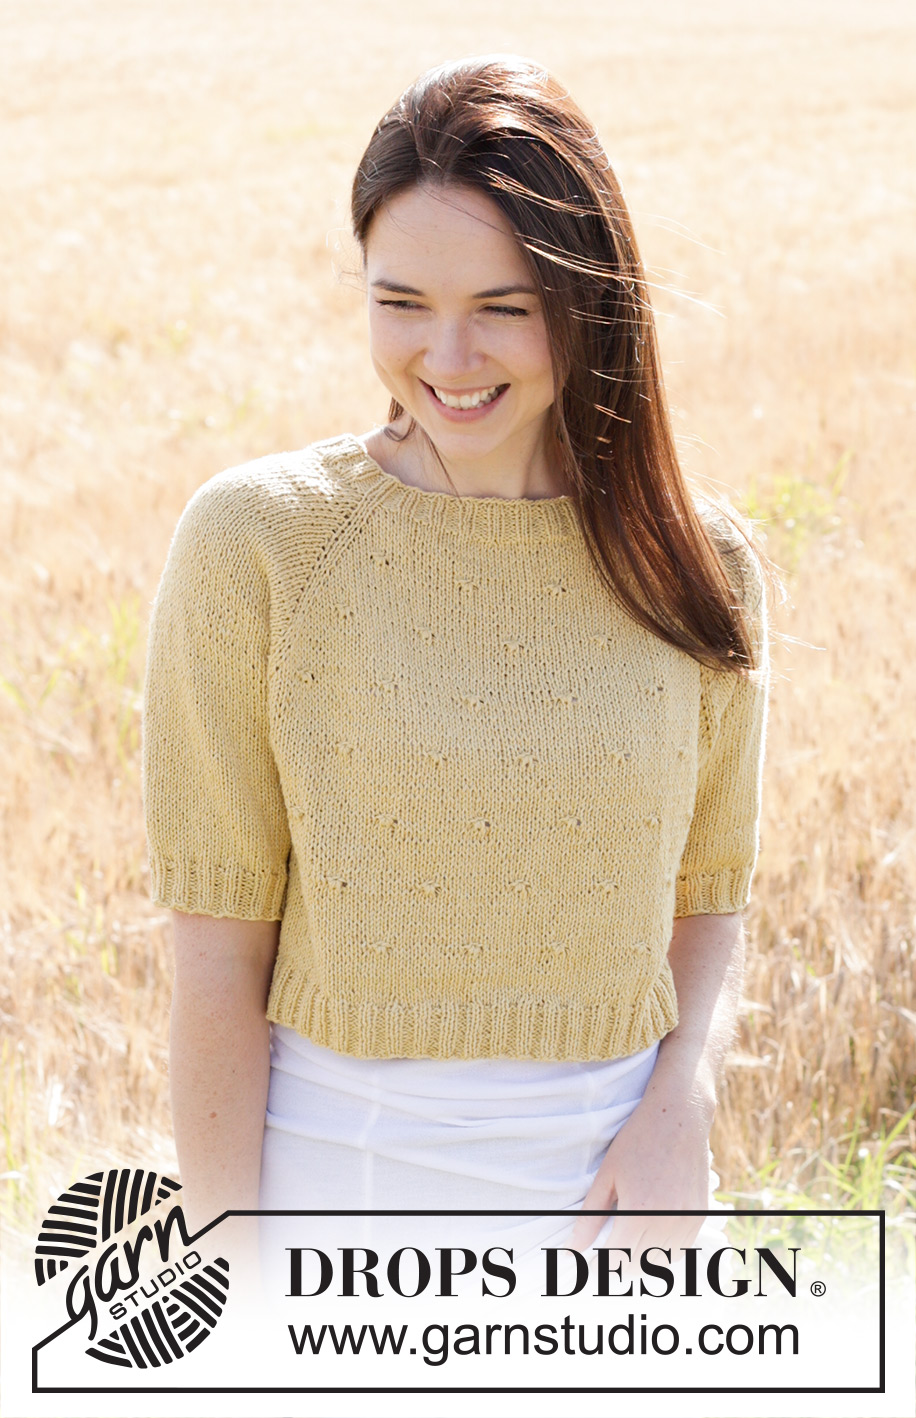
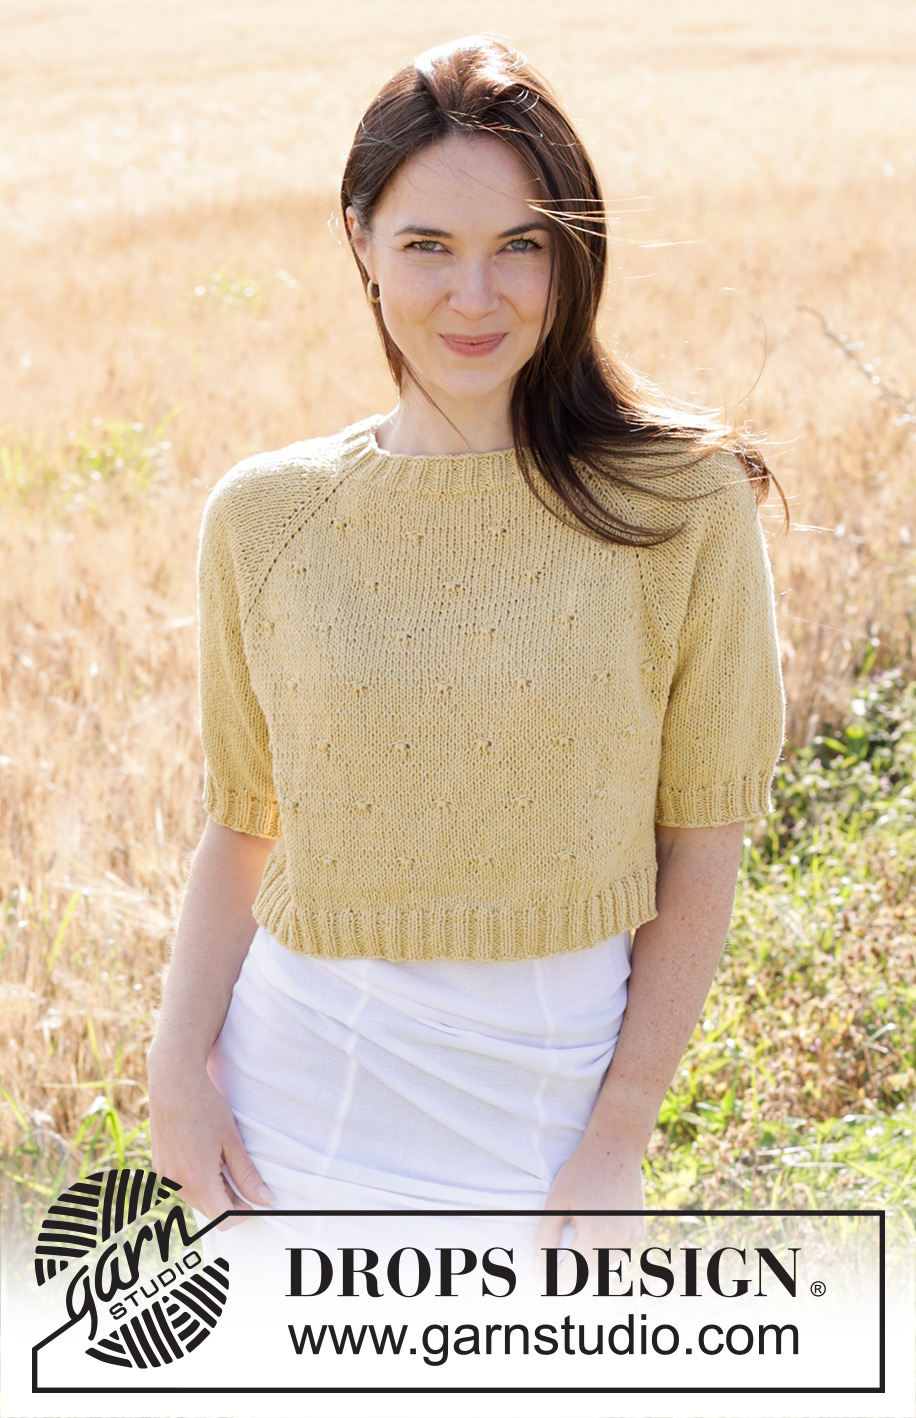
Dandelion Heart#dandelionheartsweater |
|||||||
 |
 |
||||||
Knitted short-sleeved jumper in DROPS Belle. The piece is worked top down with raglan and relief-pattern. Sizes S - XXXL.
DROPS 249-19 |
|||||||
|
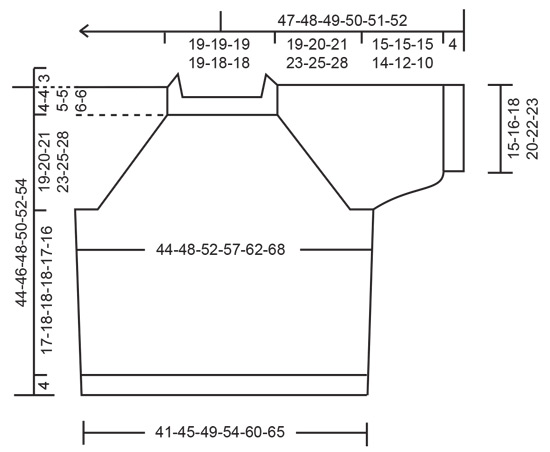
------------------------------------------------------- EXPLANATIONS FOR THE PATTERN: ------------------------------------------------------- PATTERN: See diagrams A.1 to A.3. Choose diagram for your size. RAGLAN: Increase 1 stitch before/after 2 knitted stitches in each transition between body and sleeves (marker-thread sits between these 2 stitches). Increase 1 stitch by making 1 yarn over, which is worked twisted on the next round as follows. Then work the new stitches into the pattern on the front and back pieces and in stocking stitch on the sleeves. BEFORE MARKER-THREAD: Slip the yarn-over off the left needle and replace it the other way round (insert the left needle through the back when replacing it). Knit the front loop. No hole. AFTER MARKER-THREAD: Knit the back loop. No hole. DECREASE TIP-1 (for sides of body): Decrease 1 stitch on each side of the marker-thread: Start 4 stitches before the marker-thread, knit 2 together, work 4 stocking stitches (marker-thread sits between these 4 stitches), slip 1 stitch knit-wise, knit 1, pass the slipped stitch over the knitted stitch (2 decreased stitches). DECREASE TIP-2 (mid-under sleeve): Decrease 1 stitch on each side of the marker thread as follows: Work until there are 3 stitches left before the marker thread, knit 2 together, knit 2 (marker thread sits between these 2 stitches) slip 1 stitch knit-wise, knit 1, pass the slipped stitch over the knitted stitch (= 2 stitches decreased). ------------------------------------------------------- START THE PIECE HERE: ------------------------------------------------------- JUMPER – SHORT OVERVIEW OF THE PIECE: The pattern uses both long and short circular needles; start with the length which fits the number of stitches and change when necessary. The neck and yoke are worked in the round with circular needle, from back right shoulder and top down. The yoke is divided for body and sleeves and the body is continued in the round with circular needle while the sleeves wait. The sleeves are worked in the round to finish. NECK: Cast on 112-112-120-120-128-128 stitches with circular needle size 3 mm and DROPS Belle. Knit 1 round. Work rib as follows: * knit 1, purl 2, knit 1 *, work from *-* to end of round. Continue this rib for 3 cm. Insert 1 marker. The yoke is measured from here. YOKE: Change to circular needle size 4 mm. On the next round insert 4 marker-threads while working as follows: Insert 1 marker-thread at the beginning of the round, knit 20-20-20-20-24-24 and increase 0-0-2-2-2-2 stitches evenly over these stitches, insert 1 marker-thread before the next stitch (sleeve), knit 36-36-40-40-40-40 and increase 1-1-1-1-3-3 stitches evenly over these stitches, insert 1 marker-thread before the next stitch (front piece), knit 20-20-20-20-24-24 and increase 0-0-2-2-2-2 stitches evenly over these stitches, insert 1 marker-thread before the next stitch (sleeve), knit 36-36-40-40-40-40 and increase 1-1-1-1-3-3 stitches evenly over these stitches (back piece) = 114-114-126-126-138-138 stitches. Each marker-thread sits between 2 knitted stitches from the rib. Now work PATTERN and at the same time increase for RAGLAN – read description above. Work the first round as follows: Knit 1, increase for raglan, knit 18-18-20-20-24-24 (sleeve), increase for raglan on each side of 2 knitted stitches (marker-thread sits between these 2 stitches), work A.1, A.2, A.3, increase for raglan on each side of 2 knitted stitches (marker-thread sits between these 2 stitches), knit 18-18-20-20-24-24 (sleeve), increase for raglan on each side of 2 knitted stitches, work A.1, A.2, A.3, increase for raglan, knit 1 = 122-122-134-134-146-146 stitches. REMEMBER THE KNITTING TENSION! Continue this pattern, with A.1/A.2/A.3 on the front and back pieces and stocking stitch on the sleeves. Continue increasing for raglan on each side of the 4 marker-threads every 2nd round a total of 20-23-26-27-21-17 times (including the first increase) = 274-298-334-342-306-274 stitches. NOTE: When the diagrams are finished in height, repeat them - making sure the patterns are neatly above each other. Continue increasing for raglan, but every 2nd increase is only on the front and back pieces, i.e., increase on the front and back pieces every 2nd round and on the sleeves every 4th round (alternately 4 and 8 increased stitches). Increase like this 4-4-2-4-14-22 times on the front and back pieces (2-2-1-2-7-11 times on the sleeves). After the last increase there are 298-322-346-366-390-406 stitches and the yoke measures approx. 17-19-20-22-25-28 cm from the marker. In sizes XXL and XXXL the yoke is finished. In sizes S, M, L and XL continue working without further increases until the yoke measures 19-20-21-23 cm. Now divide for the body and sleeves: Knit 1, place the next 62-68-74-78-80-80 stitches on 1 thread for the sleeve, cast on 6-8-10-14-16-20 stitches (in side under sleeve), work 87-93-99-105-115-123 stitches as before (front piece), place the next 62-68-74-78-80-80 stitches on 1 thread for the sleeve, cast on 6-8-10-14-16-20 stitches (in side under sleeve), work the last 86-92-98-104-114-122 stitches as before (back piece). The body and sleeves are finished separately. The piece is now measured from here! BODY: = 186-202-218-238-262-286 stitches. Insert 1 marker thread in each side, in the middle of the 6-8-10-14-16-20 stitches cast on under each sleeve. Allow the marker threads to follow your work onwards – they are used when decreasing each side. Work to the first marker-thread. The round starts here. Continue in the round, working the pattern on the front and back pieces as far as possible under the sleeves and working the stitches which don’t fit in stocking stitch. When the body measures 4 cm from the division, decrease 2 stitches in each side – read DECREASE TIP-1. Decrease like this every 4 cm a total of 3 times = 174-190-206-226-250-274 stitches. Work until the body measures 17-18-18-18-17-16 cm. Knit 1 round and increase 18-18-22-26-26-26 stitches evenly spaced = 192-208-228-252-276-300 stitches. Change to circular needle size 3 mm. Work rib (knit 2, purl 2) for 4 cm. Cast off. The jumper measures approx. 44-46-48-50-52-54 cm from the shoulder. SLEEVES: Place the 62-68-74-78-80-80 stitches from the thread on one side of the piece on circular needle/double pointed needles size 4 mm and knit up 1 stitch in each of the 6-8-10-14-16-20 stitches cast-on under the sleeve = 68-76-84-92-96-100 stitches. Insert 1 marker-thread in the middle of the 6-8-10-14-16-20 stitches under the sleeve. Start by the marker-thread and work stocking stitch in the round. When the sleeve measures 2 cm from the division, decrease 2 stitches under the sleeve – read DECREASE TIP-2. Repeat the decrease when the sleeve measures 4 cm = 64-72-80-88-92-96 stitches. Work until the sleeve measures 15-15-15-14-12-10 cm from the division. There is 4 cm left. Try the jumper on and work to desired length before the rib. Knit 1 round and decrease 0-4-4-4-0-0 stitches evenly spaced = 64-68-76-84-92-96 stitches. Change to double pointed needles size 3 mm. Work rib (knit 2, purl 2) for 4 cm. Cast off a little loosely. The sleeve measures approx. 19-19-19-18-16-14 cm from the division. |
|||||||
Diagram explanations |
|||||||
|
|||||||
 |
|||||||
 |
|||||||
 |
|||||||
Have you finished this pattern?Tag your pictures with #dropspattern #dandelionheartsweater or submit them to the #dropsfan gallery. Do you need help with this pattern?You'll find 27 tutorial videos, a Comments/Questions area and more by visiting the pattern on garnstudio.com. © 1982-2026 DROPS Design A/S. We reserve all rights. This document, including all its sub-sections, has copyrights. Read more about what you can do with our patterns at the bottom of each pattern on our site. |
|||||||


With over 40 years in knitting and crochet design, DROPS Design offers one of the most extensive collections of free patterns on the internet - translated to 17 languages. As of today we count 324 catalogues and 12290 patterns translated into English (UK/cm). 12290
We work hard to bring you the best knitting and crochet have to offer, inspiration and advice as well as great quality yarns at incredible prices! Would you like to use our patterns for other than personal use? You can read what you are allowed to do in the Copyright text at the bottom of all our patterns. Happy crafting!
Post a comment to pattern DROPS 249-19
We would love to hear what you have to say about this pattern!
If you want to leave a question, please make sure you select the correct category in the form below, to speed up the answering process. Required fields are marked *.