
Popular categories
Looking for a yarn?













































Comments / Questions (25)
 Tanja wrote:
Hej! Hur stor blir en medium?
15.10.2024 - 09:18DROPS Design answered:
Hej Tanja, du finder målene til blusen i måleskitsen nederst i opskriften :)
16.10.2024 - 12:11
Love wrote:
Hej! Jag skulle vilja göra denna men med garnet Brushed Alpaca Silk. Behöver jag använda dubbel tråd då eller bara en? Såg att flera mönster som använder det garnet använder dubbel tråd nämligen.
07.10.2024 - 09:43DROPS Design answered:
Hej Love. Denna kan du sticka med enkel tråd Brushed Alpaca Silk (tillhör garngrupp C). Se bara till att få den stickfasthet som uppges i mönstret och att beräkna riktig garnåtgång (använd gärna vår garn-konverterare).
08.10.2024 - 14:25
 Yolanda wrote:
He trabajado la labor hasta los 28 cm y pone dividir cuerpo y mangas, pero no entiendo: 1º pone trabajar 3 p. de A1 ( 2 revés y 1 derecho) separar las mangas, aumentar bajo la manga 11 puntos (11x2=22) trasero y derecho 107 (107x2= 214 y pone un total de 236 si sumo 3 pts de A1 serían 239 y ¿solo en un lado, no se hace A1? 2º En el cuerpo pone que cuando mida 26cm desde la división hacer 1 drcho 2 revés ¿no entiendo cuando hay que hacerlo?
25.09.2024 - 13:33DROPS Design answered:
Hola Yolanda, empiezas con los últimos 3 puntos de A.1 en la parte de la espalda, antes de la manga, después pasas los siguientes 67 puntos a un hilo, montas 11 puntos para la sisa, trabajas los 107 puntos como antes (con A.1 y punto jersey), pasas los siguientes 67 puntos a 1 hilo, montas 11 para la sisa y trabajas los 104 puntos restantes de la espalda como antes. 3+11+107+11+104 = 236 puntos (tienes los 107 de la espalda separados en 3 y 104). Después trabajas derecho sobre derecho y revés sobre revés sobre los puntos de A.1 y punto jersey sobre el resto de puntos durante 26 cm, donde empezarás el elástico del final del cuerpo.
29.09.2024 - 19:14
YOLANDA wrote:
Buenos días, no entiendo las instrucciones, dice montar el cuello en talla xl 88 puntos pero luego al repartir son 12 puntos entre las dos mangas (6 para cada una) y 52 puntos para delantero y espalda (26 puntos para cada uno) y se aumenta 2 para las mangas y 18 para delantero y espalda, la suma son 84 puntos y en las instrucciones pone que serian 108 pero faltan 24 puntos.
02.09.2024 - 11:11DROPS Design answered:
Hola Yolanda, trabajas A.1 (= 6 puntos), 6 derechos y aumentar 1 punto (= 7 puntos de las mangas), A.1 (= 6 puntos), 26 derechos y aumentar 9 puntos repartidos (= 35 puntos en el delantero), A.1 (= 6 puntos), 6 derechos y aumentar 1 punto (= 7 puntos de la manga), A.1 (= 6 puntos), trabajar los últimos 26 puntos de derecho y aumentar 9 puntos repartidos (= 35 puntos en la espalda) = 108 puntos. El diagrama A.1 es para la línea del raglán y separa las diferentes secciones de la prenda. Así que tienes los 84 puntos + 24 puntos de las 4 repeticiones de A.1 en la vuelta.
08.09.2024 - 17:27
Sofia Broborg wrote:
I översikten står det "Dubbel halskant och ok stickas runt på rundsticka från mitt bak, uppifrån och ner" dvs varvstart mitt bak. Varför står det varvstart mitt bak där, när det sen beskrivs att varvstart är före A1, höger ärm, A1? Det blir bara förvirrande.
22.06.2024 - 16:42
 Celine wrote:
De mouwmeerderingen zijn klaar. Ga verder met meerderen voor de raglan op de voor- en achterpanden 2-1-1-1-2-3 keer (= 18-20-23-24-25-27 steken gemeerderd aan elke kant van de mouwen en 20-21-24-25-27-30 steken gemeerderd aan elke kant van de voor- en achterpanden) = 236-260-284-300-316-348 steken.- ik snap niet zo goed hoe dit moet? Meerder je hier in totaal maar 4 steken? Kunnen jullie dit uitleggen?
11.05.2024 - 19:00DROPS Design answered:
Dag Celine,
Als de mouwminderingen klaar zijn, dan minder je inderdaad niet meer aan de kant van de raglanlijnen waar de mouwen zitten, maar alleen op de panden, dus inderdaad 4 minderingen op elke toer dat je mindert.
12.05.2024 - 07:45
Celine wrote:
Voor de raglan, betekent dit dat je voor de steekmarkeerder gaat meerderen of na de steekmarkeerder meerdert? Voor de pas, bij iedere tweede naald meerderen. Betekent dit dat je eerst 2x de naald rond breit of 1x de naald rond breien, dan de 2e naald meerderen voor de Raglan (op dezelfde manier rondbreien)?
03.05.2024 - 15:56DROPS Design answered:
Dag Celine,
In de beschrijving betekent 'voor de raglan' eigenlijk 'om de raglan te maken' (dus het woordje voor zegt niets over de plek (voor of na). Bovenaan staat beschreven hoe je precies moet meerderen bij de raglanlijnen. Iedere tweede naald betekent de ene naald of toer wel en de andere naald of toer niet. Je meerdert op de tweede naald, dus de eerste naald breien zonder te meerderen en de tweede naald wel meerderen.
03.05.2024 - 20:15
Celine wrote:
Ik heb verkeerd gelezen, waardoor mijn boordsteek nu (2x recht, 2x averecht) is. Moet ik het breiwerk nu weer uithalen of kan ik het breischema nu nog steeds volgen?
19.04.2024 - 07:59DROPS Design answered:
Dag Celine,
Je kunt het breischema aanhouden, maar ik weet niet of de boord van de hals dan in jouw geval mooi doorloopt in de raganlijn. En verder: als je ook op de manchetten en de boord van de panden dezelfde boordsteek wilt hebben, zorg er dan voor dat het aantal steken, vlak voordat je met de boord begint, deelbaar is door 4.
19.04.2024 - 20:04
 Licia wrote:
Sto lavorando una tg XS ma non mi trovo con le lunghezze indicate: sprone 20cm+corpo 24cm+bordo 4cm= 48 e non 52 come indicate voi. Dove lavoro i 4 cm di differenza visto che per il collo avete indicato 16cm che ho lasciato a parte?
13.02.2024 - 13:42DROPS Design answered:
Buonasera Licia, i 4 cm fanno parte del collo come indicato nello schema delle misure in fondo alla pagina. Buon lavoro!
17.03.2024 - 18:11
Marianne Persson wrote:
Helt otroligt dålig beskrivning Har stickat mycket men här stämmer inte antal maskor, var ska mönstret vara? Tråkigt men får skapa nåt egeg
03.02.2024 - 16:17
|
|||||||
Winter Iris Sweater#winteririssweater |
|||||||
 |
 |
||||||
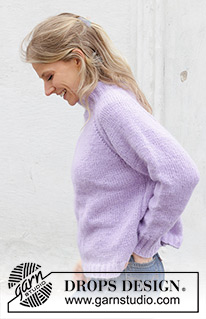
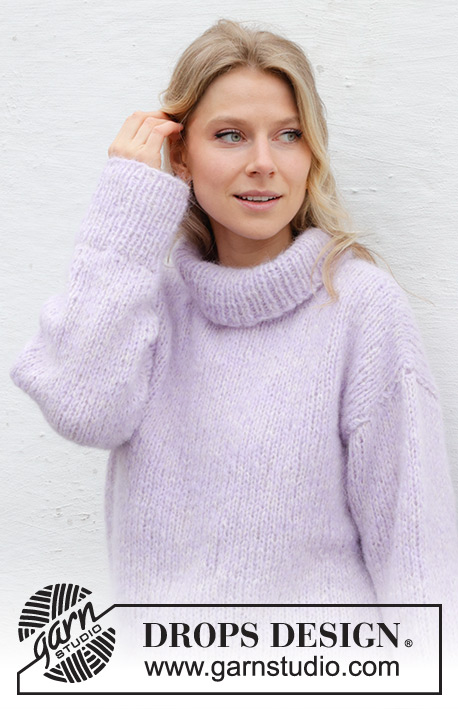
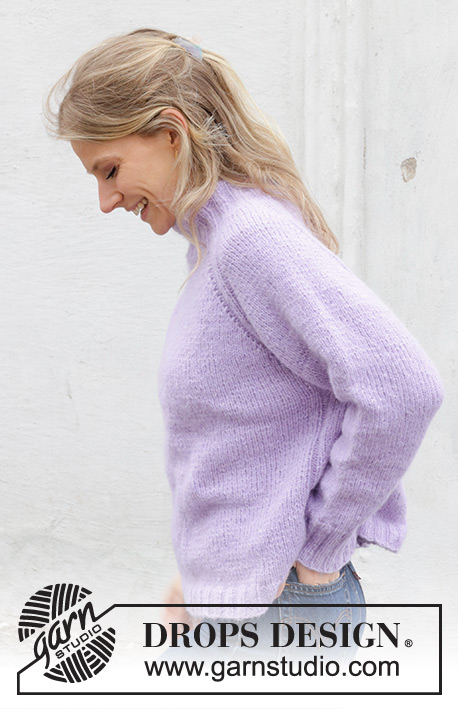
Knitted jumper in DROPS Air. The piece is worked top down with raglan and high, double neck. Sizes XS - XXL.
DROPS 243-12 |
|||||||
|
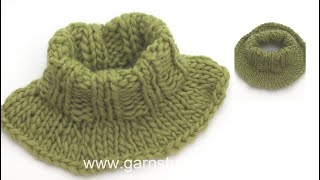
------------------------------------------------------- EXPLANATIONS FOR THE PATTERN: ------------------------------------------------------- PATTERN: See diagram A.1. RAGLAN: Increase 1 stitch before/after A.1, in each transition between the body and sleeves. Increase by making 1 yarn over which is worked as follows on the next round: BEFORE A.1: Slip the yarn over off the left needle and replace it the other way round (insert the left needle in the back when replacing it). Knit the front loop – no hole. AFTER A.1: Knit the back loop - no hole. DECREASE TIP (for sleeves): Decrease 1 stitch on either side of the marker-stitch as follows: Work until there are 3 stitches left before the marker-stitch, knit 2 together, knit 3 (marker-stitch is the middle of these 3 stitches), slip 1 stitch knit-wise, knit 1 and pass the slipped stitch over the knitted stitch. ------------------------------------------------------- START THE PIECE HERE: ------------------------------------------------------- JUMPER – SHORT OVERVIEW OF THE PIECE: The neck and yoke are worked in the round with circular needle, from mid back and top down. The yoke is divided for body and sleeves and the body is continued in the round with circular needle. The sleeves are worked with short circular needle/double pointed needles, top down. DOUBLE NECK: Cast on 72-80-80-88-88-96 stitches with circular needle size 5 mm and DROPS Air. Knit 1 round. Change to circular needle size 4 mm and work rib (purl 2, knit 2) in the round for 16 cm. The neck must be later folded twice and sewn so that the neck edge will be approx. 8 cm. Work the next round as follows: Work A.1, knit 6 and increase 1 stitch (= 7 sleeve stitches), A.1, knit 18-22-22-26-26-30 and increase 5-7-7-7-9-11 stitches evenly spaced (= 23-29-29-33-35-41 stitches on the front piece), A.1, knit 6 and increase 1 stitch (= 7 sleeve stitches), A.1, knit the last 18-22-22-26-26-30 stitches and increase 5-7-7-7-9-11 stitches evenly spaced (= 23-29-29-33-35-41 stitches on the back piece) = 84-96-96-104-108-120 stitches. Insert 1 marker at the beginning of the round; the yoke is measured from this marker! YOKE: Change to circular needle size 5 mm. Work as follows: A.1, knit 7 (sleeve), A.1, knit 23-29-29-33-35-41 (front piece), A.1, knit 7 (sleeve), A.1, knit 23-29-29-33-35-41 (back piece). Continue in the round and increase for raglan every 2nd round a total of 18-20-23-24-25-27 times = 228-256-280-296-308-336 stitches. REMEMBER THE KNITTING TENSION! The sleeve increases are finished. Continue to increase for raglan on the front and back pieces 2-1-1-1-2-3 more times (= 18-20-23-24-25-27 stitches increased on each side of the sleeves and 20-21-24-25-27-30 stitches increased on each side of the front and back pieces) = 236-260-284-300-316-348 stitches. Continue with stocking stitch and A.1, without further increases, until the yoke measures 20-20-22-24-26-28 cm from the marker after the neck. Now divide for the body and sleeves: Work 3 stitches in A.1 as before (belong to the back piece), place the next 49-53-59-61-63-67 stitches on a thread for the sleeve, cast on 9-9-9-11-11-11 stitches (in side under sleeve), work the next 69-77-83-89-95-107 stitches (front piece), place the next 49-53-59-61-63-67 stitches on a thread for the sleeve, cast on 9-9-9-11-11-11 stitches (in side under sleeve), work the last 66-74-80-86-92-104 stitches (rest of back piece). Finish the body and sleeves separately. The piece is now measured from here! BODY: = 156-172-184-200-212-236 stitches. Continue in the round with stocking stitch, knit over knit and purl over purl over A.1 (the new stitches under the sleeves are worked in stocking stitch). When the body measures 24-26-26-26-26-26 cm from the division, work as follows: * Purl 2, knit 1 (stitches from A.1), knit 9-9-9-11-11-11 and increase 3-3-3-5-5-5 stitches evenly spaced (= 12-12-12-16-16-16 stitches), knit 1, purl 2 (stitches from A.1), knit 63-71-77-83-89-101 and increase 11-11-13-15-17-17 stitches evenly spaced (= 74-82-90-98-106-118 stitches) *, work from *-* 1 more time = 184-200-216-240-256-280 stitches. Change to circular needle size 4 mm. Work rib (purl 2, knit 2) for 4 cm. Cast off with knit over knit and purl over purl. The jumper measures approx. 52-54-56-58-60-62 cm from the shoulder. SLEEVES: Place the 49-53-59-61-63-67 stitches from the thread on the one side of the piece on short circular needle/double pointed needles size 5 mm and knit up 1 stitch in each of the 9-9-9-11-11-11 stitches cast on under the sleeve = 58-62-68-72-74-78 stitches. Insert a marker in the middle stitch of the new stitches under the sleeve. Allow the marker to follow your work onwards; it is used when decreasing under the sleeve. Continue with stocking stitch in the round. When the sleeve measures 4 cm, decrease 1 stitch on each side of the marker – read DECREASE TIP. Decrease like this every 6-5-3½-2½-2½-2 cm a total of 5-6-8-9-9-10 times = 48-50-52-54-56-58 stitches. Continue working until the sleeve measures 33-32-31-29-28-26 cm. Knit 1 round and increase 8-6-8-10-8-10 stitches evenly spaced = 56-56-60-64-64-68 stitches. Change to double pointed needles size 4 mm and work rib (knit 2, purl 2) for 9 cm. Cast off with knit over knit and purl over purl. Work the other sleeve in the same way. ASSEMBLY: Fold the neck double to the inside and sew down. To avoid the neck being tight and rolling outwards, it is important that the seam is elastic. |
|||||||
Diagram explanations |
|||||||
|
|||||||
 |
|||||||
 |
|||||||
Have you finished this pattern?Tag your pictures with #dropspattern #winteririssweater or submit them to the #dropsfan gallery. Do you need help with this pattern?You'll find 21 tutorial videos, a Comments/Questions area and more by visiting the pattern on garnstudio.com. © 1982-2026 DROPS Design A/S. We reserve all rights. This document, including all its sub-sections, has copyrights. Read more about what you can do with our patterns at the bottom of each pattern on our site. |
|||||||






With over 40 years in knitting and crochet design, DROPS Design offers one of the most extensive collections of free patterns on the internet - translated to 17 languages. As of today we count 333 catalogues and 12525 patterns translated into English (UK/cm). 12525
We work hard to bring you the best knitting and crochet have to offer, inspiration and advice as well as great quality yarns at incredible prices! Would you like to use our patterns for other than personal use? You can read what you are allowed to do in the Copyright text at the bottom of all our patterns. Happy crafting!
Post a comment to pattern DROPS 243-12
We would love to hear what you have to say about this pattern!
If you want to leave a question, please make sure you select the correct category in the form below, to speed up the answering process. Required fields are marked *.