
Popular categories
Looking for a yarn?


Comments / Questions (15)
![]() Marleen wrote:
Marleen wrote:
Hallo, ik begrijp de kantrand niet . 13 steken opzetten 2e nld: haal 1st af ,3 r,1 omslag,5r,1omslag,2r samen,1omslag,2r = (15 steken ) ik heb er maar 14 over wat doe ik verkeerd?
26.01.2026 - 00:51DROPS Design answered:
Dag Marleen,
Als het goed is heb je 13 steken op de naald. Je breit als volgt op de tweede naald: haal 1 steek af, 3 recht, 1 omslag, 5 recht, 1 omslag, 2 recht samen, 1 omslag, 2 recht. Er zijn 3 steken bij gekomen door de omslagen en er is 1 steek geminderd door het samenbreien. Je hebt dus nu 15 steken op de naald.
26.01.2026 - 21:00
![]() Veronique wrote:
Veronique wrote:
Pour le rang R 10 de la bordure : Glisser 1 maille, 1 m end, glisser 1 m end, 1m end, passer la maille glissée par dessus la m tricotée, 2 m end, (1 jeté, 2 m end end) 2 fois, 1 m end (=10 m)
13.12.2025 - 10:17
![]() Véronique wrote:
Véronique wrote:
Bonjour, pour le rang R10 de la bordure j’obtiens 11 mailles et non 10. Y a t- il une erreur?
13.12.2025 - 09:52DROPS Design answered:
Bonjour Véronique, notez qu'au début, vous diminuez 1 m: (glissez 1 m à l'end, 1 m end, passez la m glissée par-dessus la m tricotée = 1 diminution); et en tricotant 2 fois (1 jeté, 2 m ens à l'end), vous gardez ici le même nombre de mailles, autrement dit, vous allez diminuer 1 seule maille = il en reste 10. Bon tricot!
15.12.2025 - 11:41
![]() JOCELYNE wrote:
JOCELYNE wrote:
Bonjour, pour les diminutions du devant : "Diminuer 2 m : après les 8 : 3 m ens à l'end ; avant les 8 m : 3 m ens torse à l'end. Diminuer 1 m : après les 8 m : 2 m ens à l'end ; après les 8 m : 2 m ens torse à l'end." Pour ce dernier paragraphe, faut il comprendre : "avant les 8 m (au lieu de après) : 2 m ens torse ? Merci pour votre réponse.
13.08.2025 - 15:31DROPS Design answered:
Bonjour Jocelyne, tout à fait, la correction a été faite, merci pour votre retour. Bon tricot!
13.08.2025 - 16:07
![]() Lise wrote:
Lise wrote:
Bonjour En taille S les augmentations de ce modèle se retrouvent au niveau des 4 mailles en jersey. comment doit on faire le point fantaisie quand on a 2mailles de plus, puis 4mailles de plus etc... jusqu'à avoir les 8mailles de plus nécessaires pour obtenir le point fantaisie complet. merci d'avance pour votre réponse
08.04.2025 - 12:36DROPS Design answered:
Bonjour Lise, tricotez les augmentations du devant droit et celles de la fin du dos comme si vous continuiez/commenciez un nouveau motif, et celles du début du dos et du début du devant gauche comme celles d'un motif précédent - vous pouvez conserver par ex 2 mailles jersey entre les augmentations. Les motifs vont ainsi s'élargir sur les côtés: à la fin du devant droit, au début du dos, à la fin du dos et au début du devant gauche. Si vous n'avez pas assez de mailles pour tricoter le point ajouré, tricotez ces mailles à l'envers (sans le jeté). Bon tricot!
08.04.2025 - 14:59
![]() Nina wrote:
Nina wrote:
Hej, Jag förstår inte hur jag ska få in de ökade maskorna i mönstret på var sin sida av märktrådarna. Har försökt men hålen hamnar ju då på fel ställen.
29.06.2024 - 08:16DROPS Design answered:
Hej Nina, nej du skal sørge for at mønsteret strikkes over hinanden, de nye masker strikkes ind som en fortsættelse af det eksisterende mønster :)
02.07.2024 - 11:41
![]() Valérie SAMSON wrote:
Valérie SAMSON wrote:
Bonjour, je souhaiterais savoir si les manches se tricotent en aller retour ou bien en rond... les explications ne sont pas claires à ce propos que ce soit au niveau de la réalisation ou au niveau de l'assemblage (seule la couture d'épaule est mentionnée). Merci d'avance pour votre réponse.
11.04.2022 - 11:01DROPS Design answered:
Bonjour Valerie, les manches se tricotent en aller retour. Bon tricot!
12.04.2022 - 10:27
![]() Nelly Boersma wrote:
Nelly Boersma wrote:
Voor patroon 55-3, vestje met ajour heb ik een vraag. Hoe meerder ik 4x 4 elke 10e naald in de strepen van het patroon?
12.02.2021 - 22:15DROPS Design answered:
Dag Nelly,
Je kunt dit doen door een omslag te maken die je op de volgende naald gedraaid recht of averecht breit (afhankelijk welke steek er dan gebreid moet worden in het patroon. Het patroon bestaat uit 8 steken, dus je zult niet een volledige patroonherhaling kunnen maken, maar wel 4 steken mee kunnen nemen in het patroon.
15.02.2021 - 11:03
![]() Nelly Boersma wrote:
Nelly Boersma wrote:
Hoe meerder ik 4x 4 steken elke 10 naald in dit lijnen patroon?
12.02.2021 - 21:52
![]() Martine Paulissen wrote:
Martine Paulissen wrote:
Pour ce modèle drops 55-3 pour le point fantaisie ne manque t il pas un jeté au rang 3 avant les 2 m ensembles à l envers merci
22.11.2020 - 16:22DROPS Design answered:
Bonjour Mme Paulissen, il manquait effectivement 1 jeté au rang 3 mais il doit se faire après les 2 m ens à l'envers. La correction a été faite, merci pour votre retour. Bon tricot!
23.11.2020 - 09:35
|
|
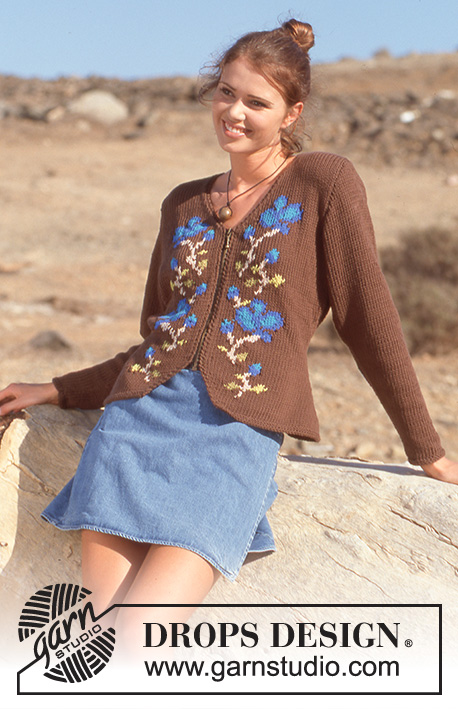
Alexandra |
|
 |
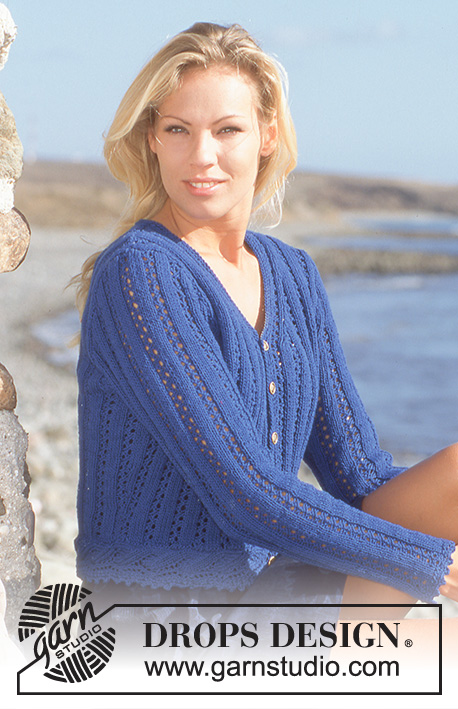 |
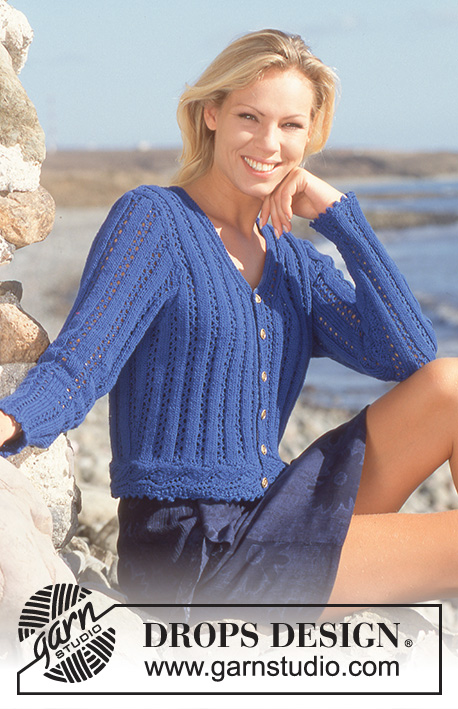
DROPS jacket with lace pattern, lace and crochet edges.
DROPS 55-3 |
|
|
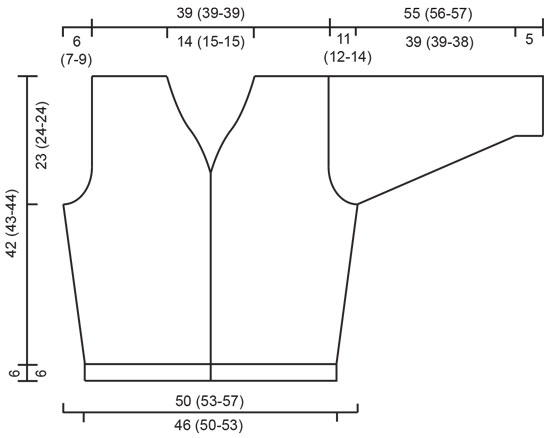
Knitting tension: 21 stitches x 28 rows with needle size 4 mm and pattern = 10 x 10 cm. Remember needle size is only a guide! Ridge/Garter stitch (back and forth on needle): 1 ridge = Knit 2 rows. Pattern ("rib"): Row 1: (right side) * K2, P1, 1 yarn over, P2 together, P1, K2 *, repeat from *-*. Row 2: (wrong side) * P2,K 4, P2 *repeat from *-*, Row 3: * K2, P1, P2 together, 1 yarn over, P1, K2 * repeat from *-*, Row 4: * P2, K4, P2 * repeat from *-*. Repeat rows 1- 4. Tip! When decreasing while working Pattern – notice where the decreases are in the pattern. On knit stitches between the rows of holes decrease as usual. When a decrease is at the same time as "yarn over, P2 together", you can decrease by just leaving out the yarn over. When the decrease is at the same time as "P2 together, yarn over" you cannot decrease 1 stitch by just “P2 together” because the yarn over will cancel out the decrease. If you P2 together you will also need to leave out the yarn over. Body: The jacket is worked back and forth with circular needle. Legg opp 194 (210-226) stitches (incl. 1 edge stitch in each side towards mid front - worked in garter stitch) with circular needle size 4 mm and blue and work 1 ridge. Insert a marker thread in each side - front piece = 49 (53-57) stitches, back piece = 96 (104-112) stitches. Then work Pattern upwards at the same time as you increase in the sides on each side of the marker threads: 1 stitch x 4 (4-4) every 10th (10th-11th) row = 210 (226-242) stitches. The increased stitches are worked into pattern as you go. Remember the knitting tension. When piece measures 19 (19-20) cm work next row as follows: 51 (55-59) stitches front piece, cast off 4 stitches for armhole, 100 (108-116) stitches back piece, cast off 4 stitches to armhole, 51(55-59) stitches front piece. Each piece is finished separately. Front piece: = 51 (55-59) stitches. Continue by casting off for armholes every 2nd row: 3 stitches x 1 (1-2), 2 stitches x 2 (3-3), 1 stitch x 2 (4-5). At the same time, when piece measures 24 (25-26) cm decrease for neck on inside of the 8 outermost stitches every 2nd row: 2 stitches x 2, 1 stitch x 6, and every 4th row: 1 stitch x 6 (7-7). Decrease as follows: After the 8 stitches: Decrease 2 stitches as follows: K 3 together. Decrease 1 stitch as follows: K 2 together. Before the 8 stitches: Decrease 2 stitches as follows: K 3 twisted together, Decrease 1 stitch as follows: K 2 twisted together. When both armhole and neck decreases are finished, there are 26 (25-25) stitches left on needle. Cast off when piece measures 42 (43-44) cm. Back piece: = 100 (108-116) stitches. Continue to cast off for armholes as for front piece = 82 (82-82) stitches. When piece measures 40 (41-42) cm cast off the middle 26 (28-28) stitches mid back for neck. Then cast off 2 stitches on next row towards neck. Cast off when piece measures 42 (43-44) cm. Sleeve: Worked back and forth on needle. Cast on 48 (48-48) stitches with double pointed needles size 4 mm and blue and work 1 ridge, then Pattern upwards. At the same time, when piece measures 5 cm increase in each side: 1 stitch x 22 (23-24) for S+M: Alternately every 4th and 5th row, L: Every 4th row = 92 (94-96) stitches - the increased stitches are worked into Pattern as you go. When piece measures 44 (44-43) cm cast off for sleeve cap in each side every 2nd row: 3 stitches x 2, 2 stitches x 12 (13-16), 3 stitches x 2, cast off. Piece measures approx. 55 (56-57) cm. Assembly: Sew shoulder seams. "Lace edge": Cast on 13 stitches with double pointed needles size 4 mm and blue and work 1 row stocking stitch, then work pattern upwards as follows: Row 1: (wrong side) and all other wrong side rows: K2, purl until there are 2 stitches left on row, K2. Row 2: (right side) Slip 1 stitch, K3, 1yarn over, K5, 1 yarn over, K2 together, 1 yarn over, K2(= 15 stitches). Row 4: Slip 1 stitch, K4, slip 1 stitch, K2 together, pass slipped stitch over, K2, (yarn over, K2 together) x 2, K1 (= 13 stitches). Row 6: Slip 1 stitch, K3, slip 1 stitch, K1, pass slipped stitch over, K2, (yarn over, K2 together) x 2, K1 (= 12 stitches). Row 8: Slip 1 stitch, K2, slip 1 stitch, K1, pass slipped stitch over, K2, (yarn over, K2 together) x 2, K1 (= 11 stitches). Row 10: Slip 1 stitch, K1, slip 1 stitch, K1, pass slipped stitch over, K2, (yarn over, K2 together) x 2, K1 (= 10 stitches). Row 12: K1, slip 1 stitch, K1, pass slipped stitch over, K2, yarn over, K1, yarn over, K2 together, yarn over, K2 (= 11 stitches). Row 14: Slip 1 stitch, (K3, yarn over) x 2, K2 together, yarn over, K2 (= 13 stitches). Repeat rows 1- 14. Cast off when piece measures approx. 92 (100-106) cm - adjust to fit pattern and body. It is especially important that the edge is not worked too long. Sew "lace edge" along bottom edge of body. Knit up approx. 250-270 stitches along both front pieces and around neck with circular needle size 4 mm and blue and work 2 ridges, at the same time as you work 6 buttonholes on right front piece, (in transition to garter stitch edge), evenly spaced from where you started to cast off for neck and down. 1 buttonhole = cast off 2 stitches and increase 2 new stitches over the cast-off stitches on next row. Sew sleeve seams. Crochet edge: Work an edge with hook size 2.5 mm and blue along the "lace edge" at bottom of body and sleeves as follows: * 2 double crochets, 3 chain stitches, 1 double crochet in first chain stitch *, repeat from *-*. Sew in sleeves and sew on buttons. |
|
 |
|
Have you finished this pattern?Tag your pictures with #dropspattern or submit them to the #dropsfan gallery. Do you need help with this pattern?You'll find 26 tutorial videos, a Comments/Questions area and more by visiting the pattern on garnstudio.com. © 1982-2026 DROPS Design A/S. We reserve all rights. This document, including all its sub-sections, has copyrights. Read more about what you can do with our patterns at the bottom of each pattern on our site. |
|


With over 40 years in knitting and crochet design, DROPS Design offers one of the most extensive collections of free patterns on the internet - translated to 17 languages. As of today we count 325 catalogues and 12298 patterns translated into English (UK/cm). 12298
We work hard to bring you the best knitting and crochet have to offer, inspiration and advice as well as great quality yarns at incredible prices! Would you like to use our patterns for other than personal use? You can read what you are allowed to do in the Copyright text at the bottom of all our patterns. Happy crafting!
Post a comment to pattern DROPS 55-3
We would love to hear what you have to say about this pattern!
If you want to leave a question, please make sure you select the correct category in the form below, to speed up the answering process. Required fields are marked *.