
Categorías populares
¿Buscas un hilo?


Comentarios / Preguntas (177)
![]() Miranda escribió:
Miranda escribió:
Hello! I have a questions about casting off the armholes. "cast off for the armholes at the beginning of each row on each side: Cast off 4-5-6-7-8-9 sts 1 time, 2 sts 0-1-2-3-4-6 times and 1 stitch 2-2-2-3-5-5 times = 68-70-72-74-76-78 sts." In this instruction, I read that for a size SM, you cast off 4 sts 1 time, then 1 st 2 times. Since I'm starting with 80 sts, That leaves me with 74 sts, but the patterns says I should have 68 at the end?
04.02.2023 - 16:34DROPS Design respondió:
Dear Miranda, you need to cast off once or twice on each side. So cast off 4 stitches once on one side and 4 stitches on the other side. Then, cast off 1 stitch on each side twice (so, cast off 4 more stitches). 4+4+4 = 12 cast-off stitches. 80-12 = 68 stitches. Happy knitting!
06.02.2023 - 00:14
![]() Miranda escribió:
Miranda escribió:
Hello! I have a question about casting off the armholes. "cast off for the armholes at the beginning of each row on each side: Cast off 4-5-6-7-8-9 sts 1 time, 2 sts 0-1-2-3-4-6 times and 1 stitch 2-2-2-3-5-5 times = 68-70-72-74-76-78 sts." In this instruction, I read that for a size SM, you cast off 4 sts 1 time, then 1 st 2 times. Since I'm starting with 80 sts, That leaves me with 74 sts, but the patterns says I should have 68 at the end?
04.02.2023 - 16:34DROPS Design respondió:
Dear Miranda, you need to cast off once or twice on each side. So cast off 4 stitches once on one side and 4 stitches on the other side. Then, cast off 1 stitch on each side twice (so, cast off 4 more stitches). 4+4+4 = 12 cast-off stitches. 80-12 = 68 stitches. Happy knitting!
06.02.2023 - 00:14
![]() Hanne Estdahl escribió:
Hanne Estdahl escribió:
Må op pind 5 1/2 for at strikkefastheden passer , og 150 g garn ( drops sky ) er bestemt heller ikke nok , strikker en str medium . Er ret træls at få sådan en opskrift der åbenbart ikke er afprøvet , skulle bruge vesten til julegave og er ikke sikker på jeg nu kan få samme indfarvning , surt .
17.12.2022 - 17:33DROPS Design respondió:
Hej Hanne, Det er individuelt hvilken pind som skal bruges for at få strikkefastheden som står i opskriften. I denne opskrift er det vigtigt at du får 20 masker i bredden og 26 pinde i højden på 10x10 cm, overholder du strikkefastheden vil det også være nok garn :)
20.12.2022 - 08:33
![]() Tanja escribió:
Tanja escribió:
Den strikkefasthed, der angives i opskriften - er det på pind 4,5 eller 3,5 ? Jeg har købt soft tweed
04.12.2022 - 22:54DROPS Design respondió:
Hei Tanja. Strikkefastheten som oppgis er med den pinnen selve plagget strikkes med, ikke vrangbord. I denne vesten er det DROPS RUNDPINNER NR 4,5, men husk pinne nr er kun veiledende. Får du for mange masker på 10 cm, bytt til tykkere pinner. Får du for få masker på 10 cm, bytt til tynnere pinner. mvh DROPS Design
05.12.2022 - 14:14
![]() Marita Weslien escribió:
Marita Weslien escribió:
Hej, jag har stickat mycket och aldrig haft problem med stickfastigheten. Detta mönster med 20m på 10 cm kan du inte nå på stickor 4,5 slätstickning. Då måste man sticka oerhört löst. Jag vill att ni kontrollerar och ändrar i mönstret. Ser att flera i kommentarsfältet också tar upp detta problem.
02.11.2022 - 20:01
![]() Melanie Proudlock escribió:
Melanie Proudlock escribió:
I did keep the tension correct but only by using larger needles, had to use 5.5 mm instead of 4.5 mm
15.10.2022 - 09:32
![]() Melanie Proudlock escribió:
Melanie Proudlock escribió:
I bought 150 grams of the Sky yarn to make the Medium size vest but found I had to increase the size of the needles and make a bigger size to get the correct dimensions. I now find I have insufficient yarn to finish the piece and the dye lot is out of stock. Very disappointed as I loved the look of the vest
14.10.2022 - 10:42DROPS Design respondió:
Dear Mrs Proudlock, sorry to hear that ; did you get and keep the correct tension in width as well as in height? Read more about tension here. Happy knitting!
14.10.2022 - 13:24
![]() Catharina escribió:
Catharina escribió:
De Soft Tweed staat er als alternatief bij, maar hiervan lijken minder bollen nodig te zijn terwijl er minder meters op een bol zitten. Een klant van ons had hierdoor te weinig. Kun je hiernaar kijken?
20.09.2022 - 10:26DROPS Design respondió:
Dag Catharina,
Dank voor het doorgeven! Er was inderdaad te weinig garen aangegeven voor de Soft Tweed en het is nu aangepast.
21.09.2022 - 19:37
![]() Bittan escribió:
Bittan escribió:
Varför maskar man av vid halsen på bakstycket, men sätter maskorna på en tråd på framstycket?
20.02.2022 - 12:59
![]() Lynn escribió:
Lynn escribió:
After binding off 32 stitches on the next row it says bind off 1 stitch from the neck. I’m interrupting that as next row bind off 1st stitch and continue for 20 stitches then knit next 20 stitches and bind off last stitch. Then continue on both shoulders until it measures 9” from the armhole. You mentioned not the break the yarn. Please advise. Thank you again for all of your help.
15.02.2022 - 22:16DROPS Design respondió:
Dear Lynn, after you have bind off the middle stitch for neck, you continue each shoulder separately. If you worked this row from RS, now turn and work the next row from WS (left shoulder on back piece), turn and at the beginning of next row from RS cast off 1 stitch for neck. Now continue back and forth over the shoulder to the finsihed measurements. Cut the yarn and work now the other shoulder casting off 1 stitch at the beginning of the first row from WS (= from neck towards shoulder). Happy knitting!
16.02.2022 - 11:03
|
|
Rose Blush#roseblushvest |
|
 |
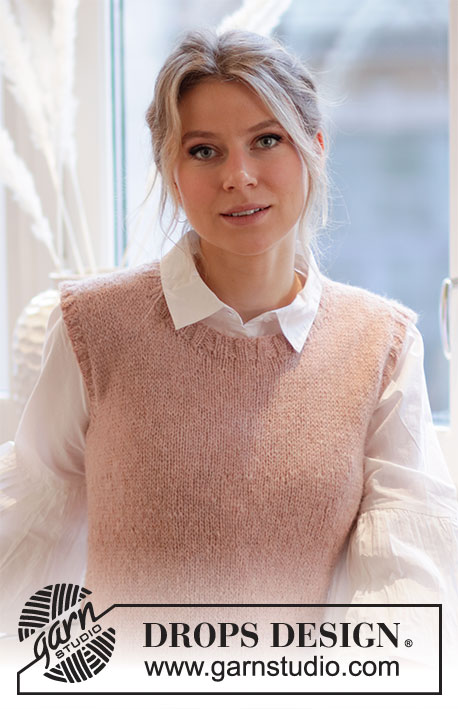 |
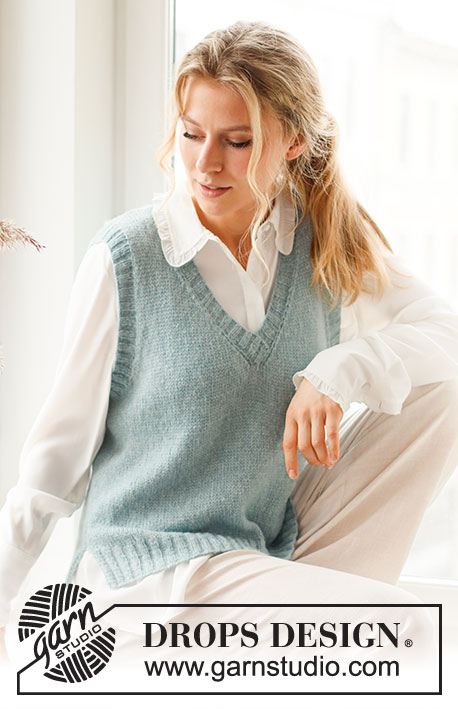
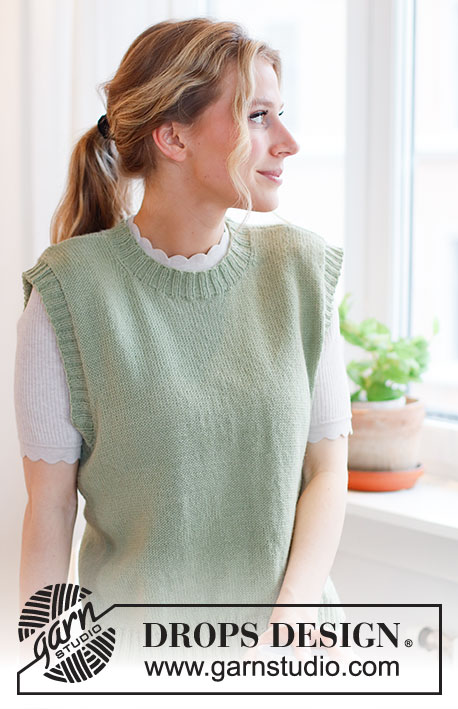
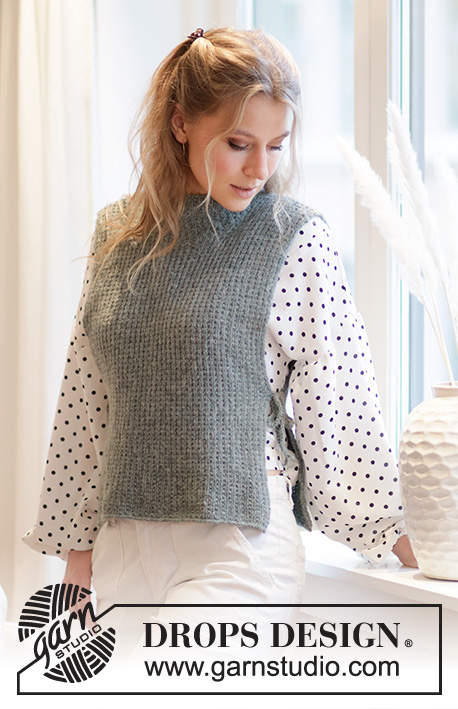
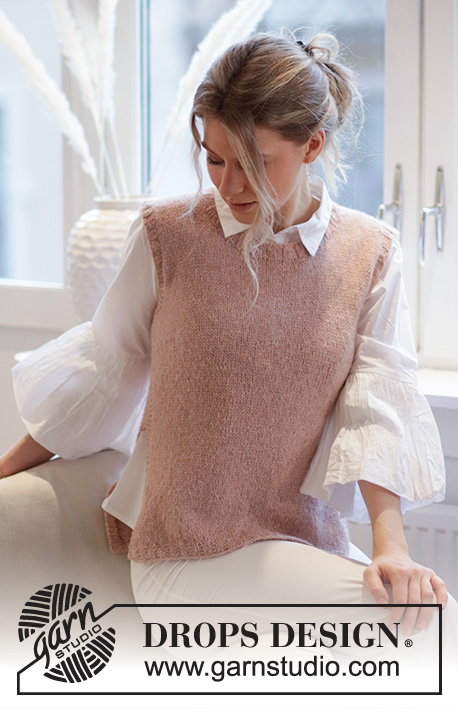
Chaleco / slipover de punto en DROPS Sky o DROPS Soft Tweed. La pieza está tejida con borde en resorte y una abertura en los lados. Tallas S – XXXL.
DROPS 212-44 |
|
|
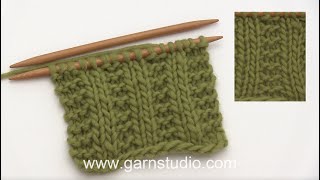
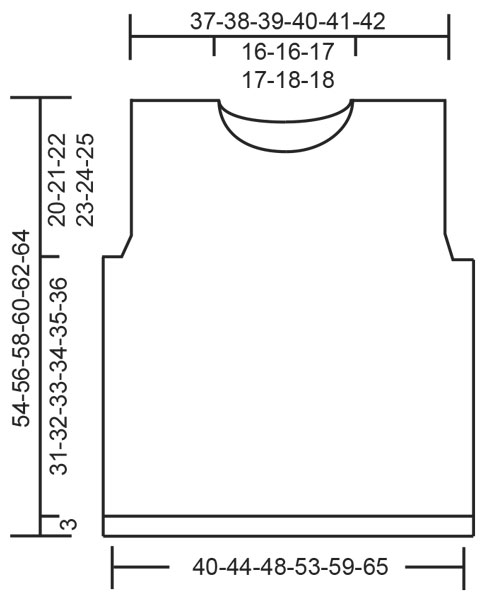
EXPLICACIONES PARA REALIZAR EL PATRÓN: ------------------------------------------------ SURCO/PUNTO MUSGO (tejido de ida y vuelta): Tejer todas las hileras de derecho. 1 surco en altura = tejer 2 hileras de derecho. TIP PARA DISMINUIR (distribuidos equitativamente): Para calcular cómo disminuir equitativamente, contar el número total de puntos en la aguja (p. ej. 88 puntos) menos los puntos de orillo (p. ej. 10 puntos) y dividir los puntos restantes entre el número de disminuciones a hacer (p. ej. 8) = 9.8. En este ejemplo, disminuir tejiendo juntos de derecho aprox. cada 9º y 10º punto (no disminuir sobre los puntos de orillo). ------------------------------------------------ COMENZAR LA PIEZA AQUÍ: ------------------------------------------------ CHALECO – RESUMEN DE LA PIEZA: La pieza se teje de ida y vuelta en secciones que son unidas con una costura cuando están terminadas. Después se levantan puntos para los bordes en resorte alrededor de las sisas y del escote. ESPALDA: Montar 88-96-104-116-128-144 puntos con aguja circular tamaño 3.5 mm y Sky o Soft Tweed. Tejer 1 hilera de revés (= lado revés). La hilera siguiente se teje de la manera siguiente por el lado derecho: 5 puntos de orillo en PUNTO MUSGO – leer descripción arriba, * 2 puntos en punto jersey, 2 puntos en punto musgo *, tejer de *a* hasta que resten 7 puntos, 2 puntos en punto jersey y terminar con 5 puntos de orillo en punto musgo. Continuar así durante 3 cm. Ahora tejer 1 hilera de derecho por el lado derecho disminuyendo 8-8-8-10-10-14 puntos distribuidos equitativamente – leer TIP PARA DISMINUIR = 80-88-96-106-118-130 puntos. Tejer 1 hilera de revés por el lado revés. Cambiar a aguja circular tamaño 4.5 mm. Tejer punto jersey de ida y vuelta con 5 puntos de orillo en punto musgo a cada lado. ¡RECORDAR MANTENER LA MISMA TENSIÓN DE TEJIDO DE LA MUESTRA! Cuando la pieza mida 34-35-36-37-38-39 cm, rematar para las sisas al principio de cada hilera a cada lado de la pieza de la manera siguiente: Rematar 4-5-6-7-8-9 puntos 1 vez, 2 puntos 0-1-2-3-4-6 veces y 1 punto 2-2-2-3-5-5 veces = 68-70-72-74-76-78 puntos. Continuar de ida y vuelta con punto jersey y 1 punto de orillo en punto musgo a cada lado. Cuando la pieza mida 50-52-54-56-58-60 cm, rematar los 30-30-32-32-34-34 puntos centrales para el escote y terminar cada hombro separadamente. Continuar rematando 1 punto en la hilera siguiente a partir del escote = 18-19-19-20-20-21 puntos restantes en el hombro. Continuar con punto jersey y 1 punto de orillo en punto musgo a cada lado hasta que la pieza mida 20-21-22-23-24-25 cm a partir de donde se comenzaron a rematar los puntos para la sisa. Rematar de derecho (asegurarse de que la orilla de remate no quede apretada). La pieza mide un total de 54-56-58-60-62-64 cm a partir del hombro para abajo. Tejer el otro hombro de la misma manera. FRENTE: Montar 88-96-104-116-128-144 puntos con aguja circular tamaño 3.5 mm y Sky o Soft Tweed. Tejer 1 hilera de revés (= lado revés). La hilera siguiente se teje de la manera siguiente por el lado derecho: 5 puntos de orillo en punto musgo – leer descripción arriba, * 2 puntos en punto jersey, 2 puntos en punto musgo *, tejer de *a* hasta que resten 7 puntos, 2 puntos en punto jersey y terminar con 5 puntos de orillo en punto musgo. Continuar así durante 3 cm. Ahora tejer 1 hilera de derecho por el lado derecho disminuyendo 8-8-8-10-10-14 puntos distribuidos equitativamente = 80-88-96-106-118-130 puntos. Tejer 1 hilera de revés por el lado revés. Cambiar a aguja circular tamaño 4.5 mm. Tejer punto jersey de ida y vuelta con 5 puntos de orillo en punto musgo a cada lado. ¡RECORDAR MANTENER LA MISMA TENSIÓN DE TEJIDO DE LA MUESTRA! Cuando la pieza mida 34-35-36-37-38-39 cm, rematar para las sisas al principio de cada hilera a cada lado de la pieza de la manera siguiente: Rematar 4-5-6-7-8-9 puntos 1 vez, 2 puntos 0-1-2-3-4-6 veces y 1 punto 2-2-2-3-5-5 veces = 68-70-72-74-76-78 puntos. Continuar con punto jersey y 1 punto de orillo en punto musgo a cada lado hasta que la pieza mida 44-46-47-49-50-52 cm, después colocar los 16-16-18-18-18-18 puntos centrales en 1 hilo para el escote y terminar cada hombro separadamente. Continuar a rematar en cada hilera a partir del escote de la manera siguiente: Rematar 3 puntos 1 vez, 2 puntos 2 veces y 1 punto 1-1-1-1-2-2 veces = 18-19-19-20-20-21 puntos restantes en el hombro. Continuar con punto jersey y 1 punto de orillo en punto musgo a cada lado hasta que la pieza mida 20-21-22-23-24-25 cm a partir de donde se comenzaron a rematar los puntos para la sisa. Rematar de derecho (asegurarse de que la orilla de remate no quede apretada). La pieza mide un total de 54-56-58-60-62-64 cm a partir del hombro para abajo. Tejer el otro hombro de la misma manera. ENSAMBLAJE: Coser las costuras de los hombros con puntos de grafting en el interior de la orilla de remate. Comenzar bajo la manga y coser la costura del lado en el bucle externo del punto más externo de modo que la costura quede plana – dejar aprox. 18 cm para la abertura. Repetir en el otro lado. ORILLA DEL ESCOTE: Comenzar por el lado derecho en una de las costuras de los hombros y levantar con aguja circular corta tamaño 3.5 mm aprox. 100 a 120 puntos (incluyendo los 16-16-18-18-18-18 puntos que están en el hilo) en el interior de 1 punto alrededor de todo el escote (el número de puntos debe ser múltiplo de 4). Tejer en resorte (= 2 derechos/ 2 reveses) en redondo durante 2½-3 cm. Rematar con derecho sobre derecho y revés sobre revés. ORILLA ALREDEDOR DE LAS SISAS: Comenzar por el lado derecho en la costura del lado bajo la manga y levantar con aguja circular corta tamaño 3.5 mm aprox. 96 a 120 puntos alrededor de la sisa (el número de puntos debe ser múltiplo de 4). Tejer en resorte (= 2 derechos/ 2 reveses) en redondo durante 2 cm. Rematar con derecho sobre derecho y revés sobre revés. Tejer la orilla alrededor de la otra sisa de la misma manera. |
|
 |
|
¿Terminaste este patrón?Entonces, etiqueta tus fotos con #dropspattern #roseblushvest o envíalas a la galería #dropsfan. ¿Necesitas ayuda con este patrón?Encontrarás 25 videos tutoriales, un espacio para comentarios/preguntas y más visitando la página del patrón en garnstudio.com © 1982-2026 DROPS Design A/S. Todos los derechos reservados. Este documento, incluyendo todas sus sub-secciones, está protegido por los derechos de autor (copyright). Lee más acerca de lo que puedes hacer con nuestros patrones en la parte de abajo de cada patrón de nuestro sitio. |
|


Con más de 40 años en el diseño de modelos de punto y de ganchillo, DROPS Design ofrece una de las más vastas colecciones de patrones gratuitos en el internet - traducidos en 17 idiomas. Al día de hoy, contamos con 324 catálogos y 12290 patrones - de los cuales 11675 están traducidos en español.
Nosotros trabajamos con mucho esmero para brindarte lo mejor que las labores de punto y ganchillo tienen para ofrecer,inspiración y consejos, así como hilos de magnífica calidad a precios increíbles! Te gustaría usar nuestros patrones para otro fin además del uso personal? Puedes leer acerca de lo que estás permitida a hacer en el texto de Copyright en la parte de abajo de todos nuestros patrones. Felices labores!
Escribe un comentario sobre DROPS 212-44
¡Nos encantaría saber qué piensas acerca de este patrón!
Si quieres escribir una pregunta referente al patrón, por favor asegúrate de elegir la categoría correcta en el formulario debajo, para acelerar el proceso de respuesta. Los campos obligatorios están marcados con un *.