
Categorías populares
¿Buscas un hilo?


Comentarios / Preguntas (227)
![]() Katie escribió:
Katie escribió:
Hello! I have finished my right shoulder on front piece and bound off. The instructions for the left shoulder on front piece say to start working stockinette on the RS, but the 25 stitches (size SM) to be worked on my needle feel like they need to be knitted from the WS first (since they were last knitted on the RS when doing the 25-16-25 middle bind off for the front neckline). Any assistance here would be appreciated! Thank you!
04.05.2025 - 20:47DROPS Design respondió:
Dear Katie, due to having cut the yarn, instead of starting from the neck, from the WS, we join the yarn on the side and start working from the RS. So you skip the WS row and start in stocking stitch from the RS. Happy knitting!
04.05.2025 - 22:09
![]() Lulu escribió:
Lulu escribió:
Bonjour Je souhaite réaliser ce modèle (collège dans)en taille s avec la laine belle 2fils si possible Est ce réalisable ? Et dans quelle mesure ? Merci d’avance pour votre réponse Lulu
02.05.2025 - 09:29DROPS Design respondió:
Bonjour Lulu, avec 1 seul fil Belle, vous n'auriez pas la bonne tension et devriez tout recalculer ; mais vous pouvez aussi utiliser 1 autre fil avec Belle, par ex. Kid-Silk, pour avoir la même tension (vérifiez la taille des aiguilles si besoin); Retrouvez des modèle avec 1 fil du groupe de fils B + 1 fil du groupe de fils A et une tension de 17-16 m ici. Bon tricot!
02.05.2025 - 13:27
![]() Karen escribió:
Karen escribió:
Hi, I’m at the armhole bind off point in the pattern & don’t understand the instructions as I am a beginner. If I bind off 3 stitches before the marker & end of the round, do I flip the work over to bind off the other 3 stitches on the purl side at the beginning of the next row ? A video or step by step instructions would be helpful. Thank you
28.04.2025 - 04:24DROPS Design respondió:
Hi Karen, After binding off for the armholes, you continue back and forth so, yes, you turn at the end of the round and work back across the front piece, turning again when you reach the second set of bound-off stitches. Regards, Drops Team.
28.04.2025 - 07:20
![]() Karen escribió:
Karen escribió:
Hi, I’ve worked the pattern in Medium size up to the armhole cast off. Could you please confirm if I should start the cast off at the 82 stitch marker or at the beginning of round marker?
26.04.2025 - 17:38DROPS Design respondió:
Dear Karen, the first marker is the marker at the beginning of the round. So you start 3 stitches before the beginning of the round and cast off the following 6 stitches. Happy knitting!
27.04.2025 - 12:12
![]() Linda Davidson escribió:
Linda Davidson escribió:
Hi, im up to the point in the pattern, where im starting the front piece in st st. Im at 88 sts on the front part...the pattern state cast off 2 sts ONE TIME then 1 st 6 TIMES.... It doesnt add up to having 72 sts left , it should say , cast off 2 sts x 2 times...not ONE to get the correct outcome. Im pointing this out as Becky wrote earlier with this problem, but the misprint wasnt mentioned...hope this helps...linda
17.04.2025 - 04:49DROPS Design respondió:
Dear Mrs Davidson, note that you should cast off the stitches on each side so that youy get: 88 sts - (2 sts x 1 time x 2 sides) - (1 st x 6 times x 2 sides) = 72 sts left. Happy knitting!
23.04.2025 - 09:33
![]() Letteria Cannata escribió:
Letteria Cannata escribió:
Buongiorno, vorrei sapere se nelle taglie e' già calcolato l'aglio. Ad esempio se la mia circonferenza torace e' 88cm devo aggiungere altri cm per l'aglio o nelle vostre misure e' già compreso. Spero di essere stata chiara e grazie per la vostra disponibilità
15.04.2025 - 10:06DROPS Design respondió:
Buonasera Letteria, le misure indicate sono quelle finali effettive. Buon lavoro!
16.04.2025 - 22:46
![]() Montillet escribió:
Montillet escribió:
Bonjour Lorsqu’on relève les mailles pour l’encolure en jersey faut il relever 2 mailles sur 3 Merci bien
03.04.2025 - 21:37DROPS Design respondió:
Bonjour Mme Montillet, quand on relève les mailles le long d'un ouvrage en jersey, on relève environ 3 mailles sur 4 rangs (cf vidéo à titre d'illustration). Si vous n'avez pas assez de mailles ou si vous en avez finalement relevé trop, ajustez simplement le nombre de mailles au 1er tour des côtes en augmentant/diminuant à intervalles réguliers. Bon tricot!
04.04.2025 - 08:52
![]() Donna Reid escribió:
Donna Reid escribió:
Drops yarn is the most soft beautiful feeling yarn I have ever worked with. I'm very excited to have found this free Drops pattern to make a vest for myself. I can see myself wearing this vest to work, or to lunch with my girlfriends, causally with jeans around town or dressing it up with a skirt for a fancy occasion. Working with Drops yarn is such a pleasure on the needles. It's so satisfying to watch a wearable item take form. Love the availability of several colors to choose from.
03.04.2025 - 18:31
![]() Donna Reid escribió:
Donna Reid escribió:
What a beautiful pattern. I'm excited to make this vest for myself
03.04.2025 - 18:11
![]() Katka escribió:
Katka escribió:
Dobrý den, potřebovala bych prosím poradit jak plést "na začátku každé řady a na obou stranách uzavíráme oka pro průramky takto: 2 oka 1x a 1 oko např. 3x " děkuji
20.03.2025 - 06:48DROPS Design respondió:
Dobrý den, Katko, pro průramky postupujte, prosím, takto:
1. řada (lícová): Uzavřete 2 oka na začátku řady, pokračujte v pletení řady dle vzoru.
2. řada (rubová): Uzavřete 2 oka na začátku řady, opět pokračujte dle vzoru.
Další řady: Uzavřete 1 oko na začátku každé řady, a to celkem 3x na každé straně.
Tímto způsobem postupně vytvarujete průramky.
Hodně zdaru!
|
|
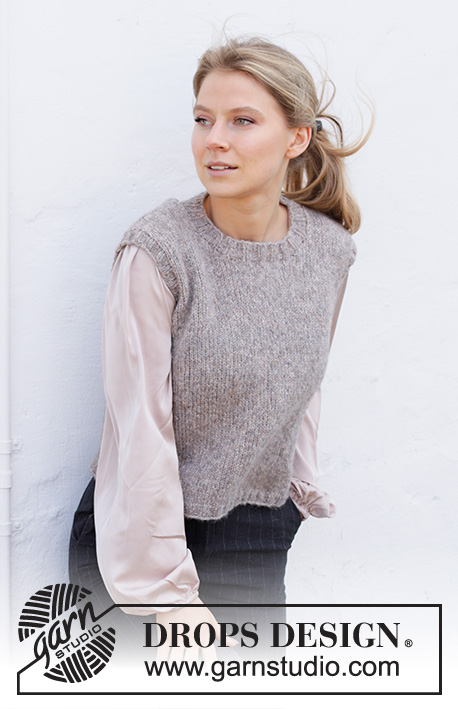
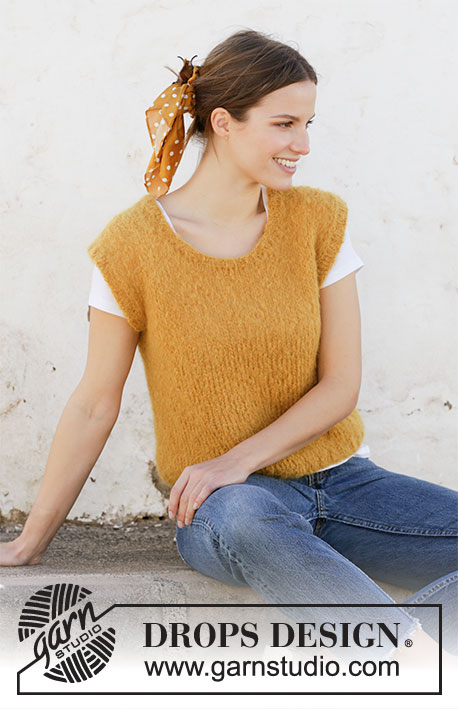
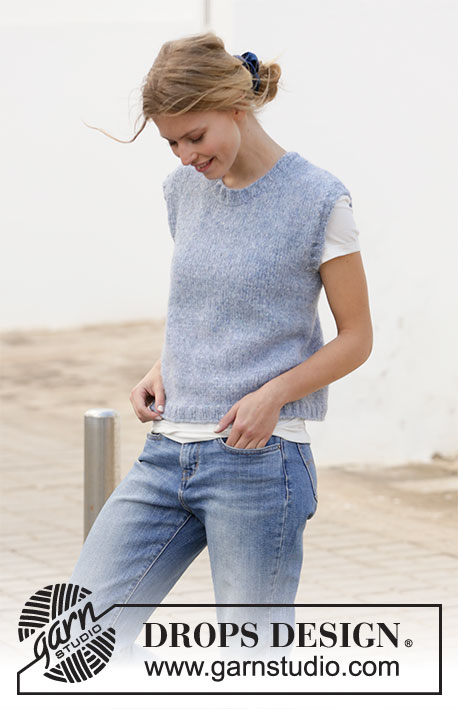
College Days#collegedaysvest |
|
 |
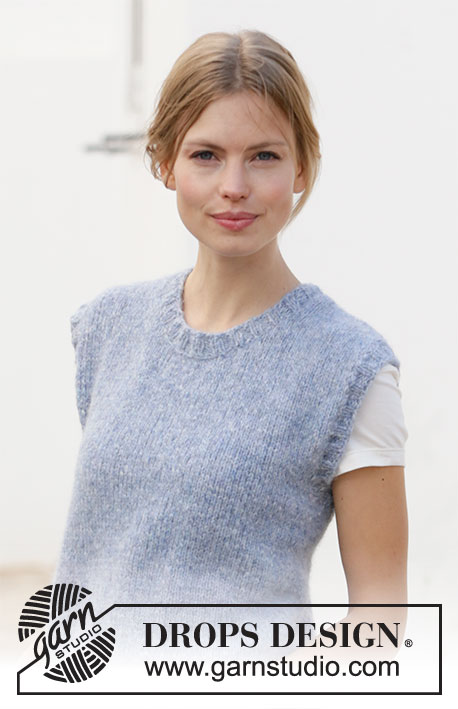 |
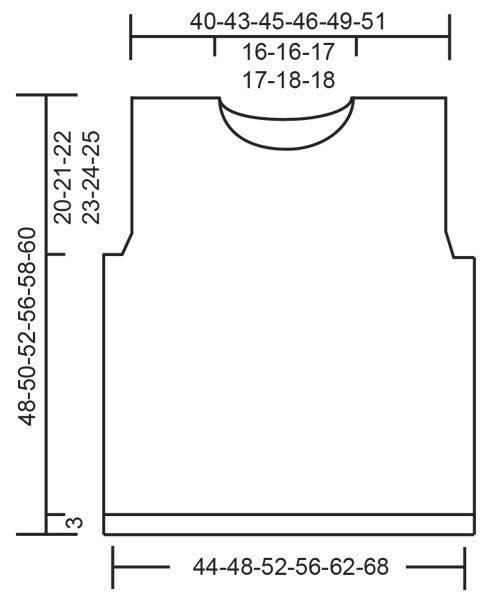
Chaleco con escote redondo en DROPS Air. Tallas S – XXXL.
DROPS 210-28 |
|
|
EXPLICACIONES PARA REALIZAR LA LABOR: ------------------------------------------------------- TIP PARA LAS DISMINUCIONES (repartidos): Para calcular cómo disminuir puntos repartidos, contar el número total de puntos en la aguja ( p.e 156 puntos) y dividir los puntos entre el número de disminuciones a trabajar (p.e 8) = 19,5. En este ejemplo disminuir trabajando aprox. cada 18º y 19º y cada 19º y 20º puntos juntos de derecho. ------------------------------------------------------- COMENZAR LA LABOR AQUÍ: ------------------------------------------------------- CHALECO - RESUMEN DE LA LABOR: La labor se trabaja en redondo con una aguja circular, de abajo arriba hasta las sisas. Finalizar el delantero y la espalda por separado de ida y vuelta. Las cenefas en el escote y las sisas se trabajan en redondo con una aguja circular hasta finalizar. CUERPO: Montar 156-172-184-200-220-240 puntos con una aguja circular de 4,5 mm y Air. Trabajar 1 vuelta de derecho, después trabajar el elástico (2 derechos, 2 reveses) 3 cm. Cambiar a una aguja circular de 5 mm. Trabajar en punto jersey, disminuir 8 puntos repartidos en la primera vuelta = 148-164-176-192-212-232 puntos – leer TIP PARA LAS DISMINUCIONES arriba. Insertar 1 marcapuntos al inicio de la vuelta y 1 marcapuntos después de los siguientes 74-82-88-96-106-116 puntos. Permitir que los marcapuntos sigan la labor; se usan para cerrar las sisas. Trabajar en punto jersey hasta que la labor mida 28-29-30-33-34-35 cm desde el borde de montaje. RECORDAR MANTENER LA TENSIÓN DEL TEJIDO! En la siguiente vuelta cerrar para las sisas, comenzar 3-3-3-4-4-4 puntos antes del primer marcapuntos; cerrar 6-6-6-8-8-8 puntos (el marcapuntos está en el centro de estos puntos), trabajar como antes hasta que queden 3-3-3-4-4-4 puntos antes del siguiente marcapuntos, cerrar los siguientes 6-6-6-8-8-8 puntos (el marcapuntos está en el centro de estos puntos) y trabajar hasta el final de la vuelta. Ahora finalizar el delantero y la espalda por separado, de ida y vuelta en la aguja. DELANTERO: = 68-76-82-88-98-108 puntos. Trabajar en punto jersey y cerrar para las sisas a cada lado al inicio de cada fila como sigue: Cerrar 2 puntos 1 vez y 1 punto 1-3-4-6-9-12 veces = 62-66-70-72-76-80 puntos. Continuar trabajando hasta que la labor mida 38-40-40-44-44-46 cm (queda aprox. 10-10-12-12-14-14 cm para alcanzar las medidas finales). En la siguiente fila por el lado derecho cerrar para el escote como sigue: Trabajar los primeros 25-27-28-29-30-32 puntos, cerrar los siguientes 12-12-14-14-16-16 puntos y trabajar los últimos 25-27-28-29-30-32 puntos. Finalizar los hombros por separado; no cortar el hilo - continuar con el hombro derecho por el lado revés. HOMBRO DERECHO DEL DELANTERO: = 25-27-28-29-30-32 puntos. Trabajar en punto jersey, comenzar por el lado revés y cerrar puntos para el escote al inicio de cada fila por el lado derecho como sigue: Cerrar 2 puntos 2 veces y 1 punto 4 veces = 17-19-20-21-22-24 puntos. Continuar trabajando hasta que la labor mida 48-50-52-56-58-60 cm desde el borde de montaje. Cerrar y cortar el hilo. HOMBRO IZQUIERDO DEL DELANTERO: = 25-27-28-29-30-32 puntos. Trabajar en punto jersey, comenzar por el lado derecho y cerrar puntos para el escote al inicio de cada fila por el lado revés como sigue: Cerrar 2 puntos 2 veces y 1 punto 4 veces = 17-19-20-21-22-24 puntos. Continuar trabajando hasta que la labor mida 48-50-52-56-58-60 cm desde el borde de montaje (ajustar con el hombro derecho). Cerrar y cortar el hilo. ESPALDA: = 68-76-82-88-98-108 puntos. Trabajar en punto jersey y rematar puntos para las sisas a cada lado al inicio de cada fila como sigue: Cerrar 2 puntos 1 vez y 1 punto 1-3-4-6-9-12 veces = 62-66-70-72-76-80 puntos. Continuar trabajando hasta que la labor mida 44-46-48-52-54-56 cm (quedan aprox. 4 cm hasta el largo final). En la siguiente fila por el lado derecho, cerrar para el escote como sigue: Trabajar los primeros 18-20-21-22-23-25 puntos, cerrar los siguientes 26-26-28-28-30-30 puntos y trabajar los últimos 18-20-21-22-23-25 puntos. Finalizar los hombros por separado; no cortar el hilo - continuar con el hombro izquierdo por el lado revés. HOMBRO IZQUIERDO EN LA ESPALDA: = 18-20-21-22-23-25 puntos. Trabajar en punto jersey, comenzando por el lado revés y rematar 1 punto al inicio de cada fila por el lado derecho = 17-19-20-21-22-24 puntos. Continuar trabajando hasta que la labor mida 48-50-52-56-58-60 cm desde el borde de montaje; ajustar al delantero. Cerrar y cortar el hilo. HOMBRO IZQUIERDO EN LA ESPALDA: = 18-20-21-22-23-25 puntos. Trabajar en punto jersey, comenzar por el lado derecho y cerrar 1 punto al inicio de la siguiente fila por el lado revés = 17-19-20-21-22-24 puntos. Continuar trabajando hasta que la labor mida 48-50-52-56-58-60 cm desde el borde de montaje; ajustar al delantero derecho. Cerrar y cortar el hilo. TERMINACIÓN: Coser las costuras de los hombros con grafting. ESCOTE: Comenzar por el lado derecho en una de las costuras de los hombros. Con una aguja circular de 4.5 mm recoger aprox. 76 - 92 puntos dentro de 1 punto alrededor de toda la línea del escote (el número tiene que ser divisible entre 4). Trabajar el elástico (2 derechos, 2 reveses) en redondo 2 cm. Cerrar con derecho sobre derecho y revés sobre revés. CENEFA ALREDEDOR DE LAS SISAS: Comenzar por el lado derecho donde se dividió la labor para la sisa. Con una aguja circular de 4.5 mm recoger aprox. 84 -124 puntos alrededor de la sisa ( el número tiene que ser divisible entre 4). Trabajar el elástico ( 2 derechos, 2 reveses) en redondo 2 cm. Cerrar con derecho sobre derecho y revés sobre revés Trabajar una cenefa alrededor de la otra sisa de la misma manera. |
|
 |
|
¿Terminaste este patrón?Entonces, etiqueta tus fotos con #dropspattern #collegedaysvest o envíalas a la galería #dropsfan. ¿Necesitas ayuda con este patrón?Encontrarás 22 videos tutoriales, un espacio para comentarios/preguntas y más visitando la página del patrón en garnstudio.com © 1982-2026 DROPS Design A/S. Todos los derechos reservados. Este documento, incluyendo todas sus sub-secciones, está protegido por los derechos de autor (copyright). Lee más acerca de lo que puedes hacer con nuestros patrones en la parte de abajo de cada patrón de nuestro sitio. |
|


Con más de 40 años en el diseño de modelos de punto y de ganchillo, DROPS Design ofrece una de las más vastas colecciones de patrones gratuitos en el internet - traducidos en 17 idiomas. Al día de hoy, contamos con 324 catálogos y 12290 patrones - de los cuales 11685 están traducidos en español.
Nosotros trabajamos con mucho esmero para brindarte lo mejor que las labores de punto y ganchillo tienen para ofrecer,inspiración y consejos, así como hilos de magnífica calidad a precios increíbles! Te gustaría usar nuestros patrones para otro fin además del uso personal? Puedes leer acerca de lo que estás permitida a hacer en el texto de Copyright en la parte de abajo de todos nuestros patrones. Felices labores!
Escribe un comentario sobre DROPS 210-28
¡Nos encantaría saber qué piensas acerca de este patrón!
Si quieres escribir una pregunta referente al patrón, por favor asegúrate de elegir la categoría correcta en el formulario debajo, para acelerar el proceso de respuesta. Los campos obligatorios están marcados con un *.