
Popular categories
Looking for a yarn?


Comments / Questions (73)
![]() Lisbeth Westman wrote:
Lisbeth Westman wrote:
Hej! Vi, dotter och barnbarn är stormförtjusta i denna fina tröja. Finns det beskrivning för större barn och vuxna att få tag på? Hoppas på svar. Vänliga hälsningar Lisbeth W
23.08.2019 - 23:09DROPS Design answered:
Hei Lisbeth. Vi har nok dessverre ikke en akurrat lik oppskrift til større barn og voksne, men om du klikker deg inn på vår hovedside og skriver "sidledes" under "Vad letar du efter?" er det mulig noe du liker kommer opp, se evnt under modellen under DROPS 110-2 (voksen). God Fornøyelse!
09.09.2019 - 11:50
![]() Mia Gunnarsson wrote:
Mia Gunnarsson wrote:
Hej, jag undrar om man ska kapa garnet efter varje omgång och fästa dessa, eller ska man låta garnet "halka med" till nästa gång man byter färg? Det blir väldigt många trådar att fästa annars ser jag när jag stickat några rep. Med vänlig hälsning Mia
13.02.2019 - 08:16DROPS Design answered:
Hej Mia, du låter garnet följa med till nästa varv. Lycka till :)
13.02.2019 - 12:15
![]() Natascha Müller wrote:
Natascha Müller wrote:
Liebes Team, eine Frage zur Jacke: Wann wird beim rechten Vorderteil die Blende gestrickt? Wenn die Anzahl der Krausrippen gleich hoch ist wie beim linken Vorderteil inkl. der Borde? Oder die Anzahl der Krausrippen mit den verkürzten Reihen gleich hoch ist?
09.02.2019 - 20:10DROPS Design answered:
Liebe Frau Müller, wenn die Anzahl Krausrippen gleich hoch ist wie am linken Vorderteil, ohne die Blende wird dann die rechte Blende mit hellgrün gestrickt (damit die gesamte Anzahl der Krausrippen genauso gleich am beiden Vorderteil ist). Viel Spaß beim stricken!
11.02.2019 - 09:02
![]() Schaufelberger wrote:
Schaufelberger wrote:
Bonjour, Comment tricoter la bordure du bas du gilet (là les fils de couleurs suivent) pour obtenir une jolie finition ?
22.08.2018 - 09:26DROPS Design answered:
Bonjour! Les fils qui suivent ne seront pas trop visibles et la bordure sera jolie. Surtout ne serrez pas trop les fils. Bon tricot!
24.08.2018 - 10:23
![]() Janet Blair wrote:
Janet Blair wrote:
I am making the 6/9 month baby jacket and am confused by the directions: "Now put the outermost 45 sts towards lower edge on a thread (= side) and cast on 42 new sts on beginning of row for sleeve, before continuing as follows." Should I have 118 stitches on the needle or 73 stitches once I cast on the sleeve stitches? Are the 45 stitches "on the thread" the neck edge? Why would I put these same 45 stitches back on the needle after I complete the sleeve?
11.07.2018 - 18:25DROPS Design answered:
Dear Mrs Blair, slip the first 65 sts from RS on a thread or a st holder (cut the yarn), then cast on 70 sts for the sleeve and work next row from RS over the remaining 39 sts on needle = 109 sts for sleeve and yoke at the same time work the short rows repeating from *-* with stripes. You are now working sleeve and yoke with short rows. Happy knitting!
12.07.2018 - 08:57
![]() Anna wrote:
Anna wrote:
Hej! Hur ska jag göra när jag ska lyfta maskan efter varje vändning? Enligt ert tips. Det blir ändå hål (större än om jag inte hade lyft en maska). Vad gör jag för fel? Jag stickar ett varv, vänder på sticket och lyfter över maskan och sedan börjar jag sticka på nästa maska, är det fel? Vilket sätt är rätt i så fall? Mvh Anna
26.06.2018 - 20:29DROPS Design answered:
Hej, när du har lyft maskan är det väldigt viktigt att tråden stramas ordentligt innan du fortsätter sticka. Det kommer fortfarande att synas att man har vänt mitt i arbetet, men det ska inte bli hål.
27.06.2018 - 16:59Jackie Morley wrote:
For the pants, I don’t understand what it means by “as right leg, but mirrored” Do I work shaping on opposite side (eg decrease at left side rather than right side) or do I just work it the same, but fold in opposite direction? Hope you can help.
13.05.2018 - 19:39DROPS Design answered:
Hi Jackie, As you say, reversed means decreasing on opposite side to the side you decreased on the right leg. Happy knitting!
14.05.2018 - 08:18
![]() Marie wrote:
Marie wrote:
Kan ikke helt hitte ud af ærmet, hvis man strikker jakken sidelæns, hvordan kan man så strikke videre til næste ærme? Syntes der mangler video af forklaringer af selve jakken og ikke af andre ting som forklaring :-) havde gjort det nemmere, håber jeg finder ud af det alligevel
06.04.2018 - 23:24
![]() Hege Kårbø wrote:
Hege Kårbø wrote:
Dersom man legger opp 70 masker I den minste str blir lengden mer enn 23 cm. Jmf strikkefastheten.
20.01.2018 - 16:49
![]() Alexandra wrote:
Alexandra wrote:
Hei, jeg må få ting inn med teskje: Når jeg strikker ermene, er det på samme måte som forklart for forstykke men med annet maske antall?
29.11.2017 - 13:51DROPS Design answered:
Hej Alexandra. Ja det stemmer, når du har slået masker op til ærmerne, fortsætter du med vendepinde fra *-* som tidligere. God fornøjelse!
06.12.2017 - 13:45
|
|
Little Fern#littlefernjacket |
|
 |
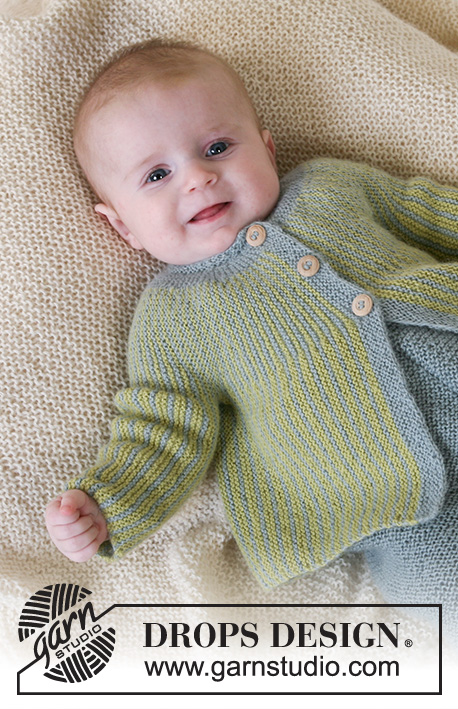 |
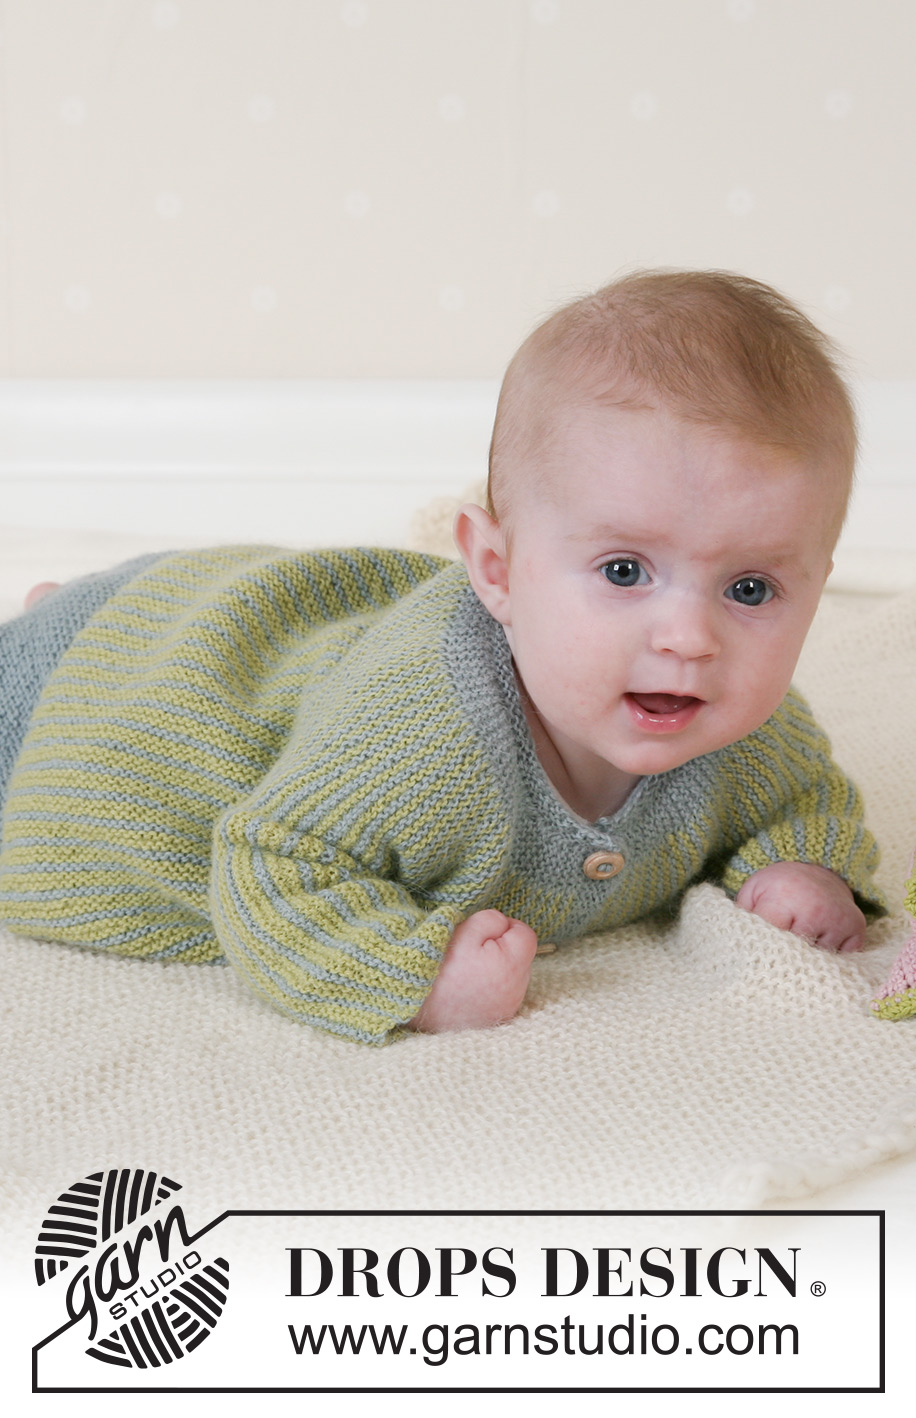
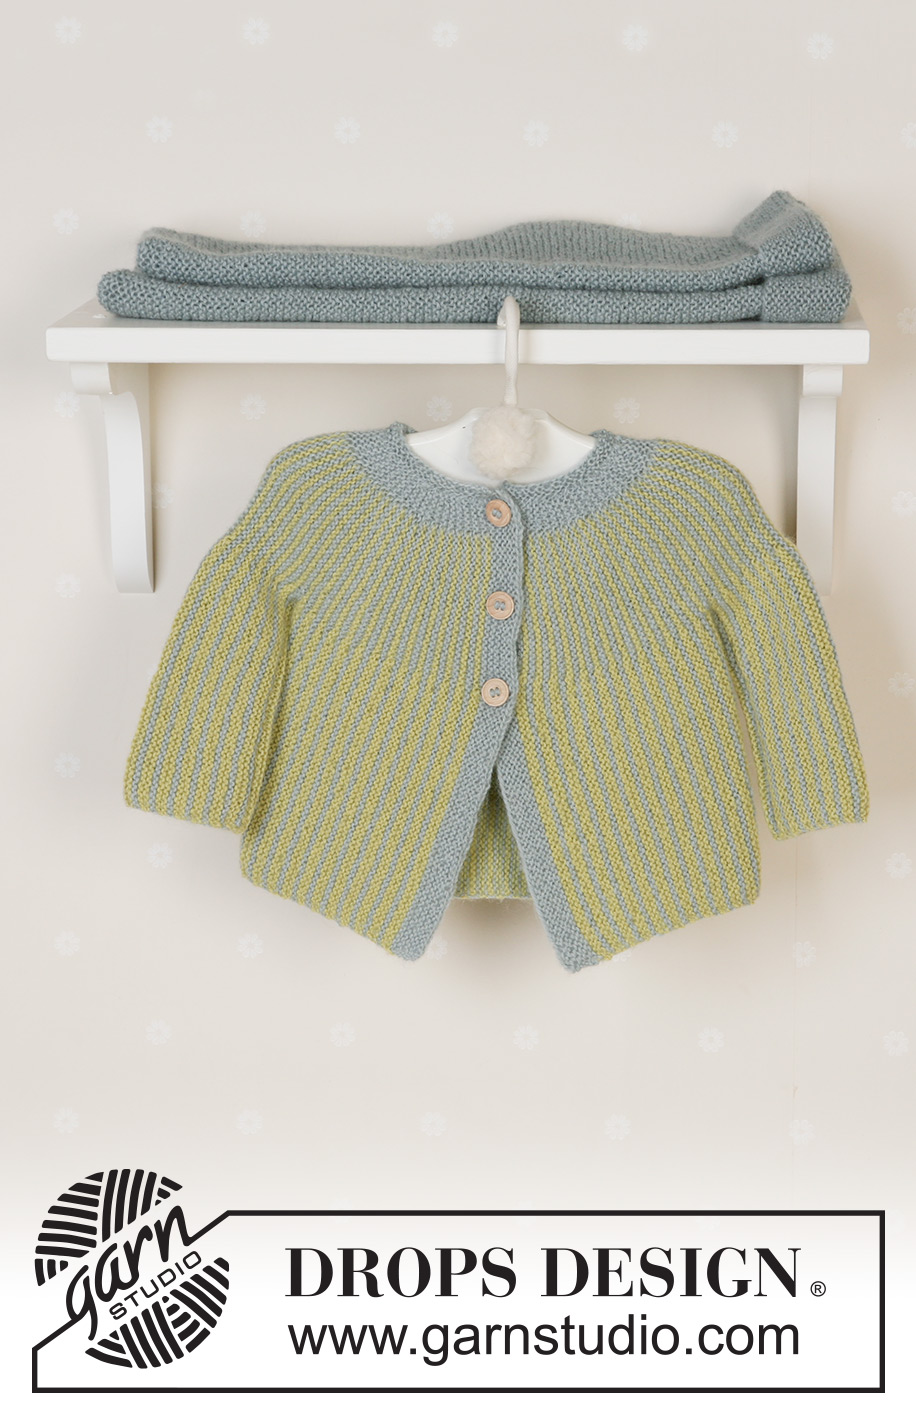
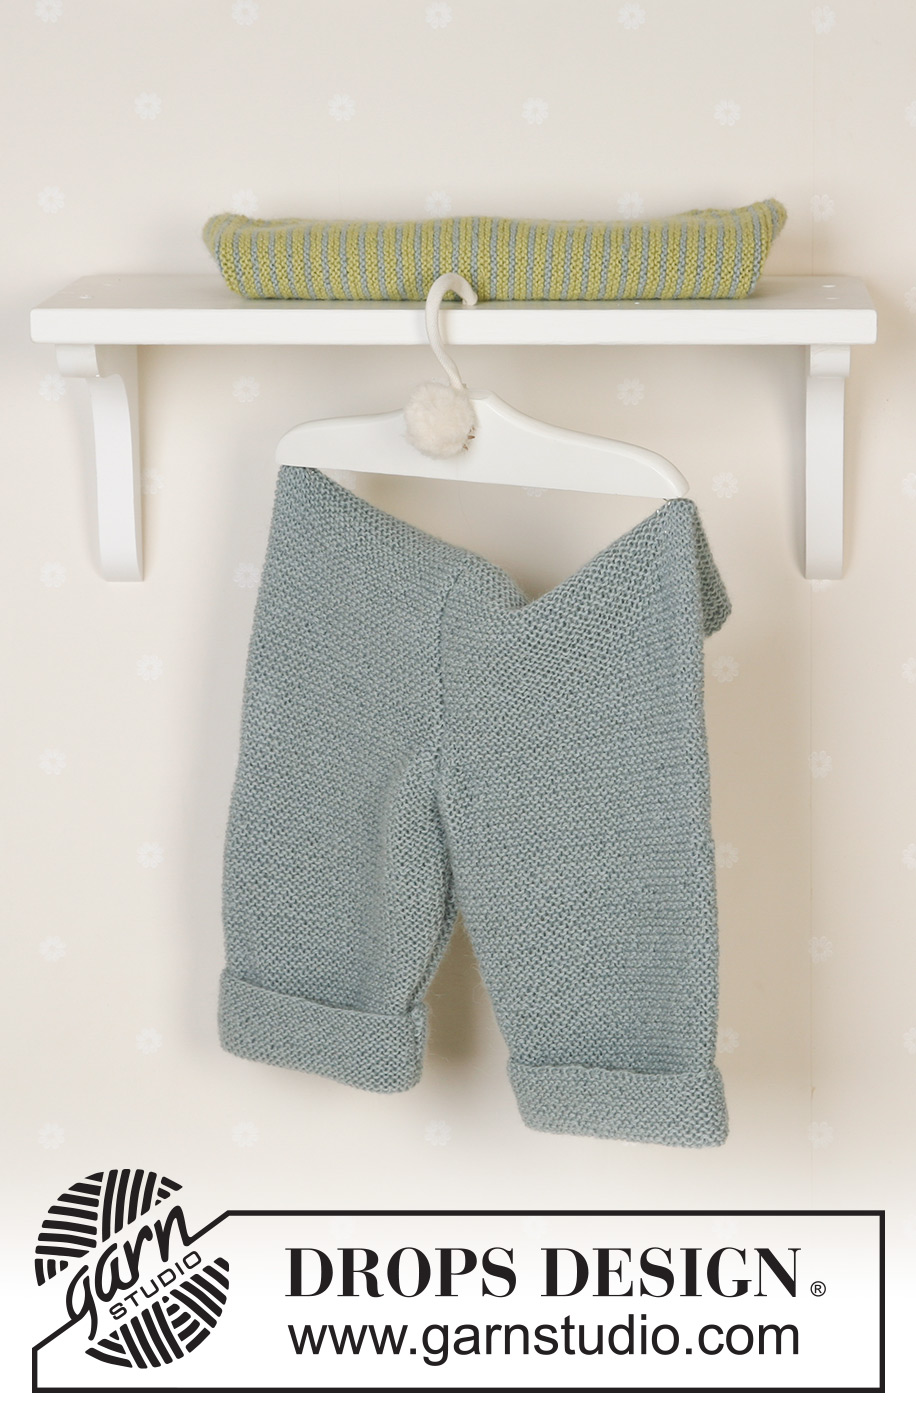
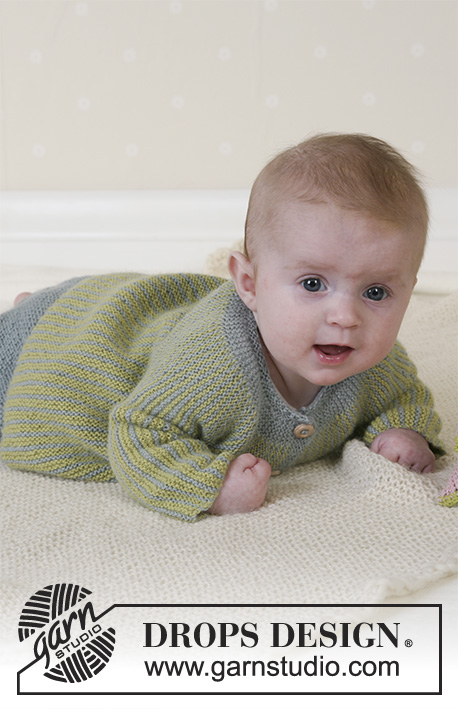
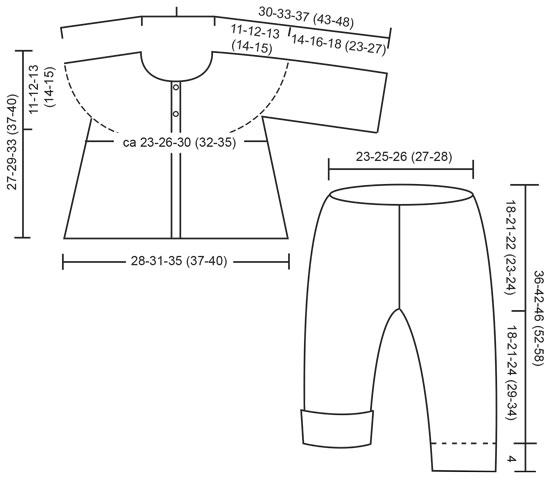
Set of pants and jacket in garter stitch in DROPS Alpaca. Sizes baby and children from 1 month to 4 years.
DROPS Baby 14-27 |
|
|
Knitting tension: 26 sts x 52 rows on needles size 2.5mm in garter sts = 10 x 10 cm. Garter sts: Knit all rows Knitting tips: Every time you turn the piece, slip 1 st after turning and tighten thread before continuing. Do this to avoid holes in transitions. JACKET: Start on left front, knit towards the sleeve, the back, the other sleeve and finish with right front. Loosely cast on 70-76-86 (96-104) sts with light mint on needle size 2.5 and knit 10 rows garter sts (= front band, 1st row = right side). Continue as follows – read Knitting tips: *2 rows garter sts over the first 46-50-57 (65-70) sts with lime (i.e. knit from right side over the first 46-50-57 (65-70) sts, turn the piece and knit back), 2 rows garter sts over the first 64-70-80 (90-98) sts with lime, 2 rows garter sts over all 70-76-86 (96-104) sts with light mint*, repeat from *-* until piece measures 16-18-19 (20.5-22) cm from cast-on row (measured where widest). Now put the outermost 41-45-52 (60-65) sts towards lower edge on a thread (= side) and cast on 36-42-46 (60-70) new sts on beginning of row for sleeve, before continuing as follows: *2 rows garter sts over the first 41-47-51 (65-75) sts with lime, 2 rows garter sts over the first 59-67-74 (90-103) sts with lime, 2 rows garter sts over all 65-73-80 (96-109) sts with light mint. When piece measures 16-17-18 (18-20) cm from sts cast on for sleeve (measured where widest), cast off the outermost 36-42-46 (60-70) sts towards lower edge of sleeve. Put the 41-45-52 (60-65) sts from thread back on needle and insert a marking thread in piece. Now knit from *-* as described for front piece. When piece measures 28-31-35 (37-40) cm from marking thread (measured where widest), put the outermost 41-45-52 (60-65) sts from lower edge on a thread (= side). Cast on 36-42-46 (60-70) new sts for sleeve and knit as before from *-* as described for the other sleeve until you have knitted as many rows as on the other sleeve. Cast off the outermost 36-42-46 (60-70) sts towards lower edge of sleeve and put the 41-45-52 (60-65) sts from thread back on needle and continue as before until you have knitted as many rows as on the other front piece. Change to light mint and knit front band as follows: Knit 4 rows garter sts over all sts, on next row make 3 button holes as follows from the right side (i.e. from lower edge towards the top): knit 43-47-55 (63-67) garter sts, yo, K2 tog, knit 10-11-12 (13-15) garter sts, yo, K2 tog, knit 10-11-12 (13-15) sts, yo, K2 tog and finish with K1. Turn and knit garter sts over all sts. Now knit 4 rows garter sts over all sts and cast off loosely. Assembly: Sew the openings under the arms. Neck: Pick up 1 st in every other row round the neck using needle size 2.5 and light mint = approx 88-95-102 (106-113) sts. Knit 3 rows garter sts (1st row = wrong side), at the same time, adjusting number of sts evenly on first row to 62-64-66 (70-72). Cast off in rib, K1, P1. Sew on buttons. ------------------------------------------------------- TROUSERS: Right leg: Cast on 52-60-64 (70-74) sts (incl 1 edge st each side) using needle size 2.5 and light mint and knit garter sts. Insert a marking thread when piece measures 4 cm (= turn-up) and measure piece from here. When piece measures 6-6-5 (5-4) cm inc 1 st each side on every 1.5-2-2.5 (3-4) cm a total of 8 times = 68-76-80 (86-90) sts. When piece measures 18-21-24 (29-34) cm, cast off 2 sts each side. Now dec 1 st on one side of piece (= towards mid front) on every other row a total of 2-4-6 (10-12) times = 62-68-70 (72-74) sts. Continue in garter sts until piece measures 36-42-46 (52-58) cm from marking thread. Now knit 2 cm stocking sts and cast off loosely. Left leg: As right leg, but mirrored. Assembly: Fold right leg double and sew inner leg seam within 1 edge st – NB! On the lower 4 cm (turn-up) sew with seam on the right side so that it doesn’t show when you turn it. Sew left leg in the same way. Sew together the trousers from mid front to mid back within 1 edge st. Turn the 2 cm stocking sts at the top against the wrong side and attach with small, neat sts. – leave a little opening for the elastic band. Turn the turn-ups. |
|
 |
|
Have you finished this pattern?Tag your pictures with #dropspattern #littlefernjacket or submit them to the #dropsfan gallery. Do you need help with this pattern?You'll find 15 tutorial videos, a Comments/Questions area and more by visiting the pattern on garnstudio.com. © 1982-2026 DROPS Design A/S. We reserve all rights. This document, including all its sub-sections, has copyrights. Read more about what you can do with our patterns at the bottom of each pattern on our site. |
|


With over 40 years in knitting and crochet design, DROPS Design offers one of the most extensive collections of free patterns on the internet - translated to 17 languages. As of today we count 325 catalogues and 12298 patterns translated into English (UK/cm).
We work hard to bring you the best knitting and crochet have to offer, inspiration and advice as well as great quality yarns at incredible prices! Would you like to use our patterns for other than personal use? You can read what you are allowed to do in the Copyright text at the bottom of all our patterns. Happy crafting!
Post a comment to pattern DROPS Baby 14-27
We would love to hear what you have to say about this pattern!
If you want to leave a question, please make sure you select the correct category in the form below, to speed up the answering process. Required fields are marked *.