
Popular categories
Looking for a yarn?


Comments / Questions (113)
![]() Brenda wrote:
Brenda wrote:
Any chance of doing a video tutorial on you-tube. I really like this headband, but am confused with the written pattern.
01.12.2022 - 01:02DROPS Design answered:
Dear Brenda, you will find videos relative to the techniques used in that pattern at the bottom of the pattern, feel free to ask your question here so that we can help you further in the part of the pattern you don't understand. Happy knitting!
01.12.2022 - 11:46
![]() Kathy wrote:
Kathy wrote:
I am on the first increase row to 24 stitches and following the established rib pattern but there are not enough stitches to complete the rib pattern! What do I do?
11.10.2021 - 01:08DROPS Design answered:
Hi Kathy, You increase all P1 to P2 (5 stitches increased) which gives you 24 stitches. You now have 1 stitch in garter stitch, 5 x K2, P2 (20 stitches), K2 and 1 stitch in garter stitch = 24 stitches. Happy knitting!
11.10.2021 - 07:04
![]() Iris wrote:
Iris wrote:
Hallo! Ich bin ziemliche Anfängerin und komme mit der Anleitung nicht ganz zurecht. Betrifft das Fertigstellen des Stirnbands mit den Maschen auf einem Hilfsfaden. Habe leider auch kein passendes Videotutorial dazu finden können. Wie lange muß der Hilfsfaden sein? und wird er mithineingenäht? Danke im Voraus für die Hilfe!
01.01.2021 - 22:03DROPS Design answered:
Liebe Iris, die stillgelegten Maschen werden wie in diesem Video zusammen mit der Anschlagskante - wie in diesem Video zusammen genäht, dh so eine "Mischung" je nach den Maschen. Viel Spaß beim zusammennähen!
04.01.2021 - 14:43
![]() Diana Connolly wrote:
Diana Connolly wrote:
This increase is called a make 1 in English. If you’d written it like this many here wouldn’t have had so many problems, make 1 is a term used when you increase by picking up the loop between stitches. Hope this helps.
27.10.2020 - 21:20
![]() Kirsty wrote:
Kirsty wrote:
Hi, wow many thanks for your helpful video reply. I really appreciate it. Love your site. Well wishes, Kirsty
28.06.2020 - 20:24
![]() Sherie Rodrigues wrote:
Sherie Rodrigues wrote:
To all the knitters who commented and asked questions, and to all the staff who answered the questions, I say THANK YOU. Without your help I may not have worked the pattern out by myself, but I am so glad I did. It is simple, when the light bulb goes off. I would suggest you look at the questions and answers until it makes sense. I do so LOVE this pattern . Thanks again everyone. Regards and happy knitting.
10.06.2020 - 15:30
![]() Karren wrote:
Karren wrote:
Thank you so much for the guidance in my pattern. I am almost finished and think I will love it. Karren
18.04.2020 - 01:05
![]() Karren wrote:
Karren wrote:
I do not understand what I am supposed to do on the wrong side of the pattern in between the increase rows. The increases occur on the right side. Does the ribbing continue through out the whole pattern?
17.04.2020 - 00:53DROPS Design answered:
Dear Karren, you increase in the P-sections seen from RS (these sts are worked K from WS), when working from WS you will K over K and P over P, and the number of K stitches from WS will increase (then decrease on the 2nd half of piece) as the P stitches from WS increases. Happy knitting!
17.04.2020 - 09:01
![]() Judith wrote:
Judith wrote:
I was sold a yarn that gets 2 st/inch on an 8 needle and is not too stiff. will the pattern work as written? Do I knit first stitch, then do the edge stitch? hat seem strange to me, so I am asking. I thought the edge stitch would be first. Thank you
16.12.2019 - 04:45DROPS Design answered:
Dear Judith, please check your tension - read more here about tension. Pattern is worked in rib with 1 edge stitch in garter stitch on each side. Happy knitting!
16.12.2019 - 09:10
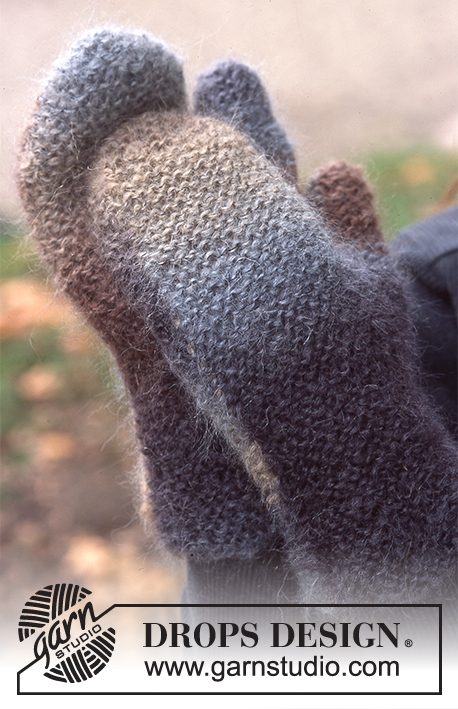
![]() Shannon wrote:
Shannon wrote:
What is the multi colored yarn in the second picture?
14.12.2019 - 04:07DROPS Design answered:
Dear Shannon, in the second picture, the mittens are made with Vivaldi ( from group C) but this yarn is discontinued. Happy knitting!
15.12.2019 - 18:41
|
|
Saturn Rings |
|
|
|
|
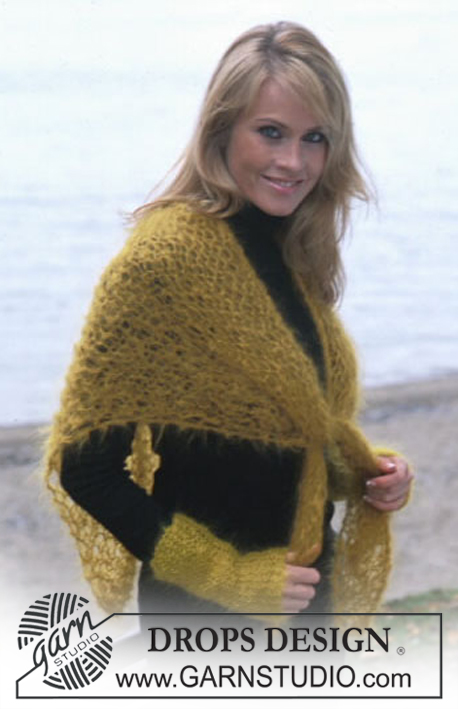
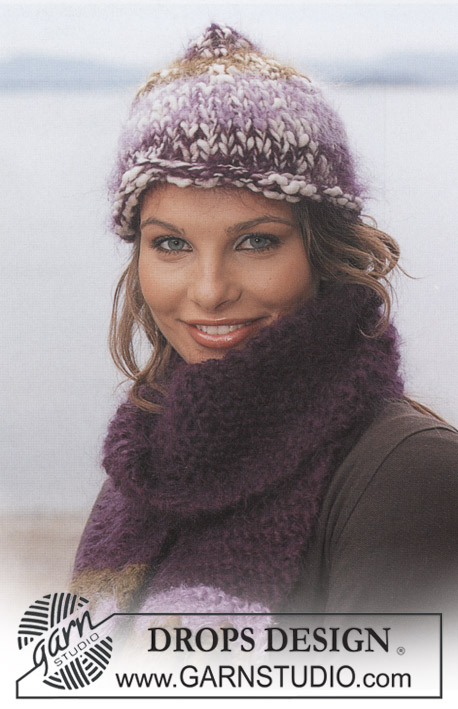
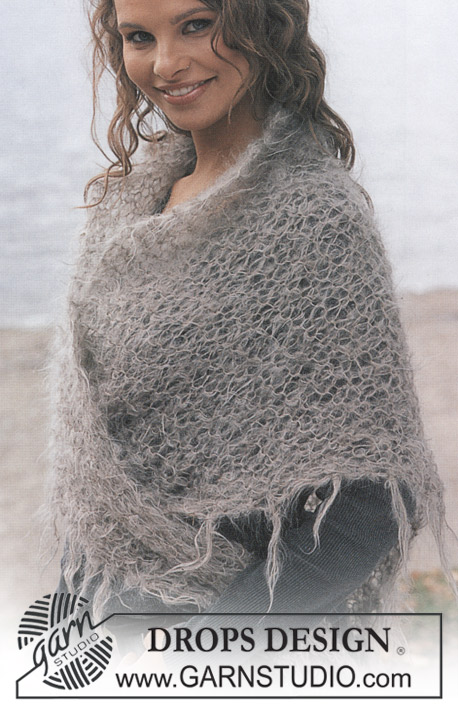
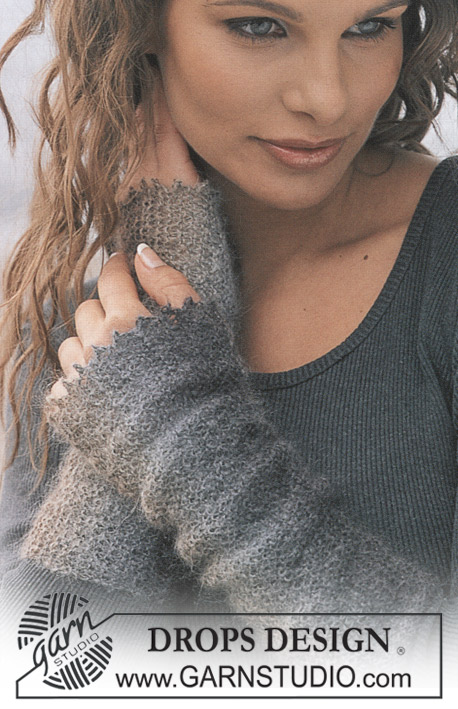
DROPS Headband in Alaska and Shawl in Vienna
DROPS 86-10 |
|
|
Gauge: 18 sts x 23 rows in stockinette st = 10 x 10 cm Headband: Start at center back. Cast on 19 sts. Work in rib as follows: Row 1 (right side): K 1 (edge st knit in garter st), * K 2, P 1 * repeat a total of 5 times – finish row with K 2 and K 1 (edge st knit in garter st). Row 2 (wrong side): K 1 (edge st knit in garter st), * P 2, K 1 * repeat a total of 5 times – finish row with P 2 and K 1 (edge st knit in garter st). Make all incs on right side rows, inc by P 2 sts into 1 P stitch. When the piece measures 8 cm all P 1 to P 2 = 24 sts. When the piece measures 14 cm all P 2 to P 3 = 29 sts. When the piece measures 18 cm all P 3 to P 4 = 34 sts. When the piece measures 21 cm inc all P 4 to P 5 = 39 sts. When the piece measures 24 cm place a marker = this is the center of headband. Now reverse shaping – measure from marker. Make all decs on right side rows, dec by P2 tog. When the piece measures 3 cm dec all P 5 to P 4 = 34 sts. When the piece measures 6 cm dec all P 4 to P 3 = 29 sts. When the piece measures 10 cm dec all P 3 to P 2 = 24 sts. When the piece measures 16 cm dec all P 2 to P 1 = 19 sts. When the piece measures a total of 48 cm bind off and sew to cast on edge. ----------------------------------------------------- SHAWL : Measurements: Length: 100 cm Width: 205 cm Materials: VIENNA from Garnstudio 200 gr nr 43, light brown DROPS 15 mm needles, or size needed to obtain correct gauge. Gauge: 5 sts x 9 rows in garter st = 10 x 10 cm (this is loosely knit) Shawl: Cast on 4 sts and knit garter st, increasing 1 st at one side every other row. Inc by knitting 2 sts in 1 st. Continue incs until there are 50 sts, the piece measures approx. 102 cm. Now dec on the same side as incs – dec every other row by K 2 tog the 2 outermost sts. Continue dec until 4 sts remain, the piece measures approx. 205 cm, bind off. Fringe: Fasten fringe tufts along both sides approx. 4-5 cm apart – start at point at lower edge. Cut 6 strands 35 cm long, fold in half, pull folded end through outermost st and pull ends through loop. |
|
Have you finished this pattern?Tag your pictures with #dropspattern or submit them to the #dropsfan gallery. Do you need help with this pattern?You'll find 16 tutorial videos, a Comments/Questions area and more by visiting the pattern on garnstudio.com. © 1982-2026 DROPS Design A/S. We reserve all rights. This document, including all its sub-sections, has copyrights. Read more about what you can do with our patterns at the bottom of each pattern on our site. |


With over 40 years in knitting and crochet design, DROPS Design offers one of the most extensive collections of free patterns on the internet - translated to 17 languages. As of today we count 324 catalogues and 12290 patterns translated into English (UK/cm).
We work hard to bring you the best knitting and crochet have to offer, inspiration and advice as well as great quality yarns at incredible prices! Would you like to use our patterns for other than personal use? You can read what you are allowed to do in the Copyright text at the bottom of all our patterns. Happy crafting!
Post a comment to pattern DROPS 86-10
We would love to hear what you have to say about this pattern!
If you want to leave a question, please make sure you select the correct category in the form below, to speed up the answering process. Required fields are marked *.