
Popular categories
Looking for a yarn?






















Comments / Questions (6)
 Hannah wrote:
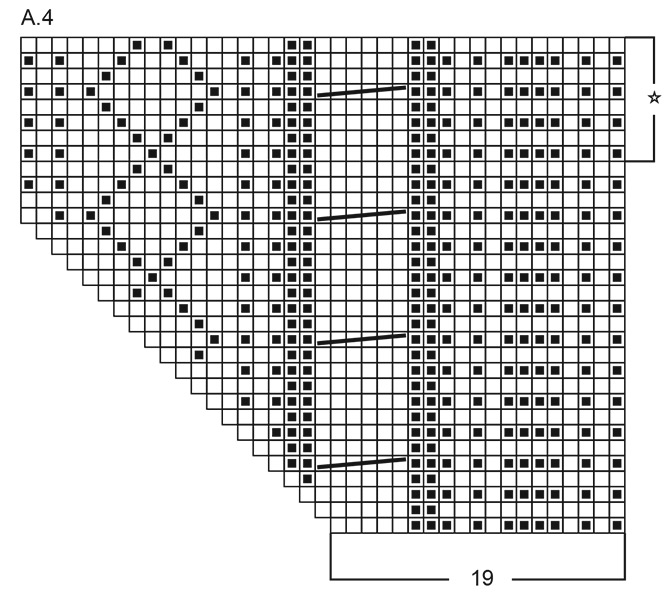
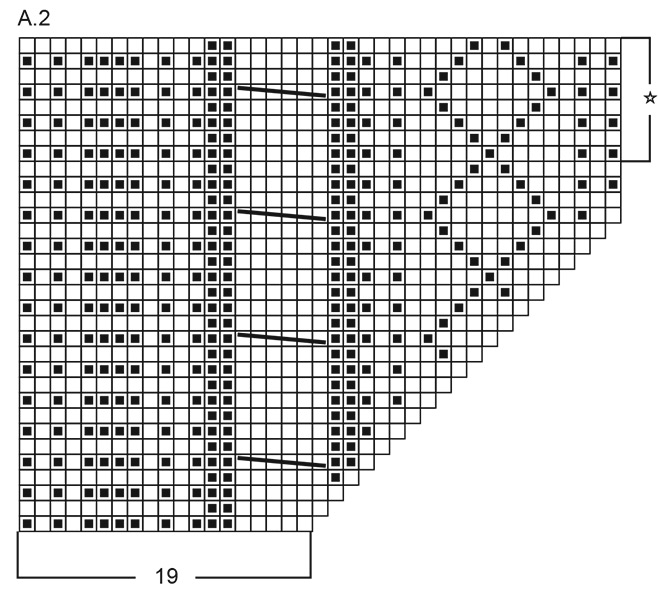
For the back piece, what increases is the pattern referring to in A.2 and A.4 when is says "When all increases shown in A.2 and A.4 are done"? Chart A.2 has a diagonal at the right side, but how does this translate to increases when actually knitting?
08.11.2026 - 18:46
 Kim wrote:
Nog een klein foutje in het patroon: aanbeet eind van de beschrijving van het lijf staat “ De trui meet 48-50-52-54-56-58-60 cm vanaf de opzetrand midden voor”. Dit moet zijn: vanaf de opzetrand midden achter.
06.11.2026 - 22:59
Cheryl wrote:
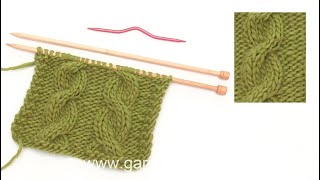
It looks like the instructions for the cables are incorrect. The chart shows 6-stitch cables, but the instructions for those cables say: slip 2 stitches on cable needle in front [or back] of piece, knit 2, knit 2 from cable needle. Isn't that a 4-stitch cable? Shouldn't the instructions say to slip 3 stitches to the cable needle, knit 3, then knit 3 from the cable needle?
01.11.2026 - 15:08DROPS Design answered:
Dear Cheryl, we will send the comment to our design department so that they may check the pattern and charts and rectify any possible mistakes. Happy knitting!
01.11.2026 - 23:59
Kim wrote:
Bij de uitleg van het tel patroon zijn er twee fouten denk ik. 1) de kabel gaat over 6 steken, dus 3 steken op de kabel naald en dan 3 steken breien etc. 2) bij het eerste kabel symbool moeten de steken op de kabel naald voor het werk gehouden worden en bij het tweede kabel symbool achter het werk. Anders draaien de kabels dezelfde kant op, het is mooier als ze beiden een andere kant op draaien.
28.10.2026 - 22:17
 Margit wrote:
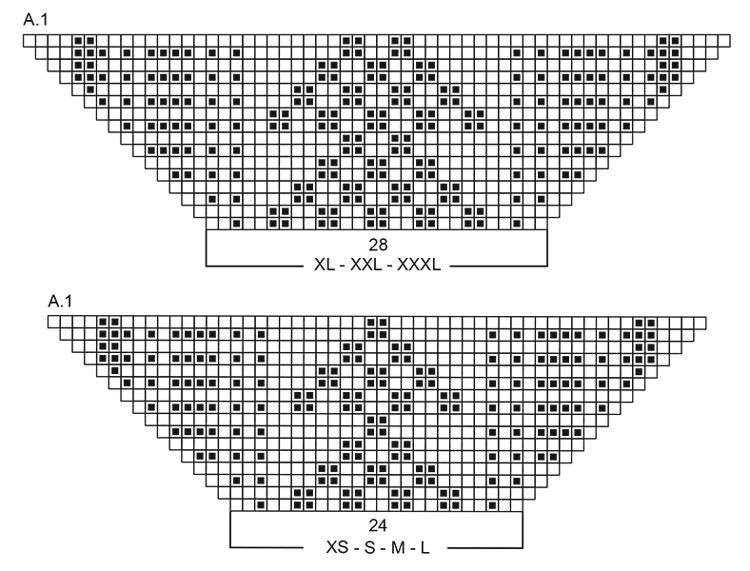
Liebes Drops Team, vielen Dank für die schöne Anleitung. Ich habe mit dem Rückenteil in Gr. L begonnen. Nach der 1. Rückreihe links, soll man die 2. und 3. Reihen 20 x stricken. Soll man nun immer nur die 2. und 3. Reihe von A1 wiederholen, und nach 40 Reihen die restlichen Reihen von A1 stricken, oder wie ist das gemeint? Ich würde mich auf eine Antwort sehr freuen. Vielen Dank und liebe Grüße Margit
28.10.2026 - 08:51DROPS Design answered:
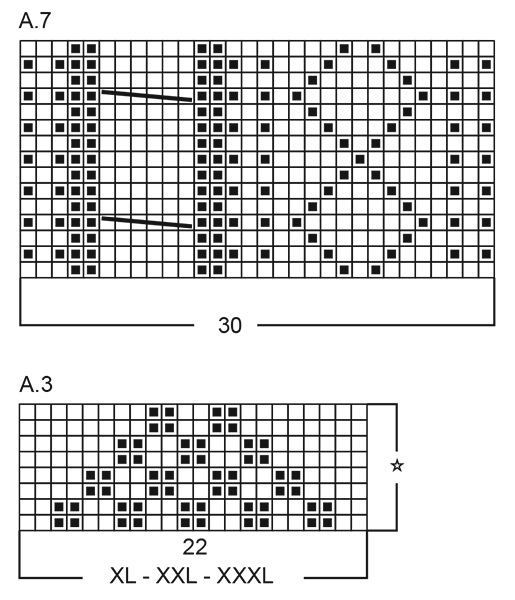
Liebe Magrit, die Zunahmen sollen Sie wie unter 2. und 3. Reihe stricken, und gleichzeitig stricken Sie A.1 mit 3 Maschen glattrechts beidseitig, dh A.1 einfach wie im Diagram stricken, die Zunahmen stricken Sie wie in A.1 gezeichnet. Wenn A.1 fertig ist, stricken Sie so (mit den Zunahmen wie zuvor): 3 M glattrechts, A.2, A.3, A.4 und 3 M glattrechts; nach den Zunahmen in A.2 und A.4 stricken Sie die letzten 4 Zunahmen glattrechts. Viel Spaß beim Stricken!
29.10.2026 - 08:26
 Sandra Fernandez wrote:
En el patrón no aparece el diagrama A1
20.10.2026 - 22:17
|
||||||||||||||||
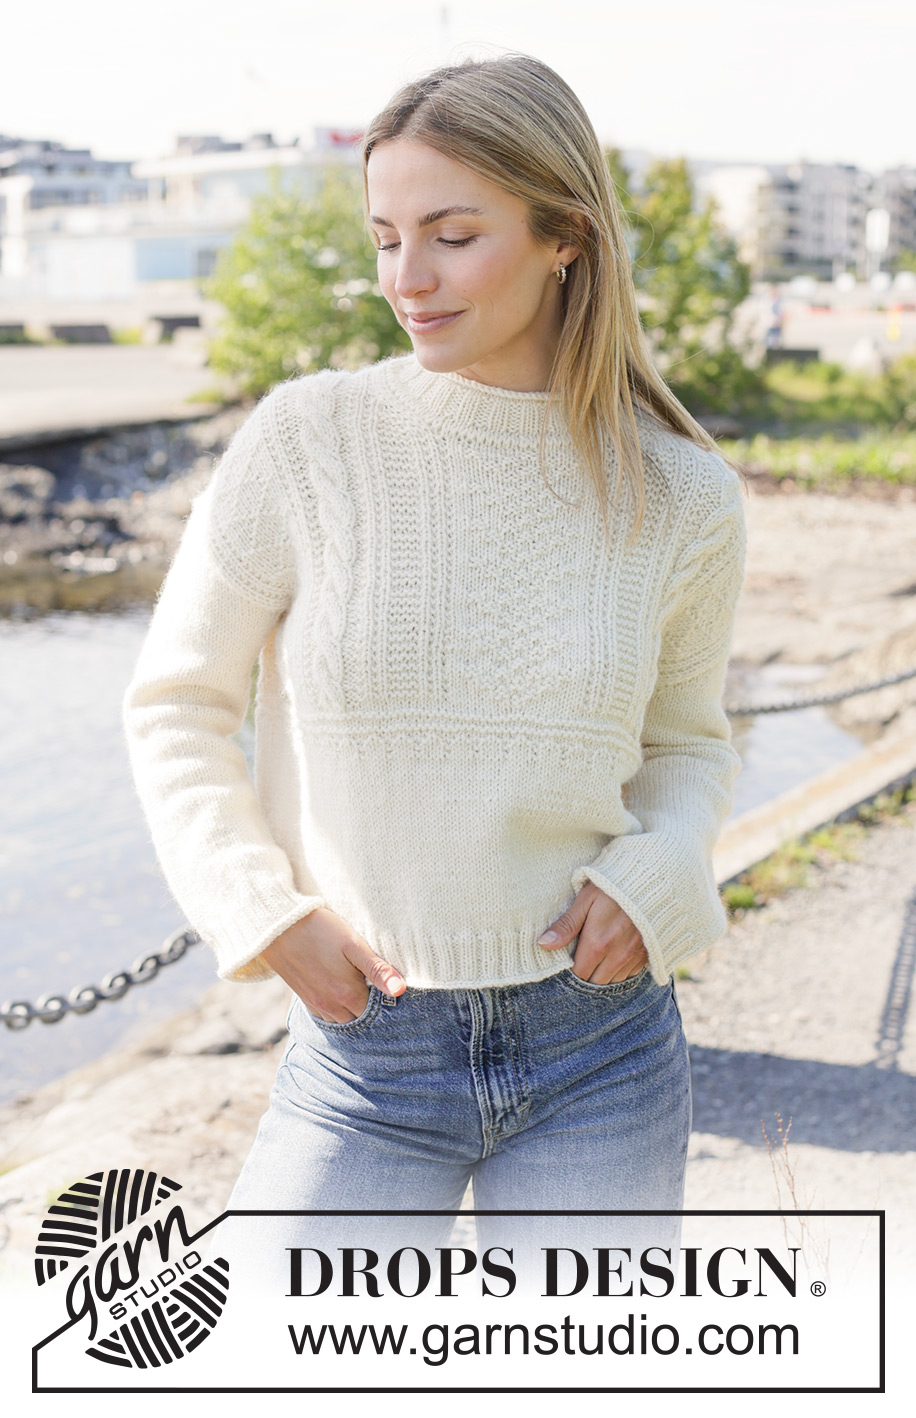
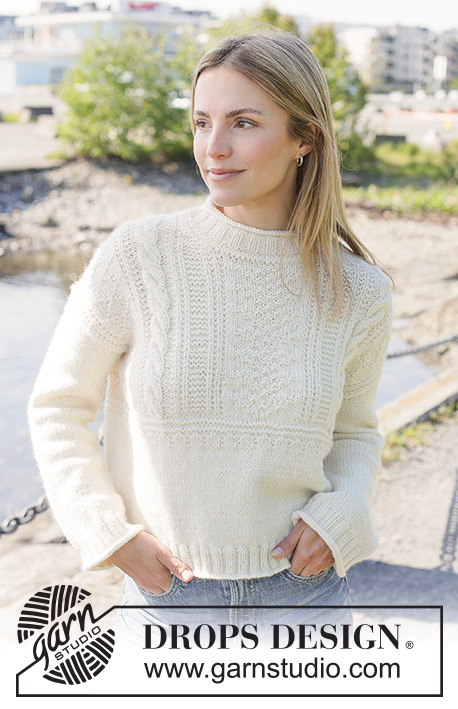
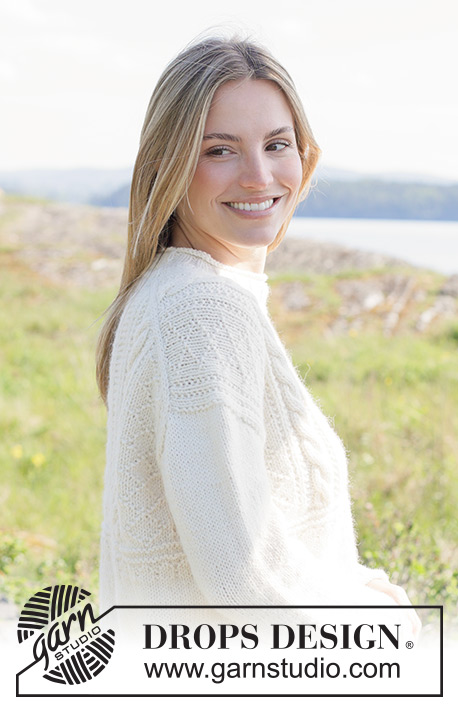
Snow Poem Sweater#snowpoemsweater |
||||||||||||||||
 |
 |
|||||||||||||||
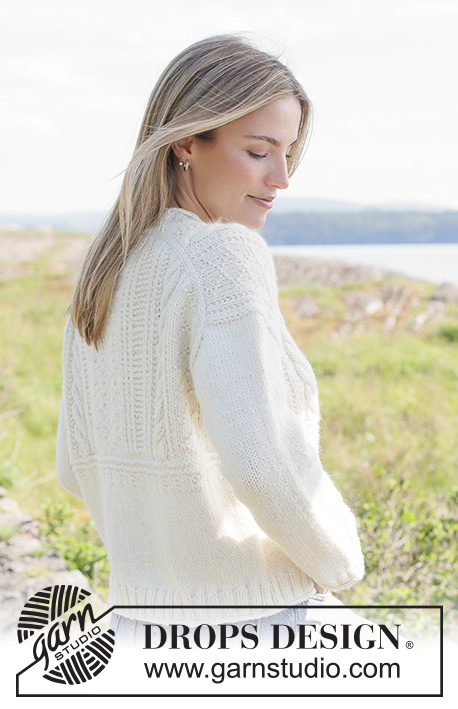
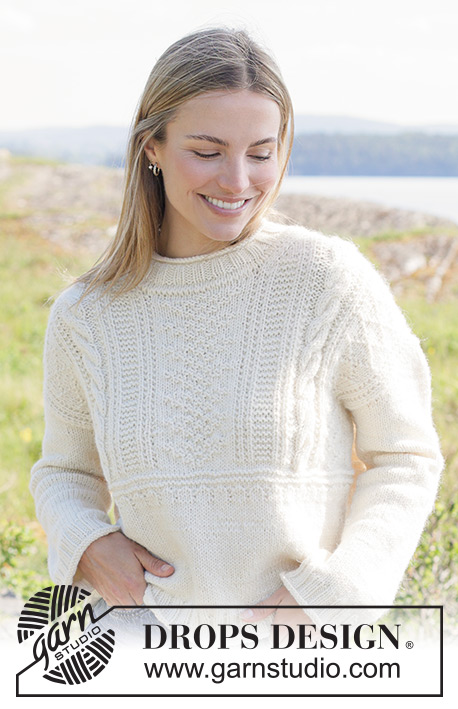
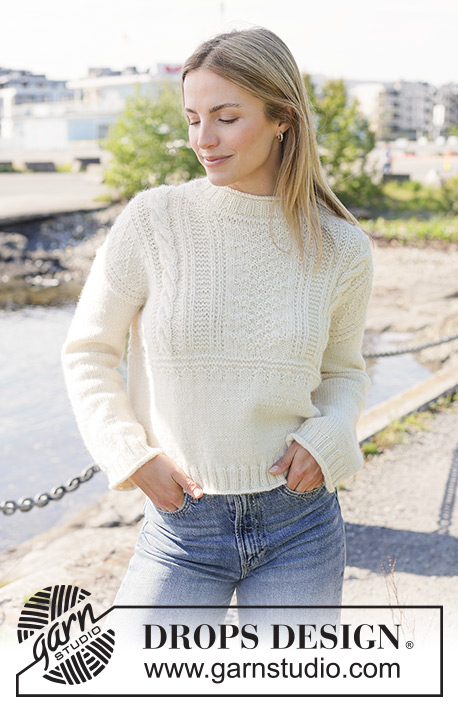
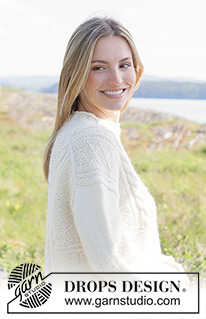
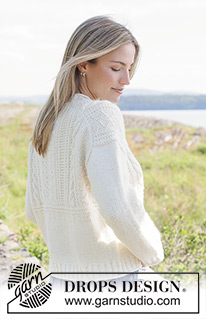
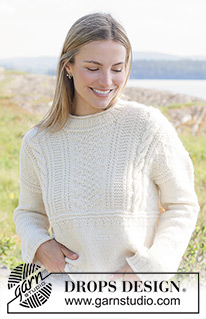
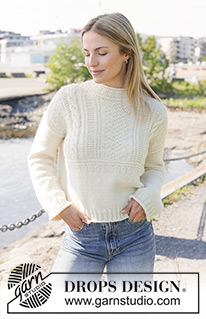
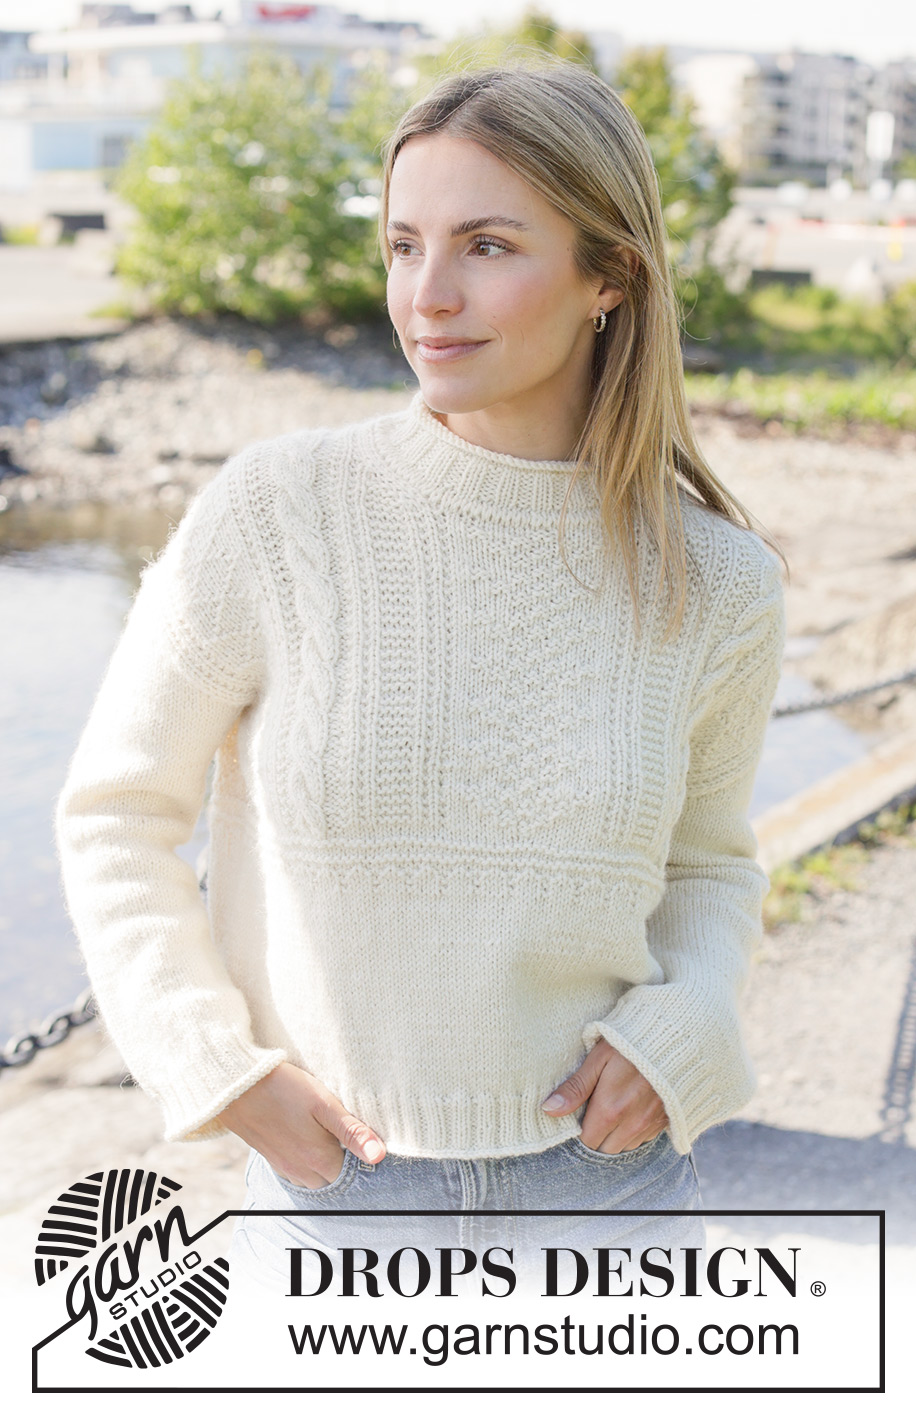
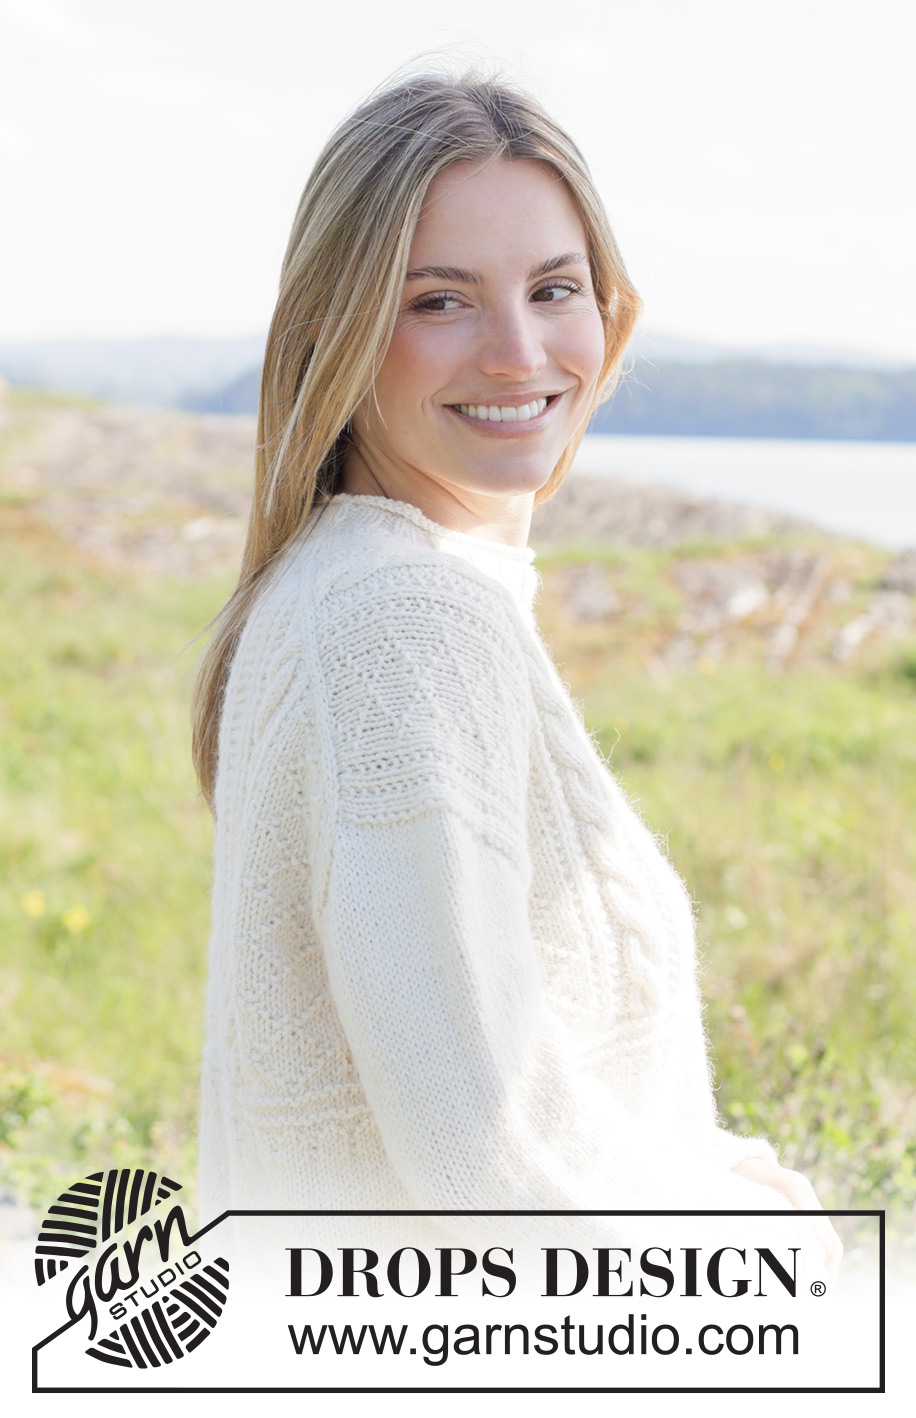
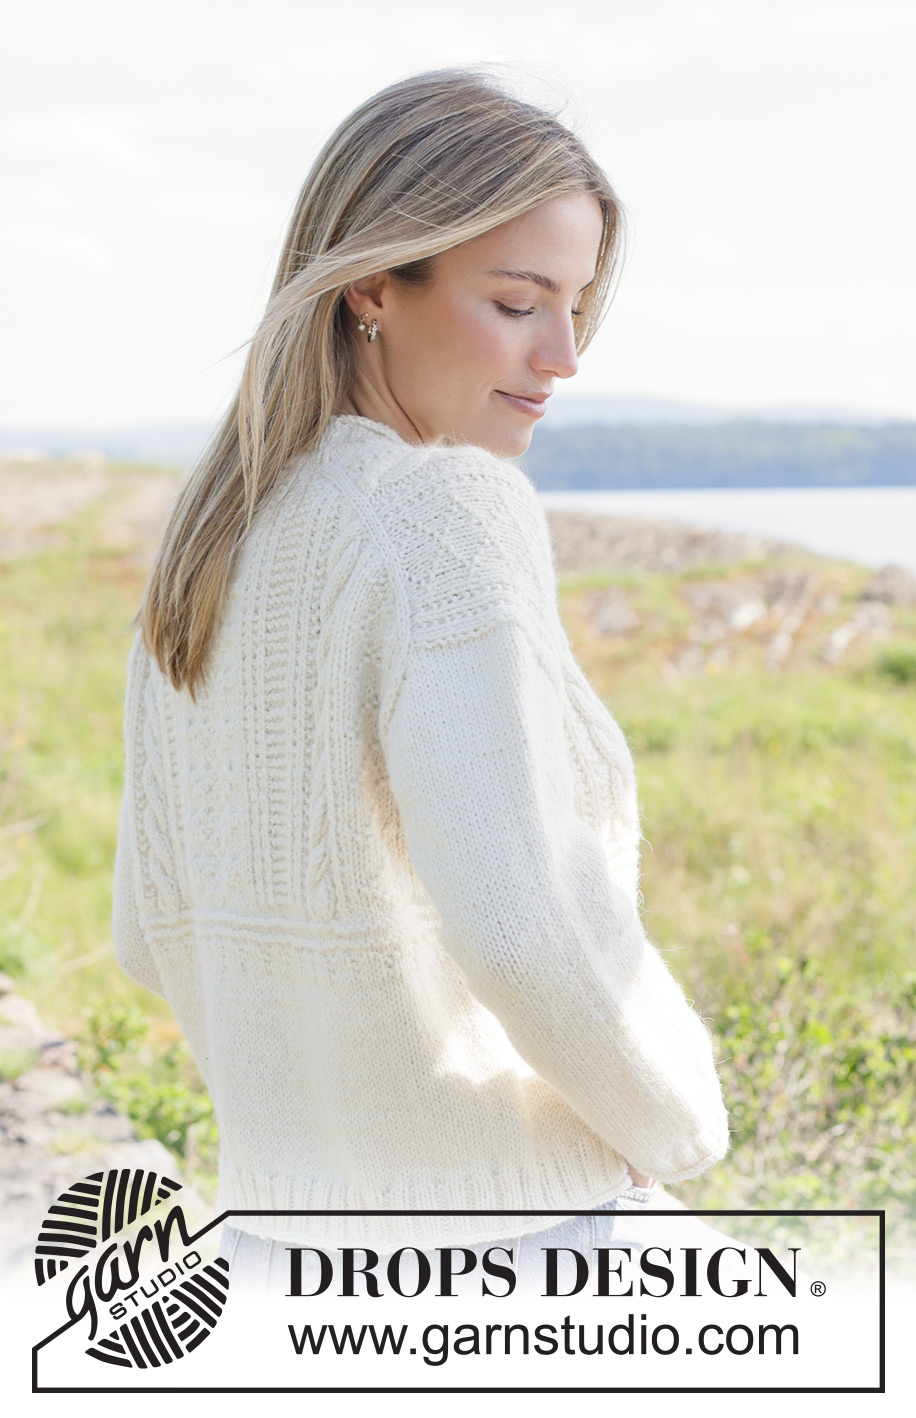
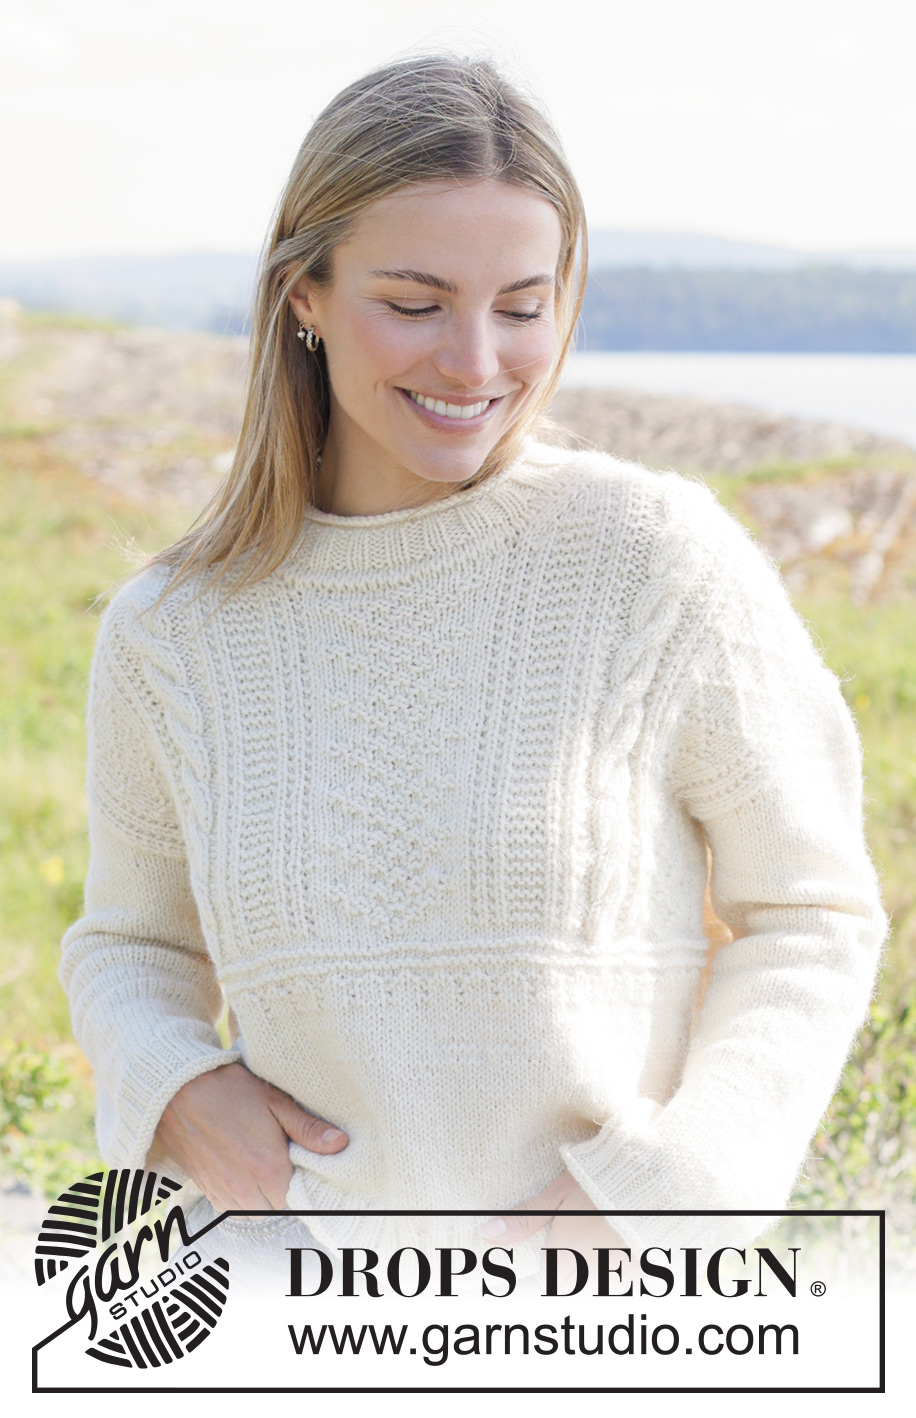
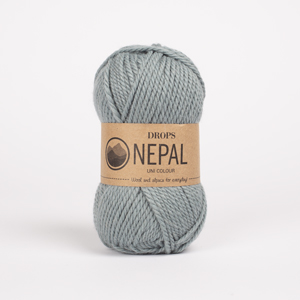
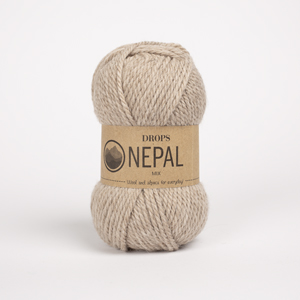
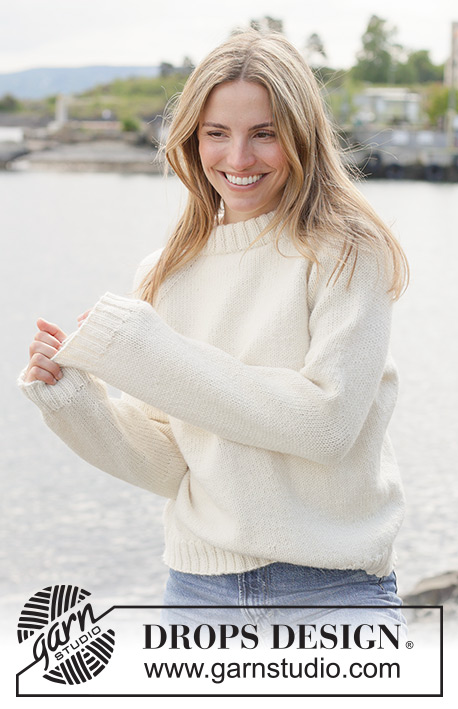
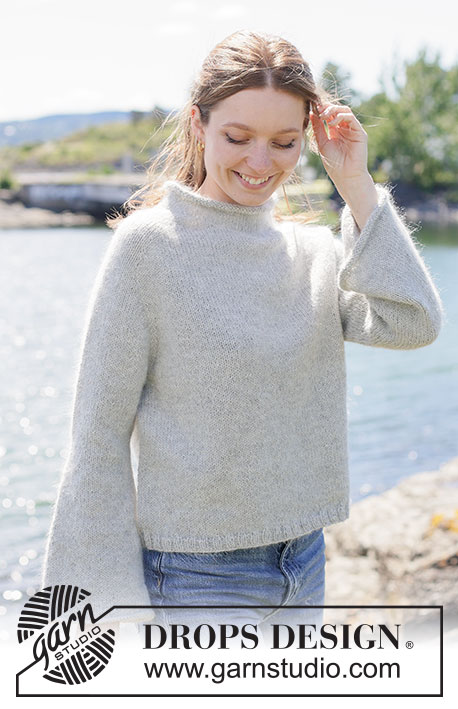
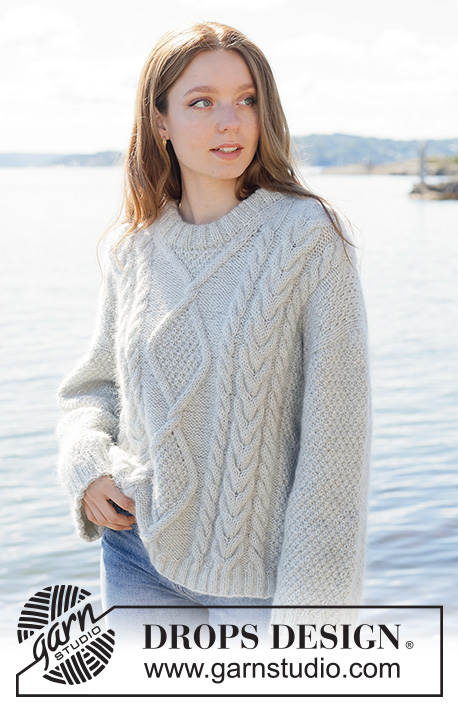
Knitted oversized jumper in DROPS Nepal or DROPS Alaska. Piece is knitted top down with European shoulders, relief pattern, cables and rolling edges. Size XS – XXXL.
DROPS 273-5 |
||||||||||||||||
|
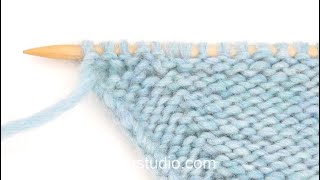
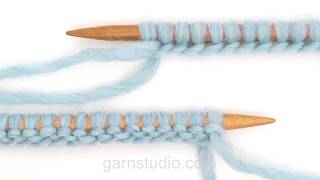
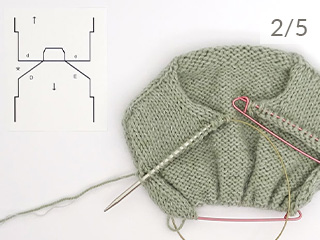
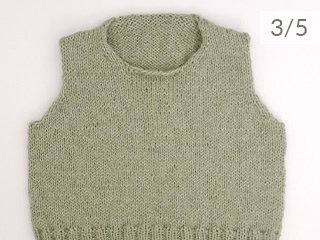
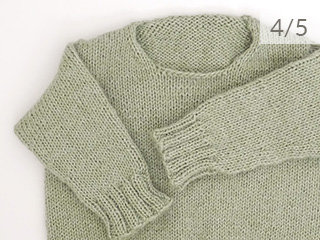
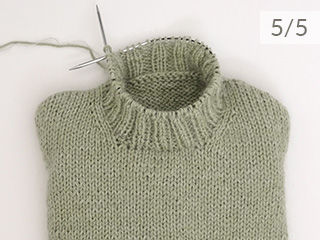
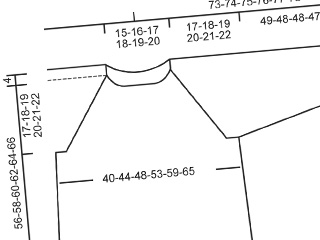
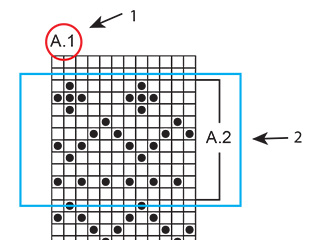
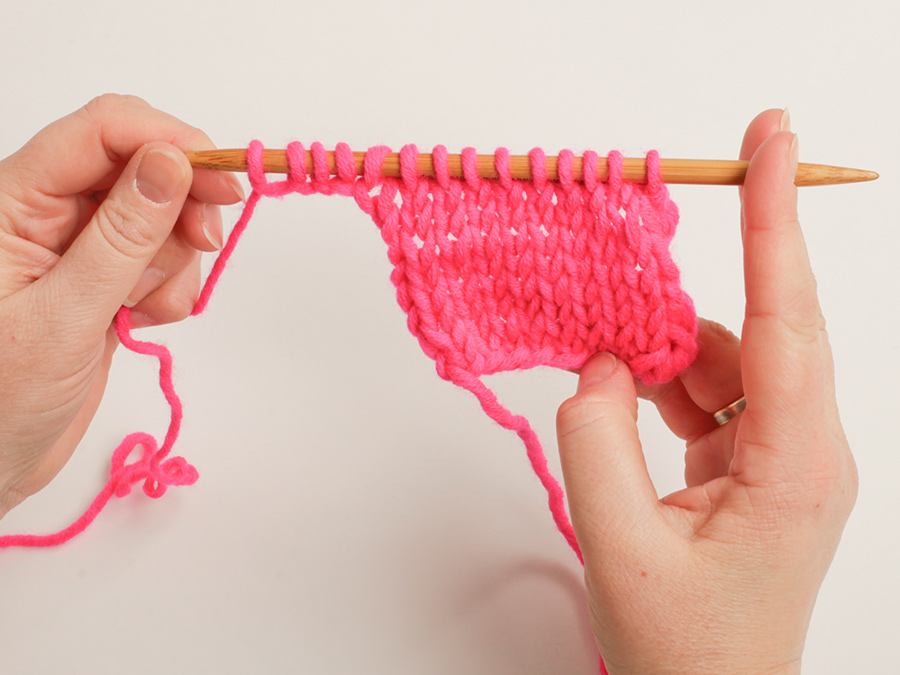
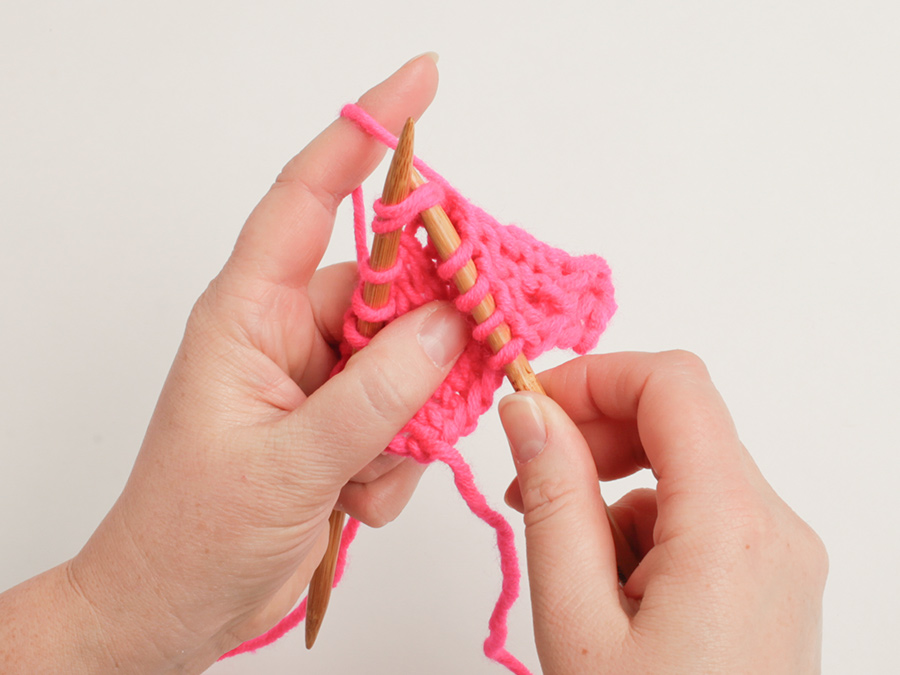
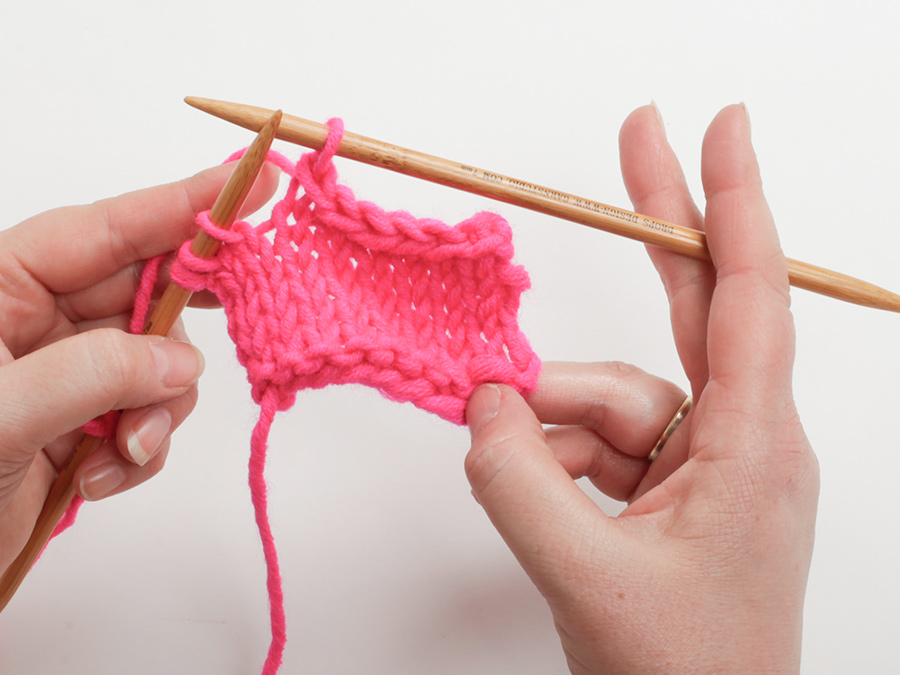
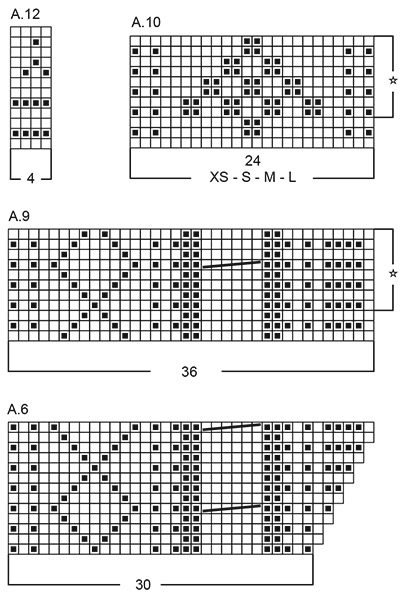
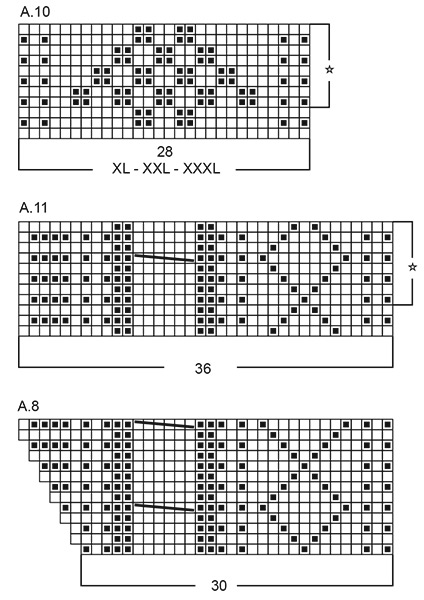
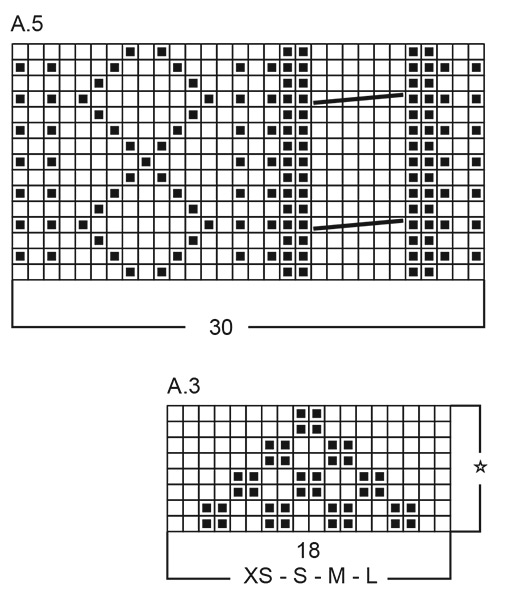
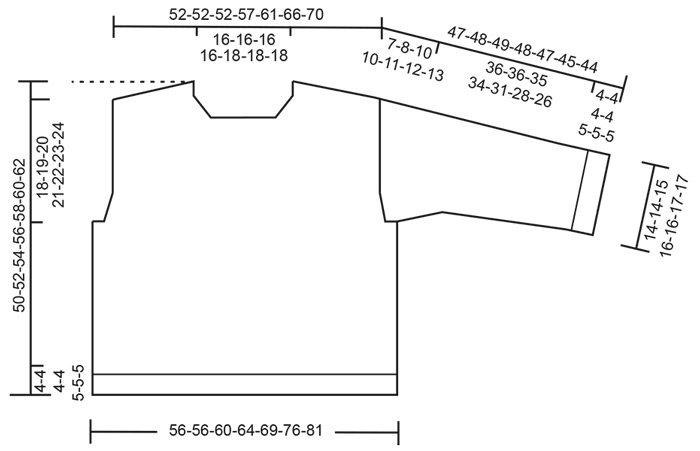
---------------------------------------------------------- EXPLANATION FOR THE PATTERN: ---------------------------------------------------------- PATTERN: See diagrams A.1 to A.12. Diagrams show all rows in pattern seen from the right side. Choose diagram for desired size (applies to A.1, A.3 and A.10). Read the diagrams from right to left when working from right side and from left to right when working from wrong side. INCREASE TIP-1: INCREASE 1 STITCH TOWARDS THE LEFT- from RIGHT SIDE: Use left needle to pick up yarn between 2 stitches from row below, pick up yarn from the front and knit stitch in stitch loop behind the needle. INCREASE 1 STITCH TOWARDS THE RIGHT - from RIGHT SIDE: Use left needle to pick up yarn between 2 stitches from row below, pick up yarn from the back and knit stitch in stitch loop in front of needle. INCREASE TIP-2: INCREASE 1 STITCH TOWARDS THE RIGHT - from WRONG SIDE: Use left needle to pick up yarn between 2 stitches from row below, pick up yarn from the back and purl stitch in stitch loop in front of needle. INCREASE 1 STITCH TOWARDS THE LEFT - from WRONG SIDE: Use left needle to pick up yarn between 2 stitches from row below, pick up yarn from the front and purl stitch in stitch loop behind the needle. INCREASE TIP - rib transition: When increasing stitches evenly in transition for rib, there will be an even increase if you increase where stitches are going to be purled, the stitches in stocking stitch will then continue nicely over into rib. KNITTING TIP: When working short rows there will be a small hole when turning the piece - the hole can be closed by using the technique German Short Rows as follows: Slip first stitch purlwise with strand in front of piece. Place strand over right needle and tighten well at the back (should lead to two loops on needle). Work these loops together on next row. DECREASE TIP: Decrease 1 stitch on each side of marker thread as follows: Work until 3 stitches remain before marker thread and knit 2 together, knit 2 (marker thread is between these 2 stitches), slip 1 stitch knitwise, knit 1, pass slipped stitch over stitch worked (= 2 stitches decreased). ---------------------------------------------------------- START THE PIECE HERE: ---------------------------------------------------------- JUMPER - SHORT OVERVIEW OF THE PIECE: In this pattern needles of different length have been used, begin with fitting length for number of stitches and switch as needed. First work piece back and forth on circular. Begin by casting on stitches in the back of neck. Then work back piece downwards in pattern while at the same time increasing in each side of piece until number of stitches for shoulder width is reached. Back piece has a slight diagonal shoulder. Then work down to armholes. Now put back piece a side and work the front piece. Front piece is first worked in 2 parts. Begin by picking up stitches along one shoulder from back piece, work pattern while increasing towards the neck. Repeat on the other shoulder. Put right and left front piece together when increases for neck are done. Then work front piece down to armholes. Now slip front piece and back piece on to same circular needle and work body downwards in the round on circular needle. Pick up stitches for sleeves around the armholes and work sleeves downwards. First work back and forth with short rows to form a sleeve cap, then work sleeves downwards in the round on needle. Finish by picking up stitches around the neck and work a neck edge. If 0 stitches are given for the chosen size, it means that you skip the information and jump to next information. BACK PIECE: Work piece back and forth on circular needle. Cast on 30-30-30-30-34-34-34 stitches on circular needle size 4.5 mm with DROPS Nepal or DROPS Alaska. ROW 1 (= wrong side): Purl all stitches. ROW 2 (= right side): Read INCREASE TIP-1 and knit 3, increase 1 stitch towards the left, work A.1 (i.e. 3 stitches remain on needle after A.1), increase 1 stitch towards the right, knit 3. ROW 3 (= wrong side): Read INCREASE TIP-2 and purl 3, increase 1 stitch towards the right, work A.1 (3 stitches remain on needle after A.1), increase 1 stitch towards the left, purl 3. AFTER 3RD ROW: Work 2nd and 3rd ROW 18-18-18-20-21-23-25 times (= 36-36-36-40-42-46-50 rows have been worked), after increase there are 102-102-102-110-118-126-134 stitches on needle – NOTE: When A.1 has been worked 1 time vertically, continue pattern as follows from right side: Knit 3, A.2, A.3, A.4, knit 3. When all increases shown in A.2 and A.4 are done (= 36 increases in each side), 0-0-0-4-6-10-14 increases remain in each side - work these stitches in stocking stitch. When entire A.2 and A.4 have been worked vertically, continue pattern the same way with 3-3-3-7-9-13-17 stitches in stocking stitch in each side – repeat the diagrams vertically as shown with star in diagrams. When all increases are done, insert 1 marker at the edge in the side. Now measure piece from here! Continue the pattern - Remember to follow the knitting tension - until piece measures 7-8-6-7-9-7-6 cm measured from the edge along the armhole - finish after a row from the wrong side and note which row in the diagram you finish on to finish on the same row in the diagram on front piece before increasing for armholes; the pattern will then fit when front piece and back piece are placed together into body. Now increase in each side for armholes. INCREASE FOR ARMHOLES: ROW 1 (= right side): Remember INCREASE TIP-1 and knit 3, increase 1 stitch towards the left, work as before until 3 stitches remain, increase 1 stitch towards the right, knit 3. ROW 2 (= wrong side): Work stocking stitch and pattern as before. Work 1st and 2nd ROW 1-1-5-5-4-6-7 times in total (= 2-2-10-10-8-12-14 rows worked) = 104-104-112-120-126-138-148 stitches on needle. Work until piece measures 8-9-10-11-12-12-12 cm, measured from marker along armhole, finish with a row from wrong side. Cut the yarn, slip stitches on a thread or stitch holder, now work left front piece along the left shoulder as explained below. LEFT FRONT PIECE: Find left shoulder on back piece as follows: Place back piece flat with right side up, place back piece so that stitches on thread/stitch holder is towards you, left side of piece = left shoulder. Now pick up stitches along left diagonal shoulder on back piece - begin from right side at the neck and pick up stitches out towards the armhole as follows: Pick up 1 stitch in every worked row inside outermost stitch = 36-36-36-40-42-46-50 stitches. All length measurements on front piece are done from pick-up edge. ROW 1 (= wrong side): Purl 3-3-3-7-9-13-17, work A.5 (remember to read the diagram from left to right when working from the wrong side), purl 3. ROW 2 (= right side): Knit 3, A.5, knit 3-3-3-7-9-13-17. Work 1st and 2nd ROW until A.5 has been worked vertically, piece measures approx. 6 cm from cast-on edge, now increase stitches towards the neck as follows: ROW 1 (= right side): Remember INCREASE TIP-1 and knit 3, increase 1 stitch towards the left, work A.6, knit 3-3-3-7-9-13-17. ROW 2 (= wrong side): Purl 3-3-3-7-9-13-17, A.6, purl 3. Work 1st and 2nd ROW 6 times in total (= 12 rows worked) = 42-42-42-46-48-52-56 stitches (work next row from right side). Cut the yarn (1 row remains in A.6), slip stitches on a thread or stitch holder, now work right front piece along right shoulder as explained below. RIGHT FRONT PIECE: Pick up stitches along right diagonal shoulder on back piece - begin from right side at the shoulder and pick up stitches in towards the neck as follows: Pick up 1 stitch in every worked row inside outermost stitch = 36-36-36-40-42-46-50 stitches. All length measurements on front piece are done from pick-up edge. ROW 1 (= wrong side): Purl 3, work A.7 (read the diagram from left to right when working from the wrong side), purl 3-3-3-7-9-13-17. ROW 2 (= right side): Knit 3-3-3-7-9-13-17, A.7, knit 3. Work 1st and 2nd ROW until A.7 has been worked vertically, piece measures approx. 6 cm from cast-on edge, now increase stitches towards the neck as follows: ROW 1 (= right side): Knit 3-3-3-7-9-13-17, A.8, increase 1 stitch towards the right – remember INCREASE TIP-2, knit 3. ROW 2 (= wrong side): Purl 3, A.8, purl 3-3-3-7-9-13-17. Work 1st and 2nd ROW 6 times in total (= 12 rows worked) = 42-42-42-46-48-52-56 stitches (work next row from right side = last row in A.8). Now place the front pieces together as explained below. FRONT PIECE (right and left part together): Work first row as follows from right side: Knit 3-3-3-7-9-13-17, work last row in A.8, knit 3, cast on 18-18-18-18-22-22-22 new stitches for neck at the end of row, knit the first 3 stitches from left front piece, work last row in A.6 over the next stitches from left front piece and finish with knit 3-3-3-7-9-13-17 = 102-102-102-110-118-126-134 stitches on needle. Work next row as follows from wrong side: Purl 3-3-3-7-9-13-17, work A.9 (remember to read the diagrams from left to right when working from the wrong side), A.10, A.11, purl 3-3-3-7-9-13-17. Work the pattern back and forth like this and repeat the reports vertically until piece measures 27-28-26-27-29-29-30 cm - finish after a row from the wrong side and adjust so that this is the same row in diagram as on back piece before increase for armholes. Now increase in each side for armholes. INCREASE FOR ARMHOLES: ROW 1 (= right side): Remember INCREASE TIP-1 and knit 3, increase 1 stitch towards the left, work as before until 3 stitches remain, increase 1 stitch towards the right, knit 3. ROW 2 (= wrong side): Work stocking stitch and pattern as before. Work 1st and 2nd ROW 1-1-5-5-4-6-7 times in total (= 2-2-10-10-8-12-14 rows worked) = 104-104-112-120-126-138-148 stitches on needle. Continue to work until piece measures 28-29-30-31-32-34-36 cm from cast-on edge, finish with a row from wrong side and make sure that this is the same row that was last row on back piece. Now put front piece and back piece together for body as explained below. Front piece is longer than back piece, approx. 2 cm of neck depth will be on the back of the garment. BODY: Work the 104-104-112-120-126-138-148 stitches from front piece as before, cast on 2-2-2-2-4-4-4 new stitches at the end of this row (= in the side mid under sleeve), work the 104-104-112-120-126-138-148 stitches from back piece as before and cast on 2-2-2-2-4-4-4 new stitches on row (= in the side mid under sleeve) = 212-212-228-244-260-284-304 stitches on needle. Now work in the round on needle, continue pattern on front piece and back piece as before (pattern is the same on the front and back) - work the new stitches in each side under sleeves in stocking stitch. Work until piece measures approx. 28-30-32-34-36-38-40 cm from cast-on edge mid back - finish after one whole repetition vertically. Now knit 1 round over all stitches but work 1 purl stitch over the "diamond" at the edge in each side on A.9/A.11 to close the square - AT THE SAME TIME on this round decrease 3 stitches over each cable (knit stitches over cable in A.11 twisted together 2 by 2 and knit stitches over cable in A.9 together 2 by 2) = 200-200-216-232-248-272-292 stitches on needle. Work A.12 in the round on body. Then working stocking stitch in the round over all stitches. Work until piece measures 44-46-48-50-51-53-55 cm from cast-on edge mid back. Switch to circular needles size 3 mm, work rib (= knit 2 and purl 2) while AT THE SAME TIME increasing 36-36-36-40-44-48-48 stitches evenly on 1st round - read INCREASE TIP = 236-236-252-272-292-320-340 stitches. When rib measures 3-3-3-3-4-4-4 cm, knit 1 round over all stitches. Then cast off by knitting. Jumper measures 48-50-52-54-56-58-60 cm from cast-on edge mid front and approx. 50-52-54-56-58-60-62 cm from the top of shoulder. SLEEVES: Sleeve is worked from the armhole and down. Place piece flat and insert 1 marker at the top of armhole = mid on top shoulder – NOTE: Mid on top shoulder is not the same place as stitches were picked up for front piece but a few cm down on front piece. Use circular needle size 4.5 mm and tightly pick up stitches (use a thinner needle if needed). PICK UP STITCHES AS FOLLOWS: Begin in the middle of the new stitches cast on under sleeve - pick up 64-66-70-74-80-82- 86 stitches inside 1 stitch – adjust to pick up same number of stitches on each side of marker. SLEEVE CAP: To get a better shape work stocking stitch with short rows back and forth over sleeve cap, begin round mid under sleeve as and work follows: ROW 1 (= right side): Work 8-8-9-9-9-10-10 stitches past marker on top of the shoulder, turn piece – read KNITTING TIP. ROW 2 (= wrong side): Work 8-8-9-9-9-10-10 stitches past marker, turn piece. ROW 3 (= right side): Work 3-2-2-2-2-2-2 stitches past where the previous turn was, turn piece. ROW 4 (= wrong side): Work 3-2-2-2-2-2-2 stitches past where the previous turn was, turn piece. Repeat ROWS 3 and 4. Work until 16-20-24-24-26-28-32 turns have been done in total (= 8-10-12-12-13-14-16 times in each side and last row is worked from wrong side). AFTER LAST TURN: The last time 4th row is worked finish row by turning piece, then work from right side until beginning of round (= mid under sleeve). Insert 1 marker thread mid under sleeve, marker thread is used when decreasing stitches under sleeve. Move marker thread upwards when working. THE SLEEVE ONWARDS: Now work in the round in stocking stitch over all stitches while AT THE SAME TIME decreasing under sleeve, read DECREASE TIP and decrease like this: When 1 round has been worked, decrease 2 stitches every other round 2-2-2-2-3-3-3 times, then decrease 2 stitches every 2-2-2-2-1½-1½-1½ cm 5-5-6-7-8-8-9 times = 50-52-54-56-58-60-62 stitches on needle. Work until sleeve measures 43-44-45-44-42-40-39 cm from marker mid on top of shoulder. Switch to double pointed needles size 3 mm and work rib (= knit 2 and purl 2) while AT THE SAME TIME increasing 6-4-6-8-6-8-6 stitches evenly on 1st round = 56-56-60-64-64-68-68 stitches. When rib measures 3-3-3-3-4-4-4 cm, knit 3 rounds while decreasing 4 stitches evenly on 1st round (= rolling edge) = 52-52-56-60-60-64-64 stitches. Cast off somewhat loosely by knitting. Sleeve measures approx. 47-48-49-48-47-45-44 cm from mid on top of shoulder. NECK EDGE: Use circular needle size 3 mm. Begin from right side at one shoulder line and pick up approx. 92-92-92-92-100-100-100 stitches inside 1 stitch around the neck. Work a neck-border as follows: ROUND 1 (= from the right side): Number of stitches is doubled on this round: * Make 1 yarn over, knit 1 *, work from *-* the entire round = approx. 184-184-184-184-200-200-200 stitches. ROUND 2: * Purl yarn over, slip the next stitch on to the right needle without working it, when slipping stitch insert the right needle in the stitch as to purl it with yarn behind piece *, work from *-* the entire round. ROUND 3: * Slip the next stitch on to the right needle without working it, when slipping stitch insert the right needle in the stitch as to purl it with yarn in front of piece, knit 1 *, work from *-* the entire round. ROUND 4: * Purl 1, slip the next stitch on to the right needle without working it, when slipping stitch insert the right needle in the stitch as to purl it with yarn behind piece *, work from *-* the entire round. ROUND 5: Number of stitches is halved: * Knit 2 together *, repeat from *-* the entire round = approx. 92-92-92-92- 100-100-100 stitches. Knit 1 round where number of stitches is adjusted if needed - number must be divisible by 4. Work rib in the round (= knit 2 and purl 2) for 3-3-3-3½-3½-4-4 cm. Work 3 rounds in stocking stitch (= rolling edge). Cast off somewhat loosely by knitting. |
||||||||||||||||
Diagram explanations |
||||||||||||||||
|
||||||||||||||||
 |
||||||||||||||||
 |
||||||||||||||||
 |
||||||||||||||||
 |
||||||||||||||||
 |
||||||||||||||||
 |
||||||||||||||||
 |
||||||||||||||||
 |
||||||||||||||||
Have you finished this pattern?Tag your pictures with #dropspattern #snowpoemsweater or submit them to the #dropsfan gallery. Do you need help with this pattern?You'll find 30 tutorial videos, a Comments/Questions area and more by visiting the pattern on garnstudio.com. © 1982-2026 DROPS Design A/S. We reserve all rights. This document, including all its sub-sections, has copyrights. Read more about what you can do with our patterns at the bottom of each pattern on our site. |
||||||||||||||||
With over 40 years in knitting and crochet design, DROPS Design offers one of the most extensive collections of free patterns on the internet - translated to 17 languages. As of today we count 333 catalogues and 12536 patterns translated into English (UK/cm).
We work hard to bring you the best knitting and crochet have to offer, inspiration and advice as well as great quality yarns at incredible prices! Would you like to use our patterns for other than personal use? You can read what you are allowed to do in the Copyright text at the bottom of all our patterns. Happy crafting!
Post a comment to pattern DROPS 273-5
We would love to hear what you have to say about this pattern!
If you want to leave a question, please make sure you select the correct category in the form below, to speed up the answering process. Required fields are marked *.