
Popular categories
Looking for a yarn?


Comments / Questions (33)
![]() Elise wrote:
Elise wrote:
Bonjour pour la taille xxl où doit on faire les diminutions pour les emmanchures 11 fois 1 maille de chaque coté tous les 2 rangs? Pas dans l'i cord? Dans les mailles bordures? J'ai peur que ca soit pas joli? Ou dans le jersey? Pour les diminutions on tricote 2 mailles ensemble? Je vous remercie par avance pour les explications.
06.04.2026 - 14:38DROPS Design answered:
Bonjour Élise, les diminutions des emmanchures se font de chaque côté comme indiqué sous DIMINUTIONS (emmanchures et encolure): au début des explications, autrement dit à 9 mailles du bord de chaque côté. Bon tricot!
08.04.2026 - 11:52
![]() Christina wrote:
Christina wrote:
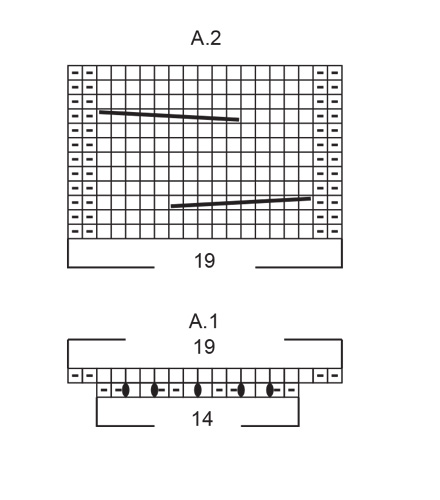
Beim Diagramm A.2 sind die reihen nur als Hinreihen angegeben oder in Hin und Rückreihen. Komme jetzt nicht weiter Vielen dank für Ihre Antwort im Voraus
18.03.2026 - 15:09DROPS Design answered:
Liebe Christina, alle Reihen sind im Diagram (A.1 und A.2) gezeichnet; die Hinreihen lesen Sie rechts nach links und die Rückreihen lesen Sie links nach rechts (siehe "in Rück-Reihen unter Symbolerklärung). Viel Spaß beim Stricken!
18.03.2026 - 16:39
![]() Françoise TRON wrote:
Françoise TRON wrote:
Je ne comprends pas tout pour le col, l\'orque vois dite , remettre les 3 mailles sur l\'aiguille gauche, doivent elles être rabattue s ??
04.03.2026 - 13:18DROPS Design answered:
Bonjour Mme Tron, non ces 3 mailles doivent juste être remises sur l'aiguille gauche, on va les tricoter à nouveau comme avant, retrouvez ici, en vidéo comment rabattre avec I-cord; dans la vidéo, on monte 2 mailles mais on tricote bien comme ici: 2 mailles endroit, 2 mailles ensemble torse à l'endroit (= la 3ème des 3 m + la m relevée), on remet les 3 m sur l'aiguille gauche et on continue ainsi jusqu'à ce que toutes les mailles aient été rabattues. Bon tricot!
05.03.2026 - 10:11
![]() MARIE-HELENE wrote:
MARIE-HELENE wrote:
Bonjour, Une fois les mailles montées, vous dites qu'il faut tricoter en côtes sur l'envers. Ou est l'envers ? rang 1 ou rang 2? je ne comprend pas. merci pour votre réponse
17.02.2026 - 17:55DROPS Design answered:
Bonjour Marie-Hélène, le tout premier rang des côtes se tricote sur l'envers, en commençant par 2 m envers après les 7 m de bordure ; ainsi, vu sur l'endroit, vous aurez 2 m end des côtes après/avant les 7 m de bordure de chaque côté. Bon tricot!
18.02.2026 - 10:23
![]() Monique RAT wrote:
Monique RAT wrote:
Bonjour, je tricote la taille S du modèle 252-31. pour les diminutions des emmanchures du devant comment peut on à partir de 97mailles en obtenir 79 en diminuant 2 fois 1 maille tous les 4 rangs ? de même pour le dos comment obtenir 74 mailles en partant de 92 et en diminuant 2 fois 1 maille tous les 4 rangs ? Merci de m'expliquer.
19.01.2026 - 23:45DROPS Design answered:
Bonjour Mme Rat, vous devez rabattre et diminuer pour les emmanchures de chaque côté, autrement dit, vous rabattez 7 m de chaque côté, il reste: 97-7-7=83 mailles, puis vous diminuez 2 fois 1 m de chaque côté (soit 2 x 2 m au total); 83-4=79 mailles. Vous diminuez ensuite 5 mailles dans A.2 = 79-5=74 mailles. Bon tricot!
20.01.2026 - 10:39
![]() Josje wrote:
Josje wrote:
Goedemorgen, Ik heb voor maat M ruim genoeg gehad aan 4 bollen AIR (200 gram).
11.10.2025 - 12:25
![]() Béatrice wrote:
Béatrice wrote:
Bonjour, j'aimerai savoir a quelle hauteur faire les trous pour les boutons. Merci pour votre réponz
18.09.2025 - 18:27DROPS Design answered:
Bonjour Béatrice, on n'ouvre pas de boutonnière dans ce modèle, les boutons sont cousus en piquant dans les 2 épaisseurs, dos et devant; Bon tricot!
18.09.2025 - 18:43
![]() Sam wrote:
Sam wrote:
Bonjour, pour les diagrammes a1 et a2 est ce que se sont uniquement les rangs qui se tricotent à l'endroit qui sont marqués? il faut donc faire une torsade dans le 5eme rang et la suivante dans le 27eme rang? merci
16.06.2025 - 16:43DROPS Design answered:
Bonjour Sam, tous les rangs figurent dans les diagrammes, autrement dit le 1er rang de A.1 se fait sur l'endroit et le 2ème sur l'envers; dans A.2, la 1ère torsade se fait au 3ème rang et la suivante au 9ème rang (on doit toujours avoir 5 rangs entre chaque torsade). Bon tricot!
17.06.2025 - 09:06
![]() Cécile wrote:
Cécile wrote:
Je viens de finir le devant, mais l'encolure fait un escalier entre les mailles centrales rabattues avec la technique i-cord et les diminutions suivantes. Ce n'est pas très joli du coup. Est-ce que j'ai loupé quelque chose?
20.04.2025 - 16:32DROPS Design answered:
Bonjour Cécile, avant de rabattre les mailles de l'encolure avec la technique du I-cord, vous allez relever les mailles tout autour de l'encolure: les mailles en attente + les mailles rabattues de part et d'autre, et seulement là, vous allez rabattre, vous ne devriez pas avoir d'escalier à ce niveau, en relevant les mailles, cet effet doit disparaître. Si vous l'avez toujours, essayez de relever le fil entre 2 "marches" (pour garder le concept d'escaliers) et placez le torse sur l'aiguille gauche puis tricotez ce fil (torse) avec la maille suivante pour compenser toute différence de hauteur. Bon tricot
22.04.2025 - 15:20
![]() Renu wrote:
Renu wrote:
I finally worked it out !! Am working on. Medium size . Thank you for replying .
28.03.2025 - 17:14
|
||||||||||||||||
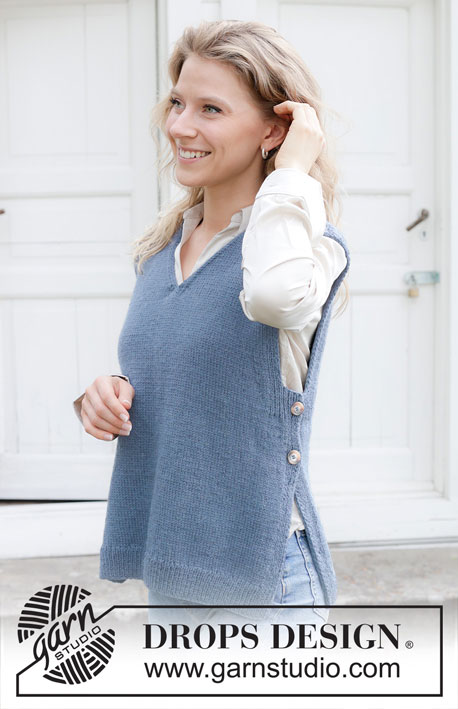
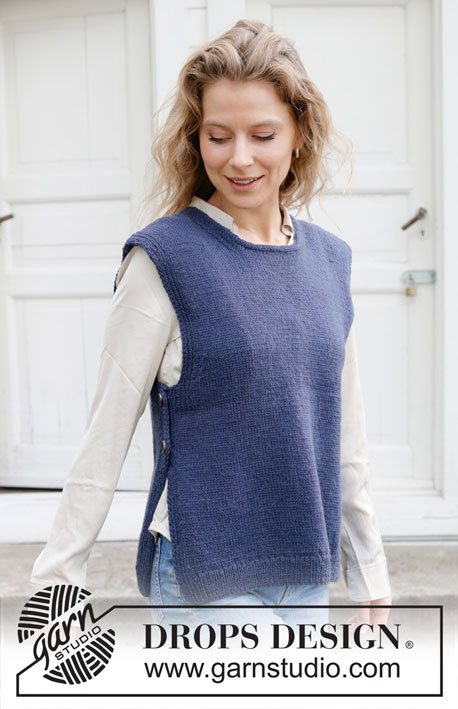
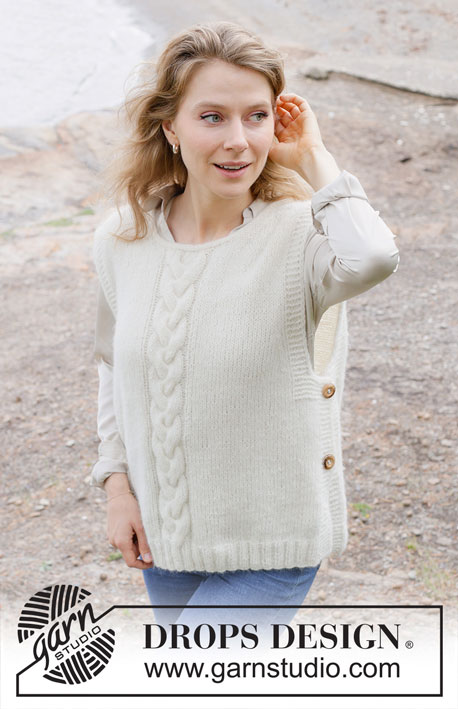
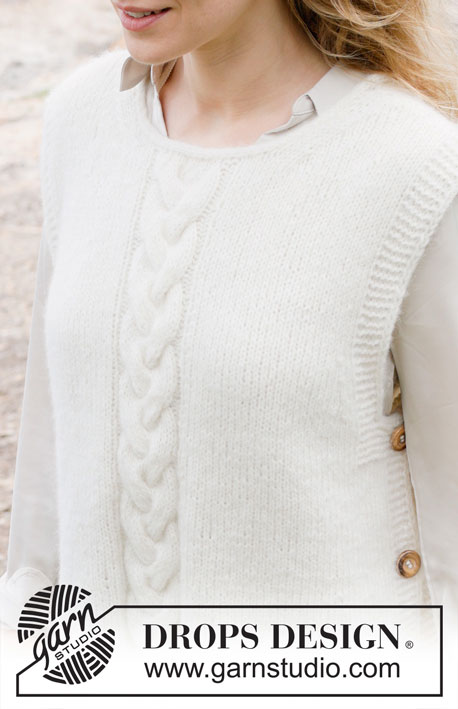
Snowfall Vest#snowfallvest |
||||||||||||||||
 |
 |
|||||||||||||||
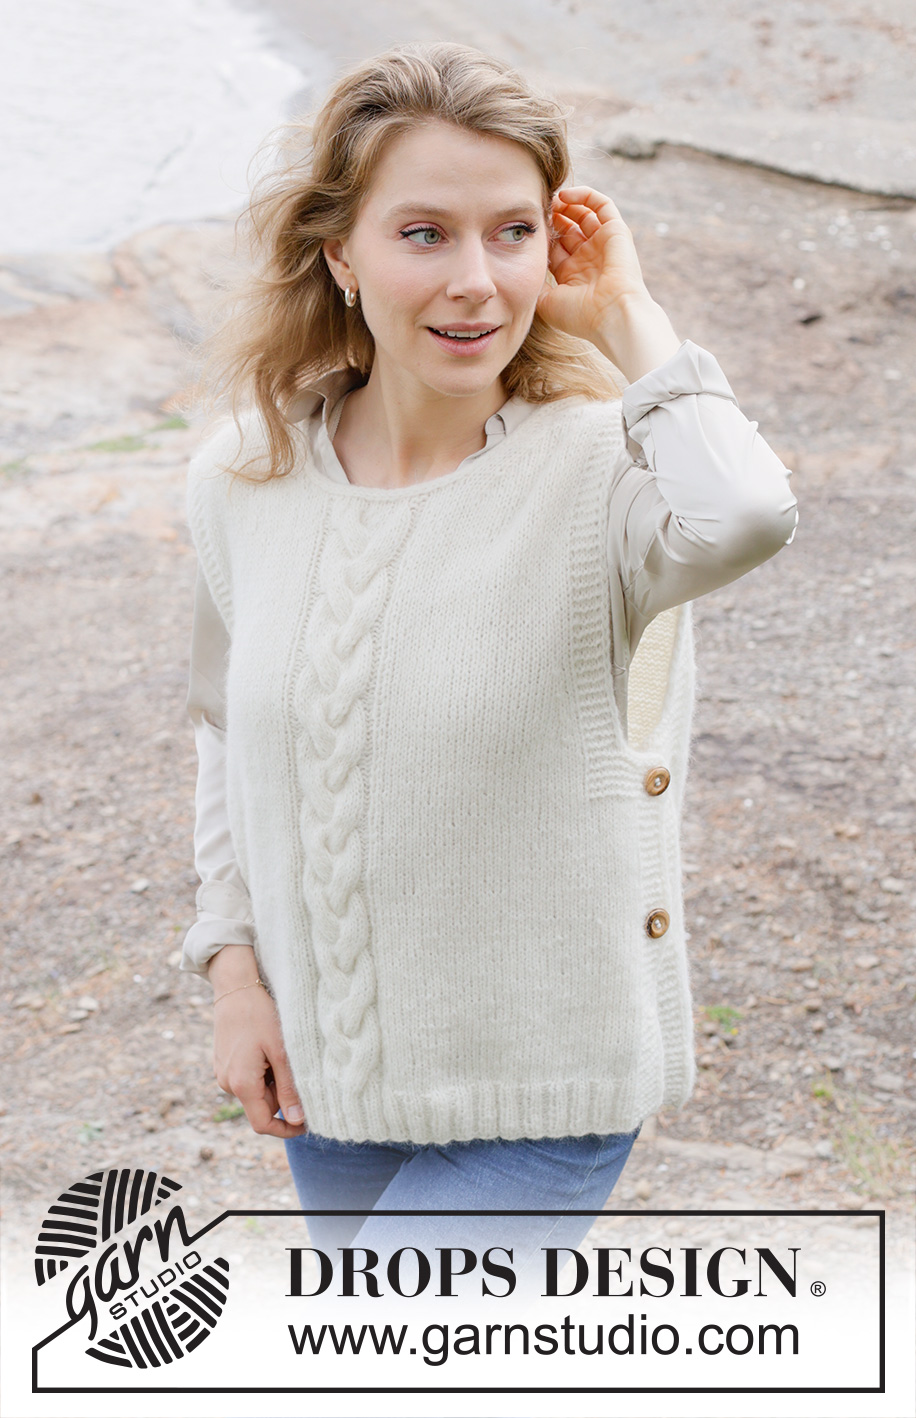
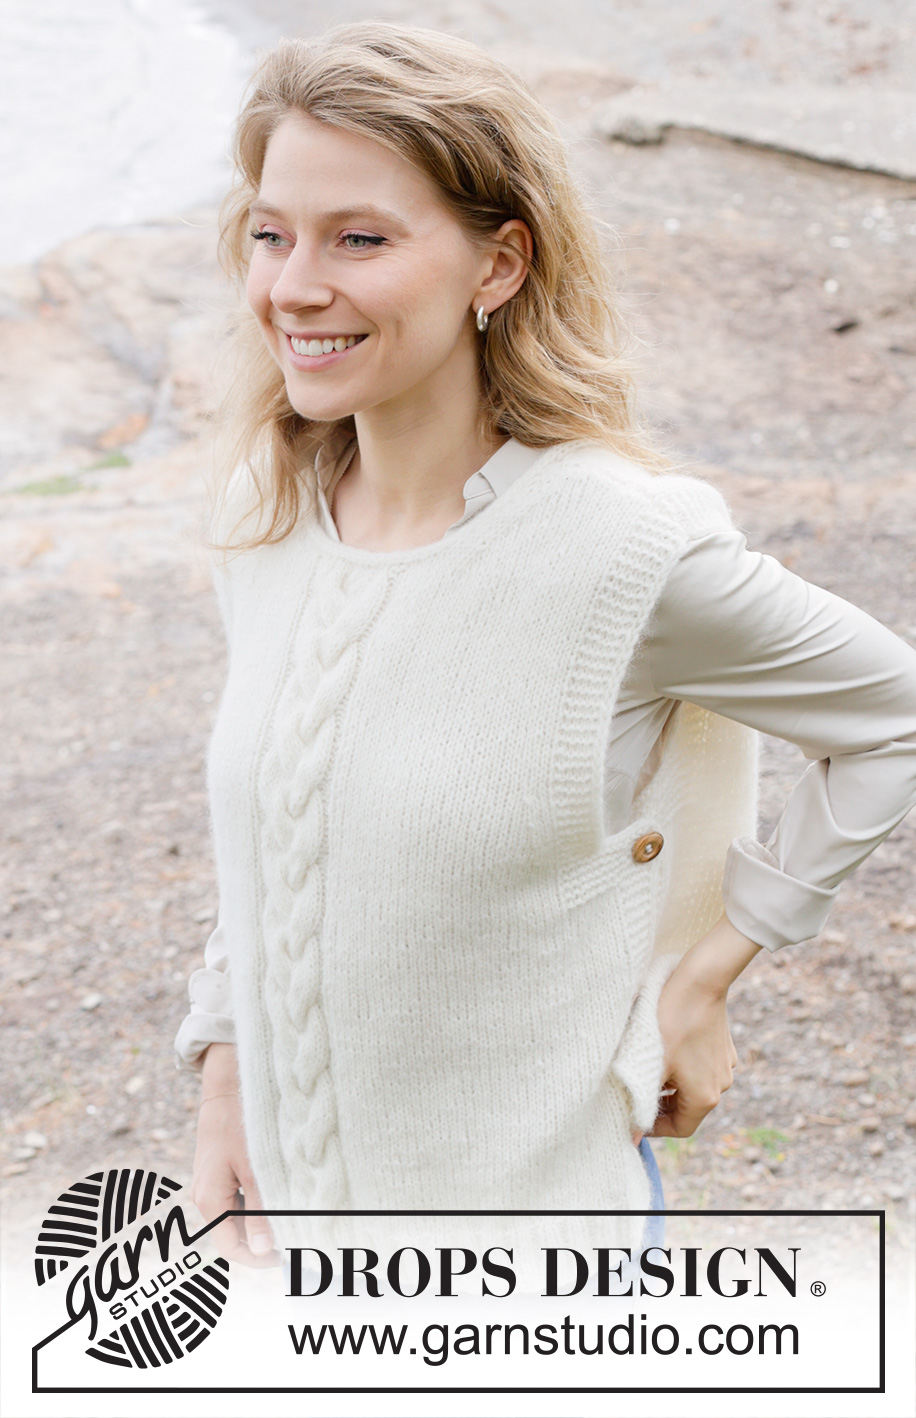
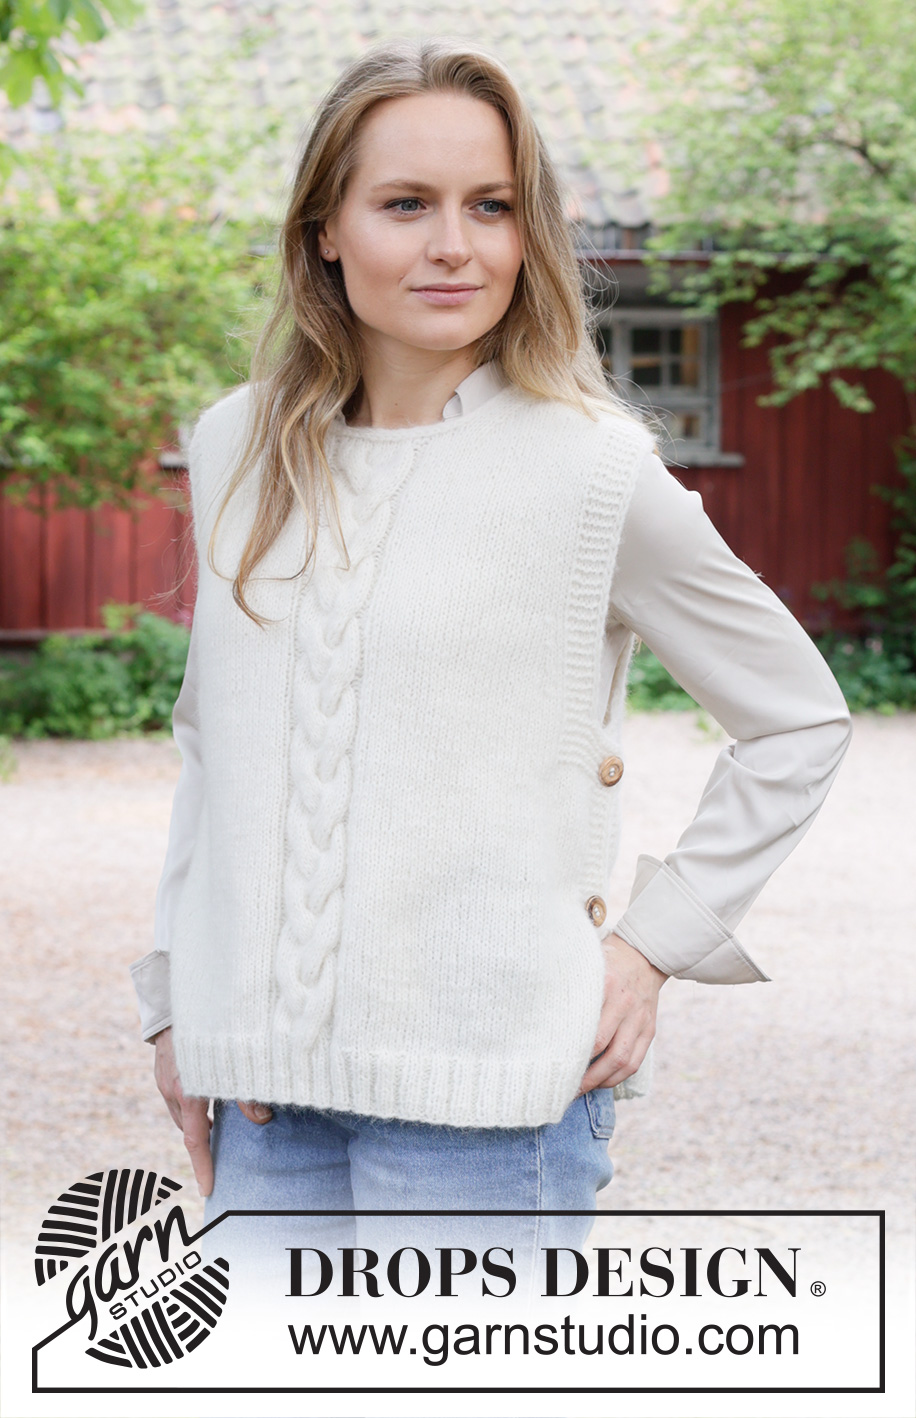
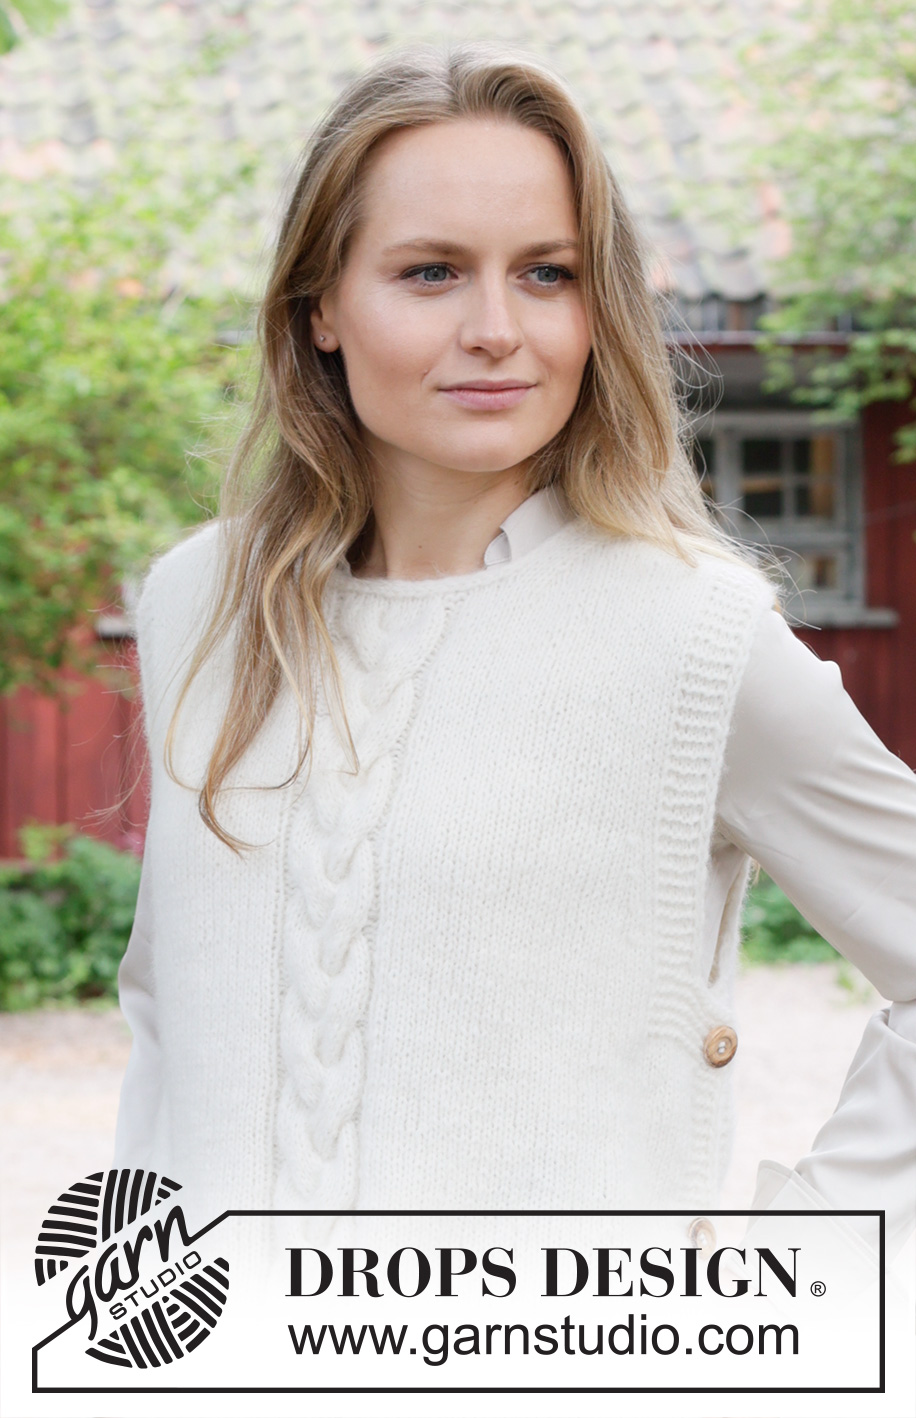
Knitted vest in DROPS Air. The piece is worked bottom up with cables, diagonal shoulders and split in sides. Sizes XS - XXL.
DROPS 252-31 |
||||||||||||||||
|
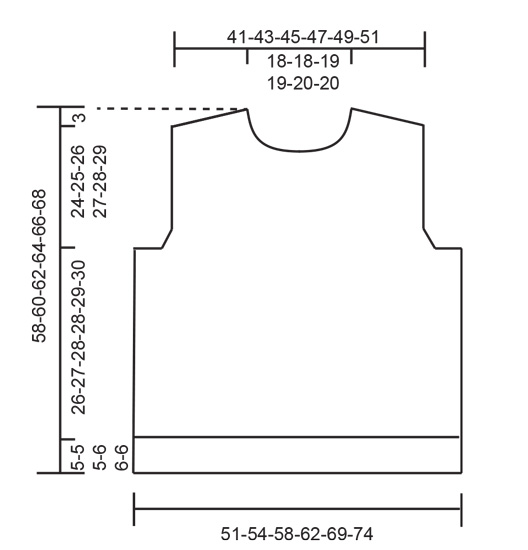
------------------------------------------------------- EXPLANATIONS FOR THE PATTERN: ------------------------------------------------------- GARTER STITCH (worked back and forth): Knit all rows, from both the right and wrong side. 1 ridge in height = knit 2 rows. BANDS WITH I-CORD: START OF ROW: Work the band as follows: Slip 1 stitch purl-wise, with yarn in front, knit 1, work 5 garter stitches. END OF ROW: Work the band as follows: Work until there are 7 stitches left on the row, work 5 garter stitches, slip 1 stitch purl-wise with yarn in front, knit 1. Work like this from both the right and wrong side. DECREASE TIP (for armholes and neckline): All decreases are worked from the right side! START OF ROW: Work the first 9 stitches as before, slip 1 stitch knit-wise, knit 1 and pass the slipped stitch over the knitted stitch (= 1 stitch decreased). END OF ROW: Work until there are 11 stitches left on the row, knit 2 together (= 1 stitch decreased), work to end of row as before. I-CORD CAST OFF: At the end of the round when the last stitch has been knitted up: Cast on 3 stitches from the right side. Slip these 3 cast-on stitches back onto the left needle with the working strand 3 stitches in on the left needle (when worked, the strand tightens to form a small tube). ROW 1 (right side): Knit 2, knit 2 twisted together. Slip the 3 stitches on the right needle back onto the left needle. Do not turn. Repeat ROW 1 until there are 3 stitches left on the right needle. Slip these 3 stitches back onto the left needle. Cast off. Sew a small stitch to join the beginning and end of the I-cord together. ------------------------------------------------------- START THE PIECE HERE: ------------------------------------------------------- VEST - SHORT OVERVIEW OF THE PIECE: The piece is worked back and forth with circular needle, bottom up. The front and back pieces are worked separately, sewn together at the shoulders and decorative buttons are sewn onto each side. FRONT PIECE: Cast on 96-104-112-120-136-144 stitches with circular needle size 4 mm and DROPS Air. Work rib from the wrong side as follows: 7 stitches according to BANDS WITH I-CORD, work rib (purl 2, knit 2) until there are 9 stitches left, purl 2 and 7 stitches according to BANDS WITH I-CORD. Work this rib back and forth for 5-5-5-6-6-6 cm. Change to circular needle size 5 mm. Work 1 row of stocking stitch with 7 band-stitches on each side. AT THE SAME TIME decrease 5-6-7-7-9-9 stitches evenly over the next 34-38-42-46-54-58 stitches, work diagram A.1 across the next 14 stitches (5 stitches increased in A.1), work stocking stitch and decrease 5-6-7-7-9-9 stitches evenly across the next 34-38-42-46-54-58 stitches, 7 band-stitches as before = 91-97-103-111-123-131 stitches. Work back from the wrong side with stocking stitch, band stitches and A.1 across the middle 19 stitches. Continue the pattern but now with A.2 across the middle 19 stitches to finished length. Remember to maintain the knitting tension. When the piece measures 28-29-30-31-32-33 cm, work an extra 7-7-8-8-9-9 garter stitches on each side (the bands now consist of the outermost 14-14-15-15-16-16 stitches on each side). When the piece measures 31-32-33-34-35-36 cm, start to decrease for the armholes as follows. Cast off 7-7-8-8-9-9 stitches on each side, then continue the bands across the outermost 7 stitches on each side and decrease for the armholes – read DECREASE TIP, every 4th-4th-4th-2nd-2nd-2nd row as follows: 1 stitch 1-2-3-5-8-11 times on each side = 75-79-81-85-89-91 stitches. Work until the piece measures 49-51-52-54-55-57 cm, after at least 3 rows without cabling in A.2 and with the next row from the right side. Work stocking stitch (bands as before) and decrease 5 stitches evenly over the stitches in A.2 =70-74-76-80-84-86 stitches. On the next row from the right side cast off the middle 16-16-18-18-20-20 stitches for the neckline and finish each shoulder separately. RIGHT SHOULDER: = 27-29-29-31-32-33 stitches. Continue with stocking stitch and the band-stitches as before. AT THE SAME TIME decrease for the neck – remember DECREASE TIP, every 2nd row 7 times = 20-22-22-24-25-26 stitches. When the piece measures 55-57-59-61-63-65 cm (approx. 3 cm left to finished length) cast off for the diagonal shoulders at the beginning of each row from the wrong side: 5-5-5-6-6-6 stitches 3 times, then cast off the remaining 5-7-7-6-7-8 stitches. The piece measures approx. 58-60-62-64-66-68 cm. LEFT SHOULDER: = 27-29-29-31-32-33 stitches. Continue with stocking stitch and the band-stitches as before. AT THE SAME TIME decrease for the neck, every 2nd row 7 times = 20-22-22-24-25-26 stitches. When the piece measures 55-57-59-61-63-65 cm (approx. 3 cm left to finished length) cast off for the diagonal shoulders at the beginning of each row from the right side: 5-5-5-6-6-6 stitches 3 times, then cast off the remaining 5-7-7-6-7-8 stitches. The piece measures approx. 58-60-62-64-66-68 cm. BACK PIECE: Cast on 96-104-112-120-136-144 stitches with circular needle size 4 mm and DROPS Air. Work rib from the wrong side as follows: 7 stitches according to bands with I-cord, work rib (purl 2, knit 2) until there are 9 stitches left, purl 2 and 7 stitches according to bands with I-cord. Work this rib back and forth for 5-5-5-6-6-6 cm. Change to circular needle size 5 mm. Work 1 row of stocking stitch with 7 band-stitches on each side. AT THE SAME TIME decrease 10-12-14-14-18-18 stitches evenly across the stocking stitches on the first row = 86-92-98-106-116-126 stitches. Continue with stocking stitch and band-stitches. When the piece measures 28-29-30-31-32-33 cm, work an extra 7-7-8-8-9-9 garter stitches on each side (the bands now consist of the outermost 14-14-15-15-16-16 stitches on each side). When the piece measures 31-32-33-34-35-36 cm, work as follows. Cast off 7-7-8-8-9-9 stitches on each side. Then continue the bands across the outermost 7 stitches on each side and decrease for the armholes every 4th-4th-4th-2nd-2nd-2nd row as follows: 1 stitch 1-2-3-5-8-11 times on each side = 70-74-76-80-84-86 stitches. When the piece measures 54-56-58-60-62-64 cm, cast off the middle 28-28-30-30-32-32 stitches for the neckline and finish each shoulder separately. DIAGONAL SHOULDERS: = 21-23-23-25-26-27 stitches. On the next row from the neck, cast off 1 stitch for the neckline = 20-22-22-24-25-26 stitches. When the piece measures 55-57-59-61-63-65 cm, cast off for the shoulders: 5-5-5-6-6-6 stitches on each row from the armhole 3 times, then cast off the remaining 5-7-7-6-7-8 stitches. The piece measures approx. 58-60-62-64-66-68 cm. ASSEMBLY: Sew the shoulder seams. Sew 2 decorative buttons onto each side of the vest; lay the band on the front piece over the band on the back piece and sew on the buttons through both layers. The top button is positioned 1 cm below the armhole, the second button 9-10 cm below the first. NECK: From the right side using circular needle size 4 mm. Start on one shoulder-seam and knit up 84 to 94 around the neckline. Change to circular needle size 5 mm and work I-CORD CAST OFF – read description above. |
||||||||||||||||
Diagram explanations |
||||||||||||||||
|
||||||||||||||||
 |
||||||||||||||||
 |
||||||||||||||||
Have you finished this pattern?Tag your pictures with #dropspattern #snowfallvest or submit them to the #dropsfan gallery. Do you need help with this pattern?You'll find 21 tutorial videos, a Comments/Questions area and more by visiting the pattern on garnstudio.com. © 1982-2026 DROPS Design A/S. We reserve all rights. This document, including all its sub-sections, has copyrights. Read more about what you can do with our patterns at the bottom of each pattern on our site. |
||||||||||||||||


With over 40 years in knitting and crochet design, DROPS Design offers one of the most extensive collections of free patterns on the internet - translated to 17 languages. As of today we count 324 catalogues and 12290 patterns translated into English (UK/cm).
We work hard to bring you the best knitting and crochet have to offer, inspiration and advice as well as great quality yarns at incredible prices! Would you like to use our patterns for other than personal use? You can read what you are allowed to do in the Copyright text at the bottom of all our patterns. Happy crafting!
Post a comment to pattern DROPS 252-31
We would love to hear what you have to say about this pattern!
If you want to leave a question, please make sure you select the correct category in the form below, to speed up the answering process. Required fields are marked *.