
Popular categories
Looking for a yarn?


Comments / Questions (22)
![]() Magda wrote:
Magda wrote:
Który to schemat A.2? Jestem już na wykonywaniu połączonych przodów i tyłów i nie bardzo rozumiem, który wzór mam wykonywać. Pogubiłam się w tym opisie. Pomocy
18.07.2025 - 12:03DROPS Design answered:
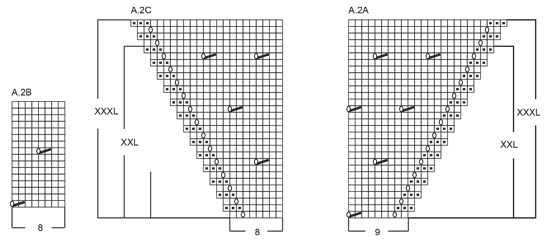
Witaj Magdo, jak połączysz tył i przody to przerabiasz już tylko schemat A.2B zgodnie z opisem - patrz część TYŁ & PRZODY. Pozdrawiamy!
18.07.2025 - 12:35
![]() Delphine W wrote:
Delphine W wrote:
Bonjour, me revoilà. L'ouvrage est presque fini mais je n'arrive pas à commencer les côtes 1/1 en augmentant en même temps pour finir le pull. Tout se met mal et je n'ai pas d'alternance 1 maille endroit - 1 maille envers pour les cotes. Merci de m'aider. Belle journée
18.07.2025 - 07:14DROPS Design answered:
Bonjour Delphine, ex. 1 maille end, vous augmentez 1 maille (jete, ce sera maille envers, vu sur l'endroit), 1 maille end, etc. Vous pouvez aussi augmenter dans le rang end, just avant les cotes. Bon tricot!
18.07.2025 - 07:41
![]() Ewa wrote:
Ewa wrote:
Tak zrobiłam :) bardzo dziękuję!
17.07.2025 - 11:23DROPS Design answered:
Witaj Ewo, koniecznie wyślij zdjęcie projektu do naszej galerii TUTAJ. Pozdrawiamy!
17.07.2025 - 17:41
![]() Ewa wrote:
Ewa wrote:
Ale w ten sposób tyko zaburza się ładna linia dodawanych oczek. Czy ma to jakiś cel?
17.07.2025 - 10:19DROPS Design answered:
Witaj Ewo, tak jest zaprojektowana ta bluzeczka. Jeśli uważasz, że będzie to wyglądać lepiej po modyfikacjach, to oczywiście śmiało je zastosuj. Sama robię to bardzo często :) Pozdrawiamy!
17.07.2025 - 10:29
![]() Ewa wrote:
Ewa wrote:
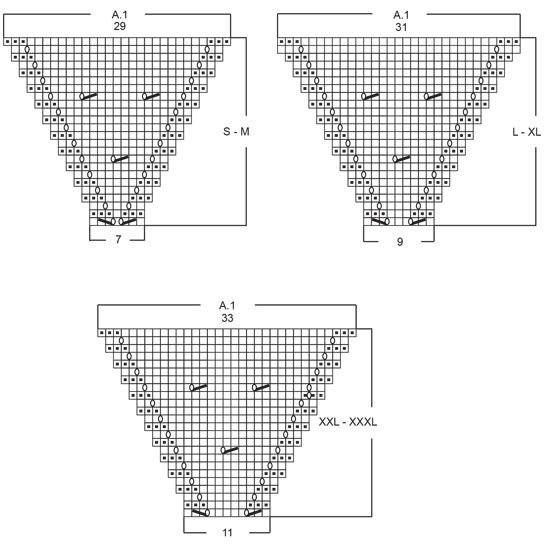
Dzień dobry, czy w schemacie A.1 dla rozm. L-XL na pewno przed ostatnim narzutem (w przedostatnim rzędzie) jest 3 oczka prawe?
15.07.2025 - 14:18DROPS Design answered:
Witaj Ewo, tak jest. Powodzenia!
16.07.2025 - 08:42
![]() Delphine W wrote:
Delphine W wrote:
Bonjour, Dans le paragraphe DOS & DEVANT - rang 1, vous parlez du diagramme A.2B et puis rangs 2, et suivants, vous parlez de A.2. Quel diagramme dois-je choisir à partir du rang 2? Merci
26.06.2025 - 19:05DROPS Design answered:
Bonjour Delphine, continuez toujours A.2B, c'est le diagramme qui correspond au point fantaisie, sans les augmentations de l'encolure/des emmanchures. Bon tricot!
27.06.2025 - 07:51
![]() Sigrid wrote:
Sigrid wrote:
Hvor finner jeg diagram for A2b?
12.04.2025 - 00:00DROPS Design answered:
Hei Sigrid, Diagram A.2b er til venstre på bunnen av diagrammene, før målskissen. God påske!
13.04.2025 - 17:58
![]() Ywe Hellman wrote:
Ywe Hellman wrote:
"BAKSTYCKE: Lägg upp 52-54-60-64-70-74 maskor på rundsticka 3 och sticka 3 rätstickning. Byt till rundsticka 4, och sticka så här:" 3 vad rätstickning? Varv? Cm? Maskor?
21.10.2024 - 15:44DROPS Design answered:
Hej. Tack för info, det ska vara 6 varv rätstickning (detta är nu rättat i texten). Mvh DROPS Design
22.10.2024 - 10:12
![]() Jen wrote:
Jen wrote:
I have been following knitting patterns for nearly 60 years but after I finished A1 I gave up. I tried multi times but it has defeated me. I wanted to make it for my granddaughter. 😔
10.10.2024 - 18:49DROPS Design answered:
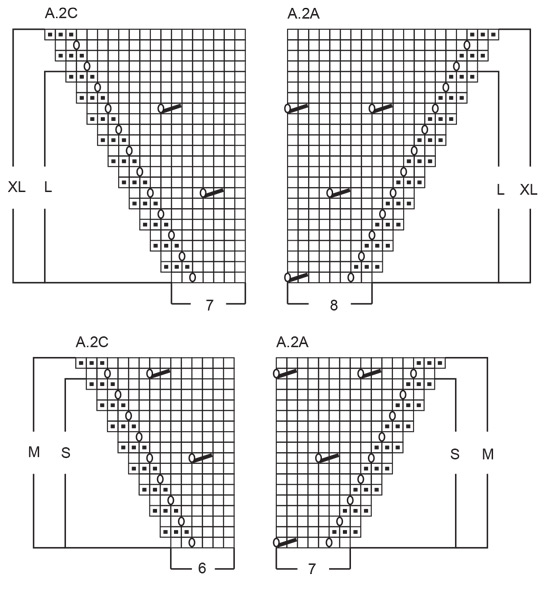
Dear Jen, when A.1 is done, you have 29-31 or 33 sts on needle (see size), then work these stitches as follows (seen from RS): A.2A (=7, 8 or 9 sts), repeat the 8 sts A.2B a total of 2 times (16 sts) and finish with A.2C (= 6, 7 or 8 sts) so that in the first size you get: 7+16+6= 29 sts, in the next 2 sizes: 8+16+7=31 sts and last 2 sizes: 9+16+8 =33 sts , now you continue increasing on each side as before and as shown in A.2A and A.2C and continue lace pattern inbetween with A.2B. Happy knitting!
11.10.2024 - 09:46
![]() Karina Shantilal wrote:
Karina Shantilal wrote:
I don't understand how to continue with the A2 pattern once you've attached the sides. I tried just repeating A2B but it doesn't look right.
28.07.2024 - 19:21DROPS Design answered:
Dear Karina, you worked A.2b with A.2a and C before in the front pieces, and the other 2 charts are for increases that you won't be working here. So you simply continue with A.2b. When you continue, continue with the next row after the last row of A.2b worked in the front pieces (for example, if you ended on the 2nd row, continue with the 3rd one, don't restart the pattern). It's important to align A.2b over the front pieces, so that the position of the pattern matches the position before; you can work incomplete repeats of the pattern at the beginning and end of the row to adjust this. Happy knitting!
28.07.2024 - 23:38
|
||||||||||||||||
Freshwater Pearl Top#freshwaterpearltop |
||||||||||||||||
 |
 |
|||||||||||||||
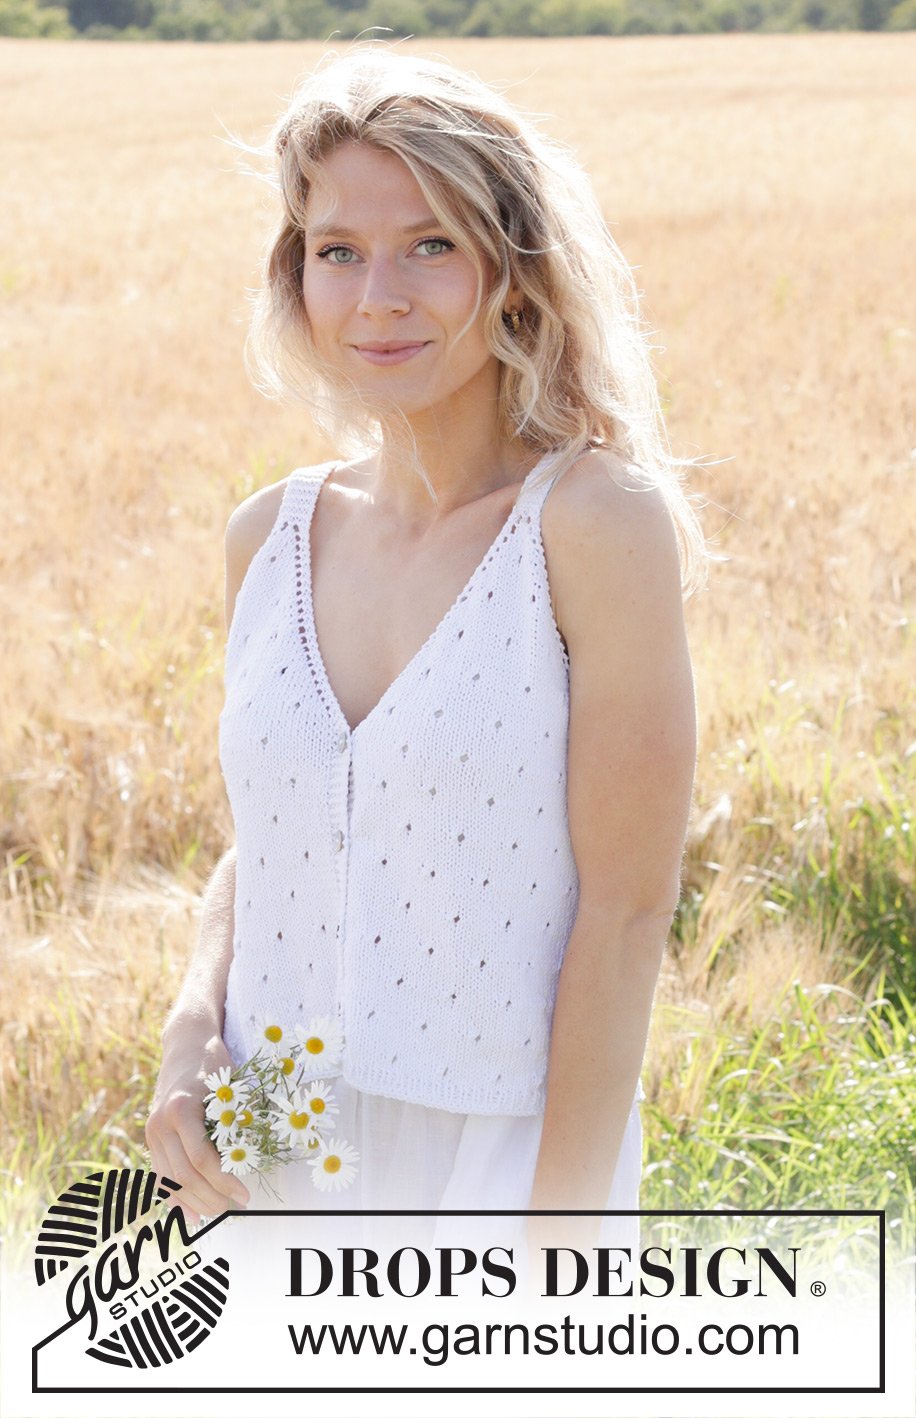
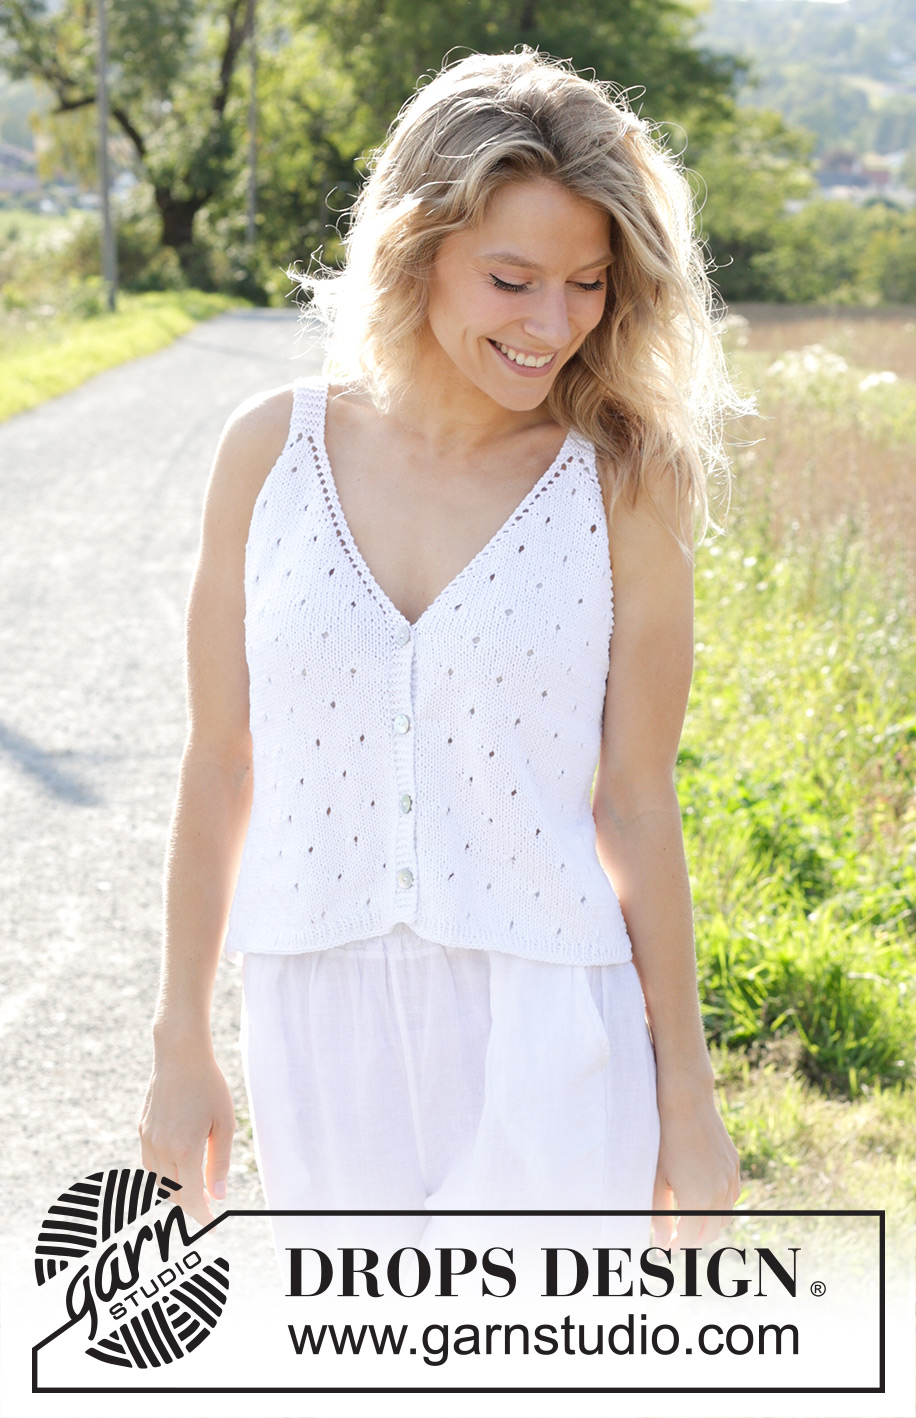
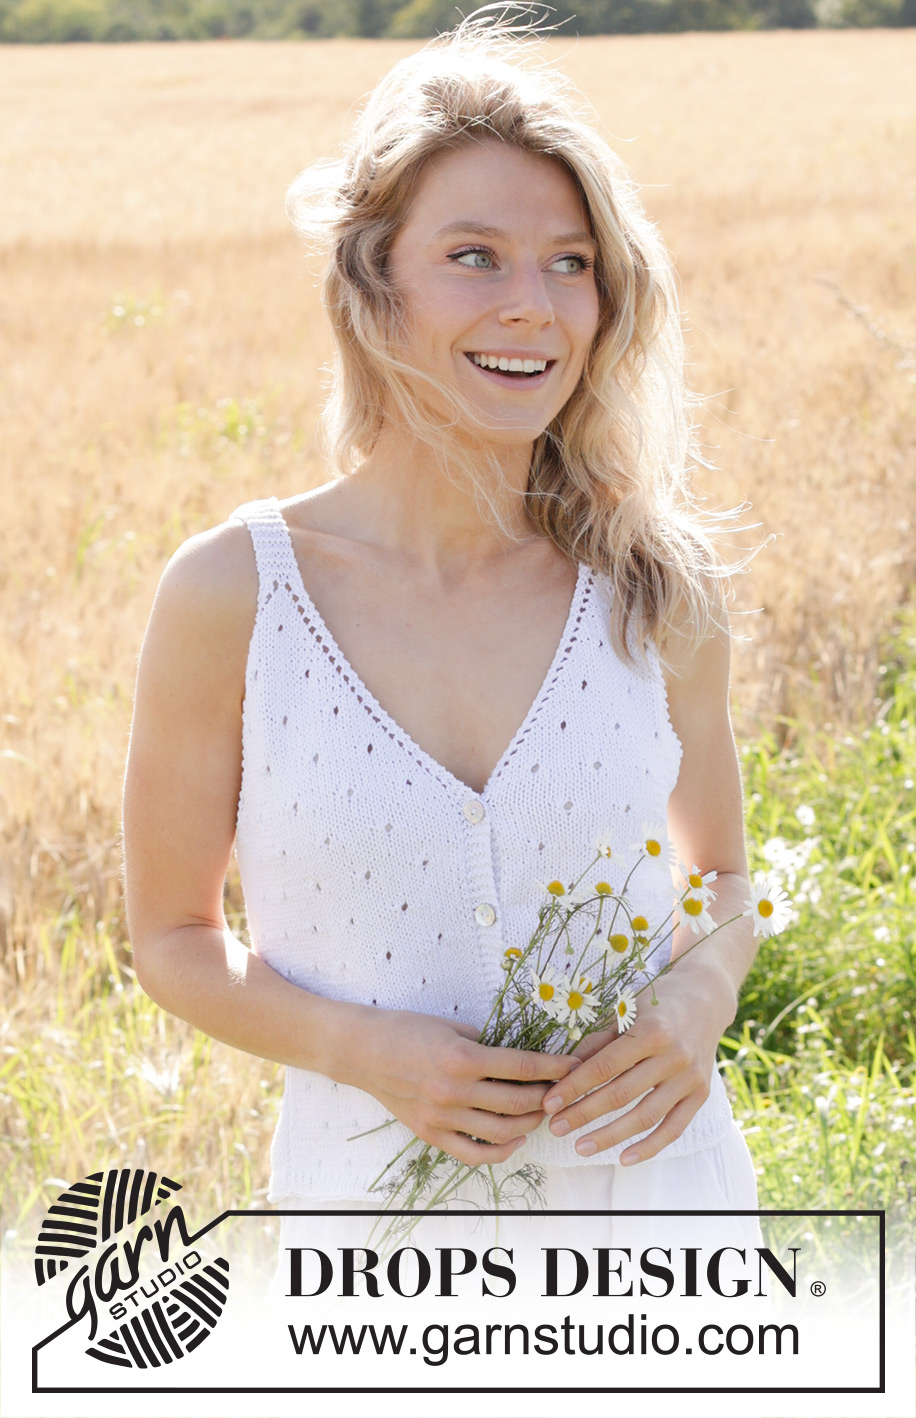
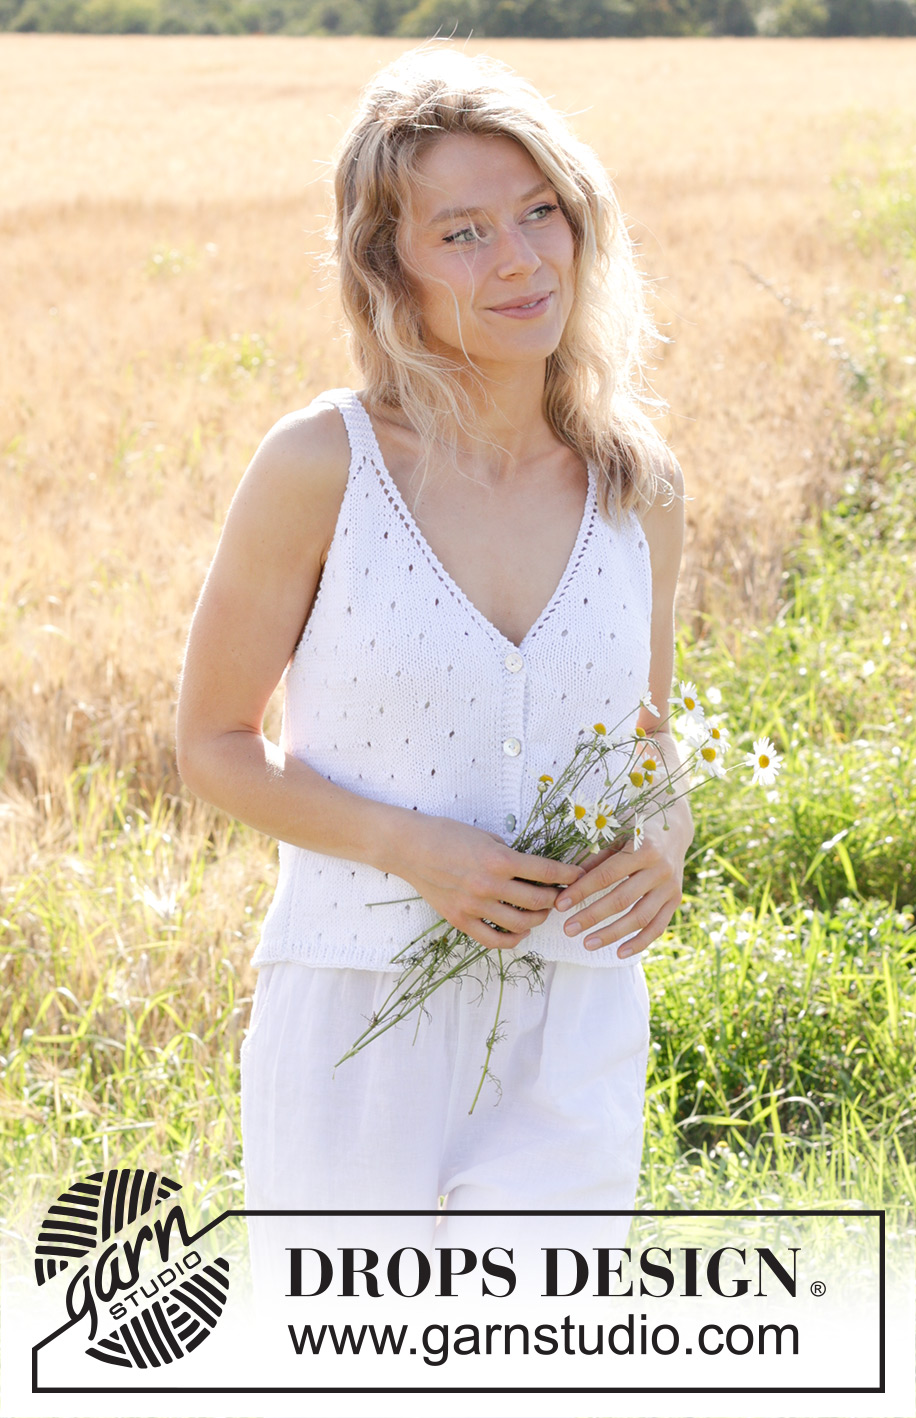
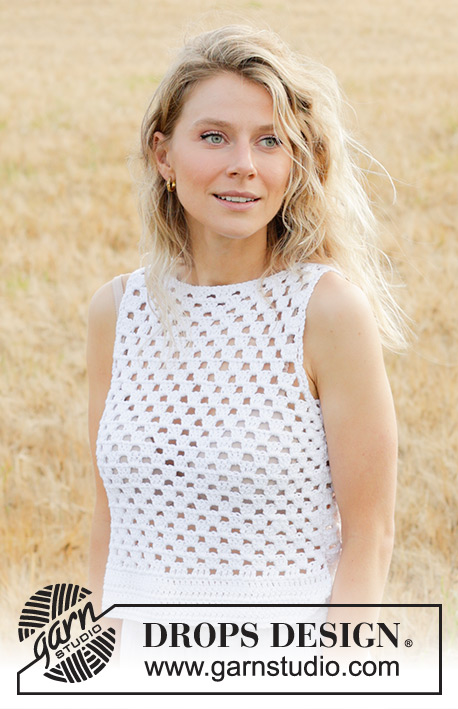
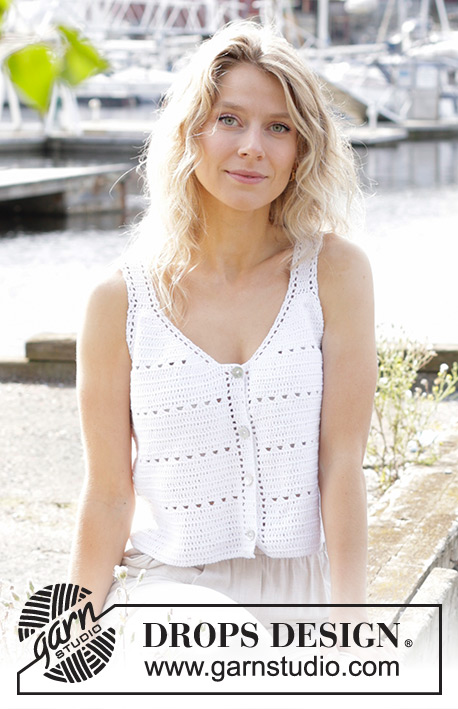
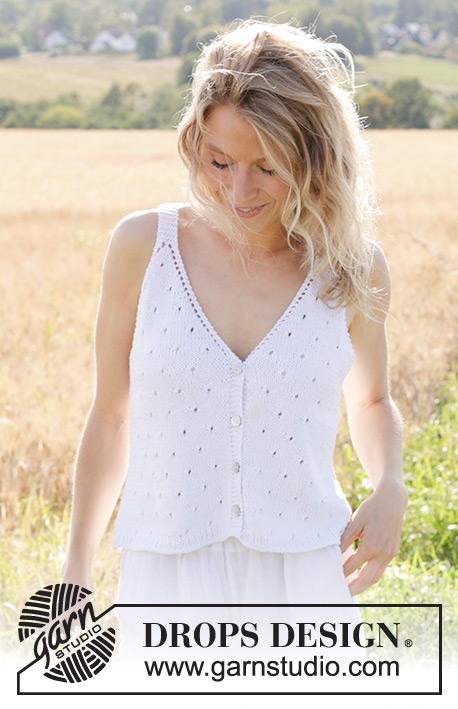
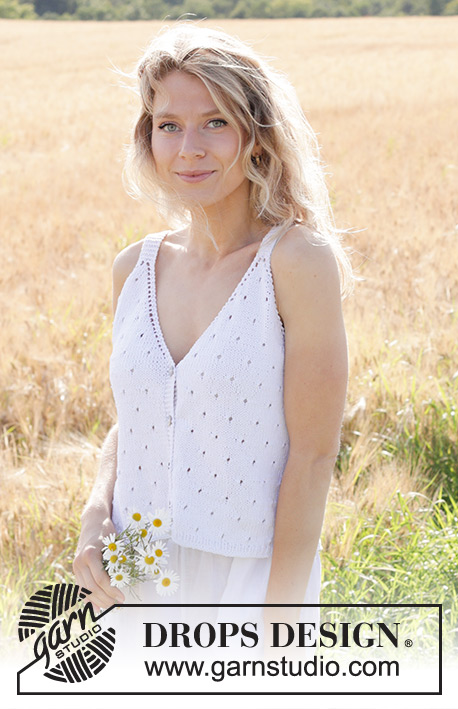
Knitted top/ vest in DROPS Cotton Light. Piece is knitted top down with lace pattern on front pieces and V-neck. Size: S - XXXL
DROPS 249-24 |
||||||||||||||||
|
---------------------------------------------------------- EXPLANATION FOR THE PATTERN: ---------------------------------------------------------- GARTER STITCH (when working back and forth): Knit on all rows, i.e. knit from right side and knit from wrong side. 1 ridge vertically = knit 2 rows. PATTERN: See diagrams A.1 and A.2. Choose diagram for correct size. Diagrams show all rows in pattern seen from the right side. INCREASE TIP-1 (band): All increases are done from the right side. INCREASE AS FOLLOWS ON RIGHT FRONT PIECE: Work until 2 stitches remain on needle, knit 1 in front and back loop of next stitch (= 1 stitch increased), knit 1. INCREASE AS FOLLOWS ON LEFT FRONT PIECE: Knit 1, knit 1 in front and back loop next stitch (= 1 stitch increased). INCREASE TIP-2 (back piece): All increases are done from the right side. Increase 1 stitch by making 1 yarn over. On next row (= wrong side) purl the yarn over to make a hole. Then work the new stitches in stocking stitch. INCREASE TIP-3 (sides of body): All increases are done from the right side. Increase 1 stitch on each side of marker thread as follows: Work until 2 stitches remain before marker thread, make 1 yarn over, knit 4 (marker thread is in the middle of these 4 stitches), make 1 yarn over (= 2 stitches increased). On next row work yarn overs twisted to avoid holes. Then work the new stitches in stocking stitch. INCREASE TIP-4 (evenly): Increase 1 stitch by making 1 yarn over. On next row work yarn over twisted to avoid holes DECREASE TIP-1 (sides of body): All decreases are done from the right side! Decrease 1 stitch on each side of marker thread as follows: Work until 3 stitches remain before marker thread, knit 2 together, knit 2 (marker thread is between these 2 stitches), slip 1 stitch knitwise, knit 1, pass slipped stitch over stitch worked (= 2 stitches decreased). Decrease the same way at the other marker thread. BUTTONHOLES (top down): Decrease for buttonholes on right band (when garment is worn). Decrease from right side when 3 stitches remain on row as follows: Make 1 yarn over, knit the next 2 stitches together, knit last stitch. On next row (wrong side) knit the yarn over to make a hole. Decrease first buttonhole when approx. 1 cm has been worked after last increase on band. Then decrease the next 3 buttonholes, approx. 7-7½-7½-8-8-8 cm apart. ---------------------------------------------------------- START THE PIECE HERE: ---------------------------------------------------------- TOP - SHORT OVERVIEW OF THE PIECE: Worked back and forth on needles, top down. Work in garter stitch on shoulder straps, lace pattern on front piece and stocking stich on back piece. Begin by casting on stitches for shoulder strap on right front piece, and work downwards while at the same time increasing in each side of piece for armhole and V-neck. When armhole and V-neck are done, put right front piece aside while working the back piece. When back piece has been worked down to armholes, work left front piece the same way as right front piece. At the armholes slip front pieces and back piece on to same circular needle, and work body downwards back and forth on circular needle. Then fasten the shoulder straps to back piece. RIGHT FRONT PIECE: Cast on 7-7-9-9-11-11 stitches on circular needle size 3 mm with DROPS Cotton Light and work in GARTER STITCH - read explanation above. When shoulder strap measures 7-7-7-7-7-8 cm, insert 1 marker, this marks the shoulder. Then work in garter stitch until shoulder strap measures 11-11-11-11-11-13 cm, finish with a row from wrong side. Switch to circular needle size 4 mm and work PATTERN - read explanation above, i.e. work A.1 and increase in each side for armhole and V-neck as shown in diagram (1st row = right side). REMEMBER THE KNITTING TENSION! When A.1 has been worked, there are 29-29-31-31-33-33 stitches on needle. Work next row as follows from right side: Work A.2A, work A.2B 2 times in total, work A.2C. Continue pattern like this. When 4 rows remain in A.2 (see bracket for correct size) and next row is worked from right side, increase 1 stitch for band at the end of row – read INCREASE TIP-1. Repeat increase on next row from right side (these 2 stitches make the neck edge go over to band). When A.2 has been worked, there are 47-49-53-57-61-65 stitches on row and piece measures approx. 18-19-20-21-22-24 cm from marker on shoulder strap. Cut the yarn, put piece aside and work the back piece as explained under. BACK PIECE: Cast on 52-54-60-64-70-74 stitches on circular needle size 3 mm and work 3 ridges. Switch to circular needle size 4 mm, and work as follows: ROW 1 (= right side): 3 stitches in garter stitch, increase 1 stitch for armhole – read INCREASE TIP-2, knit until 3 stitches remain, increase 1 stitch for armhole, work 3 stitches in garter stitch. ROW 2 (= wrong side): 3 stitches in garter stitch, purl (purl the yarn overs to make holes) until 3 stitches remain, work 3 stitches in garter stitch. Repeat 1st and 2nd row until 16-17-18-20-21-23 increases have been done in total in each side = 84-88-96-104-112-120 stitches, and last row is worked from wrong side. Cut the yarn, put piece aside and work the left front piece as explained under. LEFT FRONT PIECE: Cast on 7-7-9-9-11-11 stitches on circular needle size 3 mm, and work in garter stitch. When shoulder strap measures 7-7-7-7-7-8 cm, insert 1 marker, this marks the shoulder. Then work in garter stitch until shoulder strap measures 11-11-11-11-11-13 cm, finish with a row from wrong side. Switch to circular needle size 4 mm and work PATTERN - read explanation above, i.e. work A.1 and increase in each side for V-neck and armholes as shown in diagram (1st row = right side). When A.1 has been worked, there are 29-29-31-31-33-33 stitches on needle. Work next row as follows from right side: Work A.2A, work A.2B 2 times in total, work A.2C. Continue pattern like this. When 4 rows remain in A.2 and next row is worked from right side, increase 1 stitch for band at the beginning of row – read INCREASE TIP-1. Repeat increase on next row from right side (these 2 stitches make the neck edge go over to a band). When A.2 has been worked, there are 47-49-53-57-61-65 stitches on row and piece measures approx. 18-19-20-21-22-24 cm from marker on shoulder strap. Do not cut the yarn. Now put parts together for body as explained below. BODY: Begin from right side and work part in the following order: Left front piece, back piece, right front piece: ROW 1 (= right side): Work 5 stitches in garter stitch (= band), continue pattern as shown in A.2B until 3 stitches remain on left front piece, work 3 stitches in garter stitch, cast on 6-8-8-10-14-18 new stitches on row (= in the side), work 3 stitches in garter stitch, knit 78-82-90-98-106-114, 3 stitches in garter stitch from back piece, cast on 6-8-8-10-14-18 new stitches on row (= in the side), work 3 stitches in garter stitch, continue pattern as shown in A.2B until 5 stitches remain on right front piece, work 5 stitches in garter stitch (= band) = 190-202-218-238-262-286 stitches. Insert 1 marker thread in each side on body, in the middle of the 6-8-8-10-14-18 stitches that were cast on in each side. Move the marker threads upwards when working - marker threads should be used for decrease and increase in the sides. ROW 2 (= wrong side): Work 5 stitches in garter stitch, continue A.2 until 6-7-7-8-10-12 stitches remain before first marker thread, work 12-14-14-16-20-24 stitches in garter stitch (marker thread is in the middle of these stitches), purl 78-82-90-98-106-114, work 12-14-14-16-20-24 stitches in garter stitch (marker thread is in the middle of these stitches), continue A.2 until 5 stitches remain, work 5 stitches in garter stitch. ROW 3 (= right side): Work 5 stitches in garter stitch, continue A.2 until 6-7-7-8-10-12 stitches remain before first marker thread, work 12-14-14-16-20-24 stitches in garter stitch, knit 78-82-90-98-106-114, 12-14-14-16-20-24 stitches in garter stitch, continue A.2 until 5 stitches remain, work 5 stitches in garter stitch - remember BUTTONHOLES – read explanation above. ROW 4 (= wrong side): Work 5 stitches in garter stitch, continue A.2 until 6-7-7-8-10-12 stitches remain before first marker thread, work 12-14-14-16-20-24 stitches in garter stitch (marker thread is in the middle of these stitches), purl 78-82-90-98-106-114, 12-14-14-16-20-24 stitches in garter stitch (marker thread is in the middle of these stitches), continue A.2 until 5 stitches remain, work 5 stitches in garter stitch. Then work back and forth with 5 band stitches in garter stitch in each side towards mid front, A.2 on front pieces and stocking stitch on back piece. Work A.2 as far out towards the marker thread as possible in each side - work the stitches that do not fit a whole repetition towards the marker thread in stocking stitch. When piece measures 6-6-7-7-8-8 cm from where the parts were put together, decrease 1 stitch on each side of both marker threads - read DECREASE TIP (= 4 stitches decreased). Repeat decrease when piece measures 13-13-14-14-15-15 cm from where parts were put together = 182-194-210-230-254-278 stitches. When piece measures 19-19-20-21-22-22 cm from where the parts were put together, increase 1 stitch on each side of both marker threads - read INCREASE TIP-3 (= 4 stitches increased) = 186-198-214-234-258-282 stitches. Work until piece measures 24-25-26-26-27-27 cm from where parts were put together – adjust to work a few row in stocking stitch after a row with lace pattern on front pieces. On next row (= right side) begin rib while at the same time increasing 17-19-19-21-23-27 stitches evenly on row (do not increase over bands) – read INCREASE TIP-4 = 203-217-233-255-281-309 stitches, work as follows: Switch to circular needle size 3 mm, work band as before, work rib (= knit 1/purl 1 - remember increase) until 6 stitches remain, knit 1 stitch and band as before. When rib measures 2-2-2-3-3-3 cm cast off. Piece measures approx. 44-46-48-50-52-54 cm from marker on shoulder strap. ASSEMBLY: Sew shoulder straps to back piece - begin seam at the edge in each side and sew stitch against stitch. Sew the buttons on to the left band. |
||||||||||||||||
Diagram explanations |
||||||||||||||||
|
||||||||||||||||
 |
||||||||||||||||
 |
||||||||||||||||
 |
||||||||||||||||
 |
||||||||||||||||
Have you finished this pattern?Tag your pictures with #dropspattern #freshwaterpearltop or submit them to the #dropsfan gallery. Do you need help with this pattern?You'll find 24 tutorial videos, a Comments/Questions area and more by visiting the pattern on garnstudio.com. © 1982-2026 DROPS Design A/S. We reserve all rights. This document, including all its sub-sections, has copyrights. Read more about what you can do with our patterns at the bottom of each pattern on our site. |
||||||||||||||||


With over 40 years in knitting and crochet design, DROPS Design offers one of the most extensive collections of free patterns on the internet - translated to 17 languages. As of today we count 324 catalogues and 12290 patterns translated into English (UK/cm).
We work hard to bring you the best knitting and crochet have to offer, inspiration and advice as well as great quality yarns at incredible prices! Would you like to use our patterns for other than personal use? You can read what you are allowed to do in the Copyright text at the bottom of all our patterns. Happy crafting!
Post a comment to pattern DROPS 249-24
We would love to hear what you have to say about this pattern!
If you want to leave a question, please make sure you select the correct category in the form below, to speed up the answering process. Required fields are marked *.