
Popular categories
Looking for a yarn?


Comments / Questions (48)
![]() Agnès wrote:
Agnès wrote:
Peut on tricoter ce modele en aiguille droite et comment stp ?
12.02.2026 - 11:27DROPS Design answered:
Bonjour Agnès, cette leçon vous donnera quelques astuces. Bon tricot!
12.02.2026 - 18:12
![]() Lisbeth wrote:
Lisbeth wrote:
Drops 236-15, modell ai-398: är tanken att det ska bli hål när man ökar en maska till raglan o sedan ska sticka A. 2 över 1 maska?
07.02.2026 - 08:46DROPS Design answered:
De ökade maskorna stickas vridna på följande varv så att det inte bildas hål.
19.02.2026 - 19:06
![]() Melinda wrote:
Melinda wrote:
The pattern for the sleeve length is in question here… longer sleeves for the smaller pattern? Continue working until the sleeve measures 37-36-34-33-32-30 cm = 14½"-14¼"-13⅜"-13"-12½"-11¾" from the division?
10.12.2025 - 18:04DROPS Design answered:
Hi Melinda, We recommend shorter sleeves for the larger sizes due to wider shoulders and a longer yoke. However, this is of course adjustable. You can try the jumper on and work the sleeves to your desired length. Regards, Drops Team.
11.12.2025 - 06:37
![]() Lynn wrote:
Lynn wrote:
I am working on row 2 of raglan and im not sure what to do. Specifically, the pattern says work A.2 over 1 stitch, but in row 2 I am supposed to pearl 2 stitches and I don't have two available before I am to knit A.3 over next 48. Please help!
20.11.2025 - 18:44DROPS Design answered:
Dear Lynn, on 1st row you made 1 yarn over before A.2 = this is now the 1st stitch on 2nd row in A.2; same for A.4, you made a YO on first round after A.4, now you have 2 sts for A.4. Happy knitting!
21.11.2025 - 07:40
![]() Bianca wrote:
Bianca wrote:
Hello! I have a question regarding the division for body and sleeves, I am not sure where to start counting the 2 stitches that are to be knitted. Where should I start based on the stitch markers (I was thinking they could help me orrient myself). Thank you!
30.06.2025 - 23:41DROPS Design answered:
Dear Bianca, these 2 stitches are the first 2 stitches of the round (the marker-thread 1 is between these 2 stitches). Happy knitting!
01.07.2025 - 08:45
![]() Sba wrote:
Sba wrote:
I am not sure what I'm doing wrong started with 112 st for the raglan but after doing the increase first round missing 2 stiches...I feel the markers placement and the increase do not match up could you please check?
23.06.2025 - 23:29DROPS Design answered:
Dear Sba, you should work like this (112 sts): Knit 2, increase 1 stitch for raglan, work A.1, increase 1 stitch for raglan, knit 2, increase 1 stitch for raglan, work A.2, then A.3 then A.4 , increase 1 stitch for raglan, knit 2, increase 1 stitch for raglan, work A.1 , increase 1 stitch for raglan, knit 2, increase 1 stitch for raglan, work A.2 then A.3 and A.4 and increase 1 stitch for raglan, => you have increased 8 sts, 1 stich on each side of the knit 2 with a marker thread in between. Happy knitting!
25.06.2025 - 15:42
![]() Heike wrote:
Heike wrote:
Meine Frage hat sich erledigt. Hab es verstanden.
29.05.2025 - 15:56
![]() Heike wrote:
Heike wrote:
Hallo, das ist mein erster Pullover von drops design und ich verstehe nicht was die Zahl in der Klammer bei der Angabe A3 über die nächsten 40 Maschen (5x in der Breite) bedeutet. Danke schon mal für die Antwort.
29.05.2025 - 15:45DROPS Design answered:
Liebe Heike, A.3 besteht aus 8 Maschen in der Breite, diese 8 Maschen stricken Sie insgesamt 5 Mal, so haben Sie 40 Maschen mit A.3 gestrickt. Viel Spaß beim Stricken!
30.05.2025 - 09:00
![]() Lucie wrote:
Lucie wrote:
Bonsoir, J'ai une question au niveau de l'empiècement : il est expliqué "Tricoter 2 mailles endroit (le fil-marqueur-1 est entre ces 2 mailles), augmenter 1 maille pour le raglan, tricoter A.1 au-dessus des 10 mailles suivantes, augmenter 1 maille pour le raglan 2 mailles endroit" Mais pour le raglan je dois augmenter avant et après le marqueur, donc deux augmentations... Dois-je en faire qu'une, ou bien deux ? Je suis un peu perdue...
10.05.2025 - 19:19DROPS Design answered:
Bonjour Lucie, vous allez augmenter avant /après les 2 mailles du raglan avec 1 fil marqueur entre les 2, les tours commencent par ces 2 mailles du raglan, vous augmentez donc juste après ces 2 mailles puis, à la fin du tour vous augmentez 1 maille. = juste avant ces 2 mailles, vous aurez ainsi bien augmenté à chaque fil marqueur. Bon tricot!
12.05.2025 - 07:54
![]() Stefania Bontorin wrote:
Stefania Bontorin wrote:
Buongiorno, è possibile fare in modo di ottenere uno scollo più aderente e anatomico facendo alcuni giri di ferri aumentati sul tratto posteriore e sulle maniche? Se si quanti giri e per quanti punti? Grazie
31.03.2025 - 06:32DROPS Design answered:
Buonasera Stefania, per un aiuto così personalizzato può rivolgersi al suo rivenditore DROPS di fiducia. Buon lavoro!
01.04.2025 - 22:14
|
|||||||||||||||||||
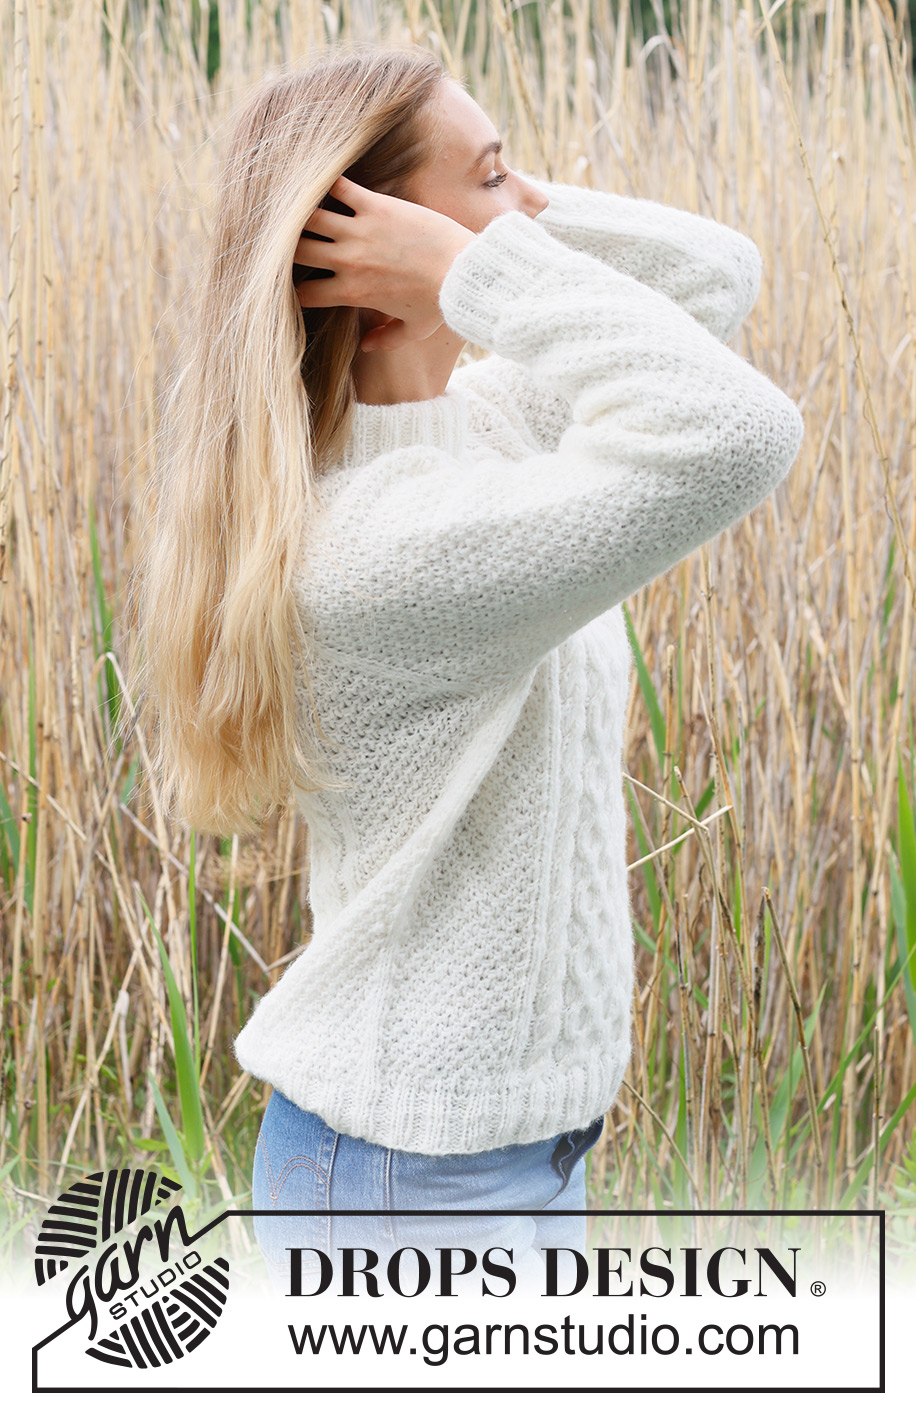
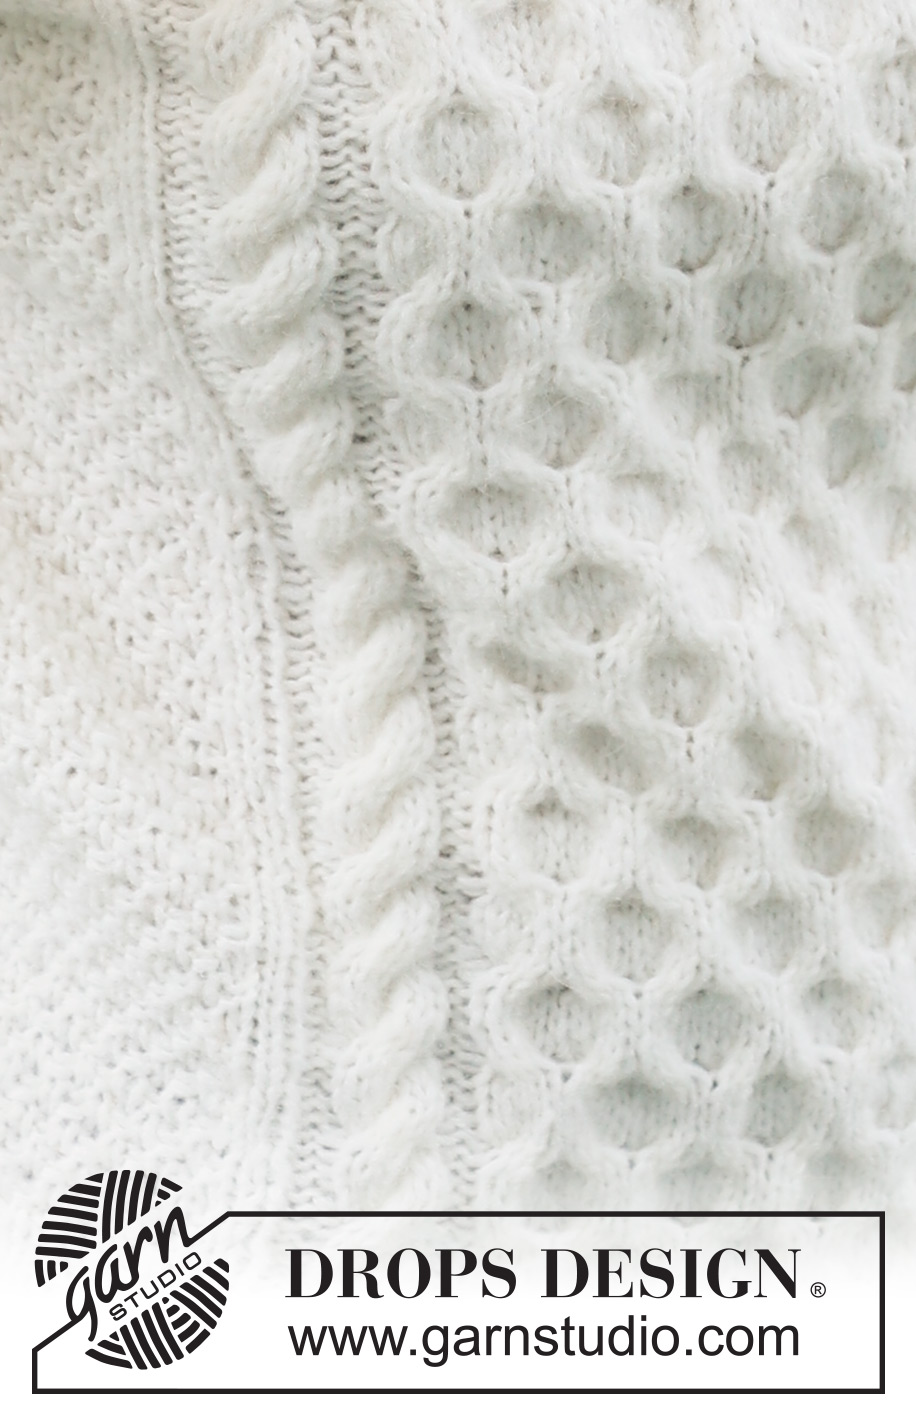
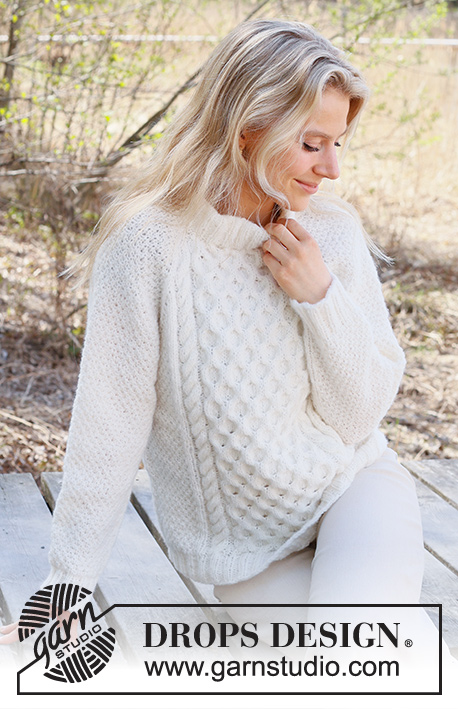
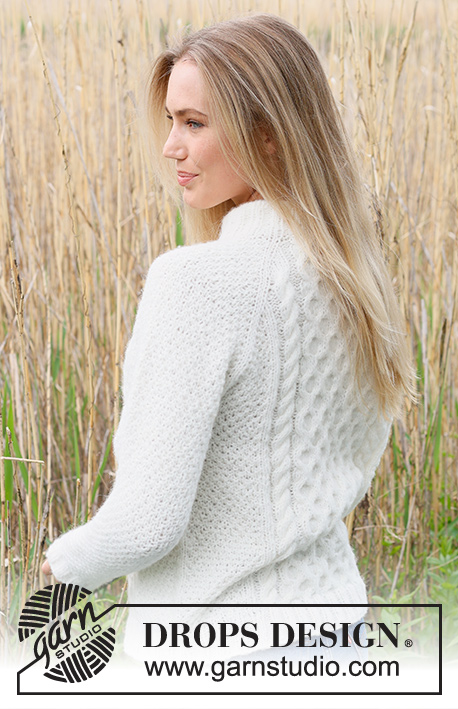
Cream Wafer#creamwafersweater |
|||||||||||||||||||
 |
 |
||||||||||||||||||
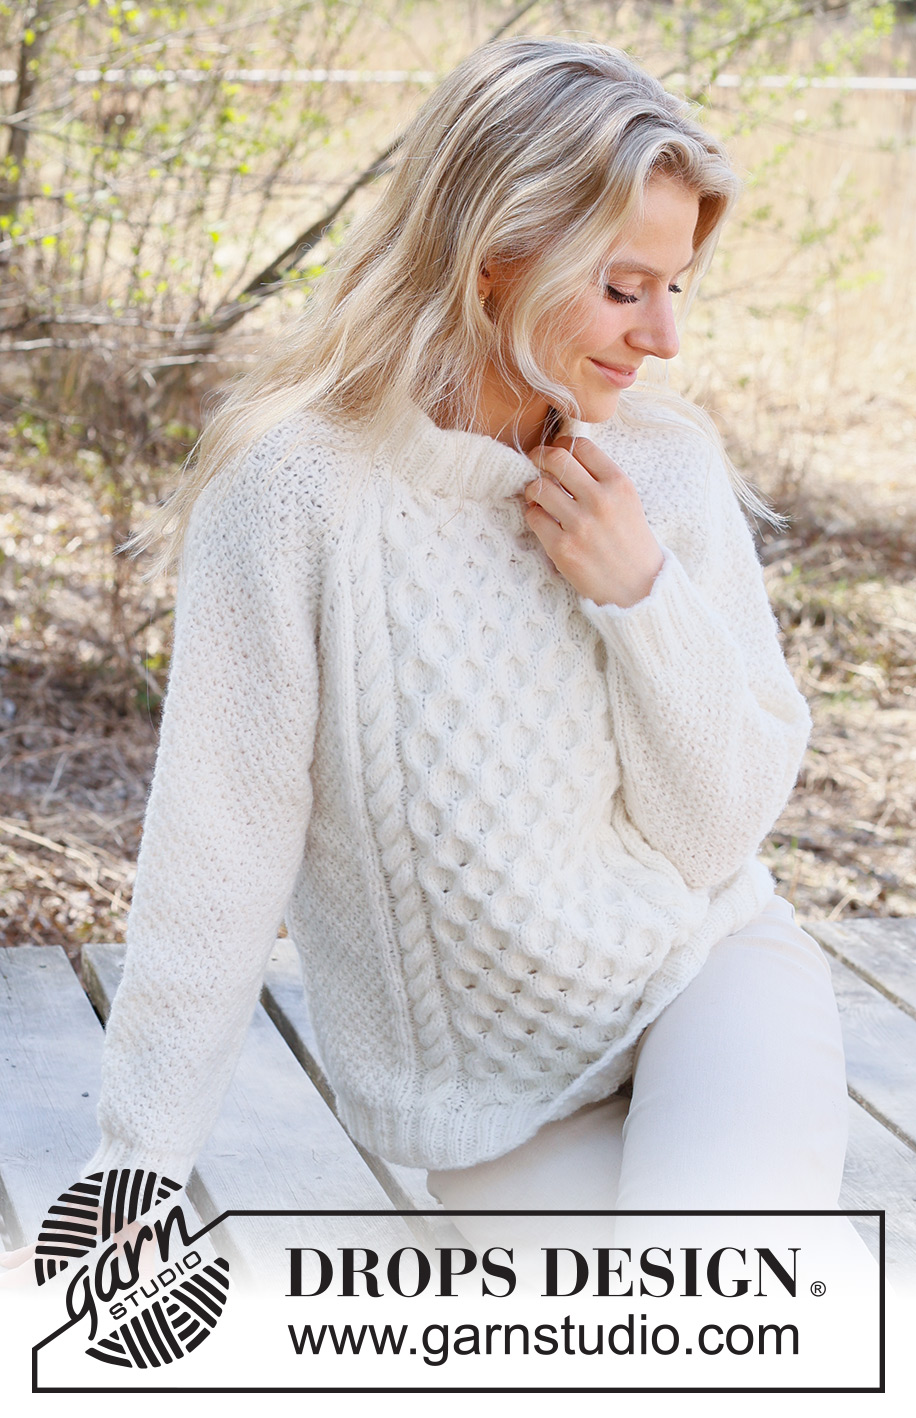
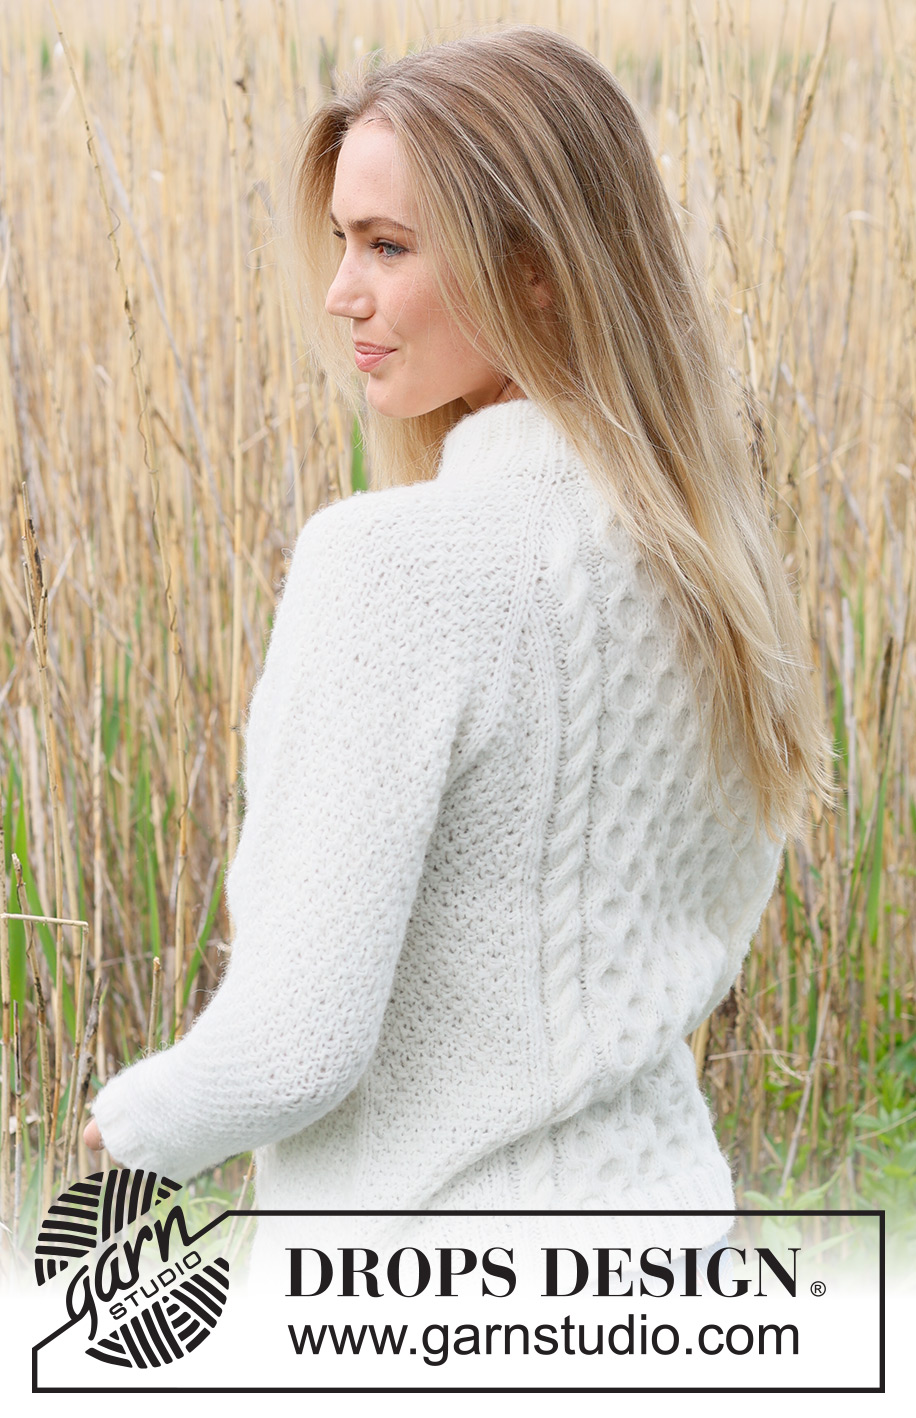
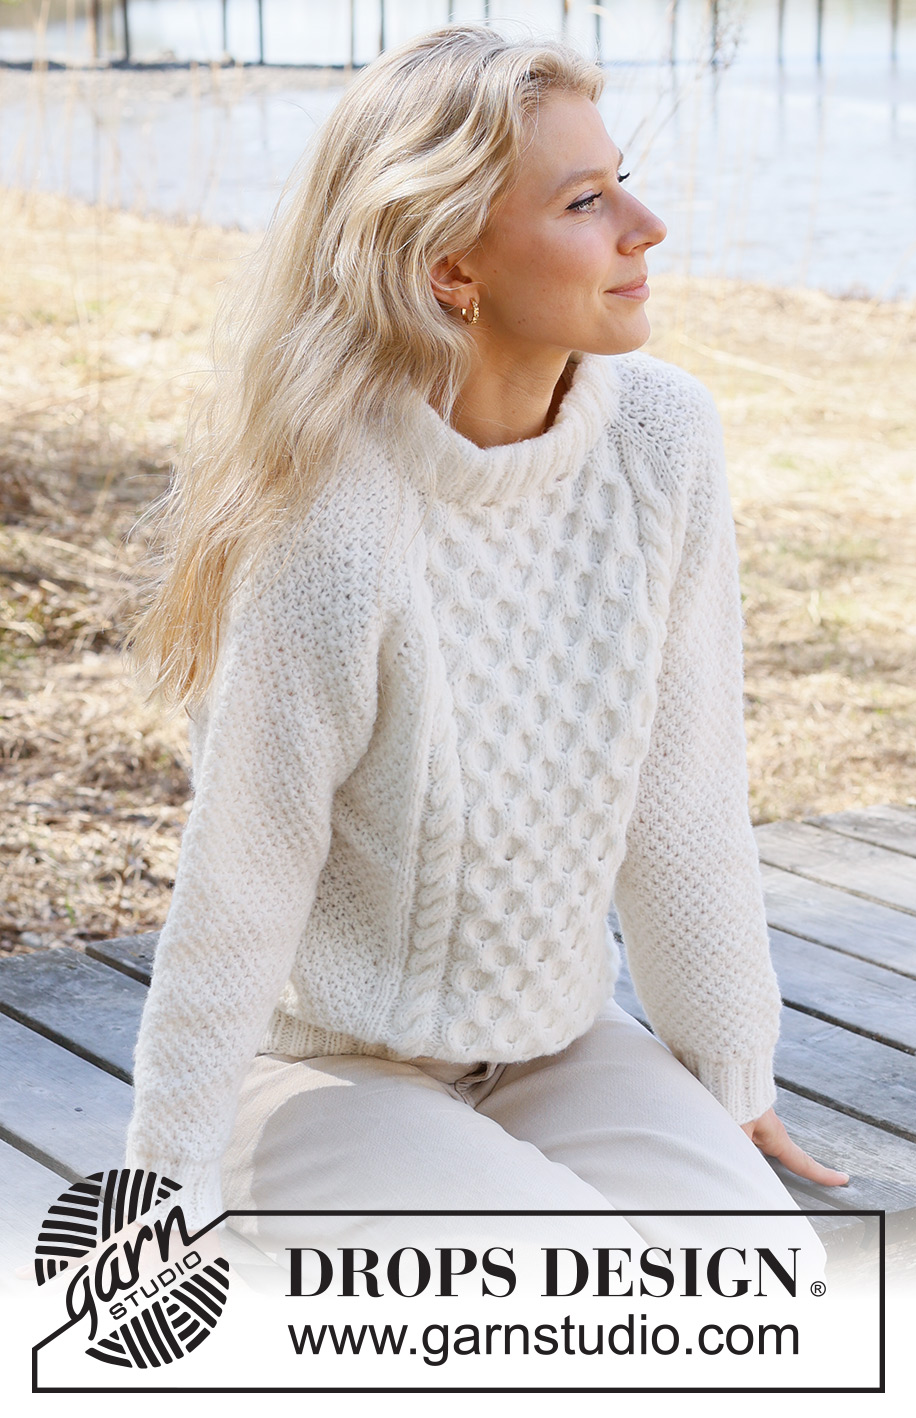
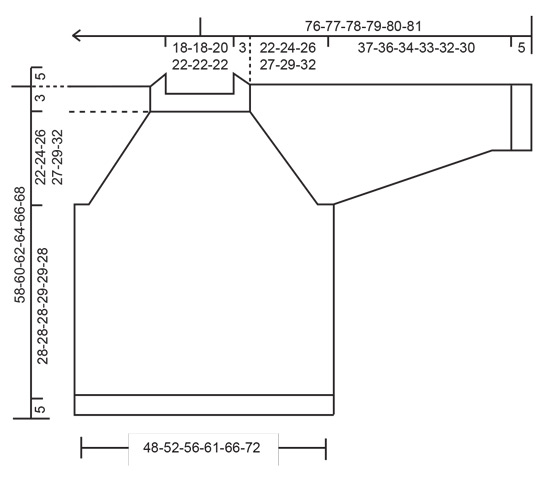
Knitted jumper in DROPS Air. The piece is worked top down with raglan, double neck, cables and moss stitch. Sizes S - XXXL.
DROPS 236-15 |
|||||||||||||||||||
|
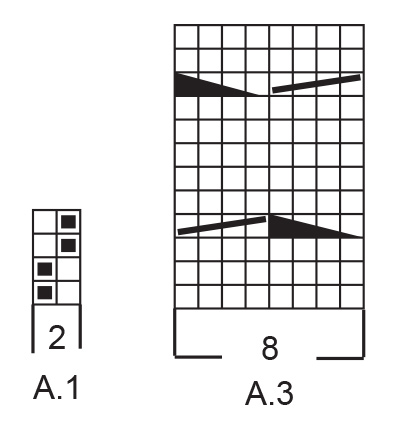
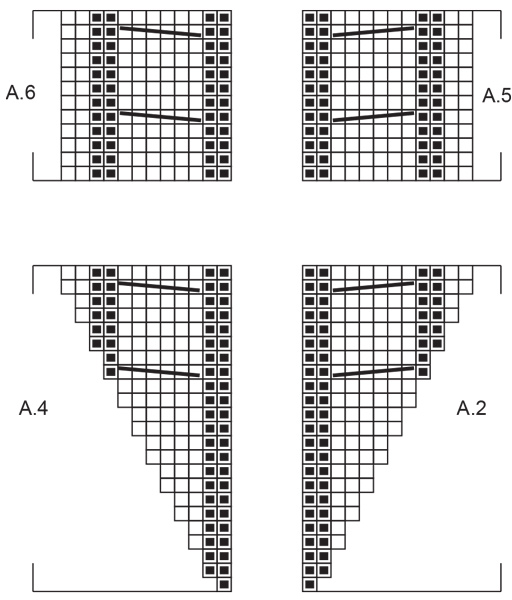
------------------------------------------------------- EXPLANATIONS FOR THE PATTERN: ------------------------------------------------------- INCREASE TIP: Increase 1 stitch by working 1 yarn over. On the next round, work the yarn over twisted to avoid holes. PATTERN: See diagrams A.1 to A.6. RAGLAN: Increase for raglan before/after 2 knitted stitches at each marker-thread as follows: AFTER THE MARKER-THREAD: Knit 1 stitch, make 1 yarn over. BEFORE THE MARKER-THREAD: Work until there is 1 stitch left before the next marker-thread, make 1 yarn over. The increased stitches are worked twisted into the pattern on the next round. DECREASE TIP (applies to the sides on the body and mid-under sleeves): Decrease 1 stitch on either side of the marker as follows: Work until there are 2 stitches left before the marker, knit 2 together, marker sits here, slip 1 stitch as if to knit, knit 1 and pass the slipped stitch over the knitted stitch. ------------------------------------------------------- START THE PIECE HERE: ------------------------------------------------------- JUMPER – SHORT OVERVIEW OF THE PIECE: The double neck and yoke are worked in the round with circular needle, top down. The yoke is divided for body and sleeves and the body is continued in the round with circular needle. The sleeves are worked with short circular needle/double pointed needles, top down. DOUBLE NECK: Cast on 80-88-88-96-96-96 stitches with DROPS Air using short circular needles size 4 mm and 5 mm held together. Remove the needle size 5 mm keeping the stitches on the short circular needle size 4 mm (this gives you an elastic cast-on edge). Work rib in the round (knit 2, purl 2) for 11 cm. Fold the neck double to the inside and work 1 more round of rib, working every 2nd stitch together with its corresponding stitch on the cast-on edge. You now have a double neck of approx. 5 cm. YOKE: Change to circular needle size 5 mm. Insert 4 marker-threads while working and increasing as follows: Knit 1 and insert marker-thread 1 before next stitch, knit 12 (sleeve) and insert marker-thread 2 before next stitch, knit 1, knit and increase 16-12-12-16-16-16 stitches evenly over the next 26-30-30-34-34-34 stitches - read INCREASE TIP (= 42-42-42-50-50-50 stitches on the front piece), knit 1 and insert marker-thread-3 before next stitch, knit 12 (sleeve) and insert marker-thread 4 before next stitch, knit 1, knit and increase 16-12-12-16-16-16 stitches evenly over the next 26-30-30-34-34-34 stitches (= 42-42-42-50-50-50 stitches on the back piece). There are 112-112-112-128-128-128 stitches on the round. Insert a marker on this round, approx. on mid-back the yoke is measured from this marker. Read the next section before continuing! You now work pattern and increase for RAGLAN – read description above. Knit 2 (marker-thread-1 sits between these 2 stitches), increase 1 stitch for raglan, work A.1 over the next 10 stitches, increase 1 stitch for raglan, knit 2 (marker-thread-2 sits between these 2 stitches), increase 1 stitch for raglan, work A.2 over 1 stitch, A.3 over the next 40-40-40-48-48-48 stitches (5-5-5-6-6-6 times in width), A.4 over 1 stitch, increase 1 stitch for raglan, knit 2 (marker-thread-3 sits between these 2 stitches), increase 1 stitch for raglan, work A.1 over the next 10 stitches, increase 1 stitch for raglan, knit 2 (marker-thread-4 sits between these 2 stitches), increase 1 stitch for raglan, work A.2 over 1 stitch, A.3 over 40-40-40-48-48-48 stitches (5-5-5-6-6-6 times in width), A.4 over 1 stitch and increase 1 stitch for raglan,. REMEMBER THE KNITTING TENSION! Continue the pattern and increase for raglan every 2nd round (the increased stitches on the sleeves are worked into A.1, the increased stitches on the front and back pieces are worked as shown in A.2/A.4). When diagrams A.2 and A.4 have been completed 1 time in height, continue with A.5 over A.2 and A.6 over A.4; the increased stitches on the front and back are now worked into A.1 (the cables in A.3 and in A.5/A.6 are made on the same round all the way). Continue to increase for raglan until there has been increased a total of 19-23-25-27-27-29 times on each side of all marker-threads = 264-296-312-344-344-360 stitches. Continue to increase but increase now only on the body (i.e. increase after marker-threads 2 and 4 and before marker-threads 3 and 1). Increase like this 3-2-3-1-3-6 times in total = a total of 19-23-25-27-27-29 times on the sleeves and 22-25-28-28-30-35 times on the body. There are 276-304-324-348-356-384 stitches on the needle. Continue the pattern without further increases until the yoke measures 22-24-26-27-29-32 cm from the marker on mid back. Now divide for sleeves and body as follows: Knit 2, place the next 48-56-60-64-64-68 stitches on a thread for the sleeve, cast on 6-6-8-8-12-12 stitches under the sleeve, work 90-96-102-110-114-124 stitches as before, place the next 48-56-60-64-64-68 stitches on a thread for the sleeve, cast on 6-6-8-8-12-12 stitches under the sleeve, work the last 88-94-100-108-112-122 stitches as before. Cut the yarn. Continue working body and sleeve separately. BODY: = 192-204-220-236-252-272 stitches. Insert 1 marker in each side, in the middle of the new stitches cast on under each sleeve. Start the round by one marker and continue in the round with pattern A.1 on each side of A.5, A.3 and A.6; NB: A.1 will not always fit, so knit 1 stitch on each side of each marker in each side under each sleeve, the remaining stitches are adjusted according to the pattern on the front and back piece. Continue working until the body measures 28-28-28-29-29-28 cm from the division. Knit 1 round and decrease 28 stitches evenly spaced = 164-176-192-208-224-244 stitches. Change to circular needle size 4 mm and work rib (knit 2, purl 2) for 5 cm. Loosely cast off with knit over knit and purl over purl. The jumper measures approx. 58-60-62-64-66-68 cm from the shoulder down. SLEEVES: Place the 48-56-60-64-64-68 stitches from the thread on the one side of the piece on short circular needle/double pointed needles size 5 mm and knit up 1 stitch in each of the 6-6-8-8-12-12 stitches cast on under the sleeve = 54-62-68-72-76-80 stitches. Insert a marker in the middle of the new stitches under the sleeve = start of the round. Continue in the round with pattern A.1. NB: A.1 will not always fit, so knit 1 stitch on each side of the marker, the remaining stitches are adjusted according to the pattern on the sleeve. When the sleeve measures 2 cm, decrease 2 stitches on each side of the marker – read DECREASE TIP. Decrease like this every 6-4-2½-2½-2-1½ cm a total of 6-9-11-12-13-14 times = 42-44-46-48-50-52 stitches. Continue working until the sleeve measures 37-36-34-33-32-30 cm from the division (or to desired length. There is approx. 5 cm left). Knit 1 round and increase 2-4-6-4-6-4 stitches evenly spaced = 44-48-52-52-56-56 stitches. Change to double pointed needles size 4 mm and work rib (knit 2, purl 2) for 5 cm. Loosely cast off with knit over knit and purl over purl. The sleeve measures approx. 42-41-39-38-37-35 cm from the division. Work the other sleeve in the same way. |
|||||||||||||||||||
Diagram explanations |
|||||||||||||||||||
|
|||||||||||||||||||
 |
|||||||||||||||||||
 |
|||||||||||||||||||
 |
|||||||||||||||||||
Have you finished this pattern?Tag your pictures with #dropspattern #creamwafersweater or submit them to the #dropsfan gallery. Do you need help with this pattern?You'll find 28 tutorial videos, a Comments/Questions area and more by visiting the pattern on garnstudio.com. © 1982-2026 DROPS Design A/S. We reserve all rights. This document, including all its sub-sections, has copyrights. Read more about what you can do with our patterns at the bottom of each pattern on our site. |
|||||||||||||||||||


With over 40 years in knitting and crochet design, DROPS Design offers one of the most extensive collections of free patterns on the internet - translated to 17 languages. As of today we count 325 catalogues and 12298 patterns translated into English (UK/cm).
We work hard to bring you the best knitting and crochet have to offer, inspiration and advice as well as great quality yarns at incredible prices! Would you like to use our patterns for other than personal use? You can read what you are allowed to do in the Copyright text at the bottom of all our patterns. Happy crafting!
Post a comment to pattern DROPS 236-15
We would love to hear what you have to say about this pattern!
If you want to leave a question, please make sure you select the correct category in the form below, to speed up the answering process. Required fields are marked *.