
Popular categories
Looking for a yarn?


Comments / Questions (54)
![]() Baetens wrote:
Baetens wrote:
Voorpand. Ik begrijp niet goed waar te beginnen. Achterwand is af. Weet niet waar steken op te nemen om de schouders te beginnen. 18 steken aan binnenkant van de buitenste steek over linkerschouder op achterwand als kledingstuk gedragen wordt??
18.12.2023 - 18:46DROPS Design answered:
Dag Beatens,
Je legt het achterpand neer met de goede kant naar boven en de schouders naar je toe. Dan neem je steken op in de linker schouder (op tafel is dat nu dus aan de rechter kant). Je zorgt ervoor dat de buitenste steek als het ware wegvalt bij het opnemen van steken. Dus je neemt de steken op tussen de een na laatste en laatste steken van het achterpand.
20.12.2023 - 19:23
![]() Inge Lepee wrote:
Inge Lepee wrote:
Gebruik ik naald 8 voor de trui zelf ? En naald 7 voor de boord ? Dank voor de hulp, Inge
15.12.2023 - 13:03DROPS Design answered:
Dag Inge,
In de beschrijving van het patroon staat aangegeven welke naalden je steeds moet gebruiken. Meestal is de kleinste maat voor de boord en de grotere maat voor de panden/tricotsteek. Het proeflapje in tricotsteek maak je met de grootste.
15.12.2023 - 19:47
![]() Riet wrote:
Riet wrote:
Bij patroon 237-3 staat dat je bij het voorpand 31 cm moet meten over het armsgat( xxl)Is dit gemeten vanaf het steken opnemen aan het rugpand? Dat is me niet geheel duidelijk.
02.12.2023 - 14:42DROPS Design answered:
Dag Riet,
Ja, dit meet je vanaf het opnemen van de steken, en dus ook vanaf het hoogste punt van de schouder.
02.12.2023 - 17:25
![]() Ulrika Palm wrote:
Ulrika Palm wrote:
Hej, vill bara meddela att det blivit ett fel i detta mönstret av välvilja eftersom jag satt en stund och funderade på hur detta skulle vara. Bakstycke,: Sätt 1 markör på insidan av de yttersta 4 maskorna i varje sida. Markörerna ska sitta innanför de yttersta 3 maskorna på varje varv. Det står 4 på båda ställena på mönstret på Norska . Tack :)
22.11.2023 - 15:13DROPS Design answered:
Hej Ulrika. Tack för info! Detta är nu rättat. Mvh DROPS Design
24.11.2023 - 08:22
![]() Lara wrote:
Lara wrote:
« Nach der letzten Zunahme sind 52 Maschen auf der Nadel. DIE ARBEIT WIRD NUN AB HIER GEMESSEN! Dann glatt rechts in Hin- und Rück-Reihen weiterstricken, bis die Arbeit eine Länge von 22cm hat, gemessen außen am Armausschnitt. « Habe ich es richtig verstanden, dass sich die 22cm nur auf die glatt rechts gestrickten Reihen ohne Zunahmen beziehen und nicht auf das ganze Stück? Wo beginnt der Armausschnitt?
11.11.2023 - 14:40DROPS Design answered:
Liebe Lara, der Armausschnitt beginnt wenn man diese 52 Maschen hat - siehe wie man so eine europäische Schulter strickt in diesem Video.Viel Spaß beim stricken!
13.11.2023 - 07:37
![]() Toos De Slegte wrote:
Toos De Slegte wrote:
Wordt dit vest met 2 soorten wol gebreid?
18.09.2023 - 17:00
![]() Josefine wrote:
Josefine wrote:
Er der nogle mål tilhørende vesten? Eksempelvis hvor mange centimeter overvidden er, og hvad længden på vesten er? Vh. Josefine
31.08.2023 - 12:52DROPS Design answered:
Hej Josefine, ja du finder vestens mål i måleskitsen nederst i opskriften :)
08.09.2023 - 15:20
![]() Aike Hegel wrote:
Aike Hegel wrote:
Hallo, lt Anleitung wird über die ganze Arbeit 2fädig gestrickt. Für Größe S sollen 200g Air und 100g Alpaka Silk ausreichen. Beide garnarten habe die gleiche Lauflänge 140m). Wie soll das bei 100g Unterschied hinkommen? Hab ich einen Denkfehler?
17.04.2023 - 17:55DROPS Design answered:
Liebe Frau Hegel, Air ist ca 150 M /50 g und Brushed Alpaca Silk ist ca 140 M / 25 g, in S braucht man dann 200g/50 g = 4 Knäuel Air + 100g/25g Brushed Alpaca Silk = 4 Knäuel Brushed Alpaca Silk. Viel Spaß beim stricken!
18.04.2023 - 10:02
![]() Natalie Wohlfarth wrote:
Natalie Wohlfarth wrote:
Die Anleitung läßt sich leider weder ausdrucken noch speichern. Was kann ich da machen? Danke!
12.12.2022 - 18:19DROPS Design answered:
Liebe Frau Wohlfarth, ich konnte diese Anleitung gerade drucken - klicken Sie auf dem "Drucken" Knopf um schauen Sie die Druckereinstellungen - um diese Anleitung als .PDF zu speichern sollen Sie einen virtuellen Drucker wählen. Viel Spaß beim stricken!
13.12.2022 - 07:58
![]() Sarah wrote:
Sarah wrote:
Under første punkt i opskriften (bagstykke) skal der tages 2 masker ud 16 gange (str M). Første udtagning sker i en pind med retmasker. Den sidste af de 16 pinde med udtagninger må derfor være med vrangmsker. Hvordan kan det så gå op, at pinden lige efter udtagningerne skal strikkes vrang?
05.12.2022 - 20:41DROPS Design answered:
Hej Sarah, nej det stemmer, du fortsætter bare i glatstrik :)
15.12.2022 - 08:09
|
|
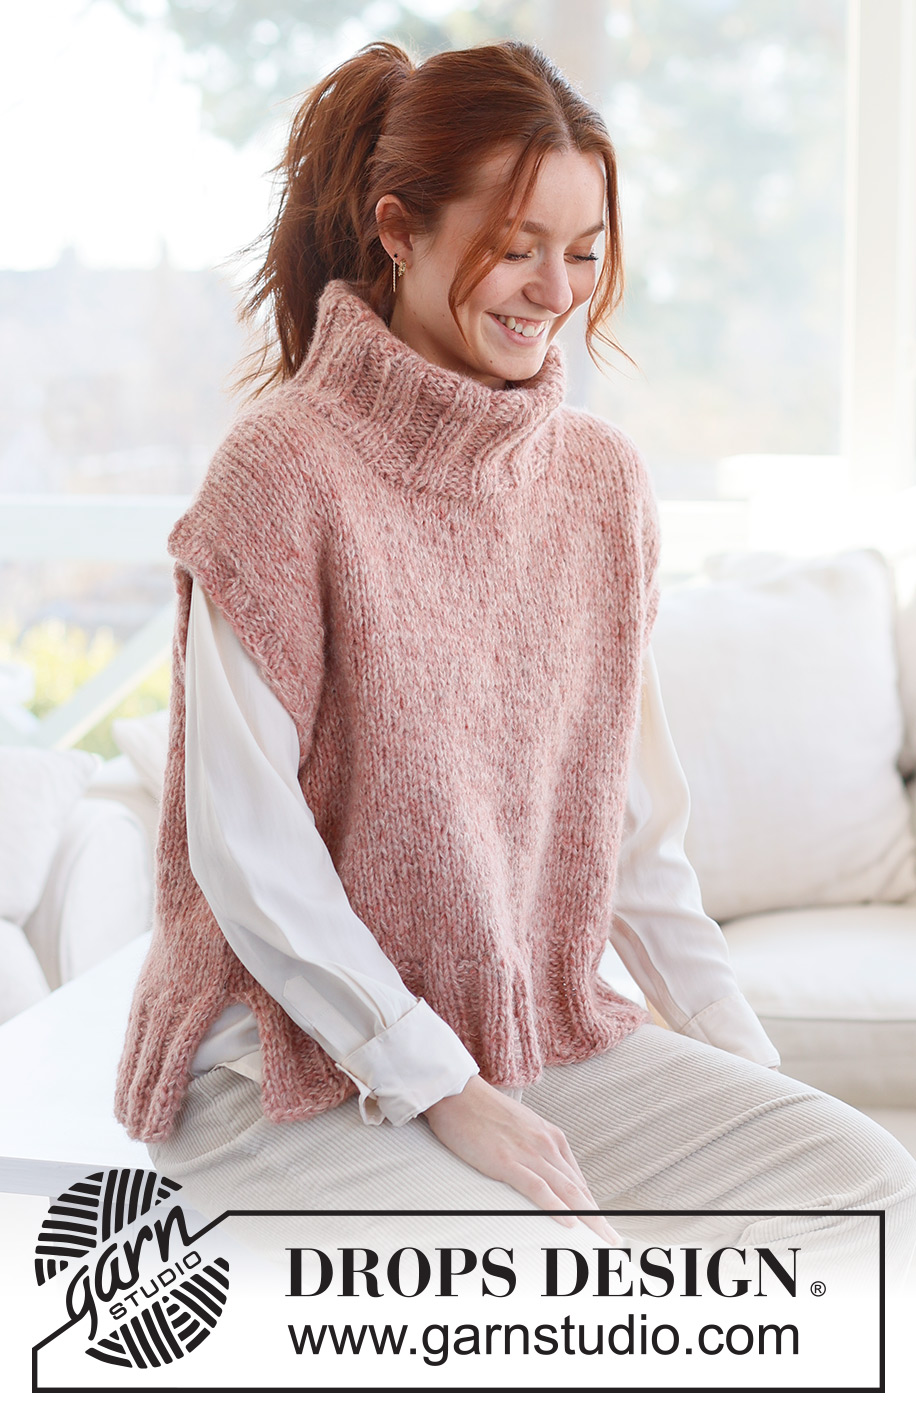
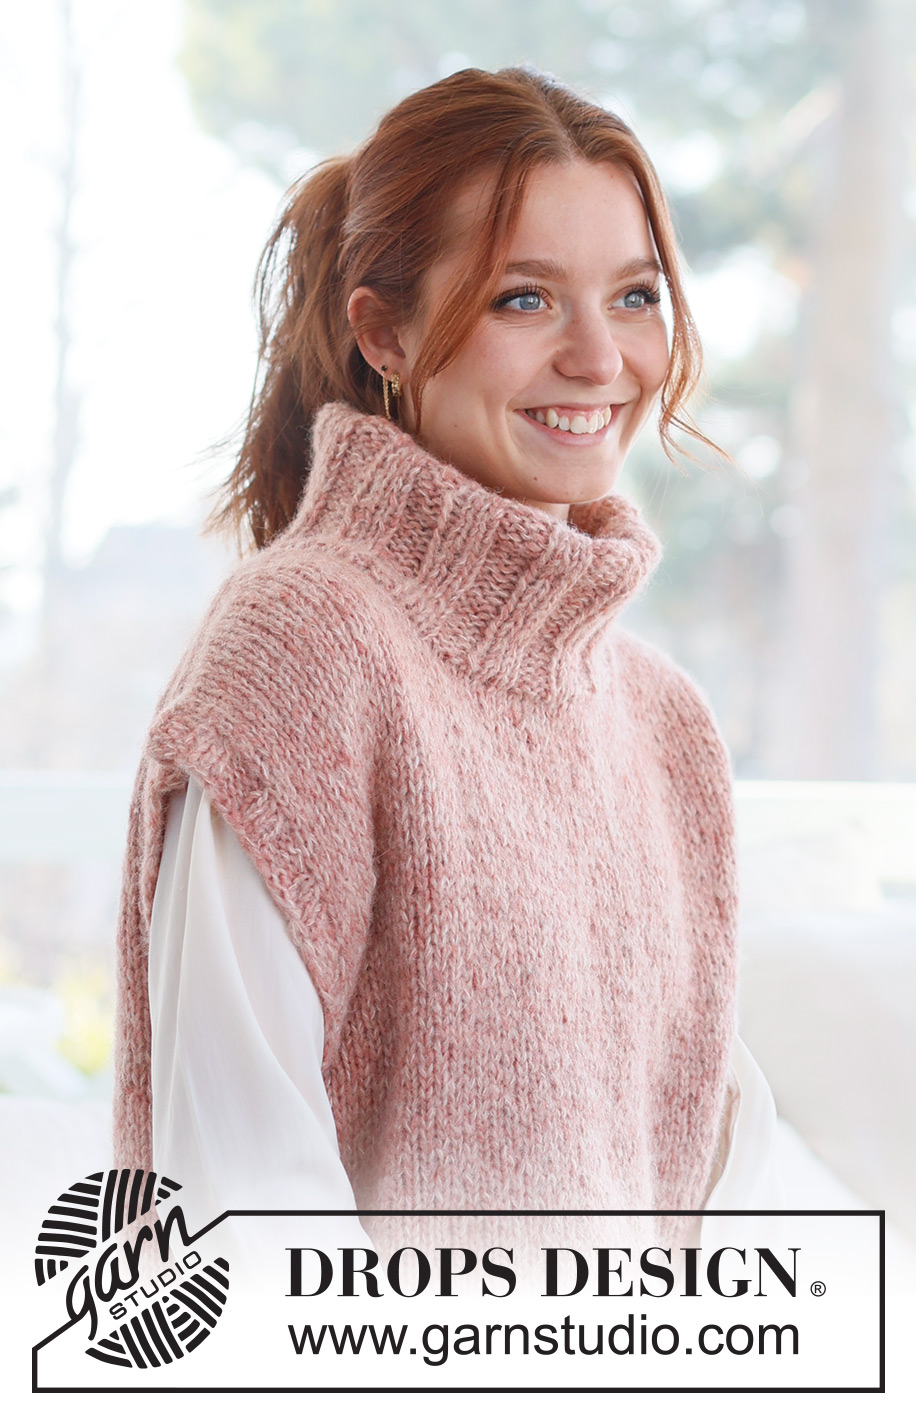
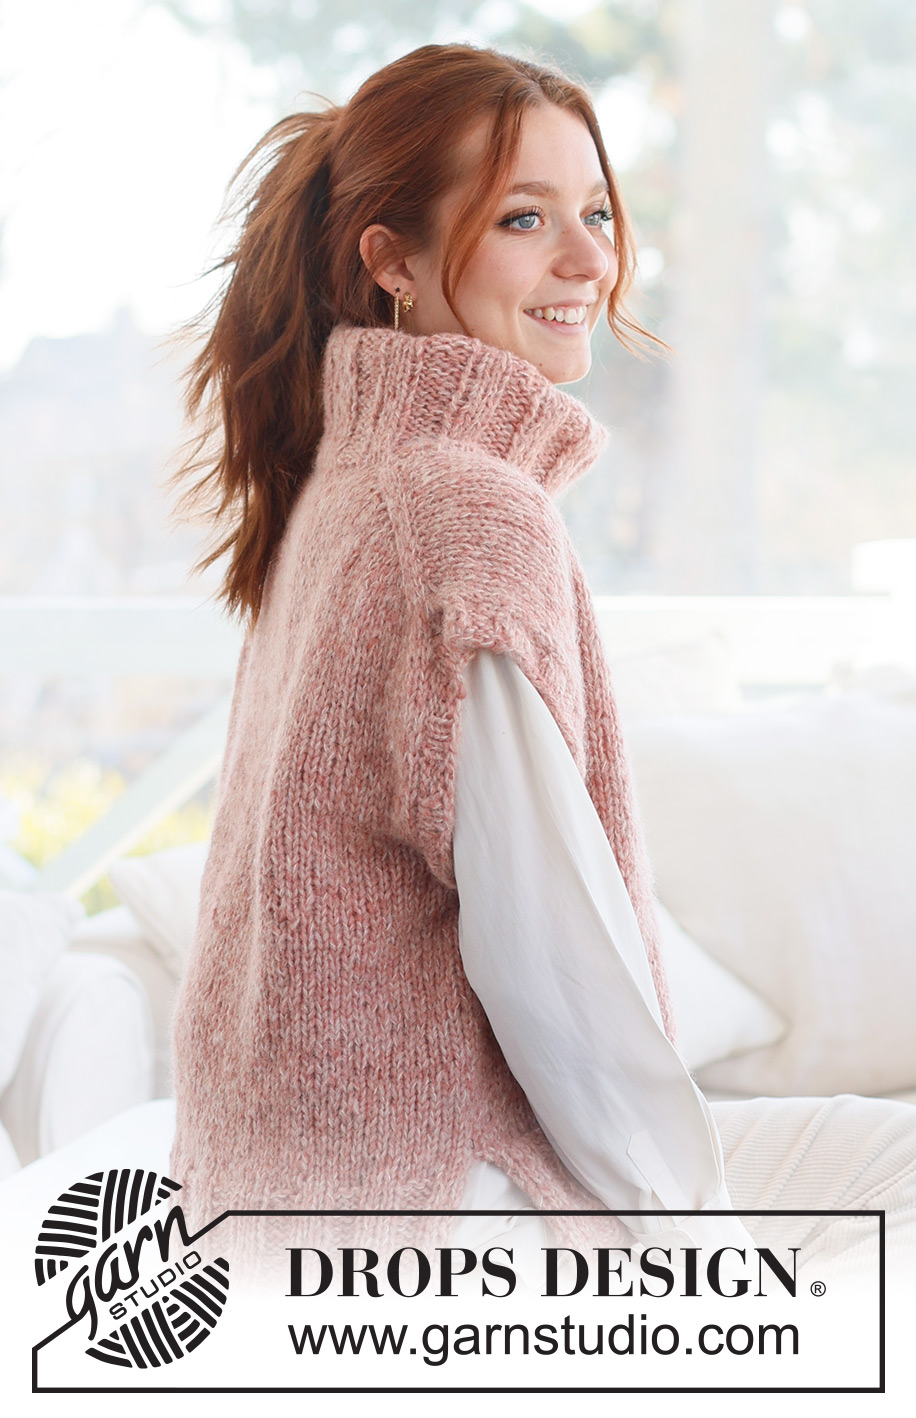
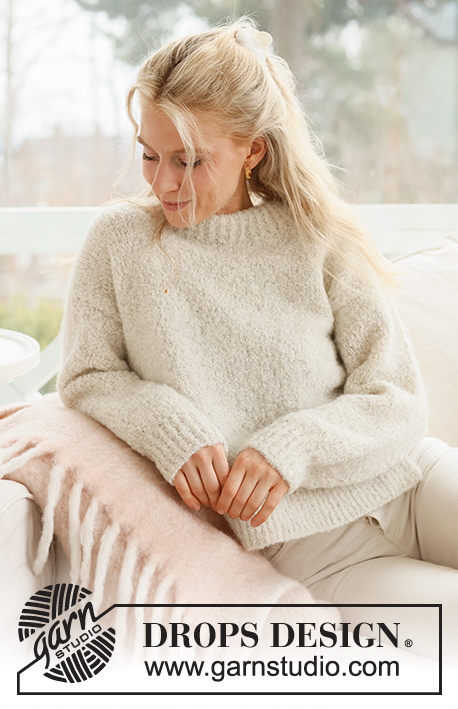
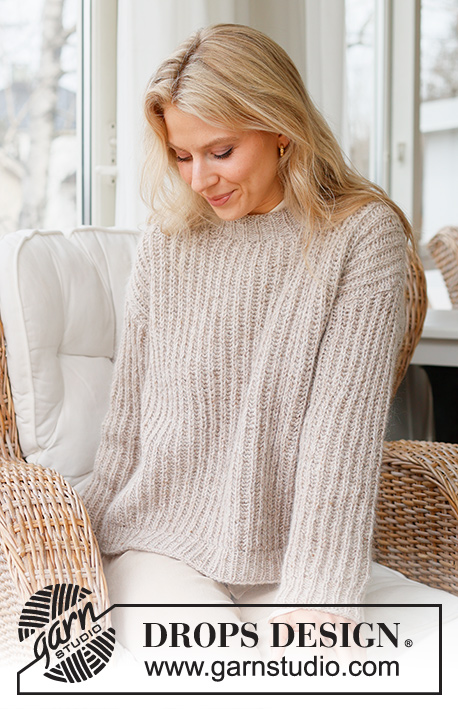
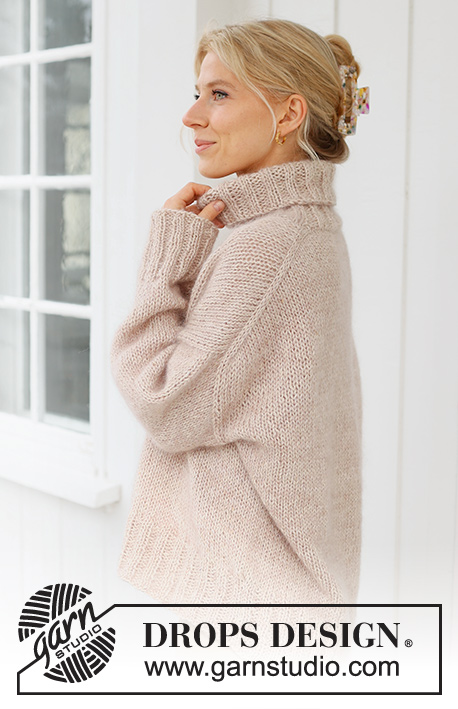
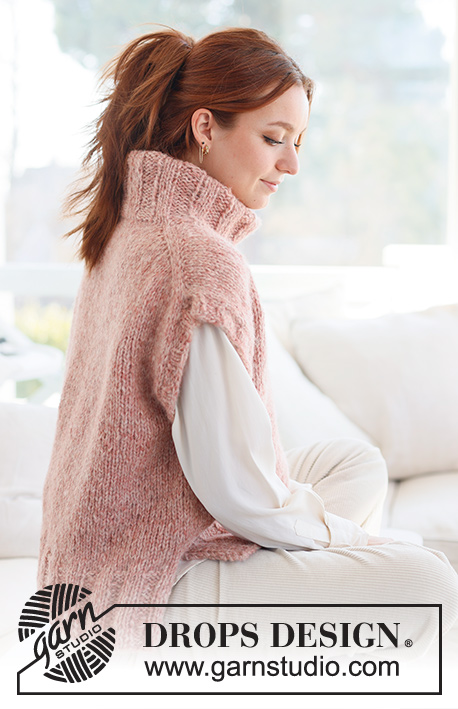
Pink Salt Vest#pinksaltvest |
|
 |
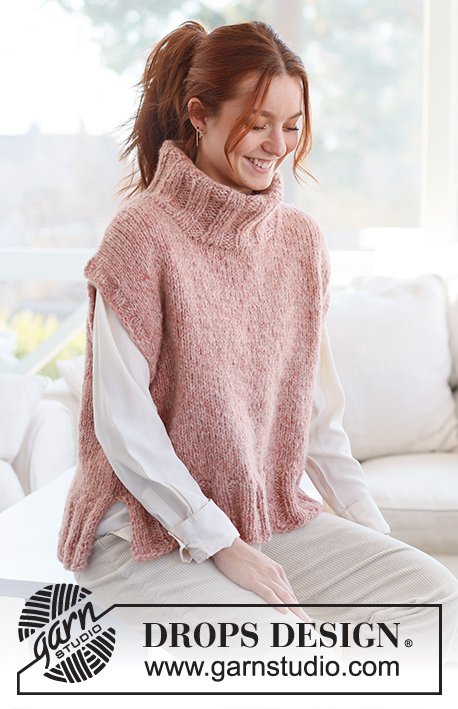 |
Knitted vest in DROPS Air and DROPS Brushed Alpaca Silk. The piece is worked top down with European shoulders / diagonal shoulders and high neck. Sizes S - XXXL.
DROPS 237-3 |
|
|
------------------------------------------------------- EXPLANATIONS FOR THE PATTERN: ------------------------------------------------------- RIDGE/GARTER STITCH (worked back and forth): Knit all rows. 1 ridge = knit 2 rows. ØKETIPS FRA RETTEN: Øk mot venstre ETTER MERKET: Bruk venstre pinne til å plukke opp tråden mellom 2 masker fra pinnen under, tråden plukkes opp forfra og masken strikkes rett i maskeleddet som ligger bak pinnen. Øk mot høyre FØR MERKET: Bruk venstre pinne til å plukke opp tråden mellom 2 masker fra pinnen under, tråden plukkes opp bakfra og masken strikkes rett i maskeleddet som ligger foran pinnen. ØKETIPS FRA VRANGEN: Øk mot høyre ETTER MERKET: Bruk venstre pinne til å plukke opp tråden mellom 2 masker fra pinnen under, tråden plukkes opp bakfra og masken strikkes vrang i maskeleddet som ligger foran pinnen. Øk mot venstre FØR MERKET: Bruk venstre pinne til å plukke opp tråden mellom 2 masker fra pinnen under, tråden plukkes opp forfra og masken strikkes vrang i maskeleddet som ligger bak pinnen. ------------------------------------------------------- START THE PIECE HERE: ------------------------------------------------------- VEST – SHORT OVERVIEW OF THE PIECE: VEST – SHORT OVERVIEW OF THE PIECE: The pattern uses both long and short needles; start with the length which fits the number of stitches and change when necessary. The piece is started back and forth, casting on stitches at the back of the neck and working the back piece top down while increasing stitches on each side for the shoulders, which become slightly diagonal. The back piece is worked as far as the armholes. The front piece is then worked in 2 sections, knitting up stitches along 1 back shoulder, increasing for the neckline. This is repeated on the other shoulder. The 2 front sections are joined when the neckline is finished and worked until the armholes are finished. The front and back pieces are then joined and the body worked in the round. Stitches are knitted up around the neckline and the neck is worked in the round, then folded double to the inside. Stitches are knitted up around the armholes for the sleeve edge. BACK PIECE: Cast on 24-24-24-26-26-28 stitches with circular needle size 8 mm and 1 strand of each quality (2 strands). Purl 1 row from the wrong side. Insert 1 marker after the 4th stitch from each side. The markers should sit outside the outermost 4 stitches on each row onwards. Work stocking stitch back and forth. AT THE SAME TIME increase AFTER the marker at the beginning of the row and BEFORE the marker at the end of the row – read INCREASE TIP FROM RIGHT SIDE. On the next row (wrong side) increase in the same way – read INCREASE TIP FROM WRONG SIDE. Continue increasing like this from both the right and wrong side a total of 14-16-18-18-20-20 times = 52-56-60-62-66-68 stitches. The piece is now measured from here! Then work stocking stitch until the piece measures 22-22-23-24-25-26 cm, down the armhole. Cut the yarn, put stitches on a thread or on an extra needle and work the front piece as explained below FRONT PIECE: Star with left shoulder (when the garment is worn). Knit up 14-16-18-18-20-20 stitches inside the outermost stitch along the left shoulder on the back piece (when the garment is worn, knitting up 1 stitch in each row along the edge). Work stocking stitch back and forth for 5 cm. Now increase stitches at the beginning of each row from the right side for the neck, but inside 3 stitches (instead of 4 stitches previously) – remember INCREASE FROM THE RIGHT SIDE. Increase 1 stitch 4 times = 18-20-22-22-24-24 stitches. Purl 1 row from the wrong side. Cut the yarn, put stitches on a thread or on an extra needle. Work the right shoulder as explained below. Work the right shoulder: Knit up 14-16-18-18-20-20 stitches inside the outermost stitch along the right shoulder on the back piece. Work stocking stitch back and forth for 5 cm. Now increase stitches at the end of each row from the right side, inside 3 stitches (instead of 4 previously) – remember INCREASE FROM THE RIGHT SIDE. Increase 1 stitch 4 times = 18-20-22-22-24-24 stitches. Purl back from the wrong side after the last increase. Work the next row from the right side as follows: Knit the 18-20-22-22-24-24 stitches from the right front piece, cast on 16-16-16-18-18-20 stitches for the neck at the end of the row then knit the 18-20-22-22-24-24 stitches from the left front piece = 52-56-60-62-66-68 stitches. Work stocking stitch back and forth until the front piece measures 26-28-29-30-31-32 cm, along the armhole. Now join the front and back pieces for the body. BODY: Work stocking stitch over the 52-56-60-62-66-68 stitches from the front piece and cast on 4-4-4-8-10-14 stitches at the end of the row (= side), work stocking stitch over the 52-56-60-62-66-68 stitches from the back piece and cast on 4-4-4-8-10-14 stitches at the end of the row = 112-120-128-140-152-164 stitches. Work stocking stitch in the round until the piece measures 46-48-50-52-54-56 cm from the top of the front piece. Now divide the piece for a split in each side. Place the 56-60-64-70-76-82 stitches from the front piece on a thread or extra needle and work the back piece. BACK PIECE: Change to circular needle size 7 mm, knit 1 row from the right side and increase 9-11-13-13-13-13 stitches evenly spaced = 65-71-77-83-89-95 stitches. Work the next row as follows from the wrong side: 1 edge stitch in GARTER STITCH – read description above, * purl 3, knit 3 *, work from *-* until there are 4 stitches left, purl 3, 1 edge stitch in garter stitch. Continue this rib for 10 cm. Cast off. FRONT PIECE: Place the stitches on circular needle size 7 mm and work in the same way as the back piece. NECK: Start on one shoulder and knit up inside the 1 edge stitch, and from the right side, 72 to 90 stitches around the neck using short circular needle size 7 mm. Work rib in the round (knit 3, purl 3) for 20 cm. Cast off a little loosely. The neck can be folded double to the inside and fasten with a couple of stitches in each side. SLEEVE EDGES: Knit up 60 to 78 stitches around the armhole with short circular needle size 7. Work rib in the round (knit 3, purl 3) for 3 cm. Cast off. Work a similar edge around the other armhole. |
|
 |
|
Have you finished this pattern?Tag your pictures with #dropspattern #pinksaltvest or submit them to the #dropsfan gallery. Do you need help with this pattern?You'll find 28 tutorial videos, a Comments/Questions area and more by visiting the pattern on garnstudio.com. © 1982-2026 DROPS Design A/S. We reserve all rights. This document, including all its sub-sections, has copyrights. Read more about what you can do with our patterns at the bottom of each pattern on our site. |
|


With over 40 years in knitting and crochet design, DROPS Design offers one of the most extensive collections of free patterns on the internet - translated to 17 languages. As of today we count 325 catalogues and 12291 patterns translated into English (UK/cm).
We work hard to bring you the best knitting and crochet have to offer, inspiration and advice as well as great quality yarns at incredible prices! Would you like to use our patterns for other than personal use? You can read what you are allowed to do in the Copyright text at the bottom of all our patterns. Happy crafting!
Post a comment to pattern DROPS 237-3
We would love to hear what you have to say about this pattern!
If you want to leave a question, please make sure you select the correct category in the form below, to speed up the answering process. Required fields are marked *.