
Popular categories
Looking for a yarn?


Comments / Questions (46)
![]() Marjolein wrote:
Marjolein wrote:
Jullie reactie op Avelien: Dag Avelien, Vanaf een hoogte van 31 steken heb je ribbesteken over de buitenste steken gebreid, dat is dus bij de armsgaten en niet midden voor. Pas vanaf een hoogte van 39 cm verdeel je het werk voor het rechter en linker voorpand. Naar aanleiding van jullie reactie... Ik heb na 31 cm A2 en A3 al 2x in de hoogte gebreid. Hoe ga ik nu verder tot de 39 cm voor maat M? Want ik mag het nu nog niet verdelen toch? en nog geen A5 en A4 breien?
16.04.2026 - 13:05
![]() Margret wrote:
Margret wrote:
Hallo, bij het splitsen van het voorpand en verder breien in A.4 wordt er al geminderd door 2 steken samen te breien in het patroon. Als ik aan de halsrand nogmaals minder heb ik in die naald 2 steken geminderd omdat er geen omslag meer gemaakt wordt. Dan kom ik toch nooit op 28 steken na 10 minderingen... En in het begin van patroon A.4 heb ik nog 3 steken over van A.1, wat doe ik daarmee? Groetjes Margret
07.12.2025 - 13:20DROPS Design answered:
Dag Margret,
Je breit inderdaad 2 steken samen in het telpatroon en je hoeft dus geen extra steken te minderen bij de halsrand.
16.12.2025 - 21:25
![]() Linda Gagnon wrote:
Linda Gagnon wrote:
Les diagrammes A4 et A5 on voit seulement 4 rangs. Est ce que je répète ces rangs et diminue les mailles du centre jusqu'à la fin ?
24.11.2025 - 16:42DROPS Design answered:
Bonjour Linda, les diminutions de A.4 et A.5 sont celles pour l'encolure V. Quand A.4 et A.5 sont terminés, continuer à diminuer de la même façon (en tricotant A.4 et A.5) jusqu'à ce qu'un total de 10-10-10-12 mailles ait été diminué (sur chaque devant). Bon tricot!
30.11.2025 - 19:27
![]() Linda Gagnon wrote:
Linda Gagnon wrote:
J’ai oublié, qu’est ce que je fais avec la maille du centre pour les diminutions du col en V ?
23.11.2025 - 05:04DROPS Design answered:
Bonjour Mme Gagnon, vous la mettez en attente sur un fil/un marqueur/une épingle de sûreté, et vous la reprendrez au moment de tricoter le col (lorsque vous relèverez les mailles du col). Bon tricot!
24.11.2025 - 10:09
![]() Linda Gagnon wrote:
Linda Gagnon wrote:
Je suis rendue à séparer mon tricot en deux pour les devants. Pour les diminutions, est ce que je diminue 3 mailles seulement au centre de chaque côté?
22.11.2025 - 21:35DROPS Design answered:
Bonjour Mme Gagnon, lorsque vous divisez pour l'encolure V, vous terminez chaque côté séparément, et vous diminuez comme avant dans A.4/A.5 (1 m tous les rangs sur l'endroit). Bon tricot!
24.11.2025 - 10:08
![]() Linda Gagnon wrote:
Linda Gagnon wrote:
Les diagrammes A.4 et A.5 se répète sur combien de rang. Je ne m’occupe pas des diminutions pour l’encolure tant que j’ai pas atteint mes cm voulus pour le modèle XL ? Je répète A.4 et 5 combien de fois ? Un moment donné les maillés ensemble vont être en dehors du tricot.
18.11.2025 - 01:35DROPS Design answered:
Bonjour Mme Gagnon, si vous avez la bonne tension en largeur et en hauteur, les diminutions ne vont pas sortir du tricot, vous allez tricoter A.4 et a.5 jusqu'à ce que vous ayez diminué 12 m (sur chaque devant): lorsque vous continuez les devants séparément, vous diminuez à 10 mailles du bord côté encolure. Bon tricot!
18.11.2025 - 08:54
![]() Personnic wrote:
Personnic wrote:
Bjr comment avoir le tuto de ce modèle svp
16.11.2025 - 02:39DROPS Design answered:
Bonjour Mme Personnic, retrouvez les explications en français ici. Bon tricot!
17.11.2025 - 08:05
![]() Ángeles wrote:
Ángeles wrote:
¿Cuantos ovillos necesitaría para hacer este mismo patrón con DROPS Merino Extra Fine? Y qué aguja? Gracias.
15.11.2025 - 12:02DROPS Design answered:
Hola Angeles, necesita de 400 - 600 g (6-12 ovillos), agujas numero 4. Es muy importante realizar la muestra antes de empezar un proyecto para obtener las medidas correctas de la prenda. Saludos!
28.11.2025 - 09:06
![]() Linda Gagnon wrote:
Linda Gagnon wrote:
Est-ce que le diagramme A5 et À4 se répète jusqu’à l’obtention de la hauteur voulue. Les autres mailles précédentes et suivantes se tricotent de la même façon que les diagrammes A 2 et A 3 ? J’attends vos réponses. Merci à l’avance.
09.11.2025 - 21:22DROPS Design answered:
Bonjour Mme Gagnon, vous devez diminuez 12 fois comme dans A.4/A.5 (cf réponse précédente), vous devriez alors avoir atteint les 41 cm. Bon tricot!
11.11.2025 - 17:22
![]() Linda Gagnon wrote:
Linda Gagnon wrote:
J’ai terminé les deux diagrammes À.3 et À.2 deux fois qui me donne 33cm. Comment je tricote les rangs suivants avant d’atteindre le 41 cm pour séparer l’ouvrage en deux.
08.11.2025 - 17:03DROPS Design answered:
Bonjour Mme Gagnon, quand A.2 et A.3 ont été tricotés 2 fois, vous devez tricotez A.4 au lieu de A.2 et A.5 au lieu de A.3 (et les autres mailles come avant) jusqu'à ce que vous ayez diminué 12 m (sur chaque devant), là votre ouvrage devrait mesurer 41 cm en XL si votre tension est juste en hauteur. Bon tricot!
11.11.2025 - 17:21
|
||||||||||||||||
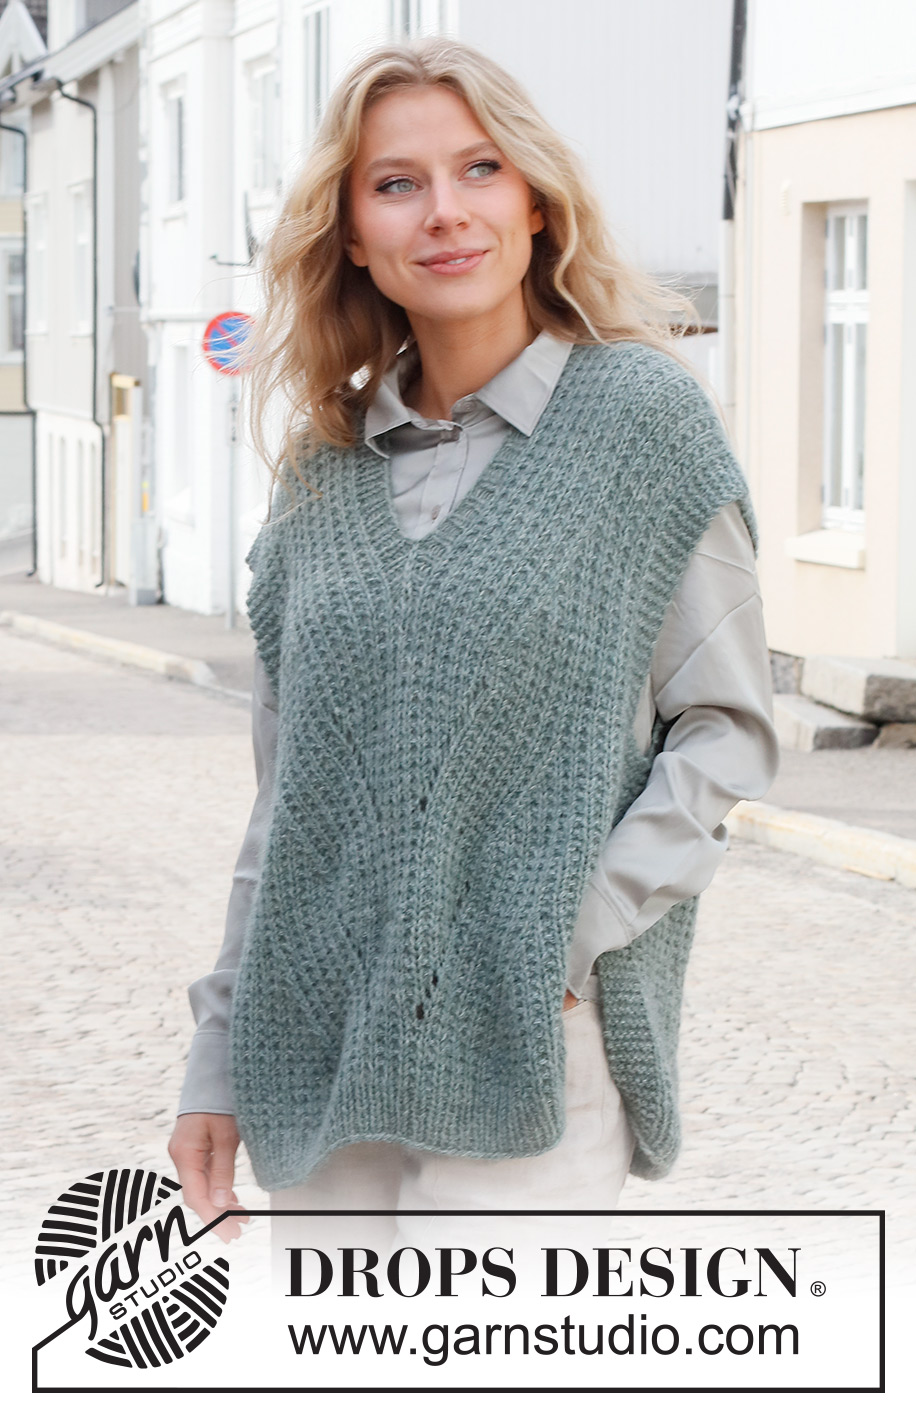
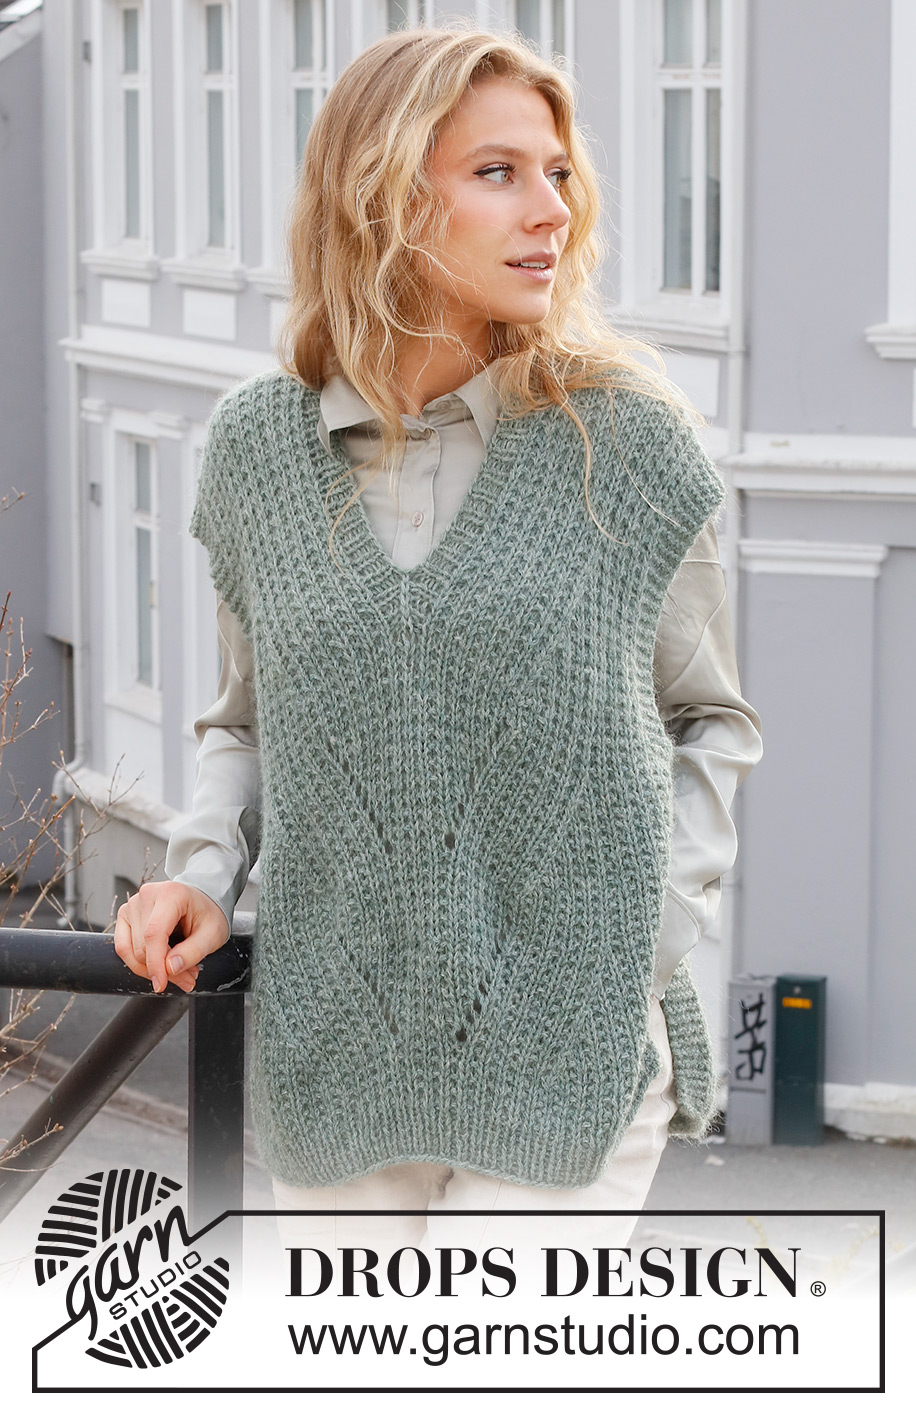
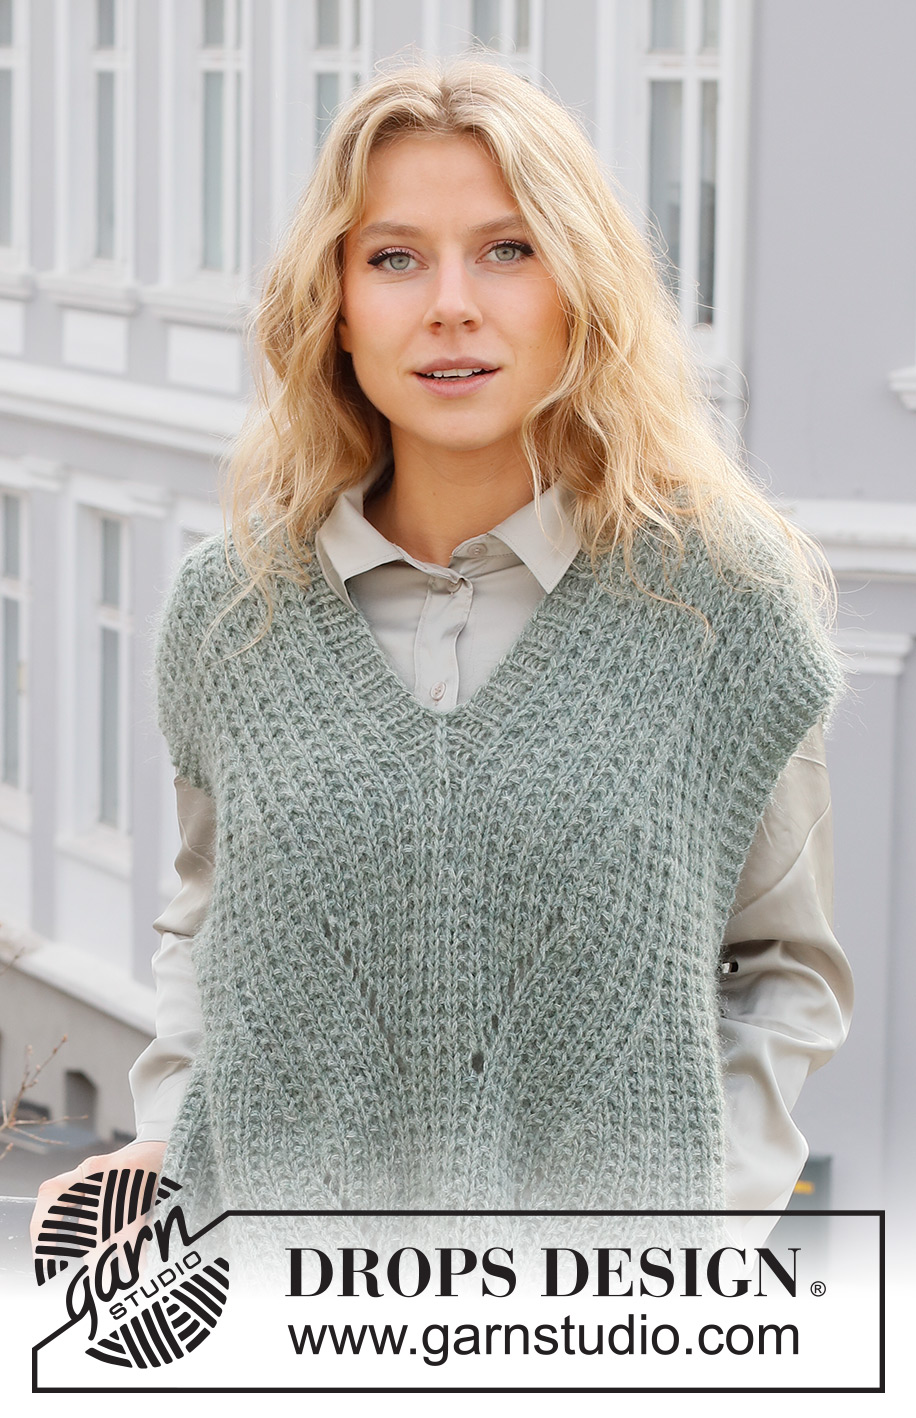
Ash Mint Slipover#ashmintslipover |
||||||||||||||||
 |
 |
|||||||||||||||
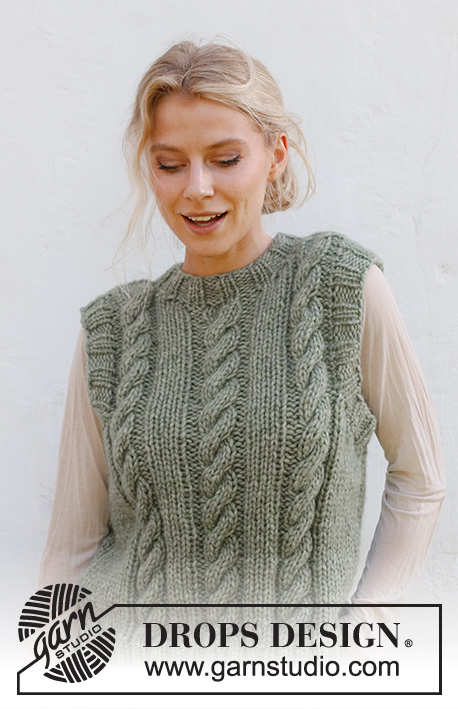
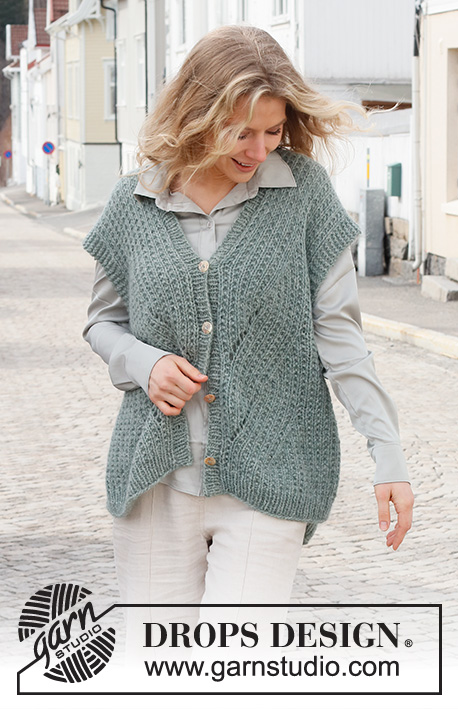
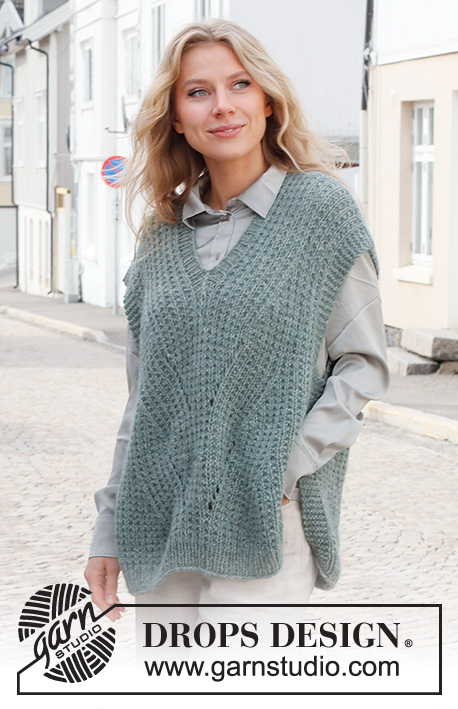
Knitted vest / slipover in DROPS Sky and DROPS Kid-Silk. Piece is knitted with V-neck pattern, vents in the sides, textured pattern and displacements. Size XS – XXL.
DROPS 227-31 |
||||||||||||||||
|
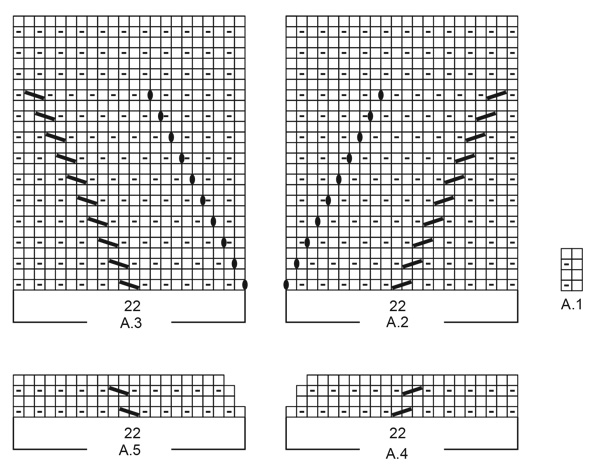
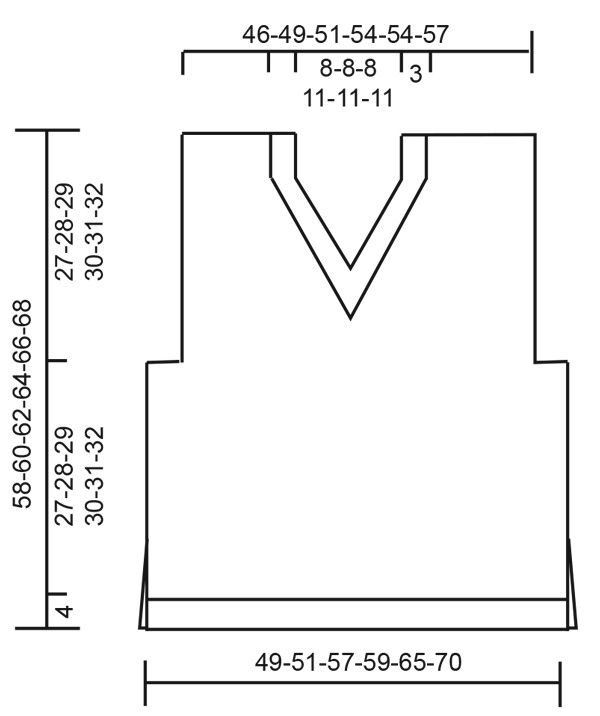
---------------------------------------------------------- EXPLANATION FOR THE PATTERN: ---------------------------------------------------------- GARTER STITCH (back and forth): Knit all rows. 1 ridge vertically = knit 2 rows. PATTERN: See diagrams A.1 to A.5. Diagrams show all rows in pattern seen from the right side. DECREASE TIP: All decreases are done from the right side! Work 6 stitches in garter stitch, slip 1 stitch knitwise, knit 1, pass slipped stitch over stitch worked(= 1 stitch decreased), work until 8 stitches remain, knit 2 together(= 1 stitch decreased), work 6 stitches in garter stitch. ---------------------------------------------------------- START THE PIECE HERE: ---------------------------------------------------------- VEST – SHORT OVERVIEW OF THE PIECE: Work back piece and front piece back and forth on circular needle. Then assemble the vest by sewing it together on the shoulders and down the side seams. Finish with a neck edge in round on a circular needle. BACK PIECE: Cast on 73-77-85-89-97-105 stitches on circular needle size 4.5 mm with 1 strand of each colour (= 2 strands). Purl 1 row from wrong side. Then work rib as follows: 6 stitches in GARTER STITCH - read explanation above - * knit 1/purl 1 *, repeat from *-* until 7 stitches remain, knit 1 and 6 stitches in garter stitch. Continue rib back and forth like this for 4 cm. Switch to circular needle size 5.5 mm. Now work pattern as follows: 6 stitches in garter stitch, work A.1 (= 2 stitches) until 7 stitches remain, work first stitch in A.1, 6 stitches in garter stitch. REMEMBER THE KNITTING TENSION! Continue back and forth like this until piece measures 29-30-31-32-33-34 cm. Now work in garter stitch over the outermost 8-8-10-10-10-10 stitches in each side. When 2 ridges have been worked over these stitches, cast off 2-2-4-4-4-4 stitches for armholes at the beginning of the next 2 rows = 69-73-77-81-89-97 stitches. In sizes XS, S, M and L skip next section and continue to work from ALL SIZES – read explanation below. In sizes XL and XXL work as explained below. SIZE XL AND XXL: Now decrease 1 stitch inside 6 stitches in garter stitch in each side- read DECREASE TIP. Decrease like this on every row from right side 4-6 times in total = 81-85 stitches. ALL SIZES: Continue back and forth with A.1 and 6 stitches in garter stitch in each side. When piece measures 56-58-60-62-64-66 cm, cast off the middle 19-19-19-23-23-23 stitches for neck and finish each shoulder separately. Then cast off 1 stitch on next row from the neck = 24-26-28-28-28-30 stitches remain for shoulder. When piece measures 58-60-62-64-66-68 cm, cast off with knit over knit and garter stitch over garter stitch. Work the other shoulder the same way. FRONT PIECE: Cast on 73-77-85-89-97-105 stitches on circular needle size 4.5 mm with 1 strand of each colour (= 2 strands). Purl 1 row from wrong side. Then work rib as follows: 6 stitches in garter stitch, * knit 1, purl 1 *, work from *-* until 7 stitches remain, knit 1, 6 stitches in garter stitch. Continue back and forth like this for 4 cm. Switch to circular needle size 5.5 mm. Now work pattern as follows: 6 stitches in garter stitch, work A.1 (= 2 stitches) until 7 stitches remain, work first stitch in A.1, 6 stitches in garter stitch. Continue back and forth like this. When piece measures 9-9-10-10-11-11 cm, work pattern as follows: Work 6 stitches in garter stitch, A.1 as before over the next 5-7-11-13-17-21 stitches, A.2 over the next 22 stitches, A.1 as before over the next 7 stitches (the middle of these 7 stitches is middle stitch on front piece = a knit stitch), A.3 over the next 22 stitches, A.1 as before over the next 5-7-11-13-17-21 stitches, 6 stitches in garter stitch. Continue back and forth like this until piece measures 29-30-31-32-33-34 cm. Now work in garter stitch over the outermost 8-8-10-10-10-10 stitches in each side. When 2 ridges have been worked over these stitches, cast off 2-2-4-4-4-4 stitches for armholes at the beginning of the next 2 rows = 69-73-77-81-89-97 stitches. OVERVIEW OF NEXT SECTION: Then work as explained below in the next sections - choose section for your size. SIZE XS, S, M and L: Divide the piece for right and left front piece, at the same time work pattern and decrease for V-neck as explained below. PATTERN AND DECREASE FOR V-NECK: Continue to work with 6 stitches in garter stitch towards the side and pattern as before over the remaining stitches. When A.2 and A.3 have been worked vertically 2 times in total, work A.4 over A.2 and A.5 over A.3 (continue the remaining stitches as before). Decrease in A.4 and A.5 is decrease for V-neck. When A.4 and A.5 have been worked vertically, continue decrease the same way until 10-10-10-12 stitches have been decreased in total (on each front piece). DIVISION FOR RIGHT AND LEFT FRONT PIECE: When piece measures 37-38-39-40 cm, divide the piece for right and left front piece by slipping middle stitch and the stitches for the other side of front piece on a thread (middle stitch = 1 knit stitch). Then work each shoulder separately with pattern and decrease as explained above (divide the piece before all decreases in pattern are done). When all decreases for V-neck are done, 24-26-28-28 stitches remain for shoulder. Continue to work until piece measures 58-60-62-64 cm. Cast off with knit over knit and purl over purl. Work the other shoulder the same way. SIZE XL AND XXL: Decrease stitches for armhole, at the same time divide the piece for right and left front piece, and work pattern and decrease for V-neck as explained below. DECREASE FOR ARMHOLES: Now decrease 1 stitch inside 6 stitches in garter stitch in each side the same way as on back piece - remember DECREASE TIP. Decrease like this on every row from right side 4-6 times in total = 81-85 stitches. PATTERN AND DECREASE FOR V-NECK: After last decrease for armhole continue to work with 6 stitches in garter stitch towards the side and pattern as before over the remaining stitches. When A.2 and A.3 have been worked vertically 2 times in total, work A.4 over A.2 and A.5 over A.3 (continue the remaining stitches as before). Decrease in A.4 and A.5 is decrease for V-neck. When A.4 and A.5 have been worked vertically, continue decrease the same way until 12-12 stitches have been decreased in total (on each front piece). DIVISION FOR RIGHT AND LEFT FRONT PIECE: When piece measures 41-42 cm, divide the piece for right and left front piece by slipping middle stitch and the stitches for the other side of front piece on a thread (middle stitch = 1 knit stitch). Then work each shoulder separately with pattern and decrease as explained above (divide the piece before all decreases are done). When all decreases for V-neck are done, 28-30 stitches remain for shoulder. Work until piece measures 66-68 cm. Cast off with knit over knit and purl over purl. Work the other shoulder the same way. ASSEMBLY: Sew shoulder seams inside cast-off edges. Sew side seam in outermost loop of edge stitches from armhole and down until approx. 17 cm remain (= vent). Repeat in the other side. NECK EDGE: Begin at one shoulder seam and pick up from right side approx. 106 to 130 stitches inside 1 edge stitch in garter stitch around the neck on a short circular needle size 4.5 mm with 1 strand in each quality (= 2 strands). Work rib in the round (= knit 1/purl 1) - but adjust so that middle stitch at the front is knitted and that rib fits the entire round. Insert 1 marker in middle stitch at the front. AT THE SAME TIME on every round decrease 2 stitches mid front as follows: Work until 1 stitch remains before stitch with marker, slip the next 2 stitches knitwise, knit 1, pass the 2 slipped stitches over stitch worked (= 2 stitches decreased). When decreasing like this the knit stitch in the middle of V-neck will follow as a straight line mid front. Decrease like this every round until neck edge measures approx. 3 cm in knitting direction. Cast off stitches with knit over knit and purl over purl. |
||||||||||||||||
Diagram explanations |
||||||||||||||||
|
||||||||||||||||
 |
||||||||||||||||
 |
||||||||||||||||
Have you finished this pattern?Tag your pictures with #dropspattern #ashmintslipover or submit them to the #dropsfan gallery. Do you need help with this pattern?You'll find 23 tutorial videos, a Comments/Questions area and more by visiting the pattern on garnstudio.com. © 1982-2026 DROPS Design A/S. We reserve all rights. This document, including all its sub-sections, has copyrights. Read more about what you can do with our patterns at the bottom of each pattern on our site. |
||||||||||||||||


With over 40 years in knitting and crochet design, DROPS Design offers one of the most extensive collections of free patterns on the internet - translated to 17 languages. As of today we count 324 catalogues and 12290 patterns translated into English (UK/cm).
We work hard to bring you the best knitting and crochet have to offer, inspiration and advice as well as great quality yarns at incredible prices! Would you like to use our patterns for other than personal use? You can read what you are allowed to do in the Copyright text at the bottom of all our patterns. Happy crafting!
Post a comment to pattern DROPS 227-31
We would love to hear what you have to say about this pattern!
If you want to leave a question, please make sure you select the correct category in the form below, to speed up the answering process. Required fields are marked *.