
Popular categories
Looking for a yarn?


Comments / Questions (166)
![]() Miriam wrote:
Miriam wrote:
Hallo, Ik ben aangekomen bij het raglan gedeelte. Ik heb 4 markeerders in het werk gezet: twee die beide mouwen met het ruggedeelte verbindt en twee die de mouwen met het linker - en rechter voorpand verbindt. Nu begrijp ik totaal niet wat er bedoeld wordt met raglan afwisselen op de mouw en op het lijf. Wat wordt dan als mouw gedeelte gezien? En wat als lijf gedeelte?
03.03.2018 - 15:13DROPS Design answered:
Hoi Miriam, Als het goed is heb je markeerdraden gezet tussen alle overgangen van mouw naar pand, dus als je bij een markeerdraad bent, zit aan de ene kant van de markeerdraad de mouw en aan de andere kant een voorpand of het achterpand. Je mindert steeds voor de raglan aan beide kanten van de markeerdraad, maar hoe vaak of om de hoeveel naalden je mindert op de mouw of op de panden is verschillend.
04.03.2018 - 17:00
![]() Diane Audet wrote:
Diane Audet wrote:
I understand how to do the following...When piece measures 21 cm / 8 1/4'', work as follows: 5 sts in garter st, A.1 2 times, P 2, stockinette st over the next etc. Now that I'm on the WS do I just purl across...and once I'm on the RS again do I repeat the above patter with the cable knit? Please do not just write what is on the pattern to make me understand. I can read the pattern. I need an explanation.
21.02.2018 - 20:22DROPS Design answered:
Dear Mrs Audet, continue in pattern as established, ie from WS K the sts in garter st, work K over K and P over P and read diagram from the left towards the right. Happy knitting!
22.02.2018 - 08:49
![]() Karine wrote:
Karine wrote:
Bonjour Il y a t il un problème avec la quantité de pelotes ? car je suis seulement au début des diminutions du raglan et je les ai fini. Il m en reste une car j'ai acheté 650gr a la place de 600 mais meme avec une de plus pas sur que cela suffise
17.02.2018 - 16:16Kim wrote:
I enjoyed making this cardigan and am very pleased with the result, however I am extremely disappointed that I needed to buy an extra 3 balls of Paris to complete it. (4th size).
31.01.2018 - 01:11
![]() Diane wrote:
Diane wrote:
5 sts in garter st, A.1 2 times, P 2, stockinette st over the next 27-33-39-44-54-64 sts, A.1 4-4-4-5-5-5 times, P 2, stockinette st over the next 27-33-39-44-54-64 sts, A.1 2 times, P 2, 5 sts in garter st. HOW OFTEN DO YOU REPEAT THIS AND WHEN?
23.01.2018 - 02:34DROPS Design answered:
Dear Diane, you continue working this pattern, at the same time, inc on each side and bind off the sts for armholes as explained, then continue in pattern as before when working yoke. Happy knitting!
23.01.2018 - 08:33
![]() Diane wrote:
Diane wrote:
The body 5 sts in garter st, (WHY ISN'T THERE A P2 ON THE RIGHT AFTER THE GARTER AS THERE IS ON THE LEFT?) IA.1 2 times, P 2, stockinette st over the next 27-33-39-44-54-64 sts, A.1 4-4-4-5-5-5 times, P 2, stockinette st over the next 27-33-39-44-54-64 sts, A.1 2 times, P 2, 5 sts in garter st.
22.01.2018 - 21:50DROPS Design answered:
Dear Diane, pattern start with P8 after the 5 sts in garter st and finishes with P8 before the 5 sts in garter st: 5 sts in garter st, * P 8, K 8 *, repeat from *-* 2 times in total, ..../... * P 8, K 8 *, repeat from *-* 2 times in total, P 8, 5 sts in garter st.
23.01.2018 - 08:31
![]() Diane wrote:
Diane wrote:
I know to Dec for buttonhole on the right but how how do I judge the spacing for a size large? On the picture it looks like every 3rd cbf going upward?
22.01.2018 - 21:25DROPS Design answered:
Dear Diane, you will find where to place buttonholes in the pattern, under BUTTONHOLES ie in SIZE L: 19, 26, 34, 42, 50 and 58 cm / 7½", 10 1/4", 13½", 16½", 19 3/4", 22 3/4". Happy knitting!
23.01.2018 - 08:30Diane wrote:
So I started with 240 stitches. I decrease alternately beg and end every 3 cm or approx every 7th row. Per Dec row it's 11 stitches ...5 times which should end up with 240-55=185 but the pattern says I should end up with 174....what am I missing? Also could you tell me if it's Dec every 3 cm why does it matter if the Dec is alternated beg and end in the purl sections? Thank you for helping D
06.01.2018 - 02:07DROPS Design answered:
Dear Diane, the pattern says "Repeat dec every 3 cm 5 more times" which means you decrease all together 6 times. Then you will get the stitch count stated in the pattern. Also you should decrease alternately at the beginning and the end of the row, so the "peplum" part does not slant to eaither way, but stays straight. I hopw this helps. Happy Knitting!
06.01.2018 - 13:01
![]() Sibylle wrote:
Sibylle wrote:
Ist es richtig, dass der Markierer zwischen Ärmel und Rumpfteil sitzt? Muss ich dann für die Raglanabnahmen a) am Rumpfteil 2M re zusammenstricken (jede 2. Reihe) und b) am Ärmel 1M abheben,1M rechts stricken und die abgehoben Masche überziehen? Das heißt: Muss ich die beschriebenen Raglanabnahmen in jeder 2. Reihe nur zur Hälfte ausführen, also nur bis zum Markierer? M
21.11.2017 - 15:19DROPS Design answered:
Liebe Sybille, ja die Markierer sind zwischen Ärmel und Rumpfteil. So wird es abgnommen wenn insg 8 M abgenommen sollen, wenn Sie nur 4 M abnehmen sollen, dann 1 M an der gewünschten Markierer abnehmen- siehe Größe. Viel Spaß beim stricken!
21.11.2017 - 16:31
![]() Sibylle wrote:
Sibylle wrote:
Der unterschiedliche Rhythmus der Raglanabnahmen scheint mir sehr kompliziert. Wie muss ich abnehmen, wenn ich an Rumpf und Ärmeln gleichzeitig abnehmen Möchte?
19.11.2017 - 18:00DROPS Design answered:
Liebe Sibylle, wenn Sie nicht wie in der Anleitung abnehmen, wird die Passe unterschiedlich aussehen/messen. Bei der Passe nehmen Sie entweder 4 oder 8 Maschen (dh je nach der Grösse nur bei den Ärmeln, nur bei Vorder- und Rückenteil oder bei allen Teile). Viel Spaß beim stricken!
20.11.2017 - 09:39
|
||||||||||
Romantic Twist#romantictwistcardigan |
||||||||||
 |
 |
|||||||||
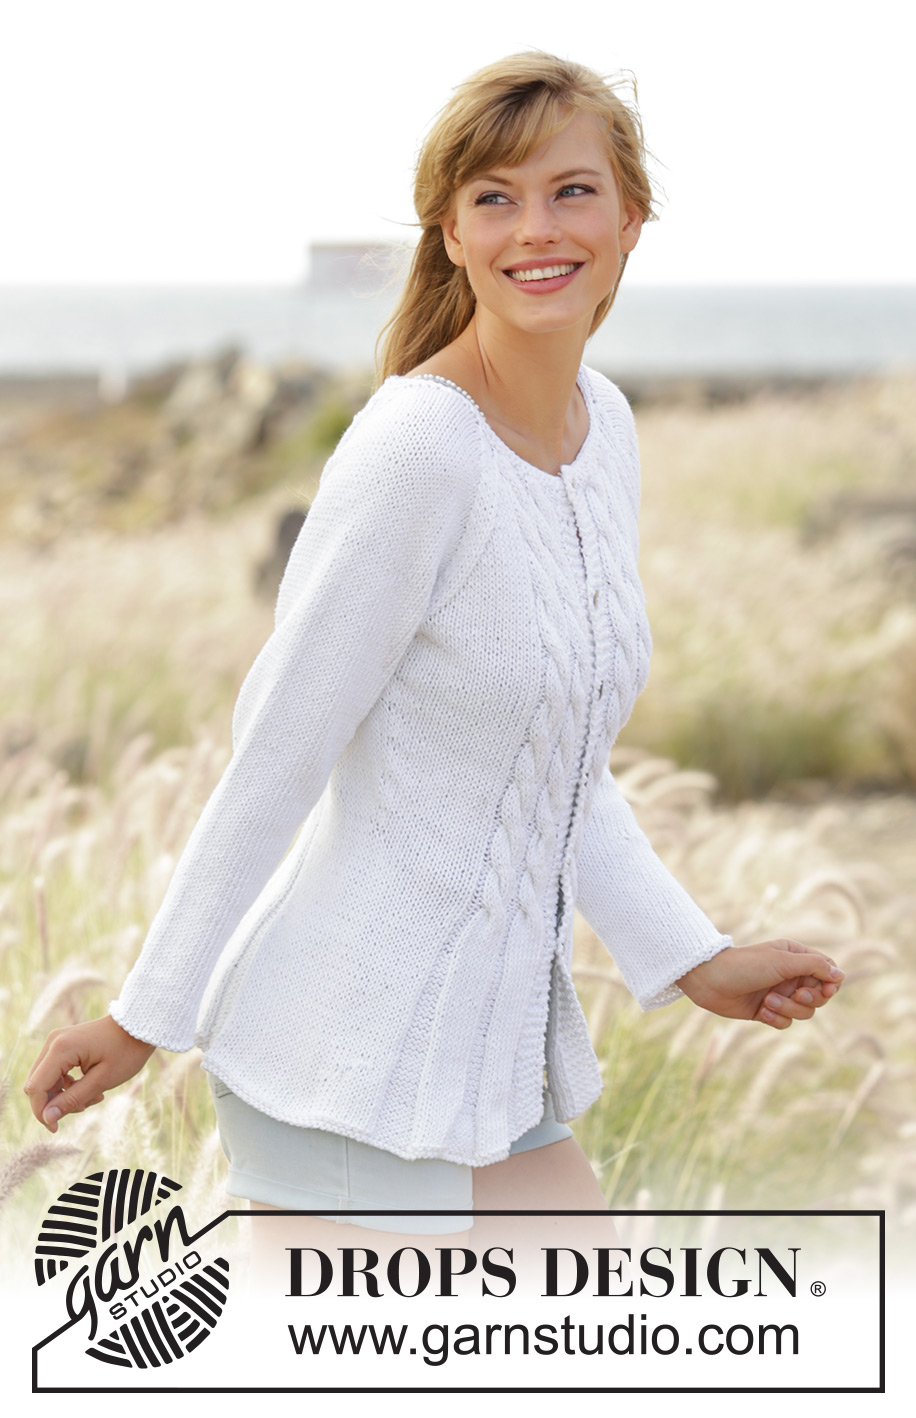
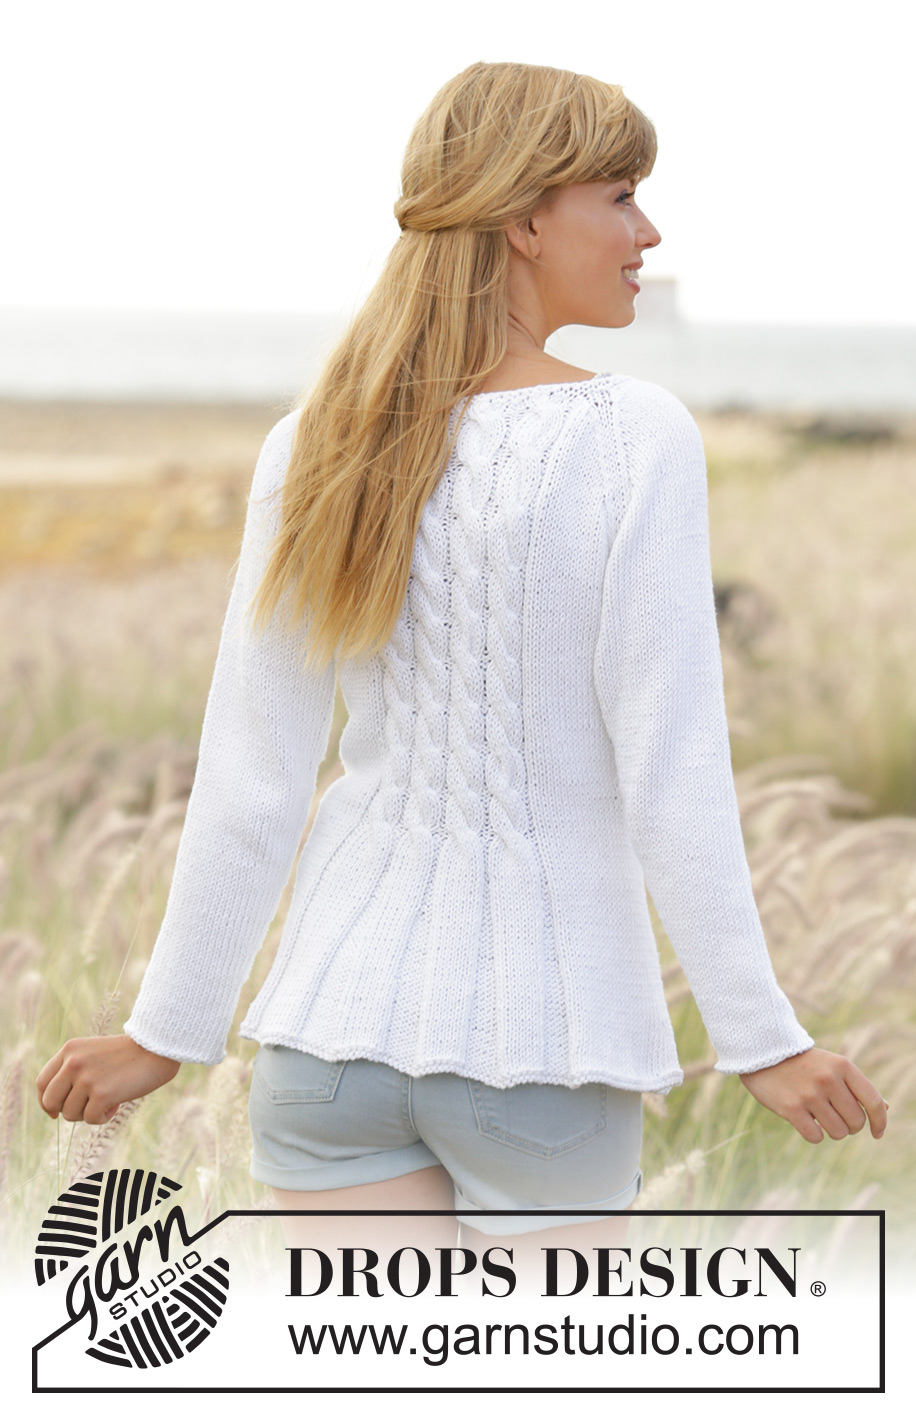
Knitted DROPS fitted jacket with cables and raglan in ”Paris”. Size: S - XXXL.
DROPS 169-1 |
||||||||||
|
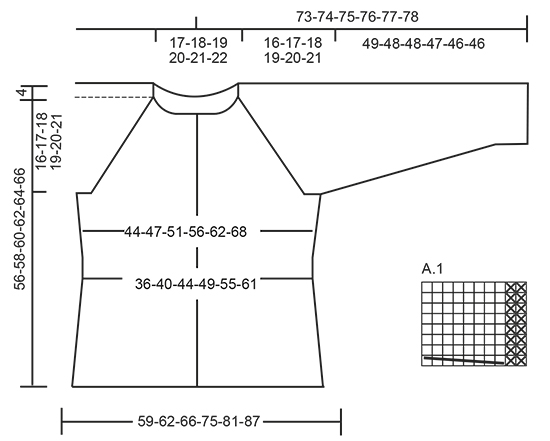
GARTER ST (back and forth): K all rows. 1 ridge = 2 rows K. GARTER ST (worked in the round): 1 ridge = 2 rounds. * K 1 round and P 1 round *, repeat from *-*. DECREASE TIP: Dec 1 st by P 2 tog. Dec alternately at beg and end of P section. PATTERN: See diagram A.1. The diagram show all rows in pattern seen from RS. RAGLAN: Dec 2 sts in every transition between body and sleeves. Dec as follows from RS: K 2 tog, K 2 (marker is between these sts), slip 1 st as if to K, K 1, psso. Dec as follows from WS: P 2 twisted tog, P 2 (marker is between these sts), P 2 tog. KNITTING TIP: If knitting tension is incorrect in height and the knitting is too tight, the raglan dec will be too short and the armholes too small. This can be adjusted by working 1 extra row without dec evenly spaced between dec. BUTTONHOLES: Dec for buttonholes on right band. 1 buttonhole = K tog 2nd and 3rd st from mid front, then make 1 YO. Dec for buttonholes when piece measures: SIZE S: 19, 26, 33, 40, 47 and 54 cm. SIZE M: 19, 26, 33, 40, 48 and 56 cm. SIZE L: 19, 26, 34, 42, 50 and 58 cm. SIZE XL: 19, 28, 36, 44, 52 and 60 cm. SIZE XXL: 19, 26, 33, 40, 47, 54 and 62 cm SIZE XXXL: 19, 26, 33, 40, 48, 56 and 64 cm ---------------------------------------------------------- BODY: Worked back and forth on circular needle from mid front. Cast on 216-228-240-266-286-306 sts (incl 5 band sts in each side towards mid front) on circular needle size 5 mm with Paris. Work 1 ridge in GARTER ST - see explanation above, then work as follows - from RS: 5 sts in garter st, * P 8, K 8 *, repeat from *-* 2 times in total, P 8, 27-33-39-44-54-64 sts in stocking st, * P 8, K 8 *, repeat from *-* 4-4-4-5-5-5 times in total, P 8, 27-33-39-44-54-64 sts in stocking st, * P 8, K 8 *, repeat from *-* 2 times in total, P 8, 5 sts in garter st. Repeat this pattern upwards. REMEMBER THE KNITTING TENSION When piece measures 5 cm, dec 1 sts in all P-sections (= 11-11-11-12-12-12 dec per dec round) - READ DECREASE TIP. Repeat dec every 3 cm 5 more times = 150-162-174-194-214-234 sts. Dec for BUTTONHOLES on right band - see explanation above. When piece measures 21 cm, work as follows: 5 sts in garter st, A.1 2 times, P 2, stocking st over the next 27-33-39-44-54-64 sts, A.1 4-4-4-5-5-5 times, P 2, stocking st over the next 27-33-39-44-54-64 sts, A.1 2 times, P 2, 5 sts in garter st. Insert 2 markers in the piece; 40-43-46-51-56-61 sts in from each side (back piece = 70-76-82-92-102-112 sts). When piece measures 23 cm, inc 1 st on each side of each marker (= 4 sts inc), repeat inc every 2½-3-3-3½-3½-4 cm 5 more times = 174-186-198-218-238-258 sts. When piece measures 40-41-42-43-44-45 cm, work next row (from RS) as follows: Work 43-46-49-54-59-64 sts, cast off the next 6 sts, work 76-82-88-98-108-118 sts, cast off the next 6 sts and work the remaining 43-46-49-54-59-64 sts. Put piece aside and knit the sleeves. SLEEVE: Worked in the round on double pointed needles. Cast on 32-34-36-38-40-42 sts on double pointed needles size 5 mm with Paris. Work 1 ridge, then work in stocking st. Insert 1 marker at beg of round (= mid under sleeve). When piece measures 8 cm, inc 2 sts mid under sleeve. Inc every 3-2½-2½-2½-2-2 cm 13-13-14-15-16-16 more times = 60-62-66-70-74-76 sts. When piece measures 49-48-48-47-46-46 cm (shorter measurements in the larger sizes because of longer sleeve cap), cast off 6 sts mid under sleeve = 54-56-60-64-68-70 sts. Put piece aside and knit another sleeve. YOKE: Slip sleeves on to same circular needle as body where armholes were cast off = 270-286-306-334-362-386 sts. Insert a marker in all transitions between sleeves and body piece. Continue pattern as before AT THE SAME TIME dec for RAGLAN – see explanation above. Dec differently on body and sleeve. RAGLAN SLEEVE: Dec every other row 16-17-17-18-18-19 times, then every row 4-4-6-7-9-9 times (= 20-21-23-25-27-28 times in total). RAGLAN BODY: Dec every 4th row 4-2-0-0-0-0 times, every other row 11-16-19-21-19-16 times, then every row 0-0-2-0-7-15 times (= 15-18-21-21-26-31 times in total). After all dec are done, 130-130-130-150-150-150 sts remain on needle. On next row dec 2 sts over every cable in A.1 = 114-114-114-132-132-132 sts. Work 2 ridges over all sts, on first row dec 20-16-12-26-22-18 sts evenly = 94-98-102-106-110-114 sts. Cast off. ASSEMBLY: Sew the opening mid under the sleeves. Sew the buttons on to the left band. |
||||||||||
Diagram explanations |
||||||||||
|
||||||||||
 |
||||||||||
Have you finished this pattern?Tag your pictures with #dropspattern #romantictwistcardigan or submit them to the #dropsfan gallery. Do you need help with this pattern?You'll find 26 tutorial videos, a Comments/Questions area and more by visiting the pattern on garnstudio.com. © 1982-2026 DROPS Design A/S. We reserve all rights. This document, including all its sub-sections, has copyrights. Read more about what you can do with our patterns at the bottom of each pattern on our site. |
||||||||||


With over 40 years in knitting and crochet design, DROPS Design offers one of the most extensive collections of free patterns on the internet - translated to 17 languages. As of today we count 324 catalogues and 12290 patterns translated into English (UK/cm). 12290
We work hard to bring you the best knitting and crochet have to offer, inspiration and advice as well as great quality yarns at incredible prices! Would you like to use our patterns for other than personal use? You can read what you are allowed to do in the Copyright text at the bottom of all our patterns. Happy crafting!
Post a comment to pattern DROPS 169-1
We would love to hear what you have to say about this pattern!
If you want to leave a question, please make sure you select the correct category in the form below, to speed up the answering process. Required fields are marked *.