
Popular categories
Looking for a yarn?


Comments / Questions (48)
![]() Barbara wrote:
Barbara wrote:
What is the best way to sew the bind off and bind on edges of the hat together? Many thanks in advance.
15.11.2020 - 14:49DROPS Design answered:
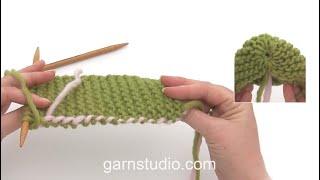
Dear Barbara, this video shows how to sew together a cast on edge and a cast off edge - it is worked the same way with a garter stitch piece. Happy knitting!
16.11.2020 - 09:04
![]() Nicole Campora wrote:
Nicole Campora wrote:
Bonjour, Je tricote le bonnet et je ne comprends pas comment sont tricotés les rangs pairs. Doit on les tricoter comme les rangs impairs ? Merci pour votre aide.
18.10.2020 - 19:32DROPS Design answered:
Bonjour Mme Campora, sur les rangs pairs, vous tricotez toutes les mailles à l'endroit (et les jetés torse à l'endroit pour éviter les trous). Bon tricot!
19.10.2020 - 09:29
![]() Ann-Marita wrote:
Ann-Marita wrote:
Jeg prøvde å gjøre som oppskriften sa på skjerfet ved å øke 1 m etter kantmasken på hver pinne, men jeg syns det ikke ble pent når den skulle strikkes vridd på neste pinne. Forsøkte derfor å øke før siste maske på hver pinne, det ble veldig pent og symetrisk
01.09.2020 - 20:08
![]() Barbara wrote:
Barbara wrote:
Ik wil deze muts voor een meisje van 10 maken, hoe kan ik hem kleiner maken?
18.01.2020 - 11:47DROPS Design answered:
Dag Barbara,
Helaas is het voor ons niet mogelijk om patronen aan te passen aan persoonlijke wensen. Je zou wat minder steken op kunnen zetten en minder lang door breien. (De hoogte waarop je afkant is de omtrek van het hoofd.)
19.01.2020 - 18:13
![]() Carmen-Gabriela wrote:
Carmen-Gabriela wrote:
Phänomenale die Diagonale, klasse Trick:)! Strickt sich super, schnelles Ergebnis mit mega Effekt! Der Herbst kann kommen - ich mache gleich ein weiteres Set:) - Einfach SUPER.
18.09.2019 - 17:45
![]() Graziella wrote:
Graziella wrote:
Non ho capito bene il procedimento della sciarpa ...un ferro aumento in ferro diminuisco. ....c'è qualche passaggio che sbaglio grazie x il chuarimento
11.01.2019 - 07:24DROPS Design answered:
Buongiorno Graziella. All'inizio aumenta fino ad avere 49 m. Da qui in avanti, sul diritto del lavoro, diminuisce 1 m all'inizio del ferro; sul ferro di ritorno aumenta 1 m all'inizio del ferro. Quindi alla fine del secondo ferro ha di nuovo 49 m. Prosegue così finché la sciarpa non misura 150 cm. Poi dinìminuisce fino ad avere 3 m. Buon lavoro!
11.01.2019 - 08:46Helen wrote:
I have read all the faq's but still a bit confused. work row 3 as stated-turn with 4 sts remaining- then work row 4. when working back on row 4 am i correct in that i keep the pattern (yo, k2tog etc) but skip the turn and complete the row? otherwise i end up with 2 short sides
25.11.2018 - 08:39DROPS Design answered:
Dear Helen, on row 3 you work 40 sts: K2 tog, K33, YO, K5 (= there are 40 sts on the right needle - leave the remaining sts on left needle unworked, turn and K these 40 sts on next row = row 4. Happy knitting!
26.11.2018 - 08:59
![]() Letizia wrote:
Letizia wrote:
Bonjour, je suis en train de tricoter l'écharpe mais je n'ai pas compris de quel coté je dois mesurer la hauteur, vu que à cause des augmentation et des diminution il y a un coté plus long par rapport à l'autre. Quand je regarde l'écharp sur l'endroit, je dois mesurer le coté droite ou le coté gauche? Merci
09.10.2018 - 12:50DROPS Design answered:
Bonjour Letizia, le début de l'écharpe se tricote en biais: vous augmentez au début de chaque rang (sur l'endroit et sur l'envers) jusqu'à ce que le côté mesure 23 cm (l'un des côtés où vous avez augmenté). Vous continuez ensuite en diminuant 1 m au début de chaque rang sur l'endroit et en augmentant 1 m au début de chaque rang sur l'envers, vous allez obtenir un rectangle, vous mesurez ensuite le long de la grande longueur. Bon tricot!
09.10.2018 - 13:38
![]() Letizia wrote:
Letizia wrote:
Bonjour, mon échantillon est plutôt 19m et pas 17, est-ce que je dois changer la taille de mes aiguilles? Merci
16.03.2018 - 14:43DROPS Design answered:
Bonjour Letizia, vous pouvez dans un premier temps laver et sécher votre échantillon dans les mêmes conditions que vous laverez votre ouvrage par la suite et vérifier si les dimensions sont justes et ajuster la taille des aiguilles si nécessaire (et renouveler l'opération jusqu'à ce que vous ayez le bon échantillon). Bon tricot!
16.03.2018 - 15:18
![]() Barbara wrote:
Barbara wrote:
Dziękuję za dołączony filmik ale wydaje mi się że nie dotyczy on tego przypadku poniewaz czapka powinna być zszyta wzdłuż "tych rowków czyli rzędów" a nie w poprzek.
25.05.2017 - 18:18DROPS Design answered:
Witam ponownie. Wykonywałam wzór 0-964 również po skosie ściegiem francuskim i zszywałam tak samo, szwu nie widać wogóle na prawej stronie robótki. Proszę spróbować na fragmencie, zawsze można spruć szew i spróbowac ponownie. POWODZENIA!
26.05.2017 - 09:19
|
|
Candy Crush Set#candycrushset |
|
 |
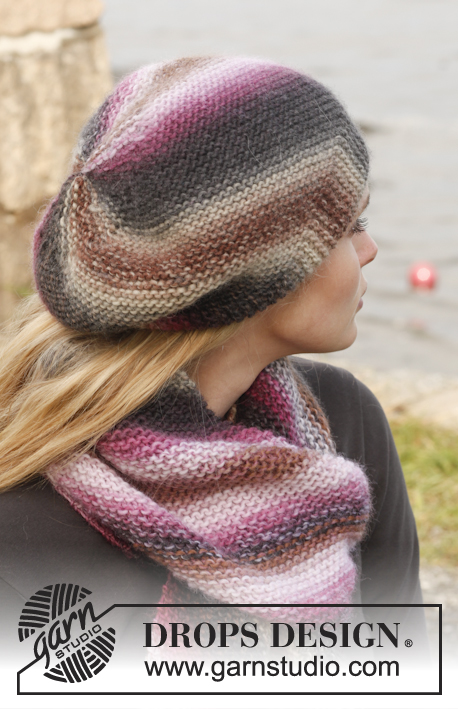 |
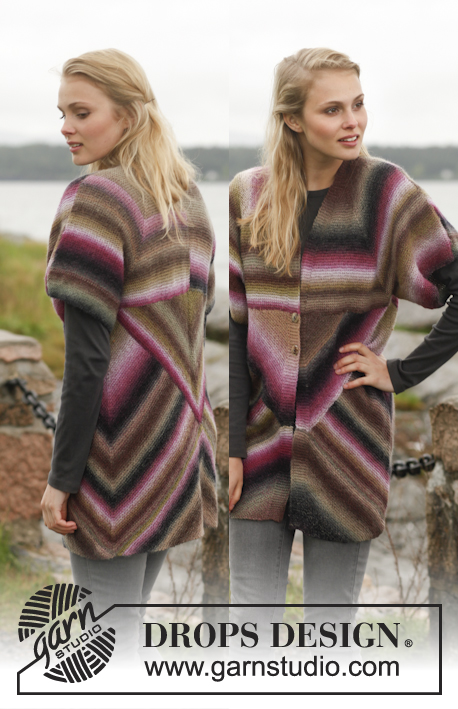
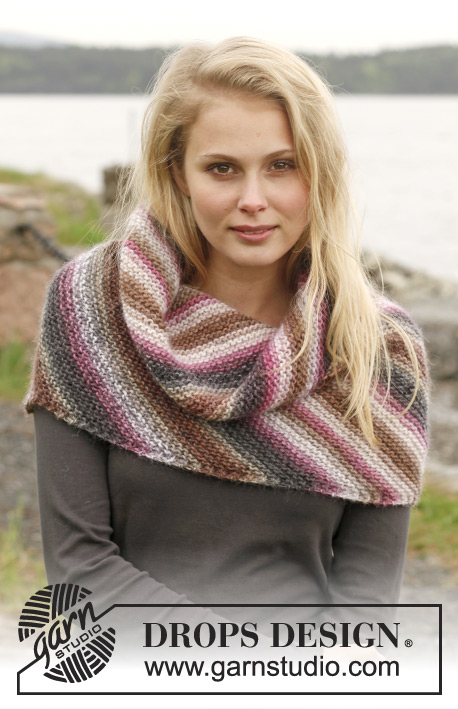
Set consists of: Knitted DROPS hat and scarf in garter st in ”Big Delight”.
DROPS 151-20 |
|
|
GARTER ST (back and forth on needle): K all rows. 1 ridge = 2 rows K. INCREASE TIP: Inc 1 st by making 1 YO after 1st edge st, on next row K YO twisted (i.e. work in back loop of st instead front) to avoid holes. DECREASE TIP: Dec inside 1 edge st in garter st by K 2 tog. ---------------------------------------------------------- HAT: Work sideways back and forth on needle with short rows. Cast on 52 sts on needle size 5 mm with Big Delight. Work in GARTER ST - see explanation above, AT THE SAME TIME work as follows - from RS: Row 1- 2: K 8, K 2 tog, K 33, 1 YO, K 9. Turn and K back (K YO twisted). Row 3- 4: K 8, K 2 tog, K 33, 1 YO, K 5, turn and work back (K YO twisted). Row 5- 6: K 8, K 2 tog, K 33, 1 YO, K 1, turn and work back (K YO twisted). Repeat these 6 rows upwards. Cast off when piece measures 50-52 cm on the longest (= bottom edge). ASSEMBLY: Sew tog the cast-on and cast-off edge. Baste a yarn through sts along the upper edge and tighten the hat tog. ---------------------------------------------------------- SCARF: Worked back and forth on circular needle. Cast on 3 sts on circular needle size 6 mm with Big Delight. Work in GARTER ST - see explanation above (1st row = RS). Then inc 1 st at beg on every row - read INCREASE TIP. Repeat inc until there are 49 sts on needle. Piece measures approx. 23 cm measured along the side with inc. Continue in garter st as before, AT THE SAME TIME dec 1 st at beg of every row from RS - READ DECREASE TIP, and continue inc as before at beg of every row from WS. Continue to inc and dec in each side of piece until finished measurements (no of sts will thus not vary). When piece measures 150 cm - measured straight up along the side of scarf (not in knitting direction) dec 1 st at beg of every row by K 2 tog. Work until 3 sts remain, cast off and fasten loose strands. |
|
Have you finished this pattern?Tag your pictures with #dropspattern #candycrushset or submit them to the #dropsfan gallery. Do you need help with this pattern?You'll find 10 tutorial videos, a Comments/Questions area and more by visiting the pattern on garnstudio.com. © 1982-2026 DROPS Design A/S. We reserve all rights. This document, including all its sub-sections, has copyrights. Read more about what you can do with our patterns at the bottom of each pattern on our site. |
|


With over 40 years in knitting and crochet design, DROPS Design offers one of the most extensive collections of free patterns on the internet - translated to 17 languages. As of today we count 324 catalogues and 12290 patterns translated into English (UK/cm). 12290
We work hard to bring you the best knitting and crochet have to offer, inspiration and advice as well as great quality yarns at incredible prices! Would you like to use our patterns for other than personal use? You can read what you are allowed to do in the Copyright text at the bottom of all our patterns. Happy crafting!
Post a comment to pattern DROPS 151-20
We would love to hear what you have to say about this pattern!
If you want to leave a question, please make sure you select the correct category in the form below, to speed up the answering process. Required fields are marked *.