
Popular categories
Looking for a yarn?


Comments / Questions (17)
![]() Maryline wrote:
Maryline wrote:
Bonjour je débute dans le crochet Je ne comprends pas le commencement des emmanchures je suis arrivée au niveau des diminutions en taille xl vous dites 3fois 1 m de chaque côté tous les rangs puis 4fois tous les deux rangs Et ensuite crocheter jusqu à l ouvrage fasse 55 cm Doit on diminuer 3 m de chaque côté pendant 2 rangs et ensuite 4 mailles tous les deux rangs? On diminue tous les rangs jusqu'au 55 cm? Merci
11.02.2026 - 17:26DROPS Design answered:
Bonjour Marilyne, vous devez diminuer pour les emmanchures de chaque côté comme indiqué sous DIMINUTIONS-1 (emmanchures): d'abord 3 x 1 m tous les rangs (= on diminue 2 m par rang, il reste 78-(2x3)=72 m; puis on diminue 4 x 1 m de chaque côté tous les 2 rangs (on diminue 2 m par rang à chaque fois, il va rester: 72-(2x4)=68 mailles. Crochetez ces 68 mailles jusqu'à 65 cm de hauteur totale, puis crochetez les épaules sur les 22 m de chaque côté. (avec A.1 /A.2 côté encolure). Bon crochet!
12.02.2026 - 17:44
![]() Clara wrote:
Clara wrote:
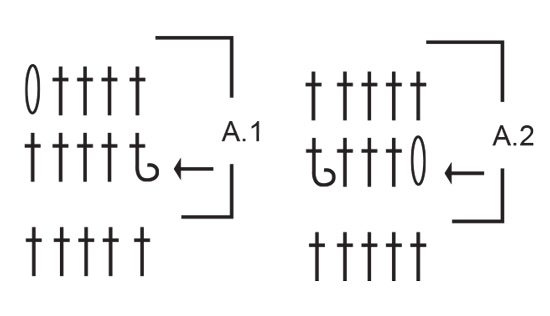
Je ne comprends pas pourquoi il est nécessaire de faire A.1 et A.2, as quoi servent-ils ? Pourquoi faire des doubles bridés reliefs ?
20.11.2025 - 19:36DROPS Design answered:
Bonjour Clara, A.1 et A.2 sont crochetés pour former la bordure de l'encolure dos et la bordure des devants. Bon crochet!
21.11.2025 - 07:42
![]() Isabelle wrote:
Isabelle wrote:
Je ne comprends pas comment faire les épaules et surtout la double bride en relief. Pouvez vous m’aider? Existe-t-il un tuto?
10.10.2025 - 21:21DROPS Design answered:
Bonjour Isabelle, dans cette vidéo, nous montrons comment réaliser une bride en relief; pour les épaules du dos, à la hauteur indiquée, vous ne crochetez que les 15-19 premières mailles comme avant + les 5 m de A.1 (sur l'endroit; sur l'envers crochetez A.1 en lisant de gauche à droite et terminez par les brides); continuez jusqu'à la hauteur indiquée et couper le fil puis crochetez l'épaule gauche avec A.2 au lieu de A.1. Bon crochet!
15.10.2025 - 07:31
![]() Hania wrote:
Hania wrote:
Chciałabym się dowiedzieć co oznacza to zdanie: Teraz zacząć podkroje rękawów, przerabiając rząd słupków tylko ponad 60-66-70-78-84-92 słupkami środkowymi (zamkniętych 3-3-4-4-5-5 oczek z każdej strony). Gdzie znajduje się 92 słupek środkowy? i co ogólnie oznacza wklejone powyżej zdanie.
16.03.2025 - 18:41DROPS Design answered:
Witaj Haniu, teraz zaczynasz od nowej nitki (poprzednio odcięłaś nitkę), zaczynasz przerabiać od 6-tego oczka i przerabiasz słupki (dokładnie 92 słupki) jak wcześniej, kończysz ten rząd gdy zostaje 5 oczek do końca rzędu. W ten sposób otrzymasz wcięcia na podkroje rękawów. Dalej przerabiaj wg wzoru. Pozdrawiamy!
18.03.2025 - 08:22
![]() Lou wrote:
Lou wrote:
Bonjour, Début des emmanchures : j’ai réalisé les 70 brides centrales (taille L). Je ne comprends pas les instructions pour diminuer. Dois-je enlever 0 maille (donc rien) de chaque côté tous les rangs puis 4 mailles de chaque côté tous les 2 rangs (soit 8 mailles) ? Sauf que j’ai l’impression que le travail diminue trop vite, je n’atteins pas les 63 cm. Merci pour votre aide
23.02.2025 - 19:17DROPS Design answered:
Bonjour Lou, quand vous voyez un "0" pour votre taille, passez simplement cette information pour aller à la suivante, autrement dit, en taille L, vous diminuez pour les emmanchures 4 fois 1 maille tous les 2 rangs, soit 70-(2x4)=62 mailles. Bon crochet!
24.02.2025 - 09:19
![]() Frieda wrote:
Frieda wrote:
Rubriek tip minderen-2 voor de V-hals: kan je hierna verduidelijken “ minder ad binnenkant vd buitenste 6 steken richting hals; dus als u mindert ah einde vd toer, haakt u tot er 8 steken over zijn, …
19.01.2025 - 20:53DROPS Design answered:
Dag Frieda,
Je mindert zeg maar naast de 6 steken van de hals en door de 2 steken vlak daarvoor samen te haken.
20.01.2025 - 20:19
![]() Monica Berta wrote:
Monica Berta wrote:
Buenas tardes, me gustaría convertir este chaleco en una chaqueta: me pueden orientar acerca de cómo hacer eso posible? Si me puedo referir a algún otro modelo para hacer las mangas o si bastaría simplemente con hacer unas mangas rectas y adaptar el escote de las mangas. Gracias por sus comentarios.
01.01.2025 - 19:18DROPS Design answered:
Hola Monica, nosotros no hacemos patrones personalizados, pero puedes ver el modelo Silver Moon Cardigan /252-19: https://www.garnstudio.com/pattern.php?id=11956&cid=23. Se trata de una chaqueta a ganchillo hecha con DROPS Air, así que deberías poder extraer las instrucciones de las mangas y el cuello y aplicarlas a este chaleco.
05.01.2025 - 18:41
![]() Mowy wrote:
Mowy wrote:
Bonjour Madame, Je me suis mal exprimée. J' ai fait l'assemblage épaules, côtés et suis arrivée à "Bordure des emmanchures". C'est à partir de là que je suis perdue 1) Il est indiqué : "en commençant en bas de l'emmanchure" = est-ce là au niveau de ces 4 mailles que débute le travail ou c'est sur les brides juste au-dessus ? 2) Par : "/ du rang de brides suivant, crocheter 3 mailles en l’air, "= Je pique où pour former les 3 m en l'air? Bonne journée
20.06.2024 - 13:25DROPS Design answered:
Bonjour Mme Mowy, commencez la bordure de l'emmanchure en bas de l'emmanchure, au niveau de la couture entre le dos et le devant, autrement dit, vous commencerez effectivement par les 4 premières brides sautées pour le dos (emmanchure droite) / devant gauche (emmanchure gauche), vous remontez le long du dos/devant gauche jusqu'à l'épaule, vous redescendez ensuite le long du devant droit/dos pour terminer en bas de l'emmanchure. Le long des emmanchures, vous crochetez votre maille serrée autour de la bride, 2 cm après la maille serrée précédente. Bon crochet!
20.06.2024 - 15:12
![]() Mowy wrote:
Mowy wrote:
Bonjour, j'ai crocheté le modèle Hazy Dew Vest en suivant vos explications mais je suis bloquée aux emmanchures. Je ne sais pas par où commencer. En bas de l'emmanchure, au début, il y a 1 diminution de 4 m. Que fait-on d'elles? J’ai cherché si, sur votre site, il y avait une vidéo explicative mais je n’ai rien trouvé. Pourriez- vous m’aider à terminer ce gilet ? Merci d’avance de vos explications, de votre aide Mowy
18.06.2024 - 22:44DROPS Design answered:
Bonjour Mme Mowy, les 4 mailles à diminuer de chaque côté pour les emmanchures se font comme indiqué sous DIMINUTIONS-1 et comme indiqué dans cette vidéo (notez que l'on ne diminue que 3 mailles dans la vidéo). Bon crochet!
19.06.2024 - 08:05
![]() Emma wrote:
Emma wrote:
Nu ik 34 cm van mijn achterpand heb gehaakt moet ik beginnen aan de armsgaten. Er staat dat ik in een toer moet haken. Moet ik dan echt in het rond haken? Zo ja, hoe moet dat dan precies
17.01.2024 - 14:05DROPS Design answered:
Dag Emma,
Nee, je blijft nog steeds heen en weer haken hoor. Je haakt eerst een aantal stokjes over de middelste steken en dan keer je het werk en blijf je heen en weer haken waarbij je steken mindert aan elke kant zoals aangegeven in het patroon.
17.01.2024 - 17:55
|
|||||||||||||
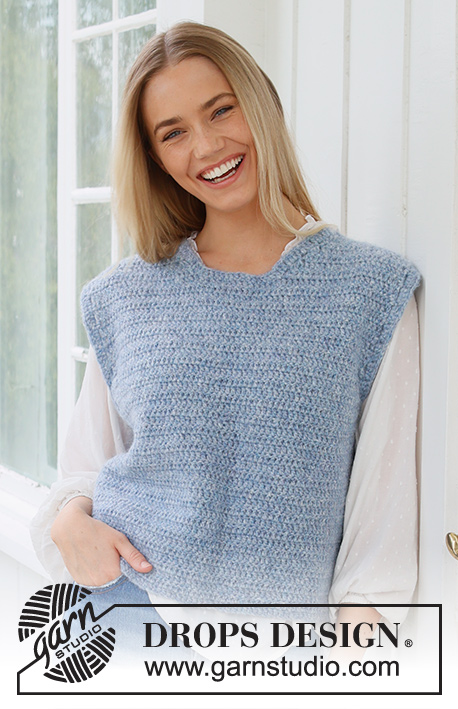
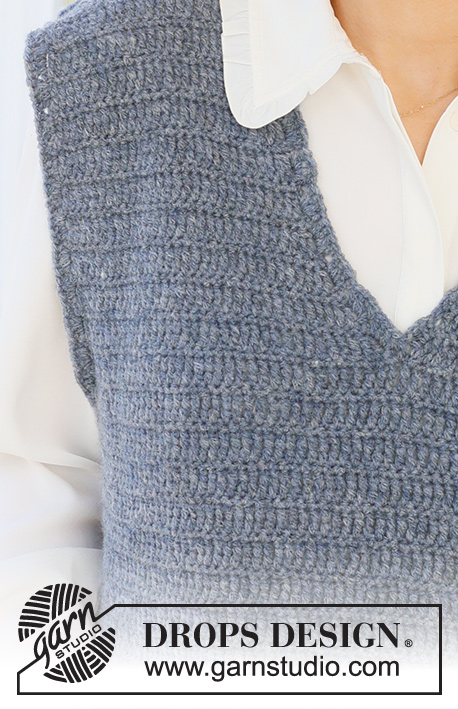
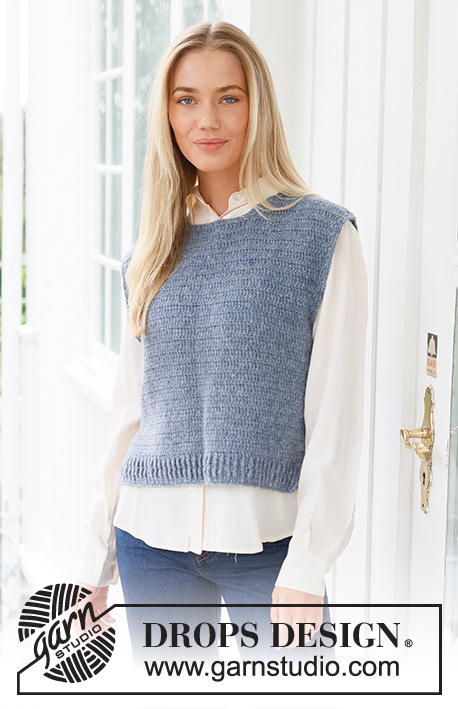
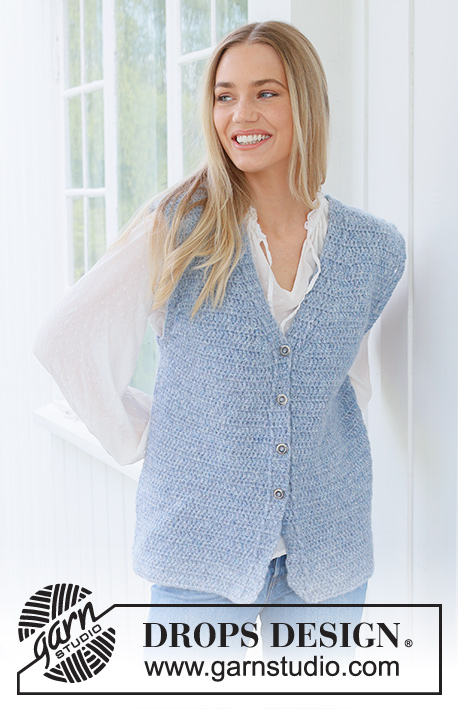
Hazy Dew Vest#hazydewvest |
|||||||||||||
 |
 |
||||||||||||
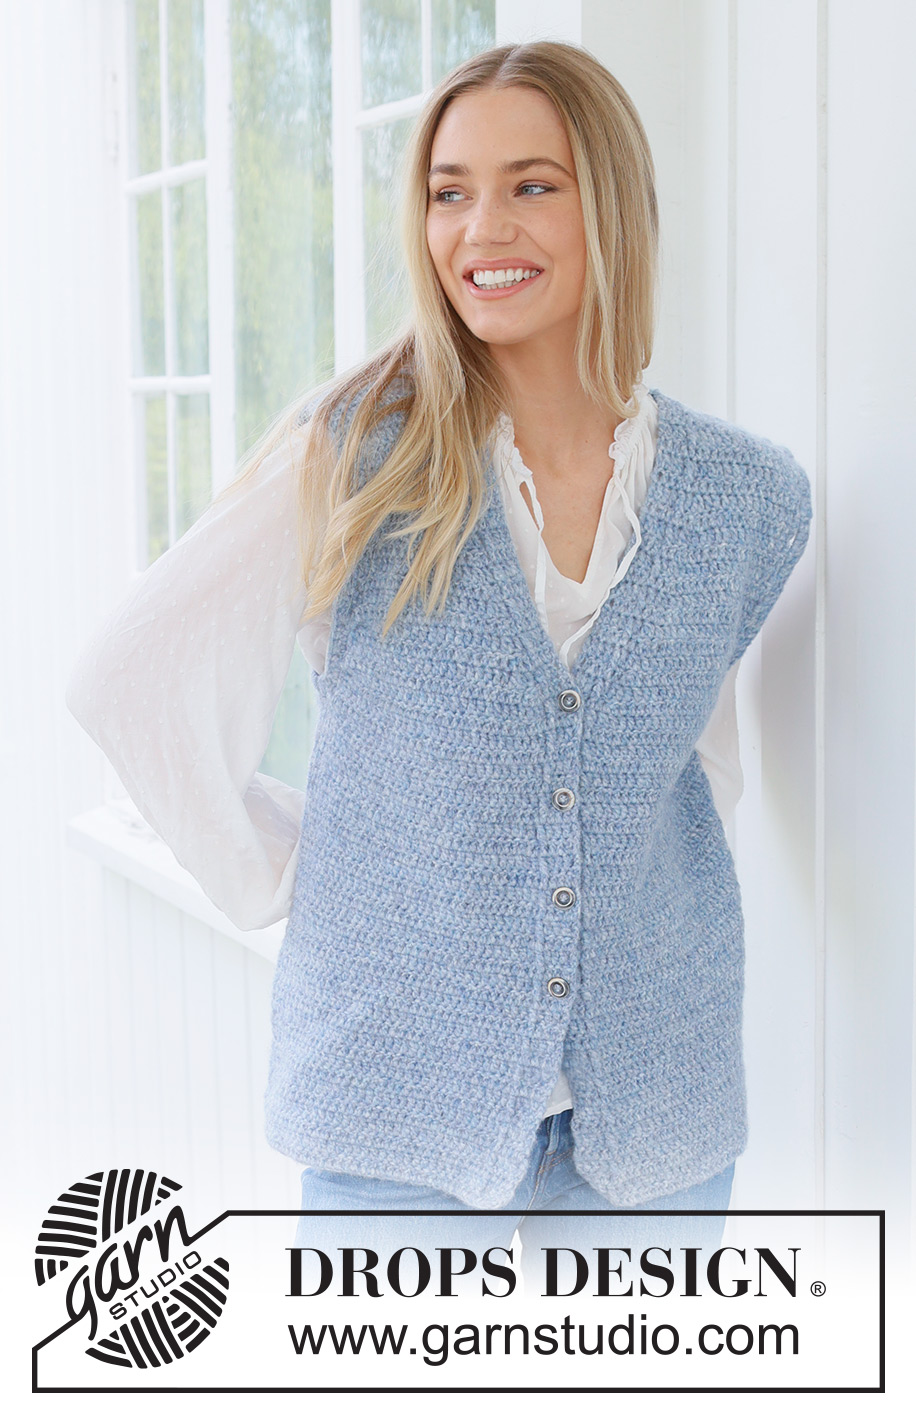
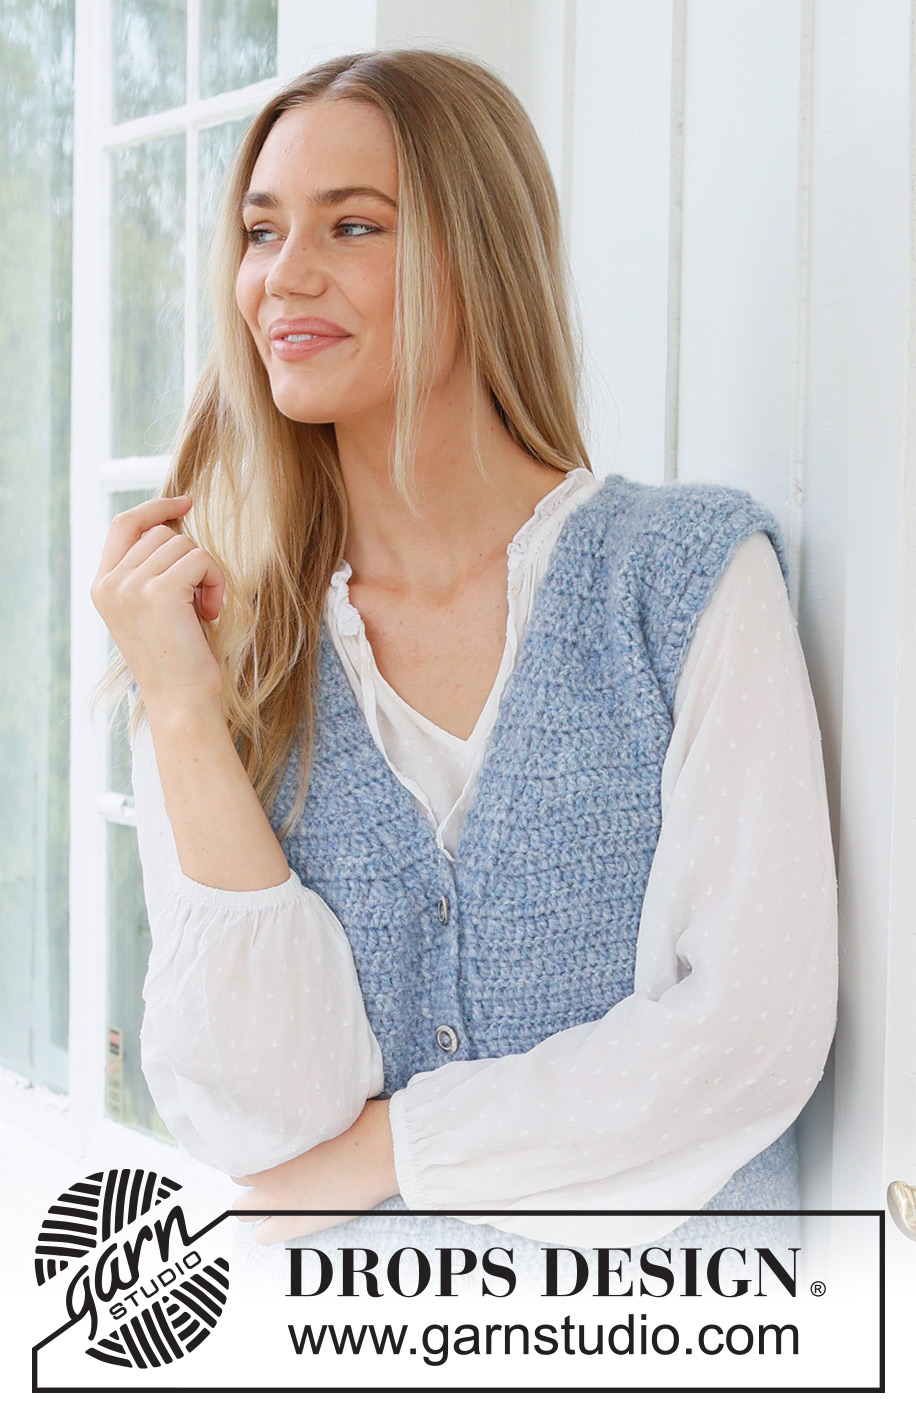
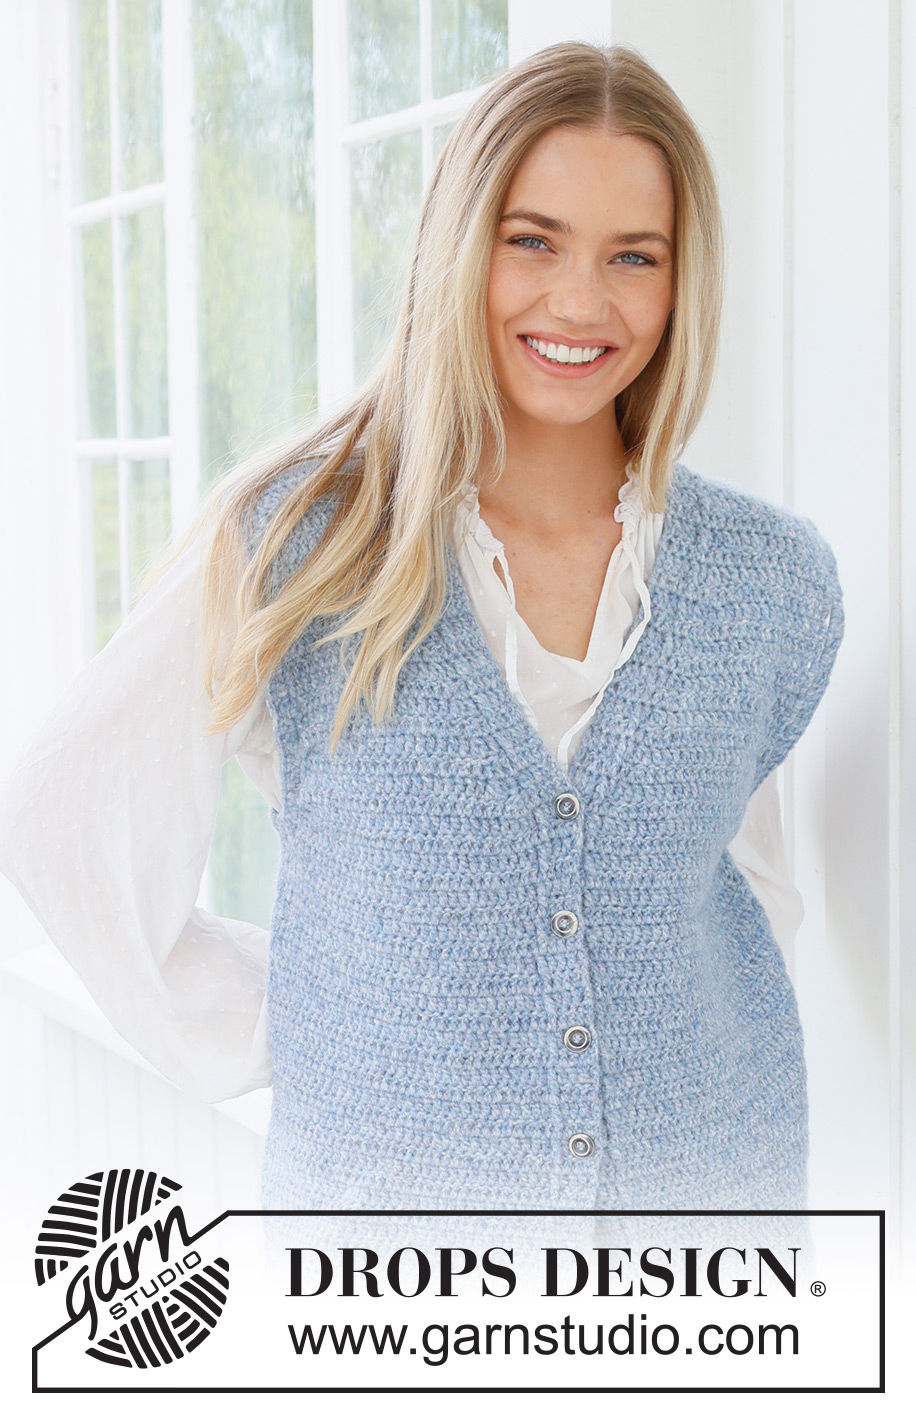
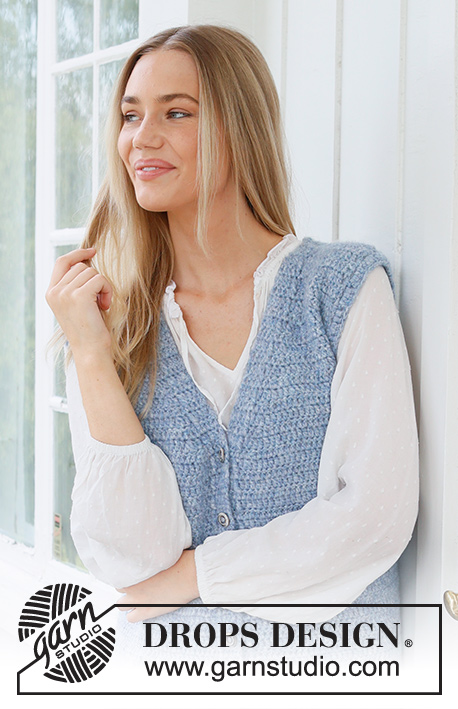
Crocheted vest in DROPS Air. The piece is worked bottom up with V-neck and split in the sides. Sizes S - XXXL.
DROPS 236-39 |
|||||||||||||
|
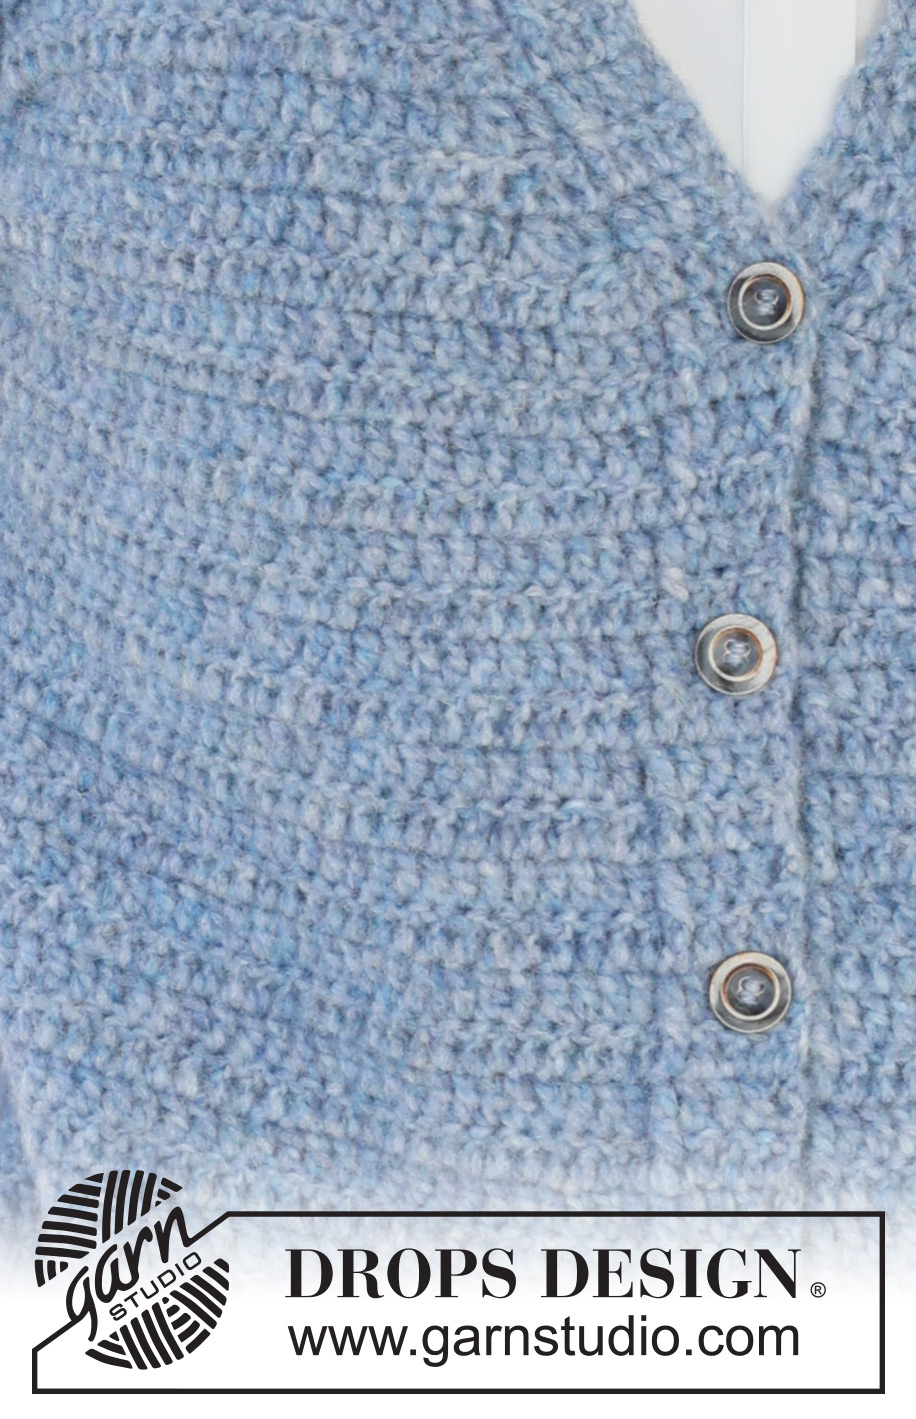
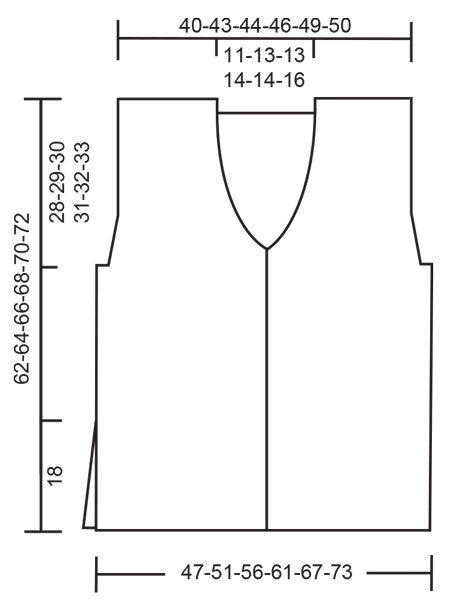
------------------------------------------------------- EXPLANATIONS FOR THE PATTERN: ------------------------------------------------------- CHAIN STITCH: If you work outermost on the hook the chain stitch will often be too tight; 1 chain stitch should be as long as 1 treble crochet is wide. CROCHET INFORMATION: Each row of treble crochets begins with 3 chain stitches which replace the first treble crochet, i.e. skip first treble crochet on previous row. Work the last treble crochet on the row in the 3rd chain stitch at the beginning from previous row. On the edge around the armholes (round 2) replace the first treble crochet with 3 chain stitches; the round finishes with 1 slip stitch in the 3rd chain stitch at the beginning of the round. PATTERN: See diagrams A.1 and A.2 (bands). DECREASE TIP-1 (for armholes): Beginning of row: Replace the number of stitches to be decreased by 1 slip stitch. At end of row: Do not work the number of stitches to be decreased. DECREASE TIP-2 (for V-neck): Decrease inside the outermost 6 stitches towards the neck; i.e. when decreasing at the end of the row, work until there are 8 stitches left, decrease 1 treble crochet as described below, work the last 6 stitches as before. At the beginning of the row, work the first 6 stitches as before, decrease 1 treble crochet as described below. WORK 2 TREBLE CROCHETS TOGETHER (1 treble crochet decreased): Work 1 treble crochet in the next stitch, but wait with the last yarn over and pull-through, work 1 treble crochet in the next stitch, pull the last yarn over through all 3 loops on the hook. BUTTONHOLES: Work buttonholes on the right band: Work 1 treble crochet in the first stitch, work the next 2 treble crochets together (read DECREASE TIP-2), 1 chain stitch, then continue as before. Work buttonholes when the piece measures: S: 17, 23, 29 and 35 cm M: 18, 24, 30 and 36 cm L: 16, 23, 30 and 37 cm XL: 17, 24, 31 and 38 cm XXL: 18, 25, 32 and 39 cm XXXL: 16, 24, 32 and 40 cm ------------------------------------------------------- START THE PIECE HERE: ------------------------------------------------------- VEST – SHORT OVERVIEW OF THE PIECE: The back and front pieces are worked separately, back and forth and bottom up. The piece is sewn together and sleeve-edges are worked to finish. BACK PIECE: Read CHAIN STITCH and CROCHET INFORMATION and work 68-74-80-88-96-104 chain stitches with hook size 5 mm and DROPS Air. Work 1 treble crochet in the 4th chain stitch from the hook, then work 1 treble crochet in each chain stitch = 66-72-78-86-94-102 stitches (including the 3 chain stitches at the beginning of the row). Work back and forth with 1 treble crochet in each treble crochet. REMEMBER THE CROCHET TENSION! When the piece measures 34-35-36-37-38-39 cm cut and fasten the strand. Now start the armholes by working a row of treble crochets only over the middle 60-66-70-78-84-92 stitches (3-3-4-4-5-5 stitches decreased on each side). Continue by decreasing 1 stitch on each side of each row 0-0-0-3-3-6 times, then every 2nd row 2-3-4-4-5-5 times – read DECREASE TIP-1 = 56-60-62-64-68-70 stitches. Continue working until the piece measures 59-61-63-65-67-69 cm. Each shoulder is then finished separately. RIGHT SHOULDER (when the garment is worn): Work 1 treble crochet in each of the first 15-16-17-17-19-19 stitches, A.1, turn. Work back and forth like this over these 20-21-22-22-24-24 stitches until the piece measures 62-64-66-68-70-72 cm. Cut and fasten the strand. LEFT SHOULDER: Start from the same side as the right shoulder, skip 16-18-18-20-20-22 stitches after for the neck, work A.2 over the next 5 stitches, then 1 treble crochet in each of the last 15-16-17-17-19-19 stitches. Work back and forth like this over these 20-21-22-22-24-24 stitches until the piece measures 62-64-66-68-70-72 cm. Cut and fasten the strand. RIGHT FRONT PIECE (when the garment is worn): Work 40-43-46-50-54-58 chain stitches with hook size 5 mm and DROPS Air. Work 1 treble crochet in the 4th chain stitch from the hook, then work 1 treble crochet in each chain stitch = 38-41-44-48-52-56 stitches (including the 3 chain stitches at the beginning of the row). Work the next row as follows from the right side (mid-front): A.2 (band), 1 treble crochet in each of the next 33-36-39-43-47-51 stitches. Continue this pattern back and forth – remember the BUTTONHOLES on the band – read description above. When the piece measures 34-35-36-37-38-39 cm, work the armhole in the same way as on the back piece; i.e. decrease 3-3-4-4-5-5 stitches 1 time, then 1 stitch on each row 0-0-0-3-3-6 times and finally 1 stitch every 2nd row 2-3-4-4-5-5 times. AT THE SAME TIME when the piece measures 36-37-38-39-40-41 cm, start to work the V-neck: Decrease on the inside of A.2 + 1 stitch – read DECREASE TIP-2: Decrease 1 treble crochet every row 10-11-11-11-11-11 times, then every 2nd row 3-3-3-4-4-5 times. After all the decreases to armhole and neck there are 20-21-22-22-24-24 stitches left on the shoulder. Work until the piece measures 62-64-66-68-70-72 cm. Cut and fasten the strand. LEFT FRONT PIECE: Work 40-43-46-50-54-58 chain stitches with hook size 5 mm and DROPS Air. Work 1 treble crochet in the 4th chain stitch from the hook, then work 1 treble crochet in each chain stitch = 38-41-44-48-52-56 stitches (including the 3 chain stitches at the beginning of the row). Work the next row as follows from the right side (side): 1 treble crochet in each of the first 33-36-39-43-47-51 stitches, A.1 (band). Continue this pattern back and forth. When the piece measures 34-35-36-37-38-39 cm, work the armhole in the side the same way as on the right front piece. AT THE SAME TIME when the piece measures 36-37-38-39-40-41 cm, start to work the V-neck. Decrease on the inside of A.1 + 1 stitch – read DECREASE TIP-2: Decrease 1 treble crochet every row 10-11-11-11-11-11 times, then every 2nd row 3-3-3-4-4-5 times. After all the decreases to armhole and neck there are 20-21-22-22-24-24 stitches left on the shoulder. Work until the piece measures 62-64-66-68-70-72 cm. Cut and fasten the strand. ASSEMBLY: Sew the shoulder seams, edge to edge. Sew the side seams edge to edge, leaving 18 cm split at the bottom. Sew the buttons onto the left band. SLEEVE-EDGES: Start at the bottom of the armhole, with hook size 4 mm: ROUND 1: * Work 1 double crochet in the middle of the first/next row of treble crochets, work 3 chain stitches, skip 1 row of treble crochets (approx. 2 cm) *, work from *-* around the armhole, finish with 1 slip stitch in the first double crochet. ROUND 2: Remember CROCHET INFORMATION, work 1 slip stitch around the first chain-space, then 3 treble crochets around each of the next 4 chain-spaces, work 4 treble crochets around each chain-space as far as the middle 8 chain-spaces over the shoulder, work 3 treble crochets around each of these 8 chain-spaces, 4 treble crochets around each chain-space until there are 4 chain-spaces left under the armhole, work 3 treble crochets around each of these 3 chain-spaces. Work a similar edge around the other armhole. |
|||||||||||||
Diagram explanations |
|||||||||||||
|
|||||||||||||
 |
|||||||||||||
 |
|||||||||||||
Have you finished this pattern?Tag your pictures with #dropspattern #hazydewvest or submit them to the #dropsfan gallery. Do you need help with this pattern?You'll find 10 tutorial videos, a Comments/Questions area and more by visiting the pattern on garnstudio.com. © 1982-2026 DROPS Design A/S. We reserve all rights. This document, including all its sub-sections, has copyrights. Read more about what you can do with our patterns at the bottom of each pattern on our site. |
|||||||||||||


With over 40 years in knitting and crochet design, DROPS Design offers one of the most extensive collections of free patterns on the internet - translated to 17 languages. As of today we count 324 catalogues and 12290 patterns translated into English (UK/cm). 12290
We work hard to bring you the best knitting and crochet have to offer, inspiration and advice as well as great quality yarns at incredible prices! Would you like to use our patterns for other than personal use? You can read what you are allowed to do in the Copyright text at the bottom of all our patterns. Happy crafting!
Post a comment to pattern DROPS 236-39
We would love to hear what you have to say about this pattern!
If you want to leave a question, please make sure you select the correct category in the form below, to speed up the answering process. Required fields are marked *.