
Popular categories
Looking for a yarn?


Comments / Questions (18)
![]() Jacqueline wrote:
Jacqueline wrote:
I understand where I should be making the increased stitches but can you please advise me how I include these extra stitches within the A1 pattern thank you for your help
11.01.2024 - 15:31DROPS Design answered:
Dear Jacqueline, when the first stitch before/after the increase is the first stitch in A.1, work the new st as the last st in A.1, the work the next increase as the the 3rd st in A.1, next 2 increases will be worked as 2nd and 1st = you have increased a whole repeat. Repeat one more time. Until one whole repeat will be increased (4 new sts), pattern will not fit, just work them as in diagram. Happy knitting!
12.01.2024 - 07:34
![]() Inge wrote:
Inge wrote:
Ich möchte die Kindermütze Northern Spirit Kids Stricken. Gleich zu Beginn stellt sich mir die Frage wie die Erklärung des Mittelteils beginnt. Maschen anschlagen ist klar. 1.;Reihe links Stricken ebenso. Danach steht KRAUS RECHTS- siehe A1. Für mich bedeutet kraus rechts: vor- und Hinreihe rechts Stricken. Das kann aber nicht gemeint sein. In welcher Richtung wird das Mittelteil gestrickt. Von vorne nach hinten? Ich hoffe, Sie können mir weiterhelfen.
12.11.2023 - 13:44DROPS Design answered:
Liebe Inge, man will das Mittelteil von vorne (angeschlagene Maschen) nach hinten stricken, mit Muster A.1 und 1 Randmasche kraus rechts, die Randmaschen bzw die 1. und die letzte Masche jeder Reihe wird rechts gestrickt; dazwischen stricken Sie A.1 (= 2 Maschen glatt rechts, 2 Maschen Krausrechts). Viel Spaß beim stricken!
13.11.2023 - 08:43
![]() Merete Justesen wrote:
Merete Justesen wrote:
Ja, men så er der også kun 9cm plus de sidste par pinde under halsen og så bliver stykket under halsen meget kortere end på billedet. Jeg tænker at det må være en fejl i opskriften.
05.12.2022 - 15:37DROPS Design answered:
Hei Merete. Fra du legger opp masker under haken strikkes det ca 15 cm (6 cm +9 cm), fra merket fra toppen er det strikket 18 cm når alle økninger/fellinger er gjort, og når man ser på bildet virker målene å stemme med hverandre. 15 cm +18 cm + de siste omgangene/avfellingene = ca 34 cm. Om du ønsker den lengre og du har nok garn, kan du fint strikke den lengre. mvh DROPS Design
05.12.2022 - 15:55
![]() Merete Justesen wrote:
Merete Justesen wrote:
Efter første udtagning til hals står der strik 9 cm fra mærket. Mærket sidder ved udtagningen til hals og derfra er der allerede strikket 6 cm. Kan det passe at der kun skal strikkes 3 cm efter første udtagning? For så bliver stykket under hals ikke så langt som på billederne. Strikker str 3-5 år
05.12.2022 - 12:38DROPS Design answered:
Hei Merete. Når du har lagt opp 12 nye masker (under haken), settes det et nytt merke. Strikk for forklart i oppskriften til arbeidet måler 6 cm, øk deretter alle 2 rett til 3 rett. Strikk videre til arbeidet måler 9 cm fra merket, altså 3 cm fra siste det ble økt masker. Og nå økes det igjen. Strikk 1 omgang med 3 masker rett / 3 masker riller. Strikk 1 omgang vrang. Deretter felles det løst av med rett. Arbeidet måler ca 34 cm fra midt på midtpartiet og ned. mvh DROPS Design
05.12.2022 - 14:45
![]() Jocelyne wrote:
Jocelyne wrote:
Je ne vois comment faire une augmentation à 7 mailles du bord et continuer à réaliser le diagramme, dans la mesure où je rajoute une maille et le diagramme tourne sur 2 mailles merci pour votre aide
02.04.2022 - 17:30DROPS Design answered:
Bonjour Jocelyne, effectivement, après la 1ère augmentation, le motif ne tombera pas juste, tricotez les mailles comme un nouveau motif en largeur, après 4 augmentations, vous aurez augmenté 1 motif complet, après 8 augmentations, vous aurez augmenté 2 motifs complets. Bon tricot!
04.04.2022 - 08:40
![]() Emma wrote:
Emma wrote:
Stämmer det att det på mittpartiet, när man stickar 24maskor, blir det en rand på 4maskor och på andra sidan en rand på 6maskor(kantmaskan inte medräknad).
21.10.2021 - 23:38DROPS Design answered:
Hej Emma. Inte helt säker på att jag förstår vad du menar. Vartannat varv i A1 kommer vara slätstickat och vartannat resårstickat (2 rm/2 am) med 1 kantmaska i rätstickning på varje sida. Mvh DROPS Design
22.10.2021 - 08:25
![]() Sølvi Myhre wrote:
Sølvi Myhre wrote:
Hei jeg skal strikke denne i Merino extra fine Bruker jeg samme pinnenr som til Lima?
24.09.2021 - 10:10DROPS Design answered:
Hej Sølvi. Ja det skulle jag tro, men det kommer an på hur stramt du stickar. Du ska ha den pinne som gör att du får den stickfasthet som uppges i oppskriften. Mvh DROPS Design
24.09.2021 - 10:43
![]() Britta wrote:
Britta wrote:
Jeg er i tvivl om hvor udtagningerne præcis skal laves. I opskriften står der: “Tag ud indenfor de yderste 7 masker mod midt foran”. Er det lige før de 7 sidste masker inden mærketråden i midten af huen? Eller er det på et vilkårligt sted blandt de første og sidste 7 masker i hver side af huen? Eller lige før den 7. Maske?
08.03.2021 - 20:33DROPS Design answered:
Hej Britta, du tager ud mod ansigtet, indenfor de yderste 7 masker :)
11.03.2021 - 09:49
|
|||||||
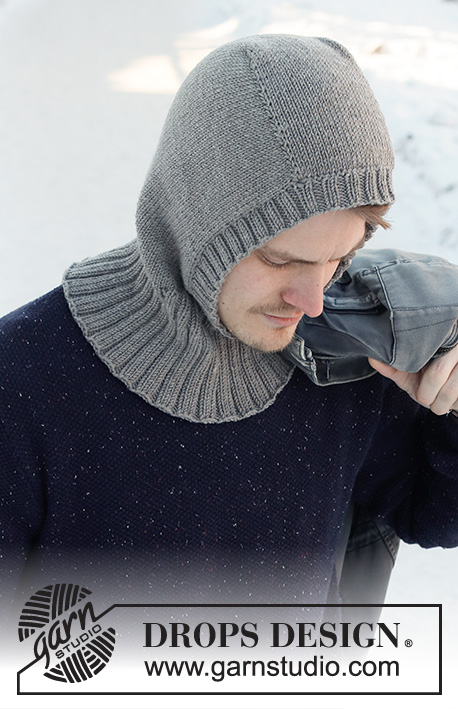
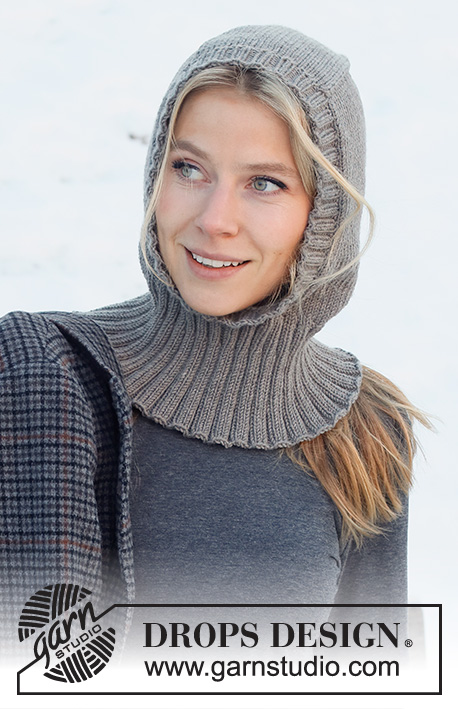
Northern Spirit Kids#northernspiritbalaclava |
|||||||
 |
 |
||||||
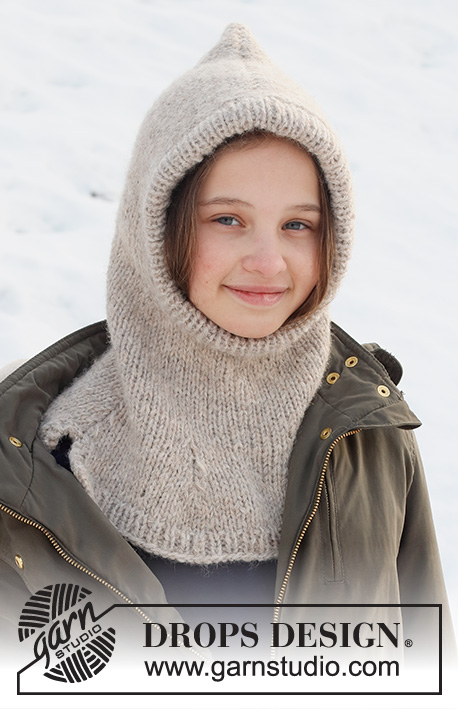
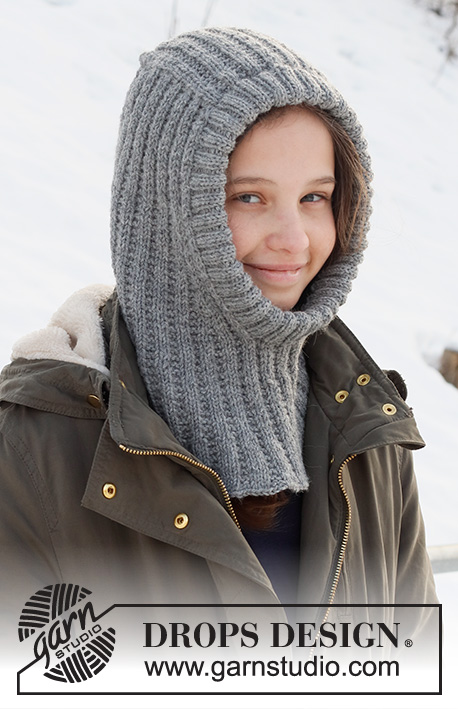
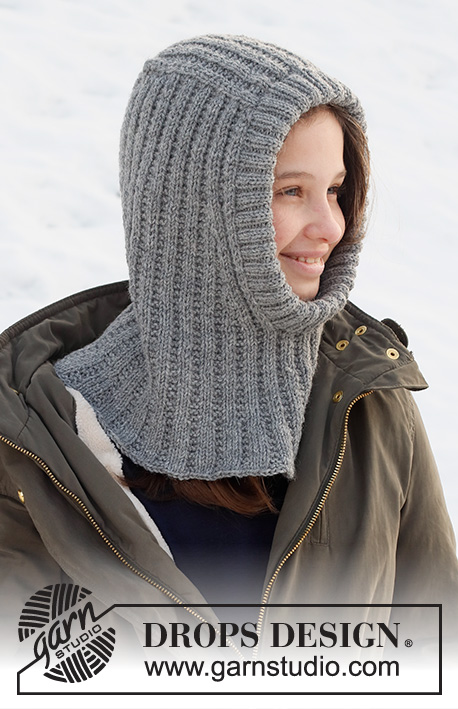
Knitted hat / balaclava for children in DROPS Lima. The piece is worked with textured pattern and ribbed edging. Sizes 2 to 12 years.
DROPS Children 37-28 |
|||||||
|
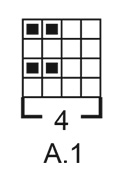
------------------------------------------------------- EXPLANATIONS FOR THE PATTERN: ------------------------------------------------------- RIDGE/GARTER STITCH (worked back and forth): Knit all rows. 1 ridge in height = Knit 2 rows. PATTERN: See diagram A.1. The diagram shows all rows in the pattern from the right side. INCREASE TIP (for sides of face-opening): Increase on the inside of the outermost 7 stitches on each side. All increases are worked from the right side! Increase 1 stitch by making 1 yarn over. On the next row (wrong side) work the yarn overs twisted to avoid holes. The increased stitches are worked into A.1, i.e. the first 2 stitches are worked in stocking stitch, the next 2 in garter stitch, the next 2 in stocking stitch, etc.. DECREASE TIP (mid-back): All decreases are worked from the right side! Start 4 stitches before the marker thread mid-back, knit 2 together, knit 4 (marker thread sits between these 4 stitches), slip 1 stitch as if to knit, knit 1 and pass the slipped stitch over the knitted stitch (= 2 stitches decreased). CASTING-OFF TIP: To avoid the cast-off edge being tight you can cast off with a larger size needle. If the edge is still tight, make 1 yarn over after approx. each 8th stitch at the same time as casting off; the yarn overs are cast off as normal stitches. ------------------------------------------------------- START THE PIECE HERE: ------------------------------------------------------- BALACLAVA – SHORT OVERVIEW OF THE PIECE: The middle section is worked back and forth with circular needle, from mid front and backwards. Stitches are knitted up on each side of this section. The piece is continued back and forth before stitches are cast on for the neck mid-front. The rest of the balaclava is finished in the round with circular needle. A ribbed edge is worked around the face-opening to finish. MID-SECTION: Cast on 24-28-32-32 stitches (including 1 edge stitch on each side) with circular needle size 3.5 mm and Lima. Purl 1 row from the wrong side. The next row is worked as follows from the right side: 1 edge stitch in GARTER STITCH – read description above, work A.1 until there are 3 stitches left, work the first 2 stitches in A.1 (so the pattern begins and finishes in the same way) and finish with 1 edge stitch in garter stitch. Continue this pattern. REMEMBER THE KNITTING TENSION! When the piece measures 9-11-11-13 cm, cast off the 1 edge stitch on each side = 22-26-30-30 stitches. Cut the strand. Then work the hood as described below. HOOD: Now knit up stitches on each side of the middle section on the next row from the right side as follows: Knit up 21-25-25-29 along the side of the mid-section inside the 1 edge stitch, continue A.1 as before over the 22-26-30-30 stitches on the needle and knit up 21-25-25-29 stitches along the other side of the mid-section inside the 1 edge stitch = 64-76-80-88 stitches. Insert 1 marker thread in the middle of the row (= mid-back). Allow the thread to follow your work onwards; it is used later when decreasing mid-back. THE PIECE IS NOW MEASURED FROM WHERE THE MARKER THREAD WAS INSERTED! Continue A.1 back and forth with 1 edge stitch in garter stitch on each side towards mid-front – the pattern should match the pattern on the middle section. Then increase on each side towards mid front and decrease mid-back as described below – read the sections on increasing and decreasing before continuing! INCREASES ON EACH SIDE TOWARDS MID FRONT: When the piece measures 8-8-9-9 cm from where the marker thread was first inserted, increase 1 stitch on each side towards mid front – read INCREASE TIP (= 2 stitches increased). Increase like this every 4th row (i.e. every 2nd row from the right side) a total of 8 times on each side. DECREASING MID-BACK: AT THE SAME TIME when you are about to increase for the 5th time, decrease 2 stitches mid-back – read DECREASE TIP. Decrease like this every 4th row a total of 4 times (the increases and decreases finish at the same time). After all the increases and decreases there are 72-84-88-96 stitches. When the piece measures 18-18-19-19 cm from where the marker thread was first inserted, cast on stitches mid-front for the neck; you can try the balaclava on and work to the desired length. Cast on 12-12-16-16 stitches at the end of the next row from the right side = 84-96-104-112 stitches. Remove the marker thread and insert 1 marker on the row. THE PIECE IS NOW MEASURED FROM THIS MARKER. Work the neck as described below. NECK: Continue working in the round with A.1 over all stitches – make sure the pattern matches the whole way round. When the piece measures 5-6-7-8 cm from the marker on the neck, increase all knit 2 sections to knit 3 by making 1 yarn over after each knit 2 (the yarn overs are knitted twisted on the next round) = 105-120-130-140 stitches. Continue working until the piece measures 8-9-10-11 cm from the marker. Now increase all 2 garter stitches to 3 garter stitches by making 1 yarn over after all 2 garter stitches = 126-144-156-168 stitches. Work 1 round with knit 3, 3 garter stitches (the yarn overs are worked twisted to avoid holes). Purl 1 round, then cast off loosely with knit – read CASTING-OFF TIP. The piece measures approx. 32-34-36-38 cm from the middle of the mid-section and down. EDGE AROUND FACE-OPENING: Start from the right side at the bottom, where stitches were cast on for the neck, and knit up 136-140-148-152 stitches around the opening, inside the 1 edge stitch using short circular needle size 3 mm and Lima. The number of stitches should be divisible by 4. Work rib in the round (knit 2, purl 2) for 5-6-6-6 cm – make sure the rib matches the stitches on the mid-section and on the cast-on stitches on the neck. Loosely cast off with knit over knit and purl over purl – read CASTING-OFF TIP. Fold the rib double to the inside and sew down. To avoid the edge being tight and rolling outwards, it is important the seam is elastic. |
|||||||
Diagram explanations |
|||||||
|
|||||||
 |
|||||||
Have you finished this pattern?Tag your pictures with #dropspattern #northernspiritbalaclava or submit them to the #dropsfan gallery. Do you need help with this pattern?You'll find 25 tutorial videos, a Comments/Questions area and more by visiting the pattern on garnstudio.com. © 1982-2026 DROPS Design A/S. We reserve all rights. This document, including all its sub-sections, has copyrights. Read more about what you can do with our patterns at the bottom of each pattern on our site. |
|||||||


With over 40 years in knitting and crochet design, DROPS Design offers one of the most extensive collections of free patterns on the internet - translated to 17 languages. As of today we count 324 catalogues and 12291 patterns translated into English (UK/cm). 12291
We work hard to bring you the best knitting and crochet have to offer, inspiration and advice as well as great quality yarns at incredible prices! Would you like to use our patterns for other than personal use? You can read what you are allowed to do in the Copyright text at the bottom of all our patterns. Happy crafting!
Post a comment to pattern DROPS Children 37-28
We would love to hear what you have to say about this pattern!
If you want to leave a question, please make sure you select the correct category in the form below, to speed up the answering process. Required fields are marked *.