
Popular categories
Looking for a yarn?


Comments / Questions (15)
![]() Ulrike wrote:
Ulrike wrote:
Hallo, die Beschreibung der Vorderteile ist verwirrend: Erst steht da, man soll in jeder Hinreihe für den Halsauschnitt zunehmen, danach steht aber in jeder 4. bzw. 6. Reihe, was stimmt denn nun? Und wenn man in jeder 4. bzw. 6. Reihe zunimmt, ist das einmal eine Hinreihe und einmal eine Rückreihe. Aber auf welche Weise soll man dann zunehmen? Immer nur so, wie im Tipp für Hinreihen beschrieben? Viele Grüße
07.04.2023 - 18:54DROPS Design answered:
Liebe Ulrike, die Zunahmen für den Halsausschnitt sollen immer bei einer Hinreihe gestrickt werden, dh so in jeder 4. Reihe: *1 Hin-Reihe mit Zunahmen, 3 Reihen ohnen Zunahmen (= 1 Rück-, 1 Hin-, 1 Rück-Reihe)*, und so in jeder 6. Reihe: 1 Hin-Reihe mit Zunahmen, 5 Reihen ohnen Zunahmen (= 1 Rück-, 1 Hin-, 1 Rück, 1 Hin + 1 Rück-Reihe)*. - siehe ZUNAHMETIPP IN HIN-REIHEN: am Anfang der Anleitung. Viel Spaß beim stricken!
11.04.2023 - 12:13
![]() Sandra wrote:
Sandra wrote:
Hallo, hab gerade mit der Jacke angefangen und bin etwas unsicher da ich noch nie eine europäische Schulter gestrickt habe. Ich hab jetzt am Rückenteil die 24 Zunahmen für xxxl gestrickt und messe ab jetzt die Arbeit am Armausschnitt. Der Armausschnitt beginnt ja nach den Zunahmen und ich messe hier ab 0 cm ist das korrekt? Dh. Ich muss jetzt 18 cm stricken oder zählt von dem vorangestrickten etwas zu den 18 cm dazu? Vielen Dank.
23.03.2023 - 11:03DROPS Design answered:
Liebe Sandra, ja genau, Sie messen jetzt ab der 1. Reihe nach den letzten Zunahmen und an der Seite (die "gerade" Seite wie auf der Skizze). Viel Spaß beim stricken!
23.03.2023 - 12:42
![]() MELB wrote:
MELB wrote:
Sherry
19.01.2023 - 03:13
![]() Daniela wrote:
Daniela wrote:
70s love
18.01.2023 - 06:46
![]() Sheena wrote:
Sheena wrote:
Dunes stroll
18.01.2023 - 03:07
|
||||||||||||||||||||||
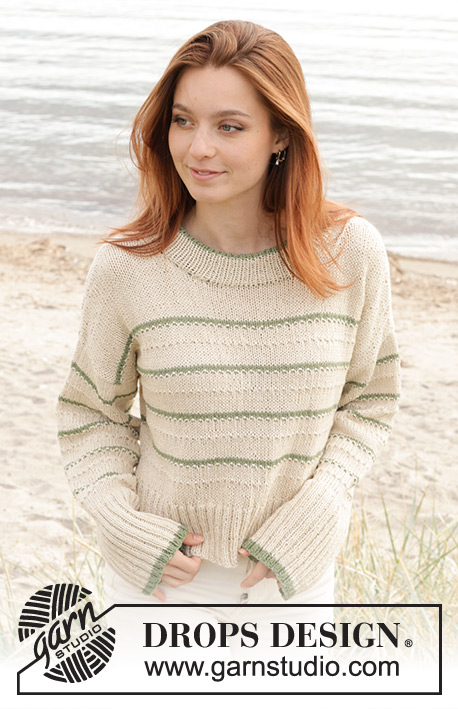
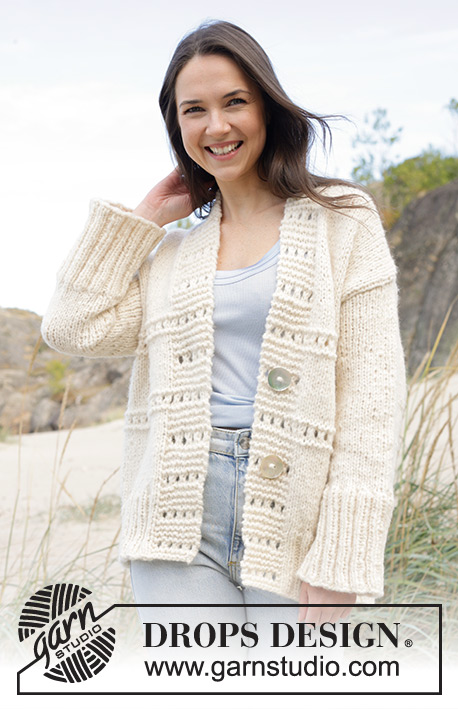
Ivory Collage Cardigan#ivorycollagecardigan |
||||||||||||||||||||||
 |
 |
|||||||||||||||||||||
Knitted jacket in 1 strand DROPS Wish or 2 strands DROPS Air. The piece is worked top down with European/diagonal shoulders and relief-pattern. Sizes S - XXXL.
DROPS 239-31 |
||||||||||||||||||||||
|
------------------------------------------------------- EXPLANATIONS FOR THE PATTERN: ------------------------------------------------------- RIDGE/GARTER STITCH (worked back and forth): Knit all rows. 1 ridge = knit 2 rows. PATTERN: See diagrams A.1 and A.2. The diagrams show all rows in the pattern from the right side. INCREASE TIP FROM RIGHT SIDE: Increase towards the left AFTER MARKER: Use left needle to pick up thread between 2 stitches from row below, pick up thread from front and knit stitch in back loop. Increase towards the right BEFORE MARKER: Use left needle to pick up thread between 2 stitches from row below, pick up thread from behind and knit stitch in front loop. INCREASE TIP FROM WRONG SIDE: Increase towards the left AFTER MARKER: Use left needle to pick up thread between 2 stitches from row below, pick up thread from behind and purl stitch in front loop. Increase towards the right BEFORE MARKER: Use left needle to pick up thread between 2 stitches from row below, pick up thread from front and purl stitch in back loop. DECREASE TIP (for sleeves): Decrease 1 stitch on either side of the marker-thread as follows: Work until there are 3 stitches left before the marker-thread, knit 2 together, knit 2 (marker-thread sits between these 2 stitches), slip 1 stitch as if to knit, knit 1 and pass the slipped stitch over the knitted stitch. ------------------------------------------------------- START THE PIECE HERE: ------------------------------------------------------- JACKET – SHORT OVERVIEW OF THE PIECE: The pattern uses both long and short needles; start with the length which fits the number of stitches and change when necessary. The piece is started back and forth, casting on stitches at the back of the neck and working the back piece top down while increasing stitches on each side for the shoulders, which become slightly diagonal. The back piece is worked as far as the armholes. Start knitting up stitches along 1 shoulder and work the the armhole increasing for the neck. This is repeated on the other shoulder. After armhole work front and back pieces on the same circular needle and work back and forth. Stitches are knitted up around the armholes for the sleeves, which are first worked back and forth with short rows for the sleeve cap then work in the round. Stitches are knitted up on the top of the front bands to work neck. BACK PIECE: Cast on 18-18-20-20-22-22 stitches with circular needle size 8 mm and 1 strand DROPS Wish or 2 strands DROPS Air. Purl 1 row from the wrong side. Insert 1 marker inside the first 3 stitches on each side. The markers should sit inside the 3 outermost stitches on each row onwards. Work stocking stitch back and forth, AT THE SAME TIME increase AFTER the marker at the beginning of the row (right side) and BEFORE the marker at the end of the row – read INCREASE TIP FROM RIGHT SIDE. On the next row (wrong side) increase in the same way - read INCREASE TIP FROM WRONG SIDE. Increase like this from both the right and wrong side a total of 18-20-20-22-22-24 times. REMEMBER THE KNITTING TENSION! After the last increase there are 54-58-60-64-66-70 stitches. The piece is now measured from here! Continue with stocking stitch until the piece measures 14-15-16-16-17-18 cm, measured along the armhole. Cut the yarn, put stitches on a thread or on extra needle and work the front piece. LEFT FRONT PIECE: Start on the left shoulder (when the garment is worn). Cast on 9 stitches (band), then knit up 18-20-20-22-22-24 stitches inside the 1 edge stitch along the left shoulder on the back piece (i.e. knit up 1 stitch in each row) = 27-29-29-31-31-33 stitches. Work A.1 over the first 9 stitches (= band) and stocking stitch over the other stitches (seen from right side). When the piece measures 6 cm, increase for the neck at the beginning of the row from the right side. Increase after 11 stitches (A.1 + 2 stocking stitches) – remember INCREASE TIP FROM RIGHT SIDE. Increase every 4th row 6 times, then every 6th row 2-2-3-3-4-4 times. When the piece measures 24-25-26-28-29-30 cm, put stitches on a thread or an extra needle – make sure that the last row is worked from the right side. Cut the yarn. Work the right shoulder as explained below. RIGHT FRONT PIECE: Knit up 18-20-20-22-22-24 stitches inside the 1 edge stitch along the right back shoulder, cast on 9 stitches at the end of the row (band) = 27-29-29-31-31-33 stitches. Work stocking stitch until there are 9 stitches left, then work A.2 (seen from right side). When the piece measures 6 cm, increase for the neck at the end of the row from the right side. Increase before the last 11 stitches (2 stocking stitches + A.2) – remember INCREASE TIP FROM RIGHT SIDE. Increase every 4th row 6 times, then every 6th row 2-2-3-3-4-4 times. AT THE SAME TIME, when the piece measures 24-25-26-28-29-30 cm work as follows from the wrong side: Work the stitches from the right front piece, cast on 6-6-8-10-14-16 stitches at the end of the row, work from the wrong side over the 54-58-60-64-66-70 stitches on the back piece, cast on 6-6-8-10-14-16 stitches, work the stitches on the left front piece. BODY: Continue back and forth with stocking stitch and A.1/A.2. Continue to increase for the neck on the front pieces. When the increases are finished there are 136-144-152-164-176-188 stitches. The first and third time the top 6 rows in A.1/A.2 are worked, work them over all stitches on the body. NOTE! So the pattern matches the bands, start and finish with a yarn over on the body-stitches. This increased stitch will be decreased on the next row by knitting 2 together. Work stocking stitch and pattern until the piece measures 52-54-56-58-60-62 cm. Knit 1 row from the right side and increase 52-56-60-64-72-76 stitches evenly spaced (do not increase the bands) = 188-200-212-228-248-264 stitches. Change to circular needle size 7 mm. Work rib as follows from the wrong side: 9 band stitches as before, * purl 2, knit 2 *, work from *-* until there are 11 stitches left, purl 2, then 9 band stitches as before. Continue this rib for 10 cm. Cast off. LEFT SLEEVE: Use circular needle size 8 mm and knit up from the right side 26-28-30-32-32-34 stitches from the bottom of the armhole and up the front piece to the shoulder, then 16-16-18-18-20-20 stitches from the shoulder down the back piece to the bottom of the armhole = 42-44-48-50-52-54 stitches. Insert 1 marker in the middle of the stitches picked up. Work now back and forth in stocking stitch with short rows for the sleeve cap, to gives a better shape to the sleeve. 1st row (from wrong side): work to 10 stitches after marker, turn. 2nd row (from right side): work to 10 stitches after marker, turn. 3rd row (from wrong side): work to 14 stitches after marker, turn. 4th row (from right side): work to 14 stitches after marker, turn. 5th row (from wrong side): work to the beginning of the row. Work stocking stitch back and forth for 6-6-7-8-9-10 cm, measure from where the stitches were picked up (all length are measured mid on top of sleeve). Join the sleeve using short circular needle/double pointed needles size 8 mm. Insert 1 marker-thread at the beginning of the round and allow it to follow your work onwards. Start at the marker-thread and work stocking stitch in the round. When sleeve measures 8-8-9-10-11-12 cm decrease 2 stitches under the sleeve – read DECREASE TIP. Decrease like this every 8-5½-5½-4½-4-4 cm a total of 4-5-5-5-5-5 times = 34-34-38-40-42-44 stitches. Continue working until the sleeve measures 34-33-33-32-32-31 cm from the knitted-up edge. There is 14 cm left; try the jacket on and work to desired length before the rib. Knit 1 round and increase 14-18-14-16-14-16 stitches evenly spaced = 48-52-52-56-56-60 stitches. Change to double pointed needles size 7 mm. Work rib (knit 2, purl 2) for 14 cm. Cast off a little loosely. The sleeve measures approx. 48-47-47-46-46-45 cm. RIGHT SLEEVE: Work the same way as the left sleeve but knit up in reverse, with first 16-16-18-18-20-20 stitches from the bottom of the armhole up the back piece and 26-28-30-32-32-34 stitches from the shoulder down the front piece. Sew the bottom of the armholes – see sketch. NECK: Knit up 1 stitch in each of the 9 garter stitches at the top of the right band with needle size 7 mm. Work garter stitch for 7-7-8-8-9-9 cm; make sure the band reaches approx. mid-back when stretched slightly. Cast off. Work the left band in the same way. Sew the bands together mid-back and sew them to the neck-line. ASSEMBLY: Sew the 2 buttons to the left band so they can be buttoned through a row of holes on the right front piece. |
||||||||||||||||||||||
Diagram explanations |
||||||||||||||||||||||
|
||||||||||||||||||||||

|
||||||||||||||||||||||

|
||||||||||||||||||||||

|
||||||||||||||||||||||

|
||||||||||||||||||||||
Have you finished this pattern?Tag your pictures with #dropspattern #ivorycollagecardigan or submit them to the #dropsfan gallery. Do you need help with this pattern?You'll find 30 tutorial videos, a Comments/Questions area and more by visiting the pattern on garnstudio.com. © 1982-2025 DROPS Design A/S. We reserve all rights. This document, including all its sub-sections, has copyrights. Read more about what you can do with our patterns at the bottom of each pattern on our site. |
||||||||||||||||||||||


With over 40 years in knitting and crochet design, DROPS Design offers one of the most extensive collections of free patterns on the internet - translated to 17 languages. As of today we count 314 catalogues and 11820 patterns translated into English (UK/cm). 11820
We work hard to bring you the best knitting and crochet have to offer, inspiration and advice as well as great quality yarns at incredible prices! Would you like to use our patterns for other than personal use? You can read what you are allowed to do in the Copyright text at the bottom of all our patterns. Happy crafting!
Post a comment to pattern DROPS 239-31
We would love to hear what you have to say about this pattern!
If you want to leave a question, please make sure you select the correct category in the form below, to speed up the answering process. Required fields are marked *.