
Looking for a yarn?


Comments / Questions (136)
![]() Lorraine H wrote:
Lorraine H wrote:
Regarding my previous question about the increases to the sleeves, I forgot to mention that I am making the L size. And therefore would be starting A9 with a knit stitch. That is why I was thinking that the first two increases would be knit stitches.
20.10.2023 - 09:23DROPS Design answered:
Thanks for these extra infos - see answer below.
20.10.2023 - 14:07
![]() Lorraine H wrote:
Lorraine H wrote:
To follow up on your answer to Jeffrey, after the first two increases, working the pattern from right to left and incorporating the new stitches into A9, the A9 pattern would be 8 knit stitches and 2 purl stitches? In other words I would be adding a new A9 pattern beginning from the right of the pattern? The same would apply to the A10 pattern?
20.10.2023 - 09:09DROPS Design answered:
Dear Lorraine, work the new stitches mid under sleeve at the beg of the round reading diagram from left to right (= first 2 increases will be purled, then next 2 knitted and next 2) so that A.9 is completed, and at the end of the round, continue diagram (= purl first 2 incrases, knit next 2 and purl next 2), then work the new sts in A.4. Happy knitting!
20.10.2023 - 14:06
![]() Corinne wrote:
Corinne wrote:
Bonjour, La description du début dos et devant est bien compliquée et source d'erreurs. Pourquoi ne pas écrire tout simplement qu'il s'agit de tricoter des cotes 2 x 2 jusqu'à ce qu'il reste 1 tour avant que l'ouvrage mesure 5 cm ? A part ça, félicitations pour vos modèles qui sont toujours agréables à réaliser.
19.10.2023 - 16:58
![]() Marie wrote:
Marie wrote:
Hallo, zu meiner voherigen Frage nochmal: in der Anleitung steht im ersten Teil des Rumpfes "A.1 über die nächsten 14-14-14-28-28-28 Maschen (= 1-1-1-2-2-2 Rapporte à 14 Maschen)". Ab Größe XL müsste ich also 2 Rapporte stricken. A.1 fängt mit zwei linken Maschen an und härt mit zwei linken Maschen auf. Dann hätte ich ja vier linke Maschen nebeneinander? Wenn ich zwei Mal A.1 nacheinander stricken soll? Nach dem Bündchen ist es bei A.5 genauso, An
18.10.2023 - 16:13DROPS Design answered:
Liebe Marie, also ja genau, so haben Sie 4 Maschen links nebeneinander, stimmt. Viel Spaß beim stricken!
19.10.2023 - 08:01
![]() Marie wrote:
Marie wrote:
Hallo, ich möchte den Pulli gerne in Größe XL stricken. Ist es richtig, dass ich am Bündchen dann 4 linke Mschen nebeneinander habe? Durch den Rapport von A.1 und anschließend von A.5? Sieht das im Bündchen nicht seltsam aus wenn alles im zweier Rippenmuster gestrickt ist nur jeweils zweimal auf Vorder- und Rückseite plötzlich vier linke Maschen sind? Ich habe leider kein einziges Foto eines Pullis in XL gefunden. Oder habe ich einen Denkfehler?
18.10.2023 - 14:29DROPS Design answered:
Liebe Marie, A.1 wird sich mit 2 linken Maschen enden, dann stricken Sie 2 rechte Maschen wie im A.2 gezeigt. Nach Bündchen stricken Sie A.4 (doppel Perlmuster), dann A.5 (A.5 beginnt und endet mit 2 linken Maschen), dann A.6 (beginnt mit einem kleinen Zopf), so ich sehen keine 4 linken Maschen nebeneinander, vielleicht misverstehe ich Ihre Frage?
18.10.2023 - 16:00
![]() Pluff wrote:
Pluff wrote:
Hej, Jag har nu stickat en bit på raglan och minskat 27ggr. Är nu uppe i 57cm för strl M. Ska jag då lägga 32 m på tråd och fortsätta minska varje varv 7ggr forsatt på raglan som i mönstret när jag stickar fram och tillbaka? Hjälp mottages gärna. Stickfadtheten är kollad.
24.09.2023 - 21:06DROPS Design answered:
Hej, ja du fortsætter raglanminskningen på hver pind. Överst i mönstret beskriver vi hur du minskar från AVIGSIDAN :)
05.10.2023 - 08:55
![]() Elisa wrote:
Elisa wrote:
Ciao! Non riesco a capire bene come devo lavorare il collo: quali sono le maglie che devo lasciare in sospeso? Quelle centrali del davanti, tra i due raglan? E quali sono le maglie che devo continuare a lavorare in piano? Quelle del retro e delle spalle? Grazie per la vostra pazienza! Elisa
30.08.2023 - 18:39DROPS Design answered:
Buongiorno Elisa, abbiamo corretto il testo: deve mettere in sospeso le maglie centrali. Buon lavoro!
01.09.2023 - 08:43
![]() Amalie wrote:
Amalie wrote:
Hejsa, Jeg er nu nået til at have indtaget 30 gange og min trøje måler nu 59 cm, skal jeg stadig lave de 6 indtagninger på hver omgang, inden jeg lukker fronten af, eller skal jeg tage de 6 masker ind fordelt, lukke fronten af også lave 6 indtagninger på de resterende masker?
25.07.2023 - 21:11DROPS Design answered:
Hei Amalie Om du nå er kommet til HALS og ditt arbeid måler 59 cm (str L) og du har felt 30 ganger, skal du avpasse at neste omgang er en oddetallsomgang i diagrammene. Så skal du felle 6 masker jevnt fordelt over de midterste 24 maskene foran. Så setter du de midterste 34 maskene på forstykket på en tråd til hals. mvh DROPS Design
28.07.2023 - 10:34
![]() Julie wrote:
Julie wrote:
Hej, Jeg har strikket den fineste trøje ud fra opskriften, og er blevet så glad for resultatet! Men efter jeg vaskede den, er den kommet ud af facon, og er blevet alt for stor? Jeg brugte uld program på 30 grader, og har hverken puttet den i tørretumbleren eller noget andet - da jeg fulgte vaskeinstrukserne. Er der noget jeg kan gøre ved trøjen? Har I nogle råd, som jeg kan prøve? De bedste hilsner Julie
22.07.2023 - 21:26DROPS Design answered:
Hei Julie. Det var kjedelig å høre. Hvilken kvalitet har du strikket genseren i? Om du har brukt garnet som står i oppskriften er dette DROPS Karisma Superwash og den skal vaskes på finvask eller Ullvask på 40`C. Plagget må tørkes flatt, men unngå å tørke plagget på underlag som suger til seg fuktighet, som for eksempel frottéhåndklær. mvh DROPS Design
27.07.2023 - 10:18
![]() Laetitia Been wrote:
Laetitia Been wrote:
Bonjour, j ai un problème des le début. Quand on fait les diminutions des diagrammes 2 et 3 on ne retrouve plus un intervalle de cotes 2x2 et on se retrouve avec une maille 'seule' . De plus pour les tours suivants le patron indique de reprendre les tours 1 et 2 des mêmes diagrammes mais du coup cela crée un décalage dans les cotes . Comment résoudre ce problème s il vous plait
24.06.2023 - 21:05DROPS Design answered:
Bonjour Mme Been, au tout début des côtes, on ne répète d'abord que les rangs 1 et 2, pas le 3ème rang avec les diminutions que l'on ne fera que lorsque les côtes mesurent 5 cm, on tricotera ainsi un certain nombre de mailles en jersey en diminuant des mailles à intervalles réguliers, on tricotera A.1 comme avant, et on diminuera dans A.2 et A.3. Bon tricot!
26.06.2023 - 08:37
|
|||||||||||||||||||||||||||||||
Ice Island#iceislandsweater |
|||||||||||||||||||||||||||||||
 |
 |
||||||||||||||||||||||||||||||
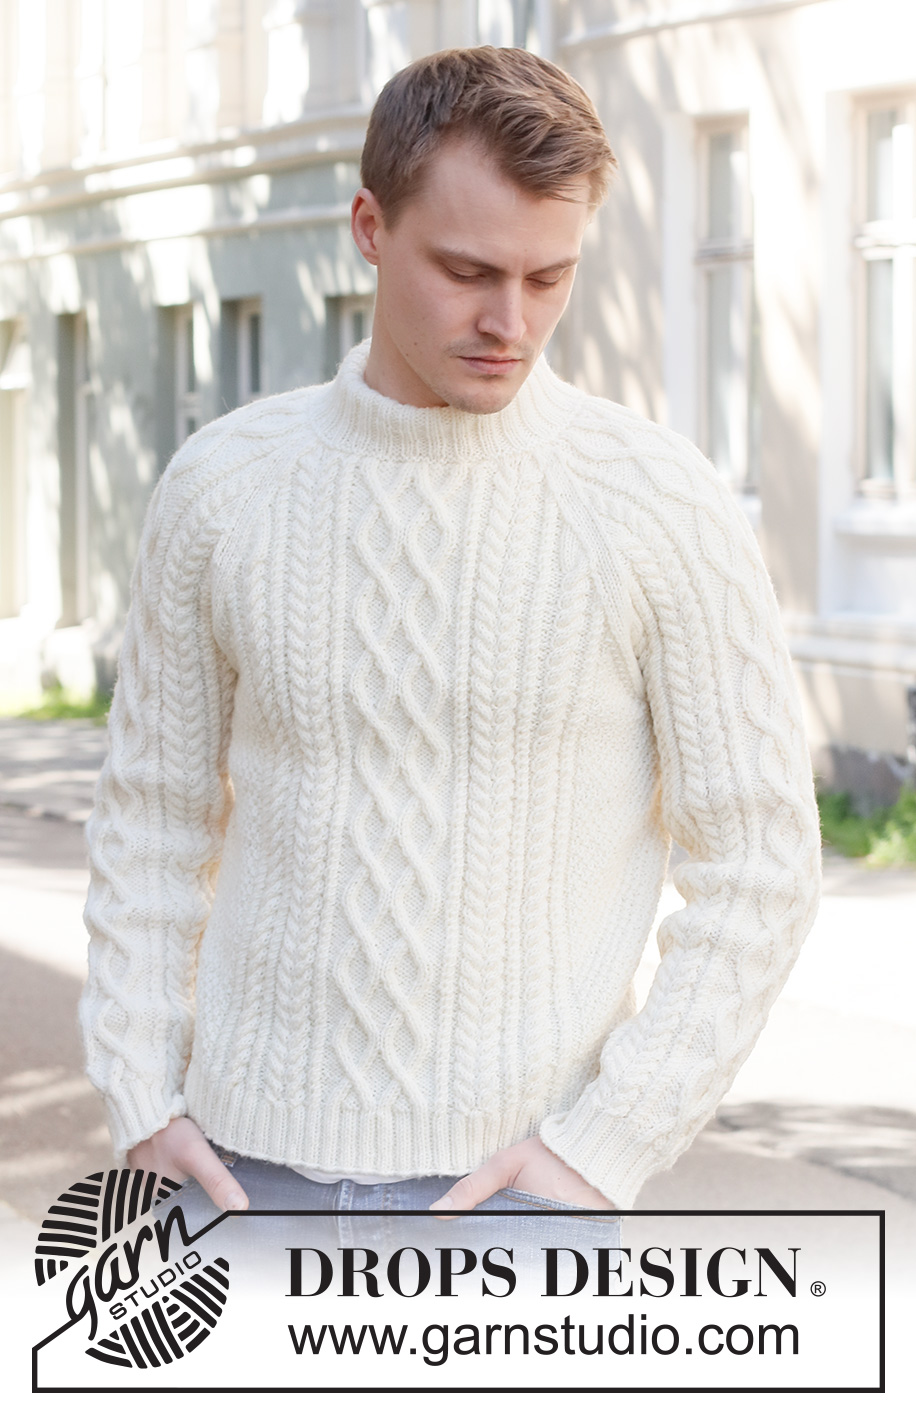
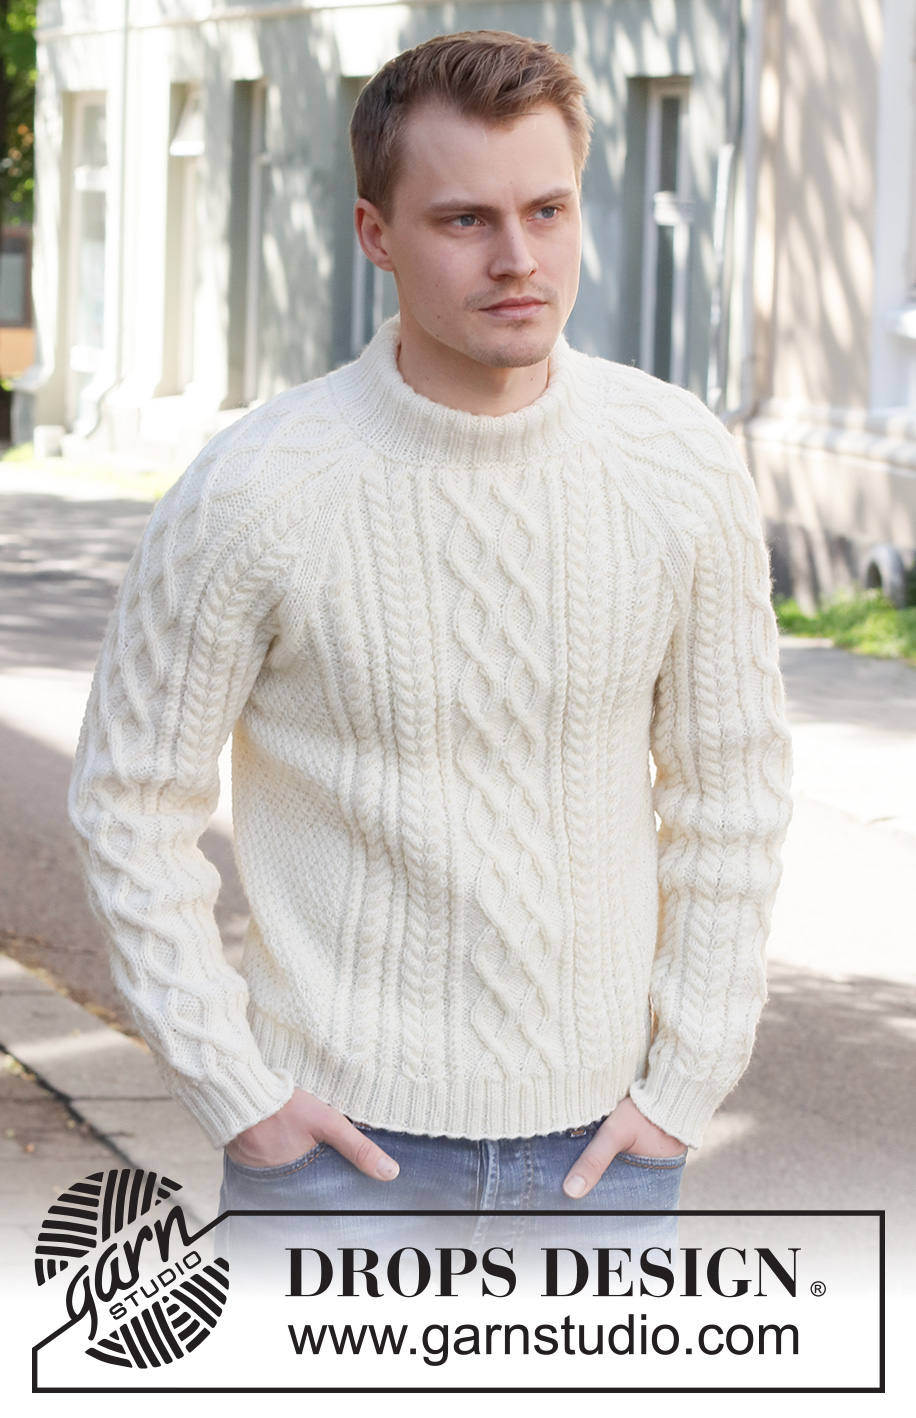
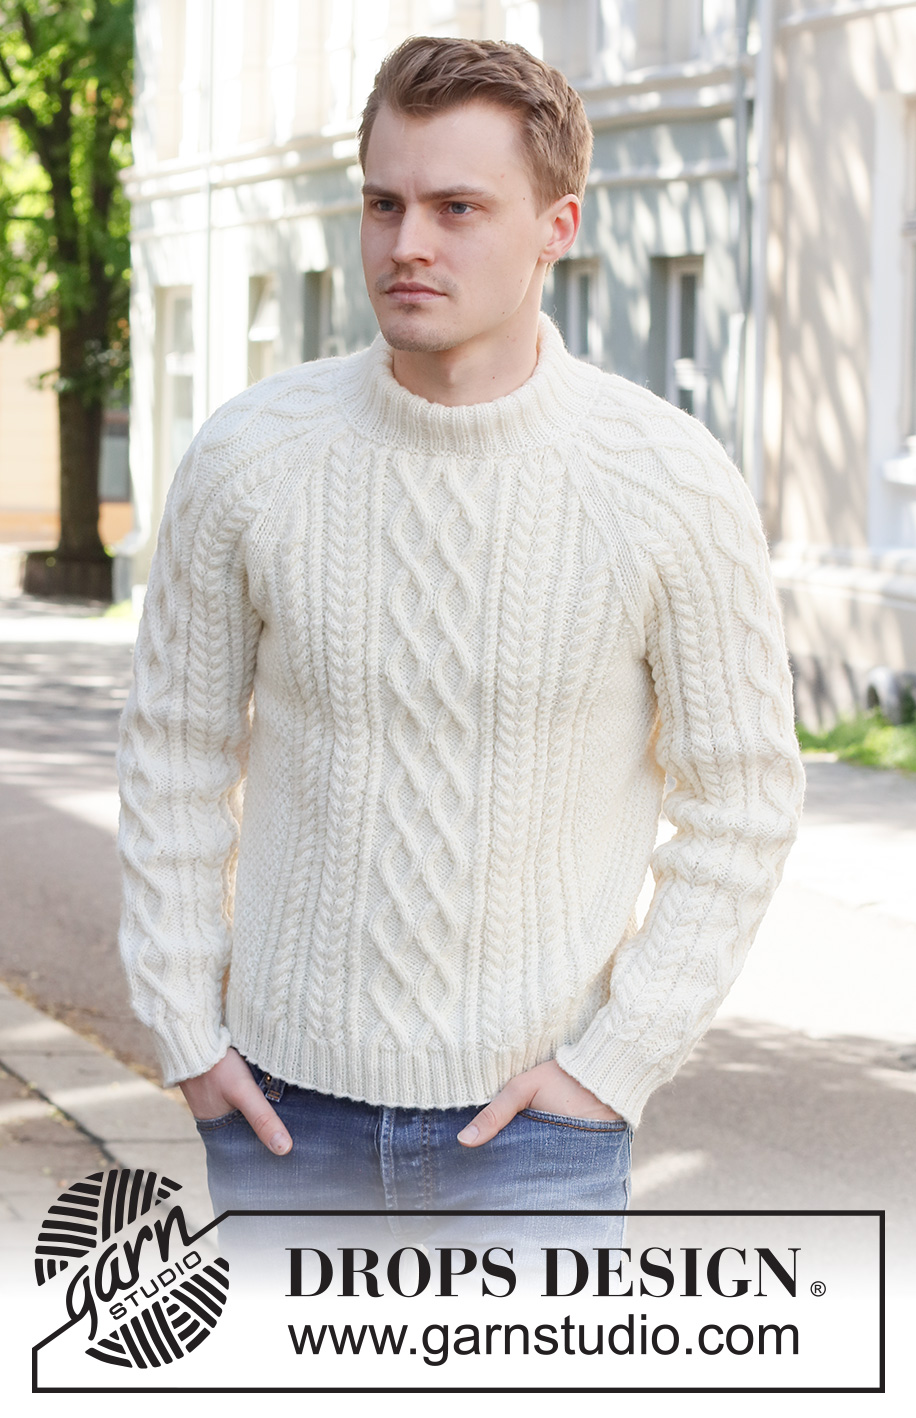
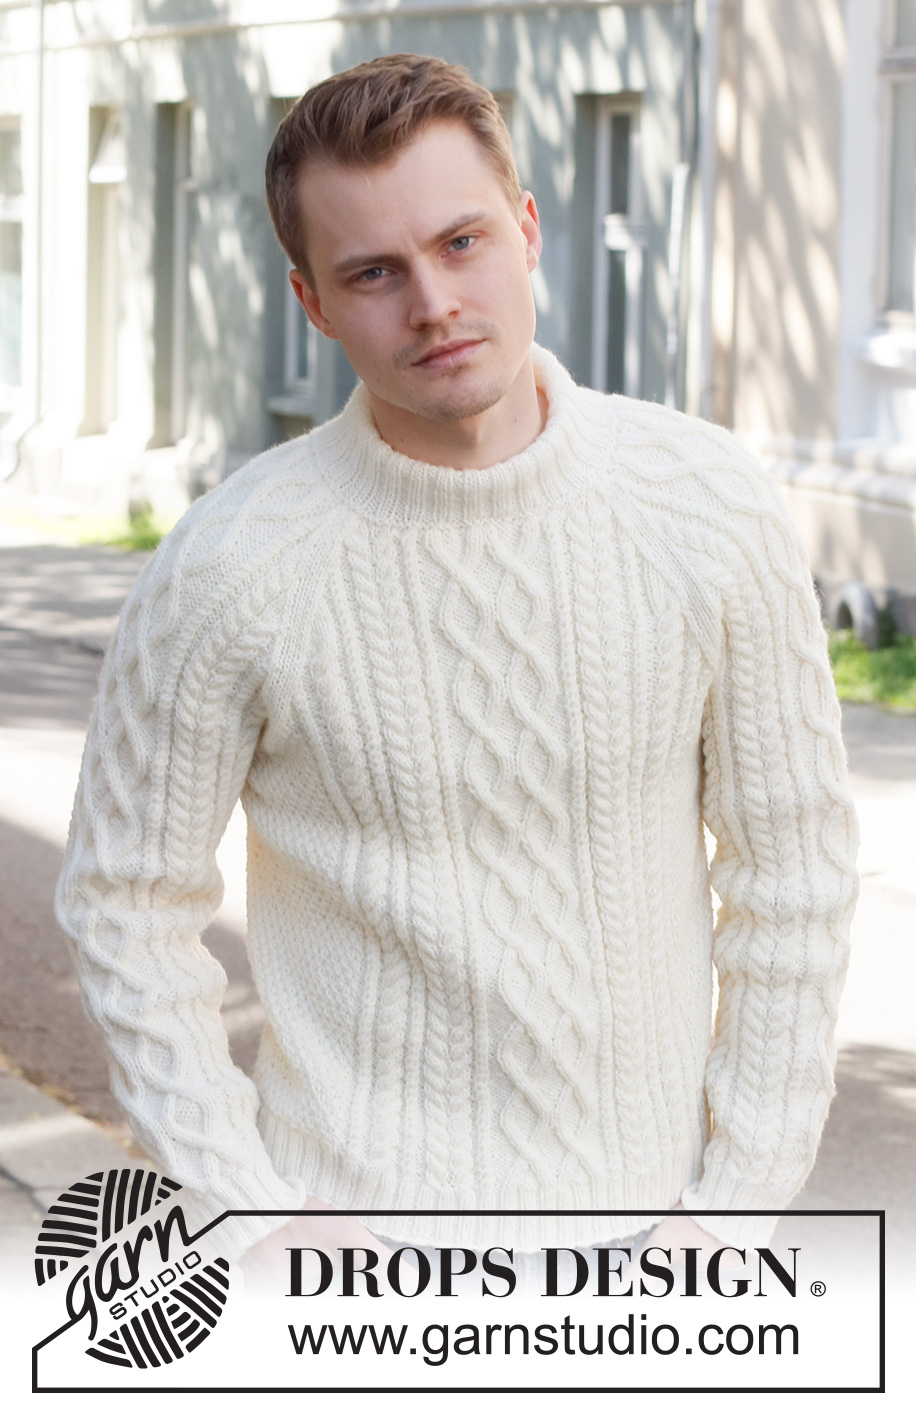
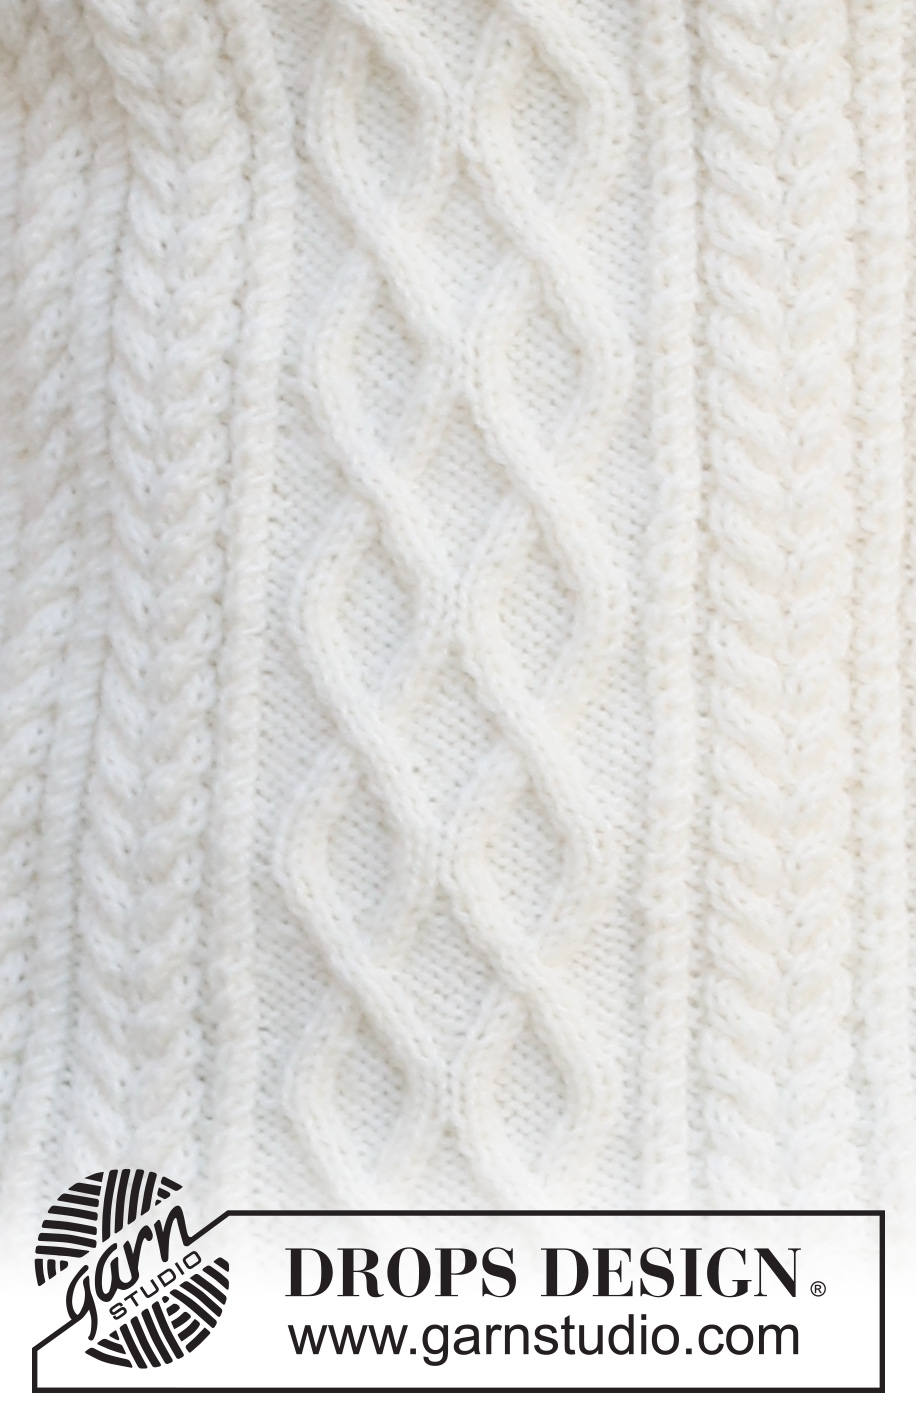
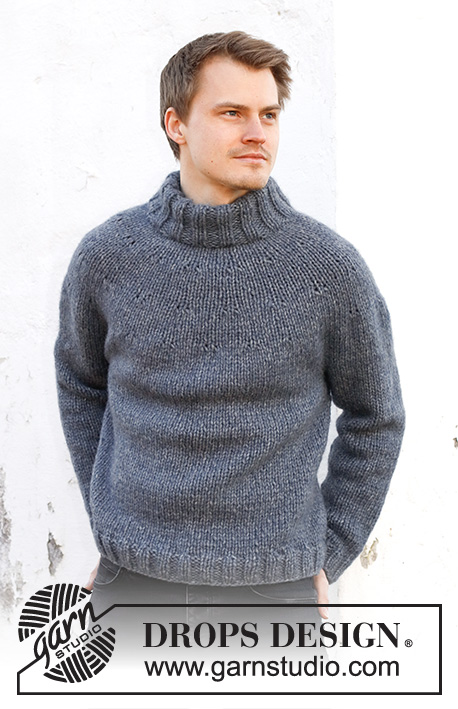
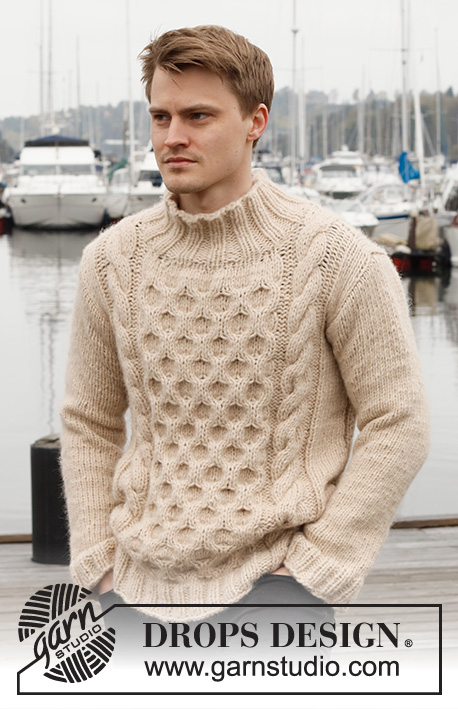
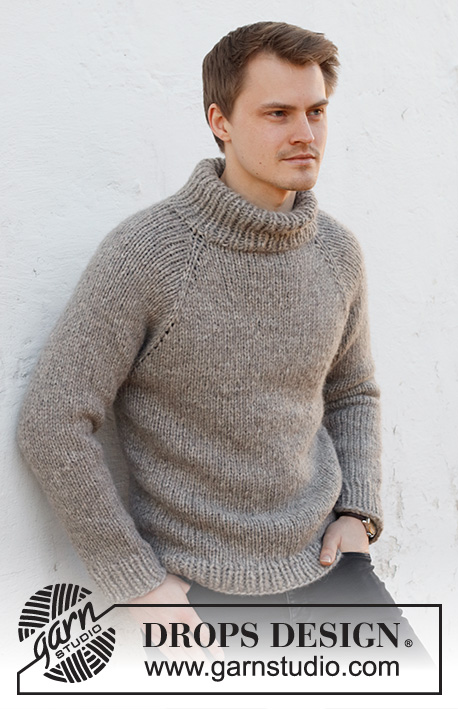
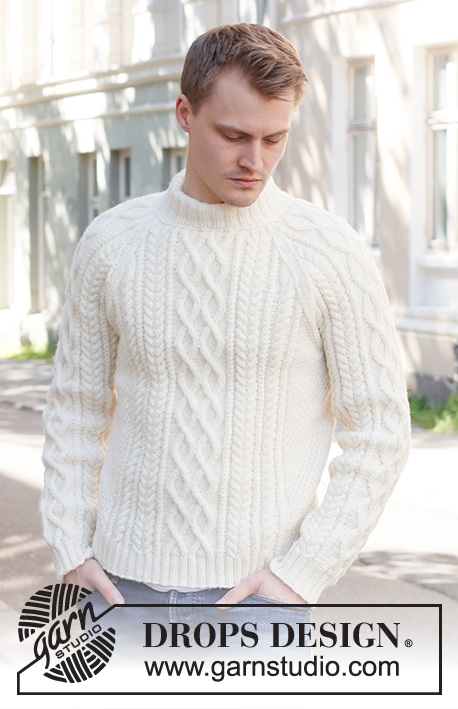
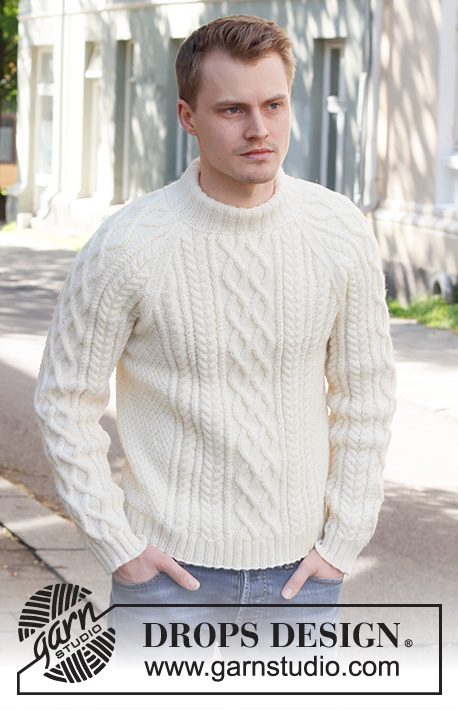
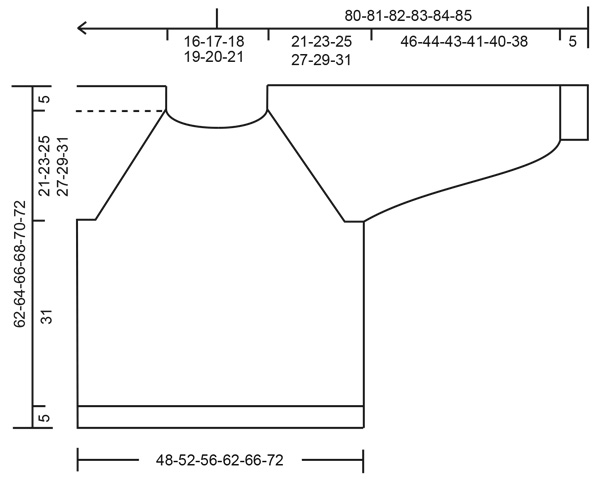
Knitted jumper for men in DROPS Karisma. The piece is worked with raglan, cables and double neck. Sizes S - XXXL.
DROPS 224-10 |
|||||||||||||||||||||||||||||||
|
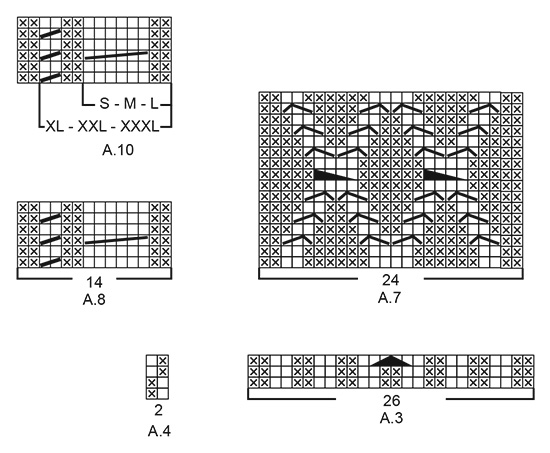
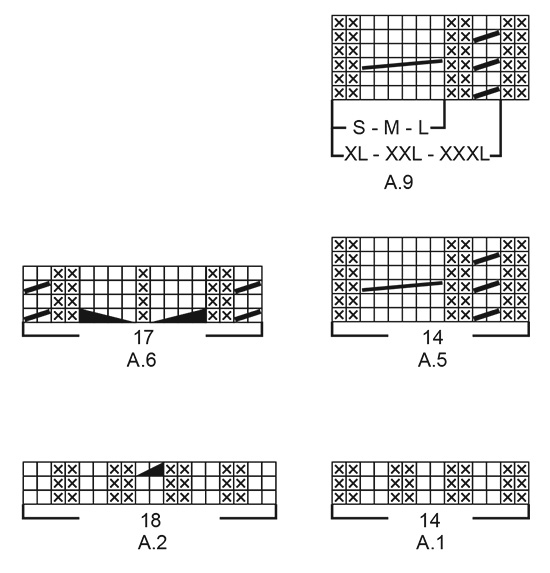
------------------------------------------------------- EXPLANATIONS FOR THE PATTERN: ------------------------------------------------------- KNITTING TIP: In sizes XL, XXL and XXXL, there will be 4 purl stitches next to each other when A.1 is worked 2 times in width. So the rib will match under A.5/A.8, which is worked after the rib. PATTERN: See diagrams A.1 to A.10. The diagrams show all rows in the pattern from the right side. DECREASE/INCREASE TIP (evenly spaced): To work out how to decrease/increase evenly, count the number of stitches to be decreased/increased over (e.g. 23 stitches), and divide by the number of decreases/increases to be made (e.g. 6) = 3.8. In this example, decrease by knitting together approx. each 3rd and 4th stitch. When increasing, make 1 yarn over after approx. each 4th stitch. On the next round work the yarn overs twisted to avoid holes. INCREASE TIP (sleeves): Increase 2 stitches under the sleeve by making 1 yarn over on each side of the marker-stitch as follows: Work the marker-stitch (always the first stitch in A.4), 1 yarn over, pattern as far as the marker-stitch, 1 yarn over (= 2 stitches increased). On the next round work the yarn overs twisted to avoid holes. Then work the new stitches into A.9/A.10 until you have room for a complete repeat, then work the stitches in A.4. RAGLAN: Decrease to raglan on each side of the marker, in each transition between body and sleeves as follows. FROM RIGHT SIDE: AFTER THE MARKER: Knit 1, slip 1 stitch as if to knit, knit 1 and pass the slipped stitch over the knitted stitch (= 1 stitch decreased) BEFORE THE MARKER: Work until there are 3 stitches left before the marker, knit 2 together, knit 1 (= 1 stitch decreased). FROM WRONG SIDE: AFTER THE MARKER: Purl 1, purl 2 together (= 1 stitch decreased) BEFORE THE MARKER: Work until there are 3 stitches left before the marker, purl 2 twisted together, purl 1 (= 1 stitch decreased). ------------------------------------------------------- START THE PIECE HERE: ------------------------------------------------------- JUMPER – SHORT OVERVIEW OF THE PIECE: The body is worked in the round with circular needle as far as the armholes. The sleeves are worked in the round with double pointed needles/short circular needle, bottom up. The body and sleeves are placed on the same circular needle and the yoke worked, decreasing to raglan at the same time. Stiches are cast off for the neck mid-front and the piece continued back and forth. The neck is worked to finish. BODY: Cast on 272-288-304-344-360-392 stitches with circular needle size 3.5 mm and DROPS Karisma. Knit 1 round. Then work the following rib: Purl 1, knit 2, * purl 2, knit 2 *, work from *-* over the next 20-24-28-24-28-36 stitches, work A.1 over the next 14-14-14-28-28-28 stitches (= 1-1-1-2-2-2 repeats of 14 stitches – read KNITTING TIP), A.2 (= 18 stitches), A.3 (= 26 stitches), A.2, A.1 over the next 14-14-14-28-28-28 stitches (= 1-1-1-2-2-2 repeats of 14 stitches – read KNITTING TIP), * knit 2, purl 2 *, work from *-* over the next 44-52-60-52-60-76 stitches, knit 2, A.1 over the next 14-14-14-28-28-28 stitches – remember KNITTING TIP, A.2, A.3, A.2, A.1 over the next 14-14-14-28-28-28 stitches – remember KNITTING TIP, * knit 2, purl 2 *, work from *-* over the next 20-24-28-24-28-36 stitches, knit 2 and purl 1. Continue this rib – NOTE: In diagrams A.2 and A.3 repeat the first 2 rounds onwards. When 1 round remains before the piece measures 5 cm, decrease stitches as follows: Work stocking stitch over the first 23-27-31-27-31-39 stitches and decrease 6-6-6-6-6-8 stitches evenly over these stitches – read DECREASE/INCREASE TIP, work A.1 as before over the next 14-14-14-28-28-28 stitches, work the last round in A.2 (= 18 stitches, 1 stitch decreased), work the last round in A.3 (= 26 stitches, 2 stitches decreased), work the last round in A.2 (= 18 stitches, 1 stitch decreased), A.1 as before over the next 14-14-14-28-28-28 stitches, work stocking stitch over the next 46-54-62-54-62-78 stitches and decrease 13-13-13-13-13-17 stitches evenly over these stitches, A.1 as before over the next 14-14-14-28-28-28 stitches, work the last round in A.2 (= 18 stitches, 1 stitch decreased), work the last round in A.3 (= 26 stitches, 2 stitches decreased), work the last round in A.2 (= 18 stitches, 1 stitch decreased), A.1 as before over the next 14-14-14-28-28-28 stitches, work stocking stitch over the last 23-27-31-27-31-39 stitches and decrease 7-7-7-7-7-9 stitches evenly over these stitches = 238-254-270-310-326-350 stitches. The rib is now finished. Insert 1 marker in the first stitch and 1 marker in the 120th-128th-136th-156th-164th-176th stitch (= sides). Allow these markers to follow your work onwards; they are used when casting off for the armholes. Change to circular needle size 4.5 mm. Work the next round as follows: A.4 over the first 17-21-25-21-25-31 stitches, A.5 over the next 14-14-14-28-28-28 stitches (= 1-1-1-2-2-2 repeats of 14 stitches), A.6 (= 17 stitches), A.7 (= 24 stitches), A.6, A.8 over the next 14-14-14-28-28-28 stitches (= 1-1-1-2-2-2 repeats of 14 stitches), A.4 over the next 33-41-49-41-49-61 stitches (marker sits in the middle of these stitches), A.5 over the next 14-14-14-28-28-28 stitches, A.6, A.7, A.6, A.8 over the next 14-14-14-28-28-28 stitches and A.4 over the last 16-20-24-20-24-30 stitches. Continue this pattern. REMEMBER THE KNITTING TENSION! When the piece measures 36 cm in all sizes, cast off for the armholes as described below. There is approx. 26-28-30-32-34-36 cm left to finished length. Adjust so that next round is an odd numbered row in the diagrams, and cast off the first 6-6-7-7-8-8 stitches, continue the pattern until there are 5-5-6-6-7-7 stitches left before the second marker-stitch, cast off 11-11-13-13-15-15 stitches, work until there are 5-5-6-6-7-7 stitches left on the round and cast off 5-5-6-6-7-7 stitches = 108-116-122-142-148-160 stitches on the front piece and 108-116-122-142-148-160 stitches on the back piece. Cut the strand. Lay the piece to one side and work the sleeves. SLEEVES: Cast on 56-60-60-64-64-68 stitches with double pointed needles size 3.5 mm and DROPS Karisma. Knit 1 round, then work rib in the round (knit 2, purl 2) for 5 cm. Knit 1 round where you increase 19-15-15-19-19-15 stitches evenly spaced – remember DECREASE/INCREASE TIP = 75-75-75-83-83-83 stitches. Insert 1 marker in the first stitch – allow the marker to follow your work onwards; it is used when increasing under the sleeve. Change to double pointed needles size 4.5 mm. Work the next round with pattern as follows: A.4 over the first stitch (marker-stitch), A.9 (= 8-8-8-12-12-12 stitches – start the diagram by the mark for your size and work from right to left), A.6 (= 17 stitches), A.7 (= 24 stitches), A.6, A.10 (= 8-8-8-12-12-12 stitches – start at the first stitch in A.10 and work from right to left as far as the mark for your size). Continue this pattern. When the piece measures 8-10-7-8-9-6 cm, increase 2 stitches under the sleeve – read INCREASE TIP. Increase like this every 4-2½-2½-2½-2-2 cm a total of 11-15-17-15-17-19 times = 97-105-109-113-117-121 stitches – NOTE: The increased stitches are first worked in A.9/A.10 until there is room for a complete repeat, then worked in A.4. Continue working until the sleeve measures approx. 51-49-48-46-45-43 cm (shorter measurements in larger sizes due to wider neck and longer yoke). Try the sleeve on and work to desired length. Adjust so that the next round is an odd numbered row in the diagrams and cast off for the armhole as follows: Cast off the first 6-6-7-7-8-8 stitches, work as before until there are 5-5-6-6-7-7 stitches left and cast off the last 5-5-6-6-7-7 stitches = 86-94-96-100-102-106 stitches. Cut the strand. Work the other sleeve in the same way. YOKE: Place the sleeves on the same circular needle size 4.5 mm as the body, where stitches were cast off for the armholes (without working the stitches) = 388-420-436-484-500-532 stitches. Insert a marker thread in each transition between the body and sleeves = 4 marker threads. Allow the threads to follow your work onwards; they are used when decreasing to raglan. Start at the transition between the back piece and the left sleeve – you can insert a marker here to show the start of the round. Continue the pattern as before, with 2 stitches in stocking stitch on each side of all 4 marker threads. OVERVIEW OF THE NEXT SECTION: On the next round start to decrease to raglan; you will also cast off stitches for the neck mid-front and finish working back and forth from mid-front. When there are not enough stitches for the cables, work stocking stitch over these stitches. Read RAGLAN and NECK before continuing. RAGLAN: Decrease to RAGLAN on each side of all 4 marker threads – read description above. Decrease every 2nd round a total of 24-27-30-32-36-38 times, then every round 7-7-6-7-4-4 times. NECK: When the piece measures 55-57-59-60-62-64 cm (adjust so the next round is an odd round in the diagrams), decrease 6-6-6-10-10-10 stitches evenly over the middle 24-24-24-32-32-32 in front – remember DECREASE/INCREASE TIP. Then place the middle 30-32-34-42-46-54 stitches on a thread for the neck. Work to the beginning of the round. Cut the strand. Start from the wrong side, by the neck and continue the pattern back and forth. AT THE SAME TIME cast off at the beginning of each row from the neck as follows: 2 stitches 1 time and 1 stitch 1-1-1-2-2-2 times on each side. After all the decreases to raglan and neck there are 98-104-102-112-116-124 stitches on the needle. Cut the strand. DOUBLE NECK: Start mid-back and knit up 134-142-142-162-170-186 stitches around the neck (including the stitches on the thread and on the needle) with short circular needle size 3.5 mm and DROPS Karisma. On the next round decrease stitches to avoid the neck being too loose – knit 1 round and decrease to 104-108-112-116-120-124 stitches evenly spaced. Purl 1 round and knit 1 round. Work the next round as follows: Knit 1, * purl 2, knit 2 *, work from *-* until there are 3 stitches left, purl 2 and knit 1. Continue this rib until the neck measures 8-8-8-10-10-10 cm. On the next round increase all purl-2 to purl-3 by making 1 yarn over after each purled section (the yarn overs are purled twisted on the next round to avoid holes). Continue working until the neck measures 11-11-11-13-13-13 cm. Switch to circular needle size 4.5 mm and cast off loosely with knit over knit and purl over purl. Fold the neck double to the inside and sew down. To avoid the neck being tight and rolling outwards, it is important that the seam is elastic. ASSEMBLY: Sew the opening under each sleeve. |
|||||||||||||||||||||||||||||||
Diagram explanations |
|||||||||||||||||||||||||||||||
|
|||||||||||||||||||||||||||||||
 |
|||||||||||||||||||||||||||||||
 |
|||||||||||||||||||||||||||||||
 |
|||||||||||||||||||||||||||||||
Have you finished this pattern?Tag your pictures with #dropspattern #iceislandsweater or submit them to the #dropsfan gallery. Do you need help with this pattern?You'll find 28 tutorial videos, a Comments/Questions area and more by visiting the pattern on garnstudio.com. © 1982-2025 DROPS Design A/S. We reserve all rights. This document, including all its sub-sections, has copyrights. Read more about what you can do with our patterns at the bottom of each pattern on our site. |
|||||||||||||||||||||||||||||||


With over 40 years in knitting and crochet design, DROPS Design offers one of the most extensive collections of free patterns on the internet - translated to 17 languages. As of today we count 320 catalogues and 12092 patterns translated into English (UK/cm). 12092
We work hard to bring you the best knitting and crochet have to offer, inspiration and advice as well as great quality yarns at incredible prices! Would you like to use our patterns for other than personal use? You can read what you are allowed to do in the Copyright text at the bottom of all our patterns. Happy crafting!
Post a comment to pattern DROPS 224-10
We would love to hear what you have to say about this pattern!
If you want to leave a question, please make sure you select the correct category in the form below, to speed up the answering process. Required fields are marked *.