
Beliebte Kategorien
Suchen Sie nach einem Garn?


Kommentare / Fragen (78)
![]() Dominique hat geschrieben:
Dominique hat geschrieben:
On-dit. glisser attente 0 fois 0 mailles sur arrêt maille je ne comprends pas. Toute cette partie pour biais épaules est incompréhensible. "Rabattre une m au rg suivant à partir de l'encolure " on rabattre une seule fois? Merci de reformuler vos explications . Je suis en attente pour faire ce modèle. Merci
02.04.2025 - 19:31DROPS Design hat geantwortet:
Bonjour Dominique, s'il y a un 0 dans votre taille, vous n'êtes juste pas concernée par cette information; les m des épaules sont mises en attente en début de rg qui commence par l'emmanchure vers l'encolure (ex dos: sur l'end pour l'épaule droite / sur l'env pour l'épaule gauche); et on rabat les m de l'encolure en début de rg à partir de l'encolure vers l'emmanchure (ex dos: sur l'end pour l'épaule gauche, sur l'env pour l'épaule droite). Cette vidéo d'un autre modèle pourrait vous aider à visualiser comment faire. Bon tricot!
03.04.2025 - 08:35
![]() Sandra Schradiek hat geschrieben:
Sandra Schradiek hat geschrieben:
Wie werden am Ärmloch die Abnahmen gemacht
27.01.2025 - 18:42DROPS Design hat geantwortet:
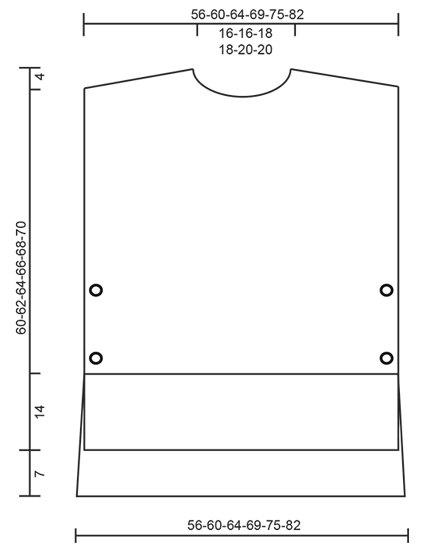
Liebe Frau Schradiek, es wird hier keine Maschen für die Armlöcher abgekettet - siehe Maßskizze. Viel Spaß beim Stricken!
28.01.2025 - 09:01
![]() Ann hat geschrieben:
Ann hat geschrieben:
Als ik 93 steken heb en voor de schouders 28 st. aan elke kant op een hulpdraad moet zetten, hoe kan het dan dat ik de middelste 18 st. moet afkanten voor de nek? Ik heb dan toch een oneven aantal steken over?
14.12.2024 - 15:38
![]() Christine DUPRE hat geschrieben:
Christine DUPRE hat geschrieben:
Pourquoi la plupart de vos modèles se tricote en aiguilles circulaires ? Pour ma part, je renonce à chaque fois pour réaliser vos modèles car je n'arrive pas à travailler en aiguille circulaire ? Il serait bien d'avoir plus de choix en aiguilles droites
04.12.2024 - 08:23DROPS Design hat geantwortet:
Bonjour Mme Dupre, les aiguilles circulaires en Scandinavie et en Europe du Nord sont très fréquemment utilisées, raison pour laquelle nombre de nos modèles en utilise, toutefois, vous pouvez souvent facilement adapter les explications sur aiguilles droites - cf cette leçon; pour ce modèle par ex, il suffit simplement de tricoter le devant et le dos comme indiqué (= séparément, en allers et retours), puis de coudre une seule des épaules pour relever les mailles du col, puis faire la couture de la 2ème épaule et du col. Bon tricot!
04.12.2024 - 16:03
![]() Marij hat geschrieben:
Marij hat geschrieben:
Beste mensen. Ik vind het erg moeilijk om met een rondbreinaald te werken. Hoe kan ik het patroon veranderen als ik gewoon 2 naalden gebruik??? Dat lukt mij het beste. Hopelijk kunt u mij helpen. Gr. Marij
06.11.2024 - 08:35DROPS Design hat geantwortet:
Dag Marij,
Om een patroon aan te passen om op rechte naalden te breien hebben we een instructie gemaakt. Deze vind je hier.
06.11.2024 - 13:44
![]() Cheryl Dillinger hat geschrieben:
Cheryl Dillinger hat geschrieben:
How many stitches and rows for the gauge?
29.10.2024 - 19:25DROPS Design hat geantwortet:
Dear Mrs Dillinger, you will find the tension for both needle size under header, together with needle size, sizes, amount of yarn and buttons. Happy knitting!
30.10.2024 - 08:08
![]() Ann Marie hat geschrieben:
Ann Marie hat geschrieben:
Vill ha beskrivningen till denna fina väst
24.10.2024 - 10:08
![]() Kirsten Sørensen hat geschrieben:
Kirsten Sørensen hat geschrieben:
Ønsker opskriften på den flotte vest
22.10.2024 - 15:14
![]() Paola hat geschrieben:
Paola hat geschrieben:
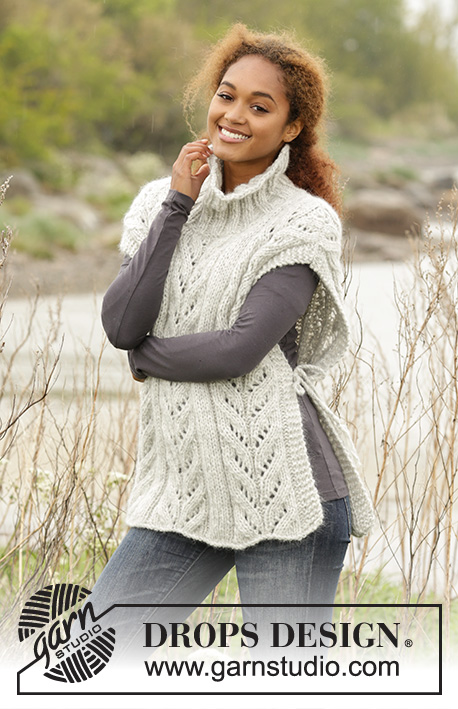
Buongiorno. Come faccio a fare questo modello con il collo alto. Grazie
13.09.2024 - 13:31DROPS Design hat geantwortet:
Buonasera Paola, per un aiuto così personalizzato può rivolgersi al suo rivenditore DROPS di fiducia. Buon lavoro!
13.09.2024 - 21:04
![]() Bec hat geschrieben:
Bec hat geschrieben:
Thank you so much for your recent feedback. I think I've done it correctly. The next step has me puzzled - I've just bound of my 1 stitch on the neck, my K1 row will be on the RS, not the WS, am I missing something? TIA
12.08.2024 - 04:33DROPS Design hat geantwortet:
Hi Bec, The knitted row after binding off the 1 stitch is from the wrong side (so work as normal from the right side before knitting from the wrong side if necessary). Regards, Drops Team.
12.08.2024 - 06:33
|
|
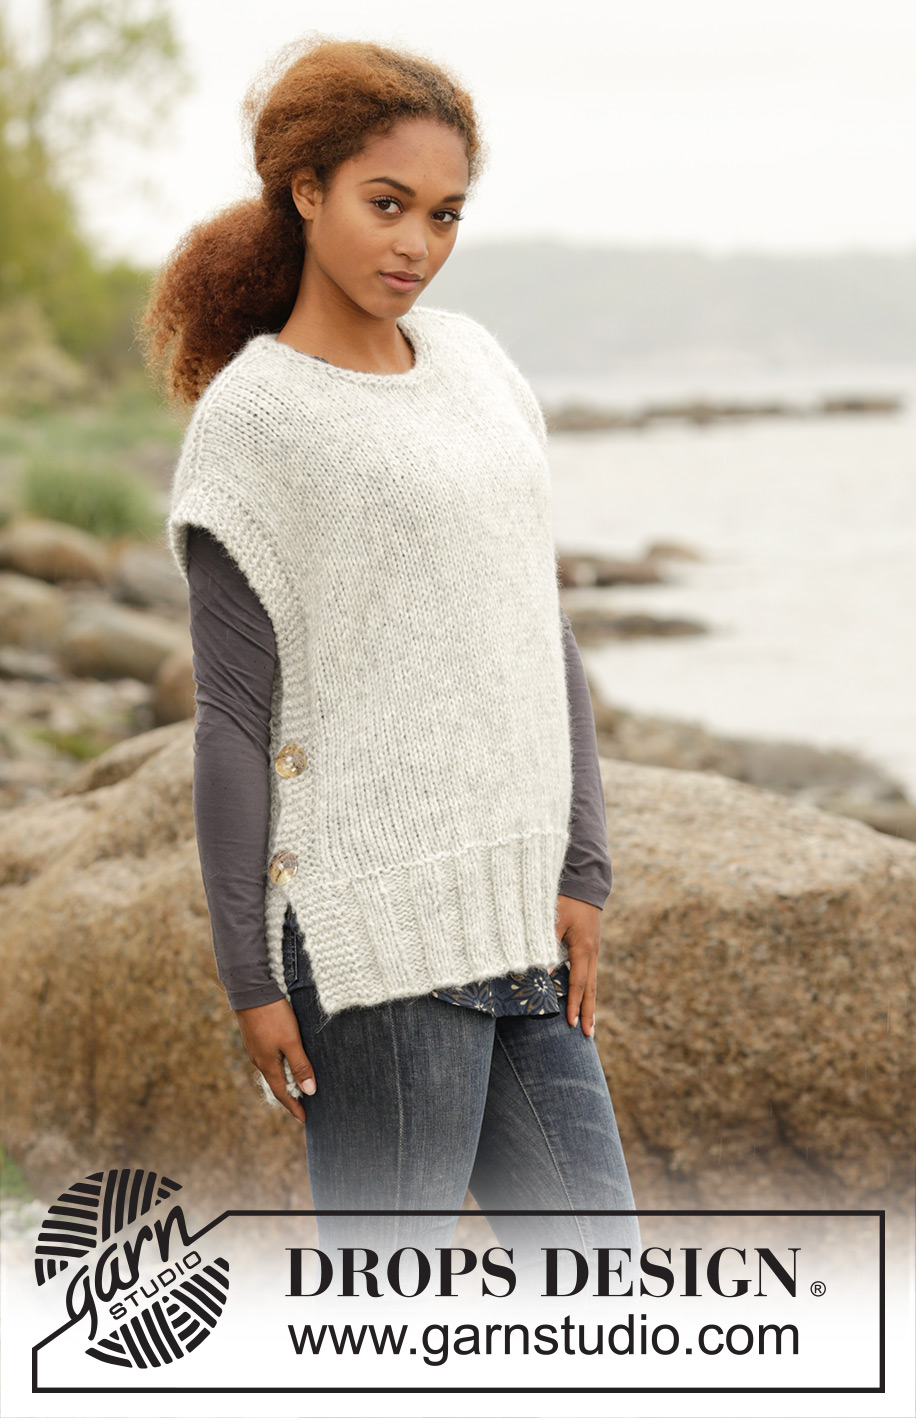
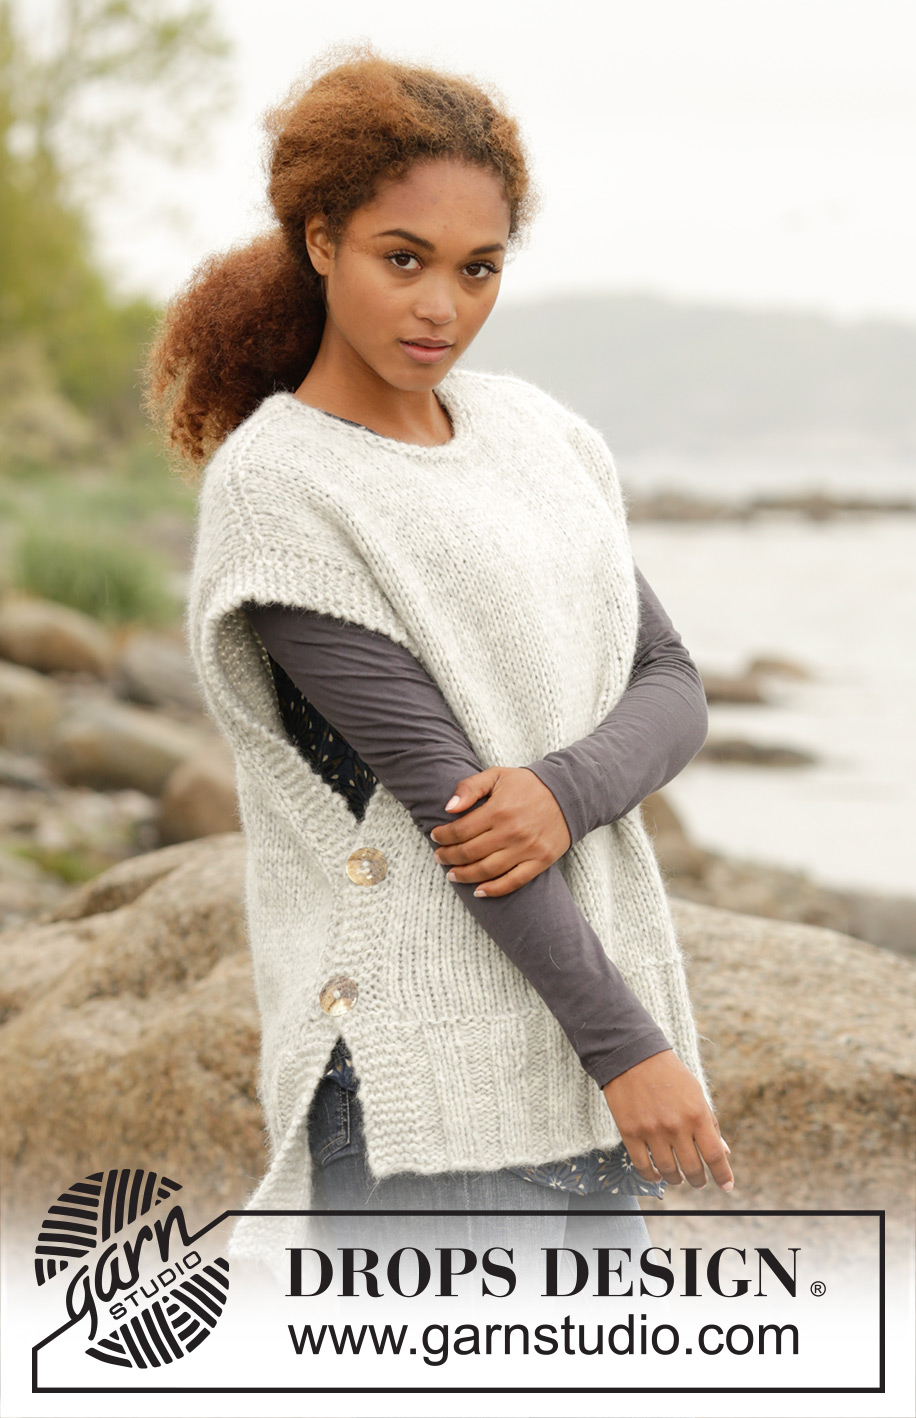
Winter is Coming#winteriscomingslipover |
|
 |
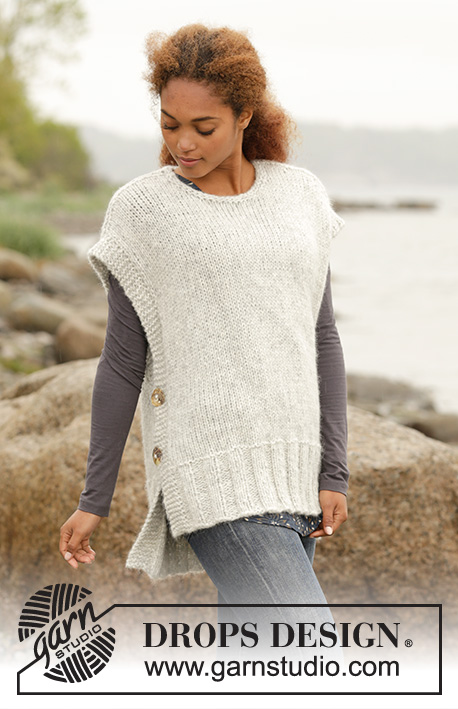 |
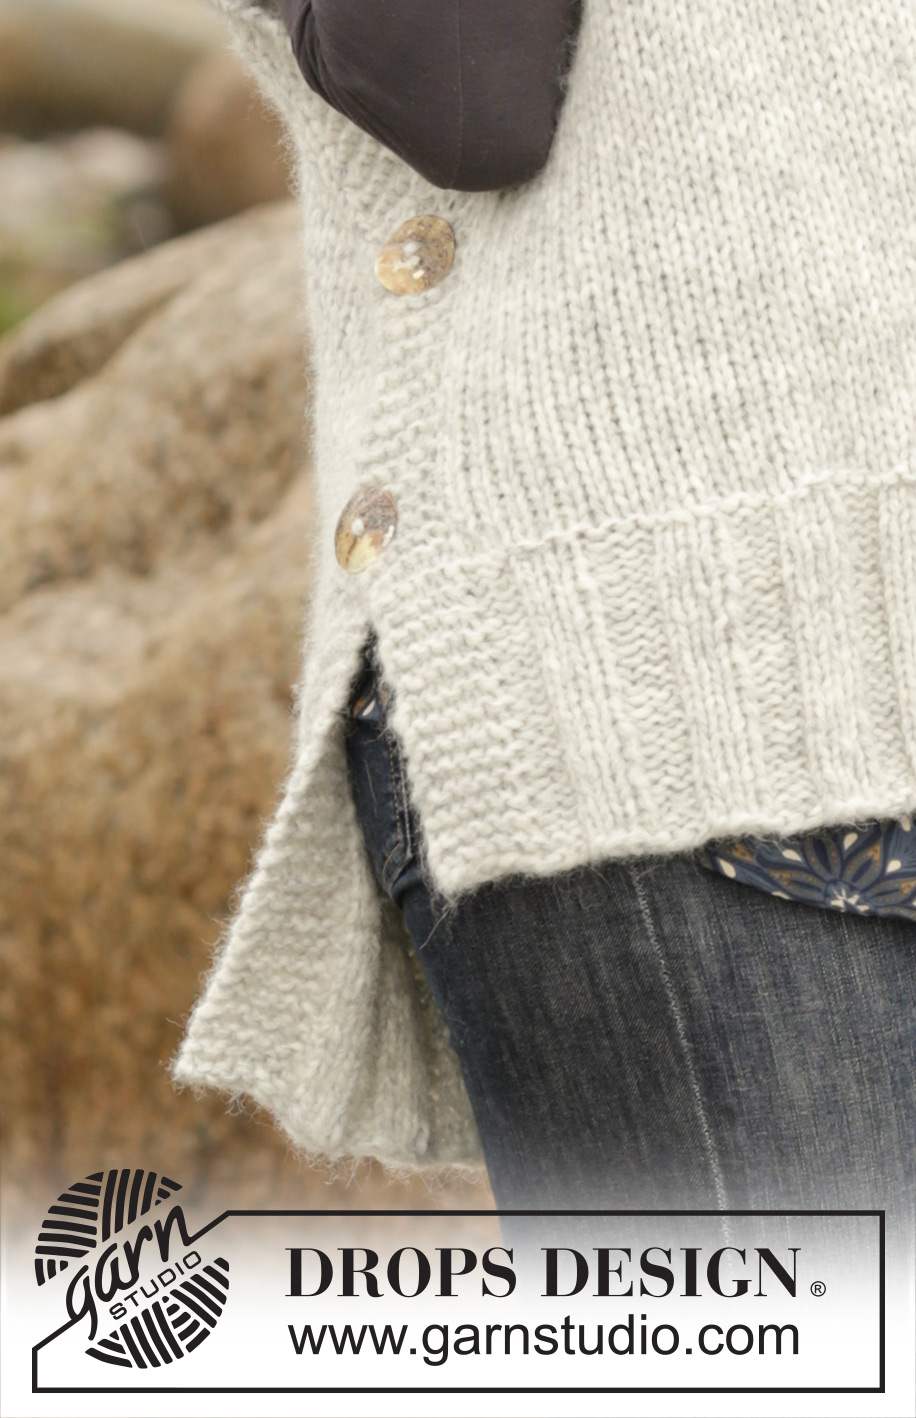
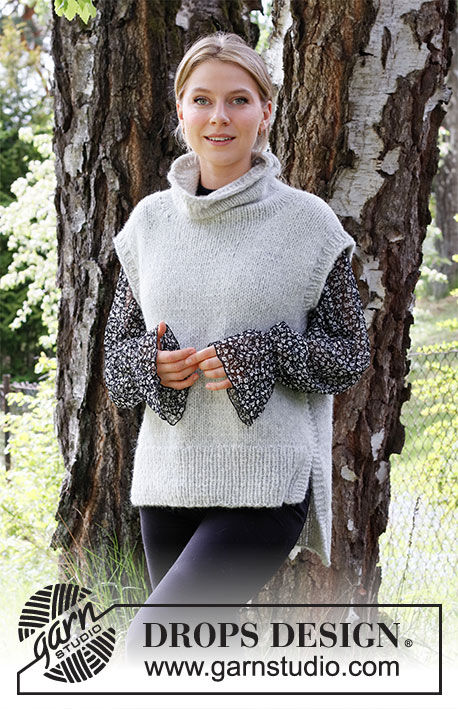
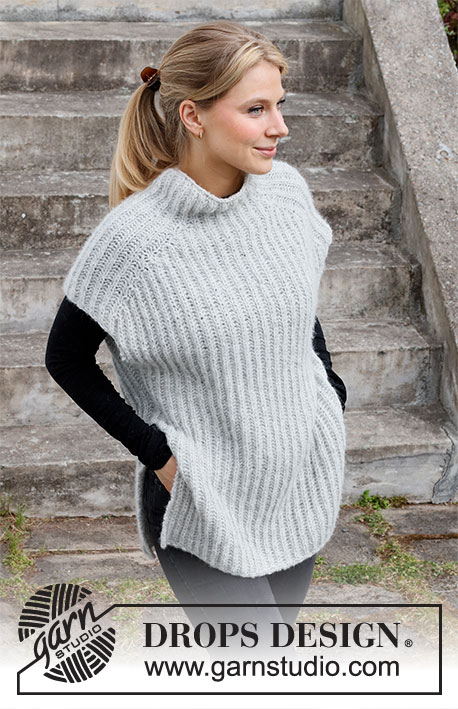
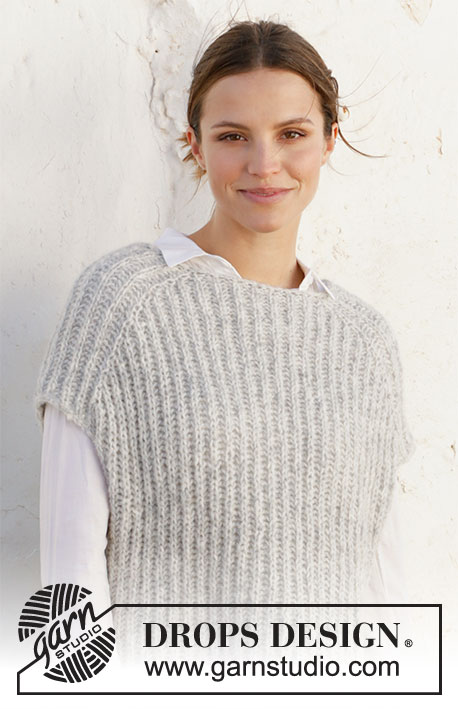
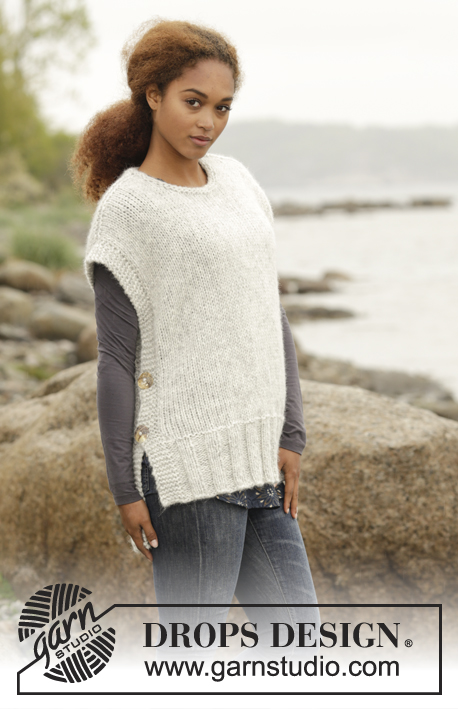
Gestrickter Pullunder in 1 Faden DROPS Cloud oder 1 Faden DROPS Wish oder 2 Fäden DROPS Air mit Seitenschlitzen und rundem Halsausschnitt. Größe S – XXXL.
DROPS 173-47 |
|
|
KRAUS RECHTS (in Hin- und Rück-R): Jede R re str. 1 Krausrippe = 2 R kraus re = 2 R re. ABNAHMETIPP: Um zu berechnen, wie oft in einer R abgenommen werden muss, die Gesamt-M-Zahl der R, z.B. 75 M - abzüglich der Maschen am Rand, z.B. 12 M - durch die Anzahl an Abnahmen, die gemacht werden sollen, z.B. 13, teilen = 4,8. D.h. in diesem Beispiel wird ca. jede 4. und 5. M zusgestr und es wird nicht bei den M am Rand abgenommen. KNOPFLÖCHER: Am Vorderteil werden beidseitig je 2 Knopflöcher eingearb. 1 Knopfloch = die dritte und vierte M bzw. die viert- und drittletzte M abketten und in der nächsten R je 2 neue M über den abgeketteten M anschlagen. Die Knopflöcher einarb, wenn die Arb eine Gesamtlänge von 16 und 26 cm für alle Größen hat (ggf. beim gewünschten Maß). ---------------------------------------------------------- PULLUNDER: Die Arb wird in Hin- und Rück-R auf der Rundnadel in 2 Teilen gestr und anschließend an den Schultern zusgenäht. RÜCKENTEIL: 75-81-87-93-99-105 M (einschl. je 6 M am Rand beidseitig) auf Rundnadel Nr. 7 mit 1 Faden Cloud oder 1 Faden Wish oder 2 Fäden Air anschlagen. 1 Rück-R li str. Die nächste Hin-R wie folgt str: 6 M KRAUS RECHTS (siehe oben), * 3 M li, 3 M re *, von *-* wdh bis noch 9 M auf der Nadel sind und enden mit 3 M li und 6 M kraus re. In dieser Weise weiter im Rippenmuster str, bis die Arb eine Gesamtlänge von 21 cm hat, die letzte R ist eine Hin-R. Zu Rundnadel Nr. 8 wechseln. Die nächste R (= Rück-R) re stricken und dabei 13-15-17-17-17-15 M gleichmäßig verteilt abnehmen – ABNAHMETIPP lesen = 62-66-70-76-82-90 M auf der Nadel. Glatt re str, mit je 6 M kraus re beidseitig. MASCHENPROBE BEACHTEN! Bei einer Gesamtlänge von 63-65-67-69-71-73 cm Maschen am Anfang jeder R, d.h. beidseitig, für die Schulterschrägung wie folgt stilllegen (BITTE BEACHTEN: Um das Fadenabschneiden zu verhindern, die M vor dem Stilllegen str): je 7-8-8-9-10-11 M insgesamt 2-3-2-2-3-2 x und dann je 8-0-9-10-0-12 M 1-0-1-1-0-1 x beidseitig. GLEICHZEITIG, wenn die Arb eine Gesamtlänge von 65-67-69-71-73-75 cm hat, die mittleren 16-16-18-18-20-20 M für den Halsausschnitt abketten und jede Schulter einzeln weiterstr, dabei am Anfang der nächsten R, die am Halsrand beginnt, 1 M abketten. Wenn alle M abgekettet bzw. stillgelegt wurden, sind 22-24-25-28-30-34 stillgelegte M für die Schulter vorhanden und das Rückenteil hat eine Gesamtlänge von ca. 67-69-71-73-75-77 cm ab dem höchsten Punkt an der Schulter nach unten gemessen. Die stillgelegten M auf Rundnadel Nr. 7 legen. 1 Rück-R re str (um ein Loch in den Übergängen zwischen den stillgelegten Bereichen zu vermeiden, an diesen Stellen den Querfaden zwischen 2 M auffassen und mit der nächsten M re verschränkt zusstr). Dann LOCKER in der Hin-R re abketten. Die andere Schulter ebenso arb. VORDERTEIL: Wie das Rückenteil str, jedoch bereits bei einer Gesamtlänge von 14 cm gleichmäßig verteilt wie beim Rückenteil abnehmen (das Vorderteil ist 7 cm kürzer als das Rückenteil). Wie beim Rückenteil weiterstr, jedoch bei einer Gesamtlänge von 16 und 26 cm jeweils beidseitig KNOPFLÖCHER einarb – siehe oben. Weiterstr, bis die Arb eine Gesamtlänge von 53-55-57-58-60-62 cm hat. Nun die mittleren 10-10-12-12-14-14 M für den Halsausschnitt stilllegen. Jede Schulter einzeln weiterstr, dabei am Anfang jeder R, die am Halsrand beginnt, wie folgt abketten: 2 M 1 x und 1 M 2 x - GLEICHZEITIG bei einer Gesamtlänge von 56-58-60-62-64-66 cm die M für die Schulterschrägung wie beim Rückenteil stilllegen. Wenn alle M abgekettet bzw. stillgelegt wurden, sind 22-24-25-28-30-34 stillgelegte M für die Schulter vorhanden und das Vorderteil hat eine Gesamtlänge von ca. 60-62-64-66-68-70 cm ab dem höchsten Punkt an der Schulter nach unten gemessen. Die stillgelegten M auf Rundnadel Nr. 7 legen und wie beim Rückenteil 1 Rück-R re str, dann in der Hin-R re abketten. Die andere Schulter ebenso arb. FERTIGSTELLEN: Die Schulternähte innerhalb der Abkettkanten schließen – darauf achten, dass die Naht nicht zu stramm wird. Den kraus re gestr Rand mit den Knopflöchern (Vorderteil) über den kraus re gestr Rand des Rückenteils legen und die Knöpfe passend annähen. An der anderen Seite wdh. HALSBLENDE: Von der Vorderseite ca. 46 bis 58 M aus dem Halsausschnitt (einschl. der stillgelegten M) auf der kurzen Rundnadel Nr. 7 mit 1 Faden Cloud oder 1 Faden Wish oder 2 Fäden Air auffassen. 1 Rd li, 1 Rd re und 1 Rd li str, dann LOCKER re abketten. |
|
 |
|
Haben Sie diese Anleitung nachgearbeitet?Dann taggen Sie Ihre Fotos mit #dropspattern #winteriscomingslipover oder schicken Sie sie an die #dropsfan Galerie Brauchen Sie Hilfe bei dieser Anleitung?Sie finden 21 Videotutorials, einen Kommentar/Fragen-Bereich und vieles mehr, wenn sie die Anleitung bei garnstudio.com aufrufen. © 1982-2026 DROPS Design A/S. Wir besitzen alle Rechte. Dieses Dokument, einschließlich aller Untersektionen, hat Urheberrechte. Mehr dazu, was Sie mit unseren Anleitungen machen können, finden Sie ganz unten auf der Seite zu jeder Anleitung. |
|


Mit über 40 Jahren Tätigkeit im Entwerfen von Strick- und Häkelmustern bietet Ihnen DROPS Design eine der umfangreichsten Sammlungen von kostenlosen Anleitungen im Internet - in 17 Sprachen übersetzt. Zum jetzigen Zeitpunkt haben wir insgesamt 325 Handarbeitshefte und 12298 Anleitungen auf Deutsch. 12210
Unser Ziel ist es, Ihnen die besten Angebote zum Stricken und Häkeln, Inspirationen und Ratschläge sowie qualitativ hochstehende Garne zu unglaublichen Preisen zu bieten! Möchten Sie unsere Anleitungen nicht nur für den persönlichen Gebrauch nutzen? Unsere Copyright Bedingungen finden Sie bei allen unseren Anleitungen ganz unten auf der jeweiligen Seite. Viel Spaß beim Handarbeiten!
Kommentieren Sie die Anleitung DROPS 173-47
Wir würden gerne Ihre Meinung zu diesem Modell erfahren!
Wenn Sie eine Frage stellen möchten, prüfen Sie bitte, dass Sie die richtige Kategorie im unten stehenden Formular gewählt haben - so bekommen Sie schneller eine Antwort. Die obligatorischen Felder sind mit einem * gekennzeichnet.