
Looking for a yarn?


Comments / Questions (11)
![]() Eva wrote:
Eva wrote:
Hello! I found a mistake in the Estonian version of this pattern - back/tagumine pool row/ring 3 must be “1 sm” stich not “2 sm”, stich count doesn’t add up and thats how i found it. English version is correct.
21.07.2024 - 14:14
![]() Emma Groteboer wrote:
Emma Groteboer wrote:
Het zijn geweldige leuke patroontjes er is heel veel keus
06.07.2024 - 00:22
![]() Annette Bach wrote:
Annette Bach wrote:
Hej 😊 Under montering står der at jeg skal "hækle sammen med appelsin"??? Det må da være en slåfejl, men hvad skal jeg så i stedet?🤔 Mvh Annette
24.05.2020 - 13:34DROPS Design answered:
Hej Annette, jo det er den orangefarvede vi har hæklet de to stykker sammen med. God fornøjelse!
27.05.2020 - 13:47
![]() Anja Spindler wrote:
Anja Spindler wrote:
Hallo, in der Häkelinfo der Anleitung befindet sich ein Fehler. Da steht: die erste fM jeder Runde wird mit 1 fM ersetzt... Es sollte aber heisen: die erste fM jeder Runde wird mit 1 LM ersetzt! LG Anja
27.04.2015 - 13:30DROPS Design answered:
Vielen Dank für den Hinweis, das wird gleich korrigiert! Viel Spaß beim Weiterhäkeln!
27.04.2015 - 15:11
![]() Smits wrote:
Smits wrote:
Ik heb het patroon toegekregen waarvoor dank MAAR ik heb enkel de uitleg voor het haken van de voor- en achterkant en heb geen idee hoe ik die bloem in het midden moet beginnen maken. Er staat enkel haak 4 l en zonnebloem. Kan u mij daarmee helpen aub. Bedankt.
06.04.2015 - 15:31DROPS Design answered:
Het patroon is compleet. Zonnebloem is de naam van de kleur geel. Als u de voorkant haakt zoals aangegeven staat, ziet u vanzelf de bloem in het midden ontstaan, die wordt niet los gehaakt maar is onderdeel van de voorkant.
07.04.2015 - 11:44
![]() Kat wrote:
Kat wrote:
Can you tell me what this is supposed to be ? Is it a trivet or a placemat or a doiley ? Pretty.
20.03.2015 - 21:51DROPS Design answered:
Dear Kat, it is a pot holder, thank you. Happy crocheting!
21.03.2015 - 10:42
![]() Bi wrote:
Bi wrote:
Ik heb namen voor dit smakvolle ding. Een Pannenzon of Passenzon of Zonnebloem voor Paasdag...
05.03.2015 - 23:39
![]() Tove Dunseth wrote:
Tove Dunseth wrote:
Den ser fin ut. fikk lyst å hekle et par.
09.09.2013 - 18:53
![]() Alice Wemper wrote:
Alice Wemper wrote:
Ich verstehe nicht was mit "den Lm-Bogen gegen sich falten" in der 4. Runde der Vorderseite gemeint ist und finde auch nichts dazu in Büchern und dem Internet. Wäre sehr dankbar, wenn man das ausführlicher erklären könnte.
11.03.2013 - 23:09DROPS Design answered:
Liebe Alice, Sie klappen den Bogen quasi etwas weg, um an die Maschen der 2. Rd zu gelangen.
12.03.2013 - 12:30
![]() Kaja wrote:
Kaja wrote:
Tagumine pool 3. RING: tee 2 sm igasse ks-sse = 24 sm. peab olema 1 sm igasse ks-sse
16.12.2012 - 00:03
|
|
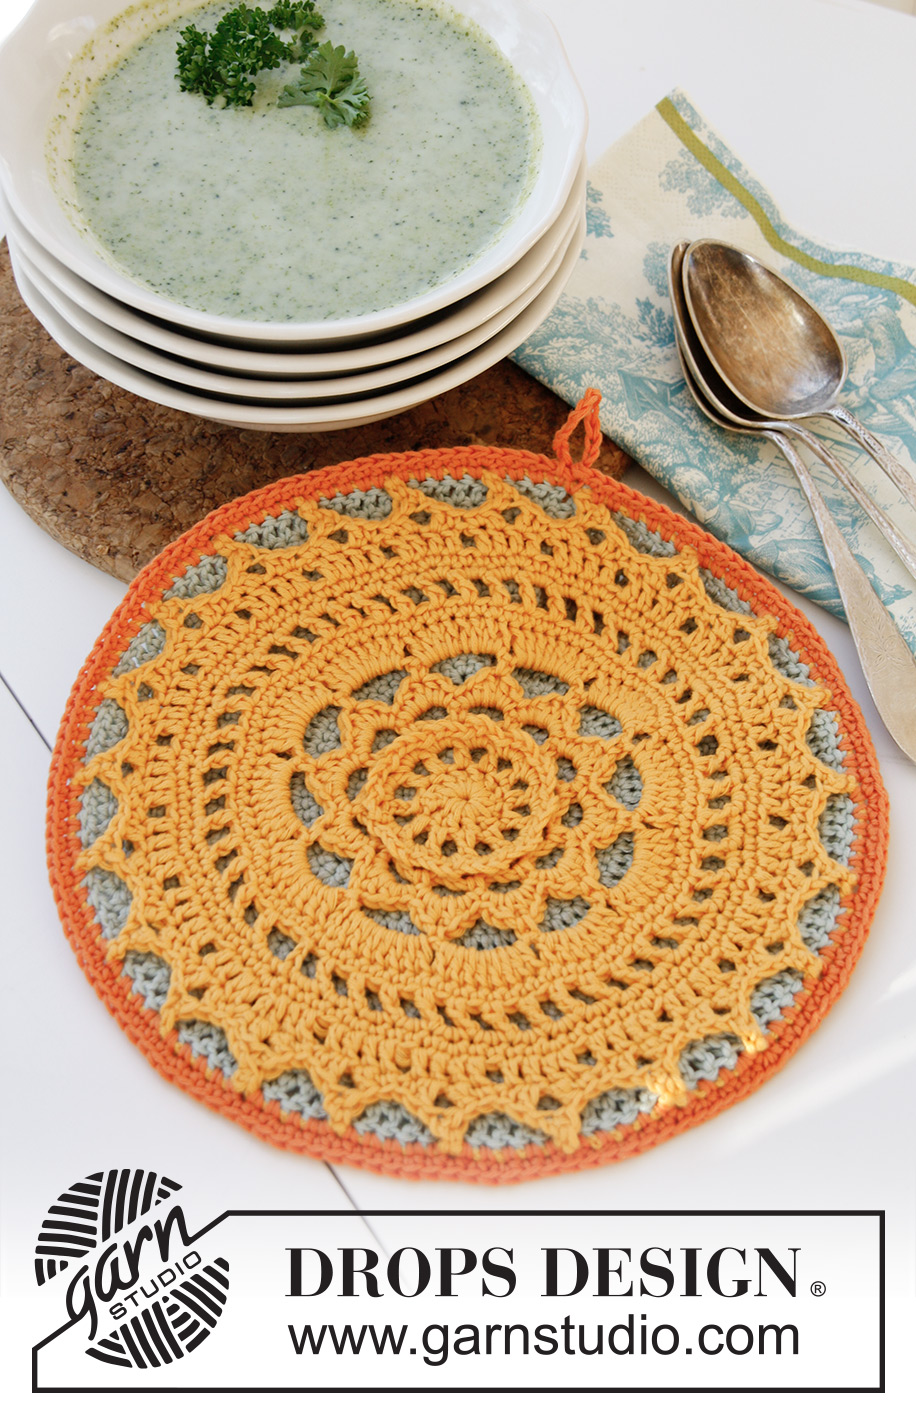
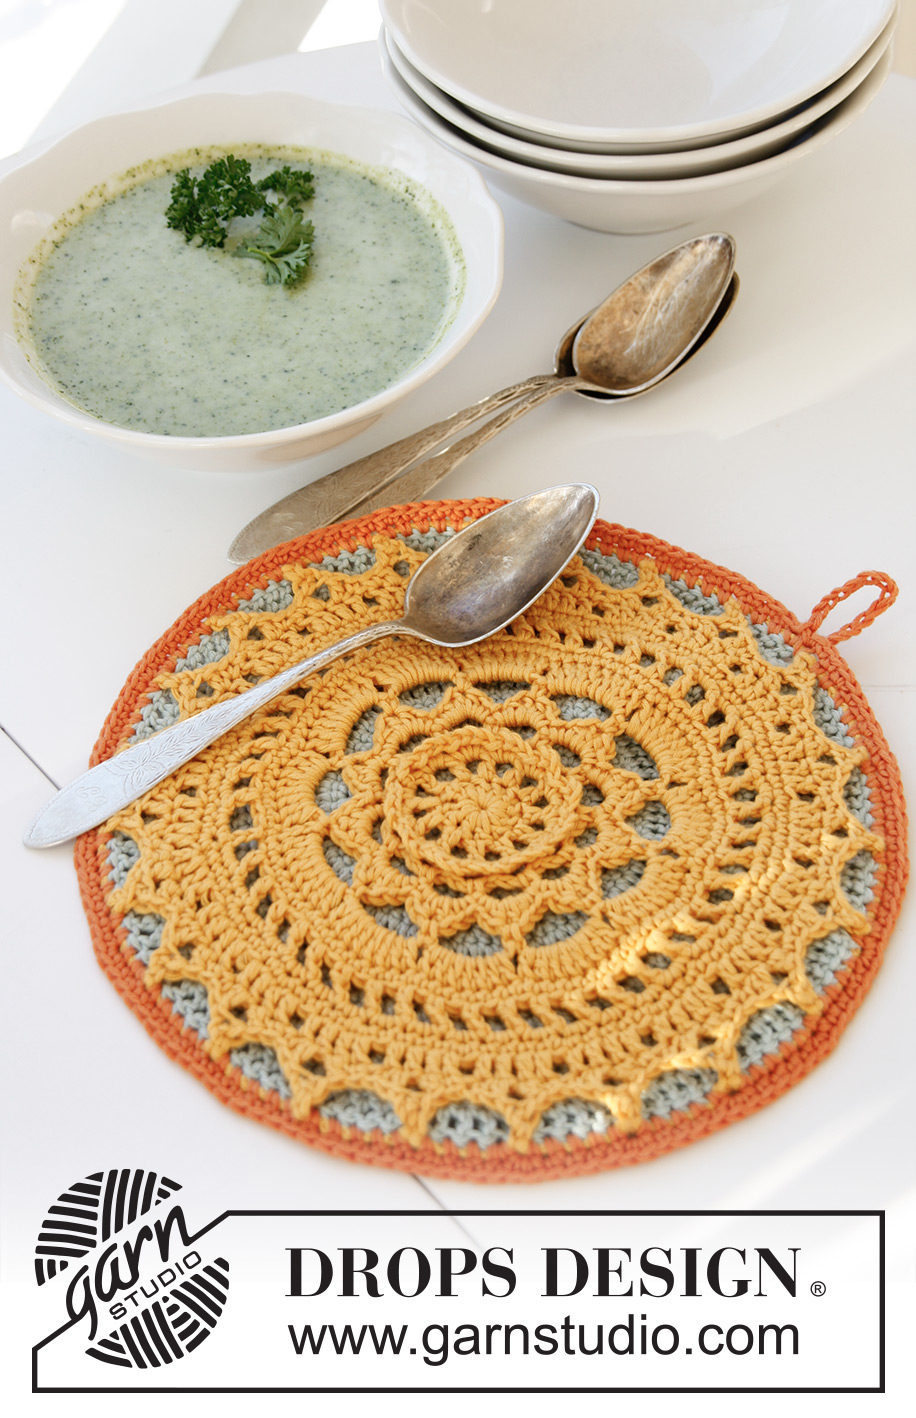
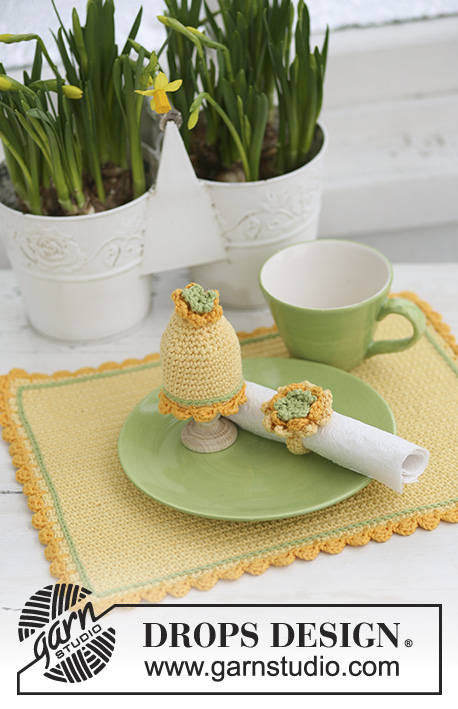
Easter Radiance Doily#easterradiancedoily |
|
 |
 |
Crochet DROPS pot holder in ”Safran” or "DROPS ♥ You #7".
DROPS Extra 0-843 |
|
|
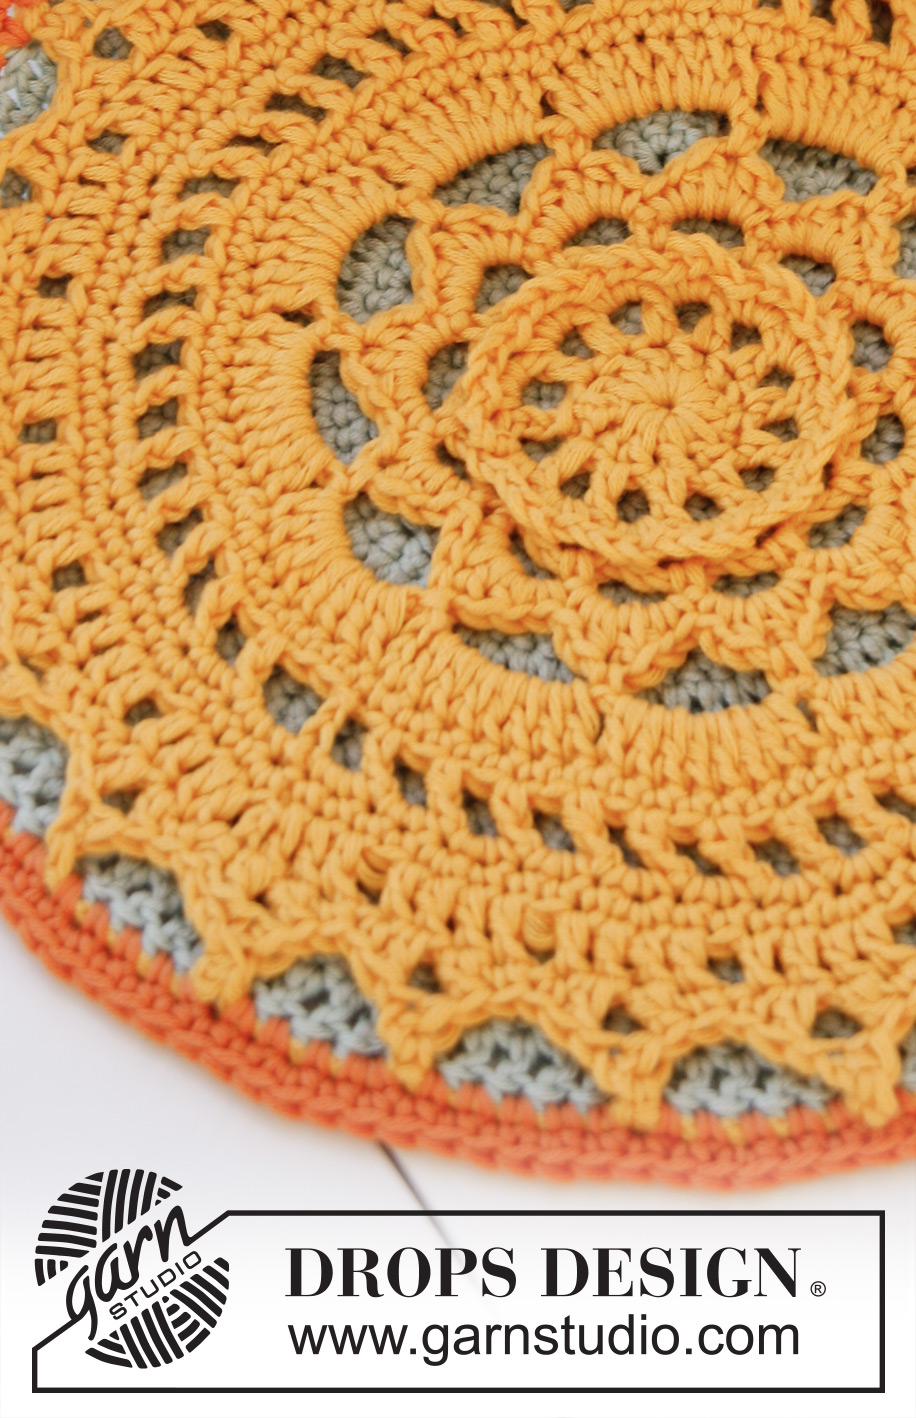
CROCHET INFO: Replace first sc at beg of every round with ch 1 and finish every round with 1 sl st in ch from beg of round. Replace first dc at beg of every round with ch 3 and finish every round with 1 sl st in 3rd ch from beg of round. ---------------------------------------------------------- POT HOLDER: Crochet one front and one back and then crochet these two tog to make a pot holder. FRONT: Ch 4 on hook size 3 mm / C with strong yellow and form a ring with 1 sl st in first ch. ROUND 1: ch 3 (= 1 dc), work 11 dc in ch-ring and finish with 1 sl st in 3rd ch from beg of round = 12 dc. ROUND 2: ch 4 (= 1 dc + 1 ch), * 1 dc in next dc, ch 1 *, repeat from *-* the entire round and finish with 1 sl st in 3rd ch from beg of round = 12 dc with 1 ch between each. ROUND 3: 1 sl st in first ch, * ch 3, 1 sc in next ch *, repeat from *-* the entire round and finish with ch 3 and 1 sl st in sl st from beg of round = 12 ch-spaces. ROUND 4: Fold the ch spaces towards you and ch 1, 1 sc in ch from 2nd round (i.e. work at the back of previous round with ch spaces), * ch 3, 1 sc in next ch from 2nd round, repeat from *-* the entire round and finish with ch 3 and 1 sl st in first sc from beg of round = 12 ch-spaces. ROUND 5: Work sl st until the middle of first ch-space from 4th round. 1 sc, * ch 4, 1 sc in next ch-space (from 4th round) *, repeat from *-* the entire round and finish with ch 4 and 1 sl st in first sc from beg of round = 12 ch-spaces. ROUND 6: ch 1, then work as follows in every ch space: 1 sc, ch 1, 1 hdc, 1 dc, 1 hdc, ch 1 and 1 sc. Finish with 1 sl st in ch from beg of round = 12 filled ch-spaces. ROUND 7: Work sl st until dc at the top of first filled ch-space, 1 sc in dc, * ch 6, 1 sc in dc in next filled ch-space*, repeat from *-* the entire round and finish with ch 6 and 1 sl st in sc from beg of round = 12 ch-spaces. ROUND 8: 1 sl st in first ch-space, ch 3 (= 1 dc), 7 dc in the same ch-space. Then work 8 dc in every ch-space, finish round with 1 sl st in 3rd ch from beg of round = 96 dc. ROUND 9: 1 ch (= 1 sc), then work 1 sc in every dc, finish with 1 sl st in ch from beg of round = 96 sc. ROUND 10: ch 5 (= 1 dc + 2 ch), * skip 1 sc, 1 dc in next dc, ch 2 *, repeat from *-* the entire round and finish with 1 sl st in 3rd ch from beg of round = 48 dc with 2 ch between each. ROUND 11: 1 sl st in first ch space, ch 1 (= 1 sc), then work 2 sc in each of the next ch-spaces the entire round, finish with 1 sl st in ch from beg of round = 95 sc. ROUND 12: ch 1 (= 1 sc), 1 sc in same st, * 2 sc in next sc, 1 sc in each of the next 4 sc *, repeat from *-* the entire round and finish with 2 sc in next st and 1 sc in each of the last 3 sc and 1 sl st in ch from beg of round = 115 sc. ROUND 13: ch 3 (= 1 dc), 1 dc in each of the next 3 sc, ch 1, * skip 1 sc, 1 dc in each of the next 4 sc, ch 1 *, repeat from *-* the entire round, skip last sc and finish with 1 sl st in 3rd ch from beg of round = 23 dc-groups with 1 ch between each. ROUND 14: ch 1 (= 1 sc), 1 dc in next dc, ch 3, 1 sl st in the first of the 3 ch (= 1 picot), 1 dc in next dc, 1 sc in next dc, skip ch, * 1 sc in next dc, 1 dc in next dc, 1 picot, 1 dc in next dc, 1 sc in next dc, skip ch *, repeat from *-* the entire round and finish with 1 sl st in ch from beg of round. ROUND 15: Work sl st until the top of the first picot, 1 sc at the top of picot, * ch 7, 1 sc at the top of next picot *, repeat from *-* the entire round and finish with ch 7 and 1 sl st in sc from beg of round = 23 ch-spaces. Fasten off. BACK: Ch 4 on hook size 3 mm / C with mint green and form a ring with 1 sl st in first ch. READ CROCHET INFO! ROUND 1: Work 12 dc in ch-ring. ROUND 2: Work 2 sc in every dc = 24 sc. ROUND 3: Work 1 dc in every sc = 24 dc. ROUND 4: Work 2 sc in every dc = 48 sc. ROUND 5: Work 1 dc in every sc = 48 dc. ROUND 6: * Work 1 sc in each of the first 2 dc, 2 sc in next dc *, repeat from *-* the entire round = 64 sc. ROUND 7: Work 1 dc in every sc = 64 dc. ROUND 8: * Work 1 sc in each of the first 3 dc, 2 sc in next dc *, repeat from *-* the entire round = 80 sc. ROUND 9: Work 1 dc in every sc = 80 dc. ROUND 10: * Work 1 sc in each of the first 4 dc, 2 sc in next dc *, repeat from *-* the entire round = 96 sc. ROUND 11: Work 1 dc in every sc = 96 dc. ROUND 12: * Work 1 sc in each of the first 5 dc, 2 sc in next dc *, repeat from *-* the entire round = 112 sc. ROUND 13: Work 1 dc in every sc while AT THE SAME TIME inc 3 dc evenly on round (inc 1 dc by working 2 dc in same st) = 115 dc. ROUND 14: Work 1 sc in every dc = 115 sc. ROUND 15: Work 1 dc in every sc = 115 dc. Fasten off. NOTE: Make sure that the back has the same measurements as the front. If needed adjust the size by removing one round or working one extra round with 1 sc or dc in every st. ASSEMBLY: Place the front piece (with RS up) on top of the back piece and work tog with orange through both layers as follows: Work around the ch-spaces on front piece while AT THE SAME TIME working through every dc on back piece with 1 sc in every dc so that there are 5 sc in every ch-space the entire round, finish with 1 sl st in first sc from beg of round. Ch 12 (for strap), fasten with 1 sl st in sl st worked to finish the round. Then work 1 sc in every sc the entire round, finish with 1 sl st in sl st by the strap. Fasten off. If needed sew a stitch through both layers on the pot holder to hold the front and back piece tog in the middle. |
|
Have you finished this pattern?Tag your pictures with #dropspattern #easterradiancedoily or submit them to the #dropsfan gallery. Do you need help with this pattern?You'll find 8 tutorial videos, a Comments/Questions area and more by visiting the pattern on garnstudio.com. © 1982-2025 DROPS Design A/S. We reserve all rights. This document, including all its sub-sections, has copyrights. Read more about what you can do with our patterns at the bottom of each pattern on our site. |
|


With over 40 years in knitting and crochet design, DROPS Design offers one of the most extensive collections of free patterns on the internet - translated to 17 languages. As of today we count 319 catalogs and 11897 patterns - 11887 of which are translated into English (US/in).
We work hard to bring you the best knitting and crochet have to offer, inspiration and advice as well as great quality yarns at incredible prices! Would you like to use our patterns for other than personal use? You can read what you are allowed to do in the Copyright text at the bottom of all our patterns. Happy crafting!
Post a comment to pattern DROPS Extra 0-843
We would love to hear what you have to say about this pattern!
If you want to leave a question, please make sure you select the correct category in the form below, to speed up the answering process. Required fields are marked *.