Comments / Questions (32)
![]() Ingrid wrote:
Ingrid wrote:
Wie heeft deze trui al klaar? Omdat de draad van de kleur naturel van het jaquarpatroon de hele tijd wordt meegevoerd, vroeg ik me af of 2 bollen Alpaca/Kid Silk genoeg zijn.
02.06.2025 - 20:01DROPS Design answered:
Dag Ingrid,
Ja, 2 bollen zouden genoeg moeten zijn.
03.06.2025 - 21:31
![]() Catherine De Souza Dias wrote:
Catherine De Souza Dias wrote:
Bonjour , J'ai acheté les laines que vous avez indiquées et en avançant dans le tricot je constate que les 100 grs d'uni naturel en alpaca et les 59 grs de écru en kid silk ne sont pas mentionnés Où est l'erreur ? Dans les explications ?
09.02.2025 - 19:15DROPS Design answered:
Bonjour Mme De Souza Dias, le coloris 100 Alpaca et 01 Kid-Silk sont ici appelé coloris "naturel" et sont utilisés pour le jacquard - cf 2ème symbole de la légende. Bon tricot!
10.02.2025 - 11:15
![]() Angelika Van Der Horst wrote:
Angelika Van Der Horst wrote:
De ronde mouwkop met verkorte toeren zit heel laag onder de schouder. Ziet er een beetje gek eruit. Als soort pofmouw op de bovenarm Ik heb de hele mouw weer uitgehaald
30.01.2025 - 13:58
![]() Hennie Kievit wrote:
Hennie Kievit wrote:
Dit lijkt me een prachtig patroon. Wel een afwijkende manier van breien, dus spannend.
27.01.2025 - 16:03
![]() Christin wrote:
Christin wrote:
Hei Har kjøpt garn og mønster. Men er litt forvirret nå i starten. Etter start på bakstykke, så står det SAMTIDIG STRIKK STRIPE BOL. Når begynner jeg på det? Er det etter jeg har økt ferdig? Gleder meg til å strikke denne 😀
26.12.2024 - 10:33DROPS Design answered:
Hei Christin. Først strikker du 15-17-19-20-22-24 cm med 1 tråd Alpaca i fargen lys perlegrå og 1 tråd Kid-Silk i fargen perlerosa. Etter siste økning er det = 87-93-101-105-113-121 masker på pinnen og arbeidet måler ca 13-14-16-16-17-19 cm fra oppleggskanten midt bak (ca 2-3-3-4-5-5 cm igjen med lys perlegrå/perlerosa før du skal bytte). Så da kommer det an på hvilken str. du strikker, les STRIPER BOL lengre opp i oppskriften og se målene i den størrelsen du strikker etter. mvh DROPS Design
03.01.2025 - 11:05
![]() Petra Baumann wrote:
Petra Baumann wrote:
Hey Meinen Kommentar, dass die Anleitung einen Fehler enthält, könnt ihr bitte streichen oder ignorieren 😂 Ich war zu doof, um zu erkennen, dass es sich um eine „europäische Schulter“ handelt 🙄 Ich brauche erstmal Kaffee. Oder einen Schnaps 😂 Petra
08.12.2024 - 11:24
![]() Petra Baumann wrote:
Petra Baumann wrote:
Hallo aus Deutschland Etwas stimmt in der Anleitung nicht. Wenn ich 33 Maschen anschlage und über 36 Reihen beidseitig pro Reihe eine Masche zunehme, wird die Schulter extrem schräg. Müssten nicht eher z.B. 4x jeweils 9 Maschen (insgesamt 72) neu angeschlagen werden? Dann käme das mit der Schulter hin. Wäre cool, wenn ihr euch das nochmal anschaut. Und danke für dieses wunderschöne Modell Petra B.
08.12.2024 - 10:17
![]() Agata wrote:
Agata wrote:
Tył swetra. Nie wiem jak przerabiać rząd 2. schematu żakardowego, na stronie lewej. Instrukcja jest taka sama jak dla strony prawej, ale czy na pewno trzeba zacząć od przerobienia 6 oczek, a nie 7? Mam też wątpliwość co do tego, gdzie jest 6 ostatnich oczek schematu A. 1 kiedy przerabiam na stronie lewej, a gdzie 7 pierwszych oczek schematu. Będę wdzięczna za wyjaśnienie.
28.11.2024 - 22:20
![]() Agata wrote:
Agata wrote:
Tył swetra. Schemat A. 1 (rozm. XL). Czy w drugim rzędzie, na lewej stronie nadal należy zacząć od strzałki?
28.11.2024 - 18:53DROPS Design answered:
Witaj Agato, zobacz również moją poprzednią odpowiedź i przesłane linki. 2-gi rząd schematu A.1 wykonasz następująco - pamiętaj aby na lewej stronie robótki czytać schemat zawsze od lewej do prawej strony : 2 oczka dżersejem, 7 pierwszych oczek schematu A.1, 3 razy schemat A.1, 6 ostatnich oczek schematu A.1, 2 oczka dżersejem. Pozdrawiamy!
29.11.2024 - 08:58
![]() Ellen N Koorn wrote:
Ellen N Koorn wrote:
Ik meerder bij het rugpand bovenaan zoals voorgeschreven, maar die rand is niet rekbaar. Kan dit kloppen?
08.11.2024 - 09:09DROPS Design answered:
Dag Ellen,
Je meerdert in het begin van het rugpand inderdaad voor de diagonale schouders. De naad wordt dan inderdaad niet heel rekbaar, maar zorg ervoor dat de steken niet al te strak zijn op dei schoudernaad.
10.11.2024 - 13:45
Winter Sunrise#wintersunrisesweater |
||||||||||||||||
 |
 |
|||||||||||||||
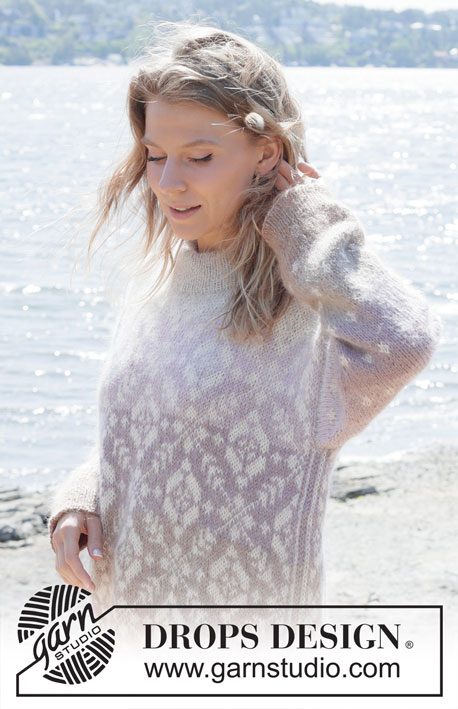
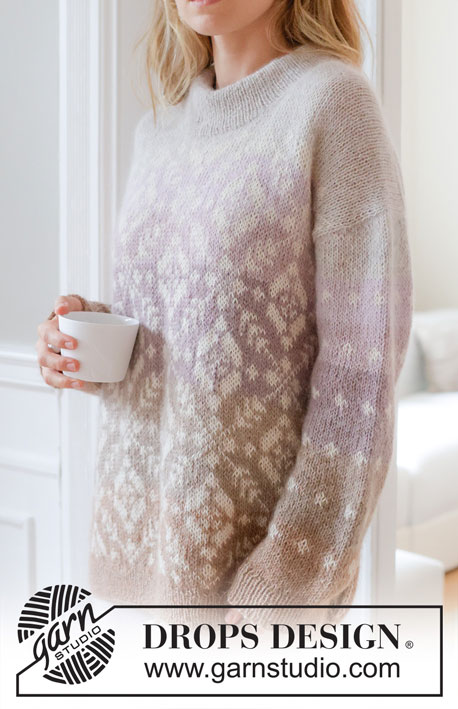
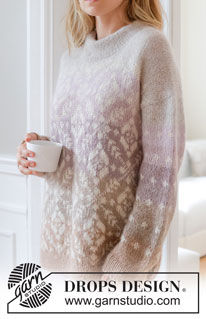
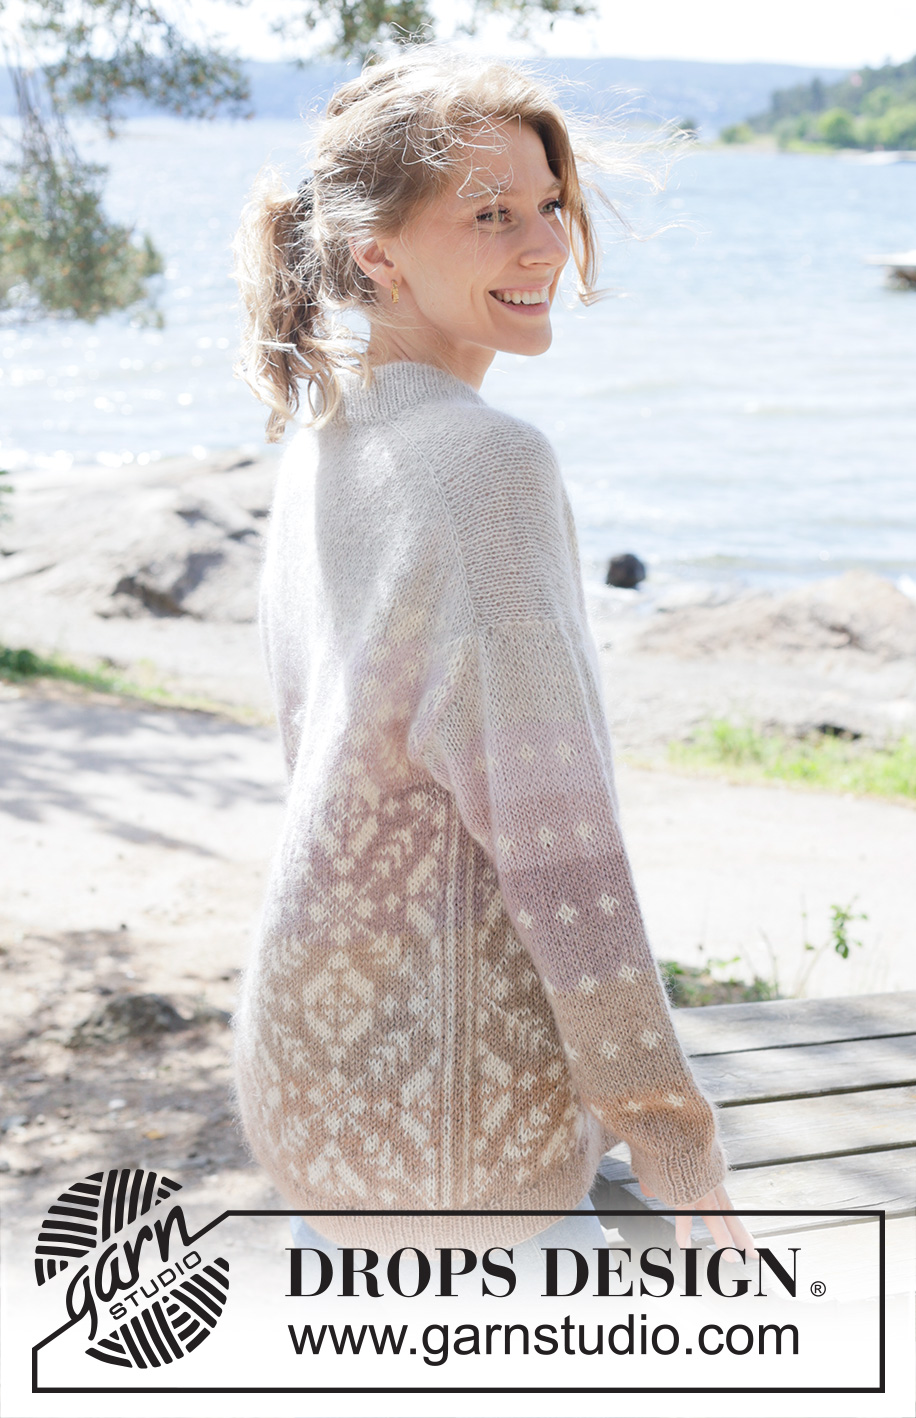
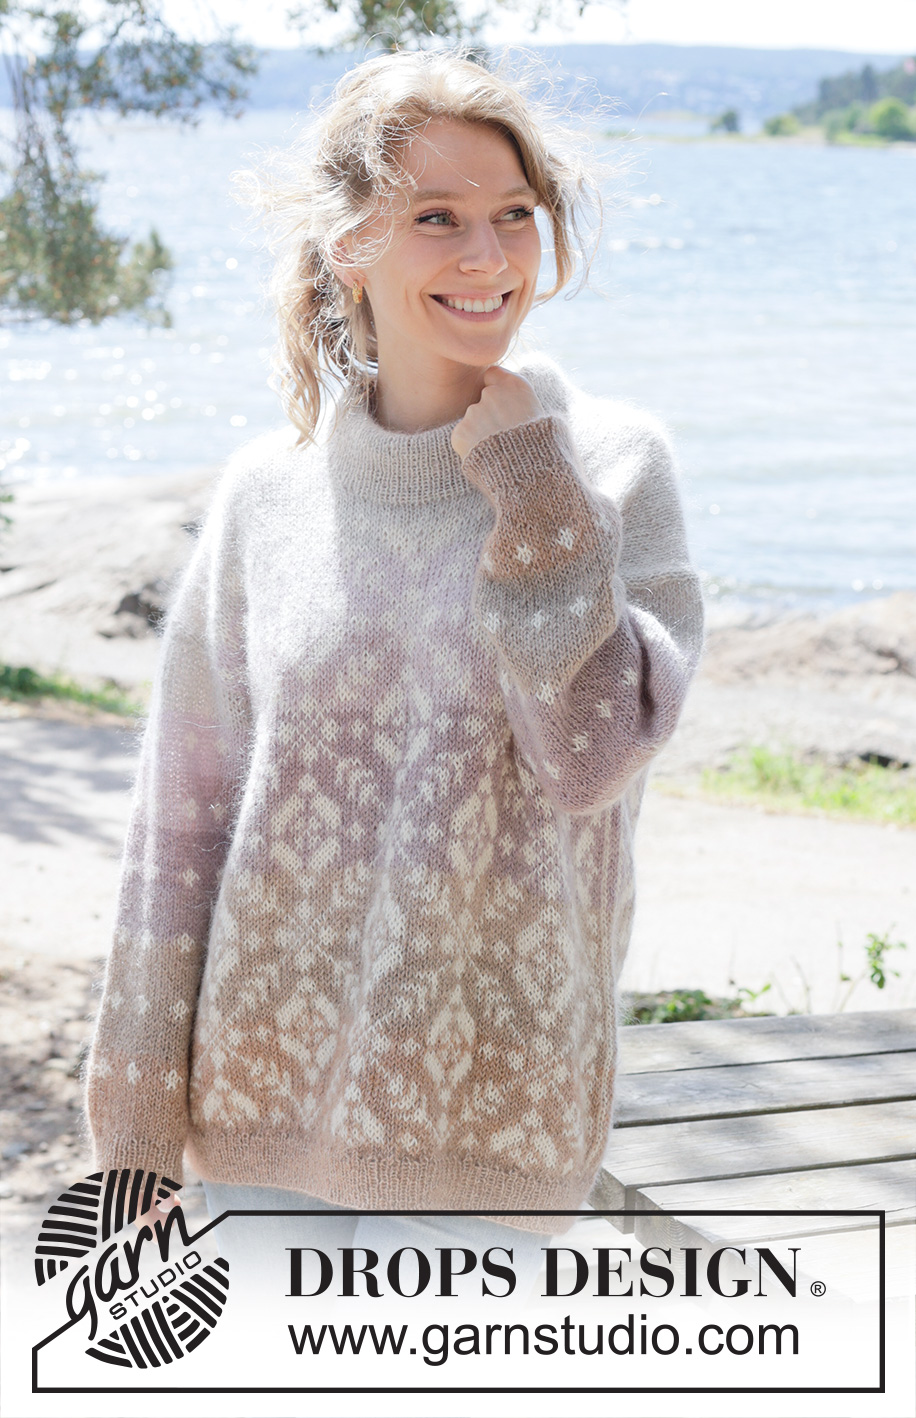
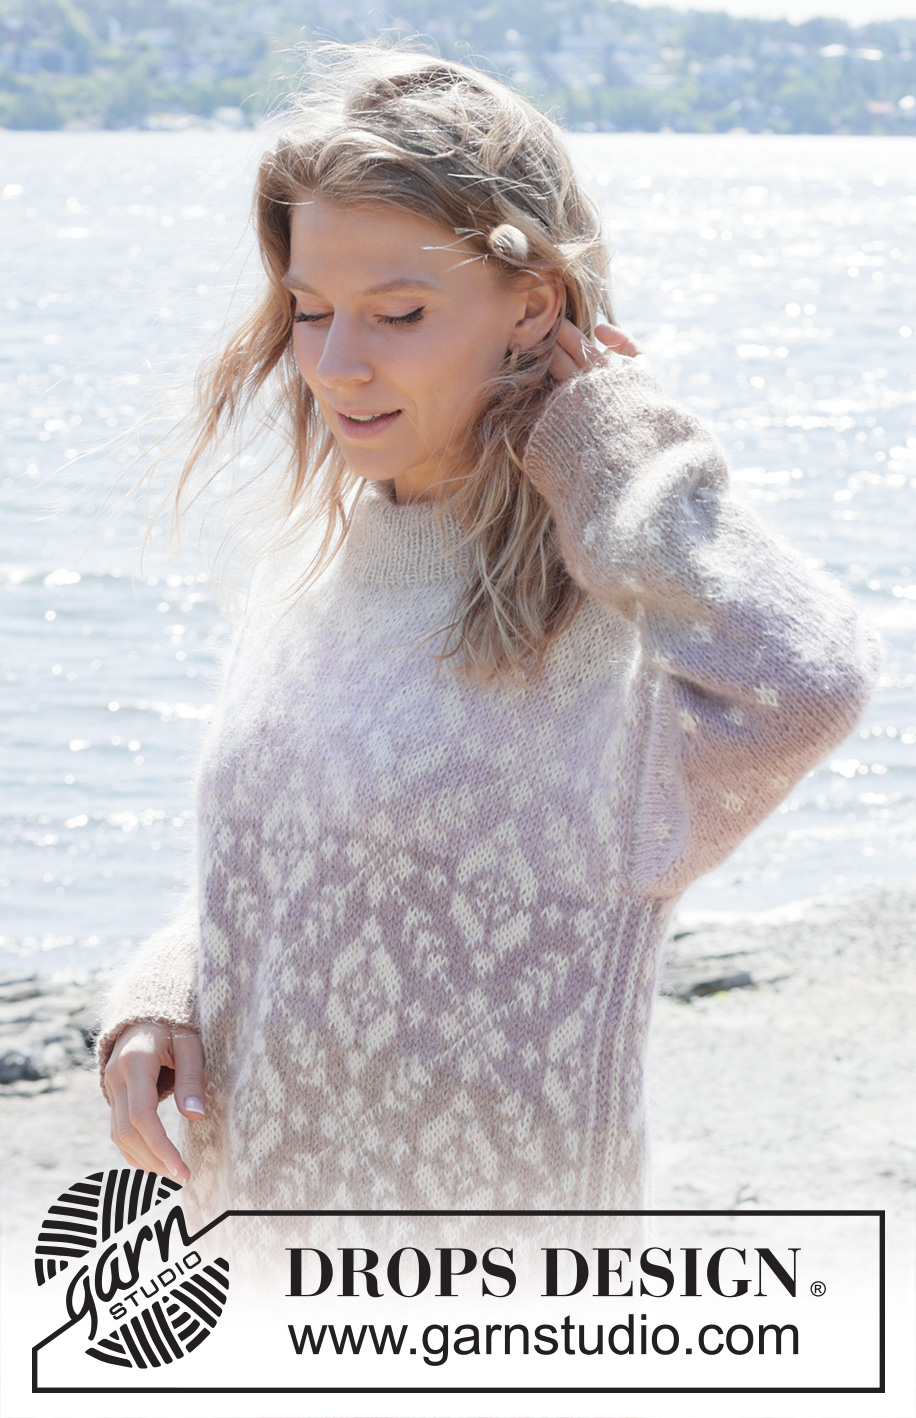
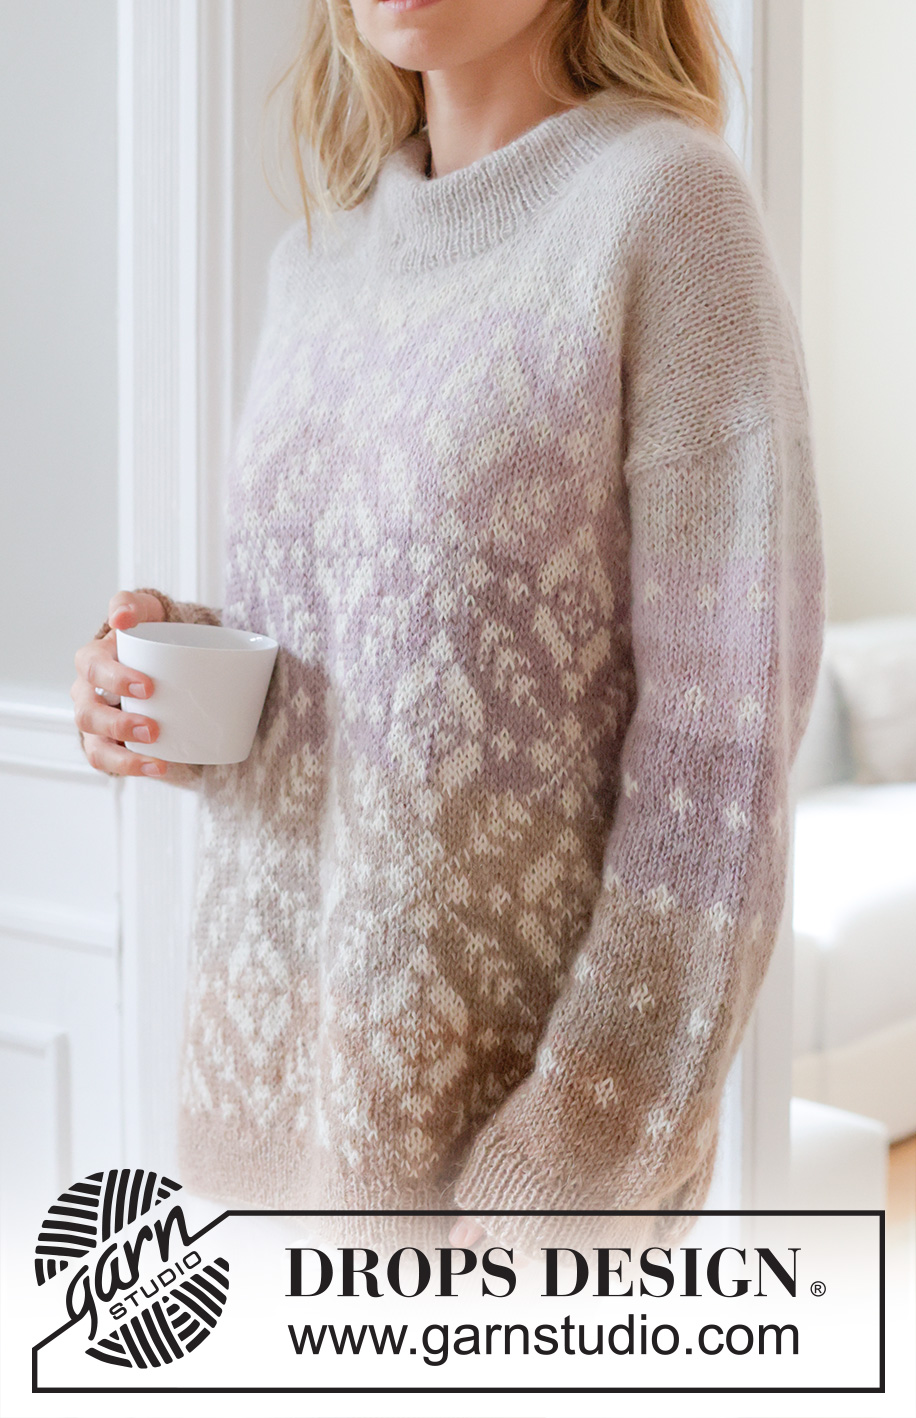
Knitted over-sized jumper in DROPS Alpaca and DROPS Kid-Silk. The piece is worked top down with European/diagonal shoulders, tone-on-tone stripes, Nordic pattern and double neck. Sizes XS - XXL.
DROPS 255-16 |
||||||||||||||||
|
------------------------------------------------------- EXPLANATIONS FOR THE PATTERN: ------------------------------------------------------- INCREASE TIP-1: INCREASE 1 STITCH TOWARDS LEFT – from right side: Use the left needle to pick up the strand between 2 stitches from the previous round, pick up the strand from the front and knit the back loop. INCREASE 1 STITCH TOWARDS RIGHT – from right side: Use the left needle to pick up the strand between 2 stitches from the previous round, pick up the strand from the back and knit the front loop. INCREASE TIP-2: INCREASE 1 STITCH TOWARDS LEFT – from wrong side: Use the left needle to pick up the strand between 2 stitches from the previous round, pick up the strand from the back and purl the front loop. INCREASE 1 STITCH TOWARDS RIGHT – from wrong side: Use the left needle to pick up the strand between 2 stitches from the previous round, pick up the strand from the front and purl the back loop. INCREASE TIP-3 (evenly spaced): To work out how to increase evenly, count the total number of stitches on the needle (e.g., 178 stitches) and divide by the number of increases to be made (e.g., 30) = 5.9. In this example, increase by making 1 yarn over after approx. each 6th stitch. On the next round work the yarn overs twisted to avoid holes. STRIPES BODY: The stripes are worked in stocking stitch with 1 strand of each quality (= 2 strands) in the following order: 15-17-19-20-22-24 cm (on back piece) / 14-15-17-18-19-21 cm (on front piece) with 1 strand colour light pearl grey Alpaca and 1 strand colour pink pearl Kid-Silk. 6-6-6-6-6-6 cm with 1 strand colour light lavender Alpaca and 1 strand colour pink pearl Kid-Silk. 6-6-6-6-6-6 cm with 1 strand colour light lavender Alpaca and 1 strand colour powder Kid-Silk. 6-6-6-6-6-6 cm with 1 strand colour lavender frost Alpaca and 1 strand colour powder Kid-Silk. 6-6-6-6-6-6 cm with 1 strand colour lavender frost Alpaca and 1 strand colour bright sand Kid-Silk. 6-6-6-6-6-6 cm with 1 strand colour light nougat Alpaca and 1 strand colour bright sand Kid-Silk. 6-6-6-6-6-6 cm with 1 strand colour light nougat Alpaca and 1 strand colour beige Kid-Silk. 10-11-10-11-11-11 cm (or to finished length) + rib with 1 strand colour light nougat Alpaca and 1 strand colour almond Kid-Silk. STRIPES SLEEVES: The stripes are worked in stocking stitch with 1 strand of each quality (= 2 strands) in the following order: 4-4-4-4-5-5 cm (= elevation) with 1 strand colour light pearl grey Alpaca and 1 strand colour pink pearl Kid-Silk. 5-5-5-5-4-4 cm with 1 strand colour light lavender Alpaca and 1 strand colour pink pearl Kid-Silk. 5-5-5-5-4-4 cm with 1 strand colour light lavender Alpaca and 1 strand colour powder Kid-Silk. 5-5-5-5-4-4 cm with 1 strand colour lavender frost Alpaca and 1 strand colour powder Kid-Silk. 5-5-5-5-4-4 cm with 1 strand colour lavender frost Alpaca and 1 strand colour bright sand Kid-Silk. 5-5-5-5-4-4 cm with 1 strand colour light nougat Alpaca and 1 strand colour bright sand Kid-Silk. 5-5-5-5-4-4 cm with 1 strand colour light nougat Alpaca and 1 strand colour beige Kid-Silk. 8-8-6-5-8-7 cm (or to finished length) + rib with 1 strand colour light nougat Alpaca and 1 strand colour almond Kid-Silk. PATTERN: See diagrams A.1 to A.6. The diagrams show the pattern from the right side. The pattern is worked in stocking stitch. Choose diagram for your size (applies to A.5). Find your size in the diagram (applies to A.1 - A.3/A.4). KNITTING TIP: Mark in the diagram which row the back piece finishes on. This makes it easier to match the front piece when working the armholes. KNITTING TIP-2: When working short rows, there will be a small hole after each turn. This hole can be closed by tightening the strand or using the technique German Short Rows as follows: Slip the first stitch purl-wise, take the strand over the right needle and tighten well from the back (2 loops on the needle). These loops are worked together on the next row. DECREASE TIP: Decrease 1 stitch on each side of the marker-thread as follows: Work until there are 3 stitches left before the marker-thread, knit 2 together with background colour, knit 2 with background colour (marker-thread sits between these 2 stitches), knit 2 together with background colour (2 stitches decreased). ------------------------------------------------------- START THE PIECE HERE: ------------------------------------------------------- JUMPER – SHORT OVERVIEW OF THE PIECE: The pattern uses both long and short needles; start with the length which fits the number of stitches and change when necessary. The piece is started back and forth, casting on stitches at the back of the neck and working the back piece top down with pattern, while increasing stitches on each side for the shoulders, which become slightly diagonal. The back piece is worked as far as the armholes. The front piece is then worked in 2 sections, knitting up stitches along 1 back shoulder, working pattern and increasing for the neckline. This is repeated on the other shoulder. The 2 front sections are joined when the neckline is finished and worked until the armholes are finished. The front and back pieces are then joined and the body worked in the round. Stitches are knitted up around the armholes for the sleeves, which are started back and forth with short rows for the sleeve cap then finished in the round, top down. Stitches are knitted up around the neckline and the neck is worked in the round, then folded double to the inside. BACK PIECE: The piece is worked back and forth. Cast on 31-33-33-33-37-37 stitches with circular needle size 5 mm, 1 strand colour light pearl grey DROPS Alpaca and 1 strand colour pink pearl DROPS Kid-Silk (= 2 strands). Work STRIPES BODY – read description above, whilst working as follows: NOTE: The outermost 2 stitches on each side + increases are worked with the background/stripe colour until the armholes are finished. ROW 1 (wrong side): Purl. ROW 2 (right side): Read INCREASE TIP-1. Knit 2, increase 1 stitch towards the left, knit until there are 2 stitches left, increase 1 stitch towards the right, knit 2. ROW 3 (wrong side): Read INCREASE TIP-2. Purl 2, increase 1 stitch towards the left, purl until there are 2 stitches left, increase 1 stitch towards the right, purl 2. Work ROWS 2 and 3 a total of 14-15-17-18-19-21 times (28-30-34-36-38-42 rows worked) = 87-93-101-105-113-121 stitches and the piece measures approx. 13-14-16-16-17-19 cm from the cast-on edge mid-back. Insert 1 marker outermost on one side. The piece is now measured from here! On the next row from the right side work PATTERN – read description above, as follows: 2 stocking stitches in the background colour, start at the arrow for your size, work the last 9-12-32-2-6-10 stitches in A.1, then the whole of A.1 a total of 2-2-2-3-3-3 times, the first 10-13-1-3-7-11 stitches in A.1 (so the pattern is symmetrical on both sides), finish with 2 stocking stitches in the background colour. Continue this pattern back and forth – remember to continue the stripes and to maintain the knitting tension. When A.1 is finished in height, work A.2 in the same way (i.e., 2 stocking stitches in the background colour, start at your arrow and work the last 9-12-32-2-6-10 stitches in A.2, work A.2 a total of 2-2-2-3-3-3 times, then the first 10-13-1-3-7-11 stitches in A.2 and 2 stocking stitches in the background colour. A.2 is repeated in height onwards. Work until the piece measures 14-15-15-16-17-17 cm from the marker, measured along the armhole and finishing with a row from the wrong side – read KNITTING TIP-1. Cut the strand, place the stitches on a stitch holder and work the left front piece along the left back shoulder. LEFT FRONT PIECE: Find the left back shoulder as follows: Lay the back piece flat, right side up, with the stitch holder towards you; left side of piece = left shoulder. Start from the right side on the left back shoulder by the neck. Use 1 strand colour light pearl grey DROPS Alpaca and 1 strand colour pink pearl DROPS Kid-Silk (= 2 strands). Knit up 1 stitch in each worked row, inside 1 stitch along the shoulder to the armhole, then 1 stitch in each of the next 2 rows outermost by the armhole = 30-32-36-38-40-44 stitches. All lengths on the front piece are measured from this knitted-up row. Work stocking stitch and stripes back and forth. When the piece measures 7-7-9-9-9-10 cm, increase for the neckline as follows: ROW 1 (right side): Remember INCREASE TIP-1, knit 2, increase 1 stitch towards the left), knit to end of row. ROW 2 (wrong side): Purl. Work ROWS 1 and 2 a total of 4 times (8 rows worked) = 34-36-40-42-44-48 stitches. Cut the strand, place the stitches on a stitch holder and work the right front piece along the right back shoulder. RIGHT FRONT PIECE: Start from the right side with the same colour as the left front piece and 2 rows before the last increase on the right back shoulder by the armhole. Knit up 1 stitch in each of the first 2 rows, then 1 stitch in each worked row along the shoulder to the neckline, inside 1 edge stitch = 30-32-36-38-40-44 stitches. All lengths on the front piece are measured from this knitted-up row. Work stocking stitch and stripes back and forth. When the piece measures 7-7-9-9-9-10 cm, increase for the neckline as follows: ROW 1 (right side): Knit until there are 2 stitches left, increase 1 stitch towards the right, knit 2 – remember INCREASE TIP-1. ROW 2 (wrong side): Purl. Work ROWS 1 and 2 a total of 4 times (8 rows worked) = 34-36-40-42-44-48 stitches. Now join the 2 front piece together. FRONT PIECE: Work as follows from the right side: Work the 34-36-40-42-44-48 stitches from the right front piece as before, cast on 19-21-21-21-25-25 stitches for the neckline, then work the 34-36-40-42-44-48 stitches from the left front piece = 87-93-101-105-113-121 stitches. Work stocking stitch and stripes back and forth. When the piece measures 12-12-14-14-14-16 cm from the knitted-up row (approx. 1-1-1-1-1-2 cm of stocking stitch after casting on for the neckline), work the next row and PATTERN from the right side as follows: Work 2 stocking stitches in the background colour, start at the arrow for your size and work the last 9-12-32-2-6-10 stitches in A.1, then the whole of A.1 a total of 2-2-2-3-3-3 times, the first 10-13-1-3-7-11 stitches in A.1 (so the pattern is symmetrical on both sides), 2 stocking stitches in the background colour. Continue this pattern back and forth – remember to continue the stripes. When A.1 is finished in height, work A.2 in the same way (i.e., 2 stocking stitches in the background colour, start at your arrow, work the last 9-12-32-2-6-10 stitches in A.2, then A.2 a total of 2-2-2-3-3-3 times, the first 10-13-1-3-7-11 stitches in A.2 and 2 stocking stitches in background colour. Repeat A.2 in height onwards. Work until the piece measures 26-27-29-30-31-33 cm from the knitted-up row on the shoulder, finishing after the same row from the wrong side as on the back piece. Now join the front and back pieces. The piece is now measured from here! BODY: Continue the pattern across the 87-93-101-105-113-121 stitches from the front piece, cast on 2-2-2-8-8-8 stitches (in side mid-under sleeve), continue the pattern across the 87-93-101-105-113-121 stitches from the back piece, cast on 2-2-2-8-8-8 stitches (in side mid-under sleeve) = 178-190-206-226-242-258 stitches. Work in the round, with A.2 on the front and back pieces and A.5 in each side as follows: Work the first 2 stitches on the round according to the last 2 stitches in A.5, continue A.2 across the next 83-89-97-101-109-117 stitches (= front piece), A.5 across the next 6-6-6-12-12-12 stitches (= the 2-2-2-8-8-8 cast-on stitches + 2 stitches on each side), continue A.2 across the next 83-89-97-101-109-117 stitches (= back piece), work the last 4-4-4-10-10-10 stitches according to the first 4-4-4-10-10-10 stitches in A.5. Continue this pattern until the piece measures 32-33-32-33-33-33 cm from the armholes (the front piece measures approx. 58-60-61-63-64-66 cm from the knitted-up row) and finishing after the round marked either with star-1 or star-2 in A.2. If you finish after a round with star-1, work A.3 across the stitches in A.2 (starting at the correct arrow and continuing the pattern, with A.5 in each side as before). If you finish after a round with star-2, work A.4 across the stitches in A.2 (starting at the correct arrow and continuing the pattern, with A.5 in each side as before). When A.3/A.4 is finished in height, work 2 rounds of stocking stitch across all stitches, using the background colour. Change to circular needle size 3.5 mm and work rib with the background colour/colour of the last stripe (knit 1, purl 1). AT THE SAME TIME, increase 30-34-38-38-42-46 stitches evenly on round 1 – read INCREASE TIP-3 = 208-224-244-264-284-304 stitches. When the rib measures 5-5-6-6-7-7 cm, cast off a little loosely with rib. The front piece measures approx. 65-67-69-71-73-75 cm from the knitted-up row, the front piece is approx. 3 cm longer than the finished length as the knitted-up row is not on top of the shoulder but positioned slightly down the back piece. The jumper measures approx. 62-64-66-68-70-72 cm. SLEEVES: The sleeves are worked top down. Lay the piece flat and insert 1 marker mid-top of shoulder (NOTE! Mid-top of shoulder is not the knitted-up row on the front piece but approx. 6 to 8 cm down the front piece). Use circular needle size 3.5 mm, 1 strand colour light pearl grey DROPS Alpaca and 1 strand colour pink pearl DROPS Kid-Silk (= 2 strands). Start in the middle stitch in the cast-on stitches under the sleeve and knit up 65-67-73-83-85-91 stitches (inside 1 stitch) around the armhole, making sure you have equal numbers of stitches on each side of the marker on the shoulder. Change to circular needle size 5 mm. Insert 1 marker in the middle stitch on the row (= mid-stitch on top of sleeve, which should have a different colour from the first marker). Work STRIPES SLEEVES – read description above, with short rows back and forth for the sleeve cap to give a better fit, beginning mid-under the sleeve as follows: ROW 1 (right side): Work to 8-8-8-9-9-9 stitches past the first marker on top of sleeve, turn – read KNITTING TIP-2. ROW 2 (wrong side): Work to 8-8-8-9-9-9 stitches past the marker turn. ROW 3 (right side): Work to 7-7-7-7-7-7 stitches past the previous turn, turn. ROW 4 (wrong side): Work to 7-7-7-7-7-7 stitches past the previous turn, turn. Repeat ROWS 3 and 4 onwards until you have turned a total of 8-8-8-8-10-10 times (4-4-4-4-5-5 times on each side and with the last row from the wrong side). AFTER THE LAST TURN: Turn and work back to the beginning of the round from the right side (mid-under sleeve). Insert 1 marker-thread here, which is used when decreasing under the sleeve; allow the thread to follow your work onwards. You now work stocking stitch and stripes in the round, AT THE SAME TIME as decreasing stitches and working PATTERN – read description above. Read the next 2 sections before continuing (remember to continue the stripes): DECREASING: When the sleeve measures 1 cm from the join, decrease 2 stitches under the sleeve - read DECREASE TIP. Decrease like this every 2nd round a total of 2-2-2-8-8-8 times, then every 1½ cm 6-7-7-6-7-7 times = 49-49-55-55-55-61 stitches. PATTERN: Whilst decreasing, when the sleeve measures 7-7-7-6-6-6 cm from the marker on top of the sleeve, work A.6 around the sleeve – the pattern will not fit under the sleeve; count out from the marker-stitch on top of the sleeve to determine where to start the pattern under the sleeve; the marker-stitch should match the mid-stitch in A.6. Work A.6 a total of 5-5-5-5-4-4 times in height, work the first 3 rounds in A.6, then work stripes to finished length. Work until the sleeve measures 42-42-40-39-37-36 cm from the marker on the shoulder. Change to double pointed needles size 3.5 mm, work rib (knit 1, purl 1) with the same colour as the working stripe. AT THE SAME TIME, increase 7-7-9-9-9-11 stitches evenly on the first round = 56-56-64-64-64-72 stitches. When the rib measures 5-5-6-6-7-7 cm cast off a little loosely with rib. The sleeve measures approx. 47-47-46-45-44-43 cm from the marker on the shoulder. NECK: Use circular needle size 3.5 mm, 1 strand colour light pearl grey DROPS Alpaca and 1 strand colour pink pearl DROPS Kid-Silk (= 2 strands). Start from the right side on one shoulder-line and knit up 108-112-118-118-132-134 stitches inside 1 stitch (if you knit up fewer stitches than this, adjust to the correct number on round 1) – the stitch count should be divisible by 2, with 1 knitted stitch on each shoulder-line. Work rib in the round (knit 1, purl 1) for 11-11-11-13-13-13 cm. Change to circular needle size 5 mm, cast off a little loosely. Fold the neck double to the inside and fasten with a couple of stitches by each shoulder. |
||||||||||||||||
Diagram explanations |
||||||||||||||||
|
||||||||||||||||

|
||||||||||||||||

|
||||||||||||||||

|
||||||||||||||||
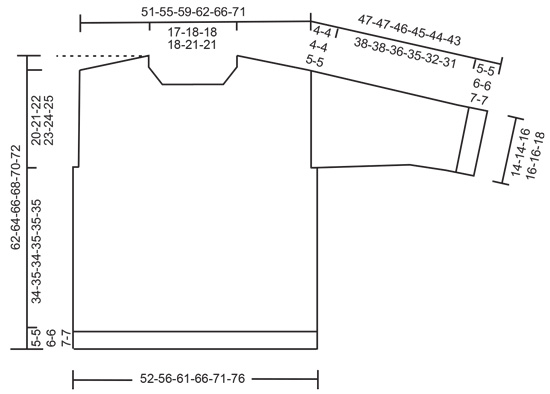
|
||||||||||||||||
Have you finished this pattern?Tag your pictures with #dropspattern #wintersunrisesweater or submit them to the #dropsfan gallery. Do you need help with this pattern?You'll find 38 tutorial videos, a Comments/Questions area and more by visiting the pattern on garnstudio.com. © 1982-2025 DROPS Design A/S. We reserve all rights. This document, including all its sub-sections, has copyrights. Read more about what you can do with our patterns at the bottom of each pattern on our site. |
||||||||||||||||







Post a comment to pattern DROPS 255-16
We would love to hear what you have to say about this pattern!
If you want to leave a question, please make sure you select the correct category in the form below, to speed up the answering process. Required fields are marked *.