
Popular categories
Looking for a yarn?


Comments / Questions (4)
![]() Lucia wrote:
Lucia wrote:
Buongiorno, nella traduzione in italiano, nella sezione iniziale dello sprone, c'è scritto: " Quando lo sprone misura 5-5-6-6-7-7 cm dal segnapunti, aumentare 38-40-54-54-60-62 maglie in modo uniforme (..). Aggiustarlo in modo che il ferro successivo sia lavorato dal rovescio del lavoro." E' corretto dire che gli aumenti vanno fatti sul dritto e che la prima riga del motivo A1, tutta in grigio, deve essere lavorata sul rovescio, e che il motivo inizia dalla 2 riga, lavorata sul diritto?
15.05.2025 - 11:45DROPS Design answered:
Buongiorno Lucia, il primo ferro di A.1 è a rovescio. I diagrammi si leggono dal basso verso l'alto e da destra verso sinistra per i ferri sul diritto e da sinistra a destra per quelli sul rovescio. Gli aumenti sono all'altezza delle frecce come indicato. Buon lavoro!
17.05.2025 - 10:32
![]() Hanan Salah wrote:
Hanan Salah wrote:
Bonjour Madame , comment cacher les 2 grands trous qui se forment dessous les manches ? Merci d’avance .
03.12.2024 - 21:32DROPS Design answered:
Bonjour Mme Salah, si on relève les mailles du milieu sous la manche dans celles montées lors d de la division, on n'aura pas de trou (cf photo 18 B dans cette leçon; si vous avez monté les mailles (photo 18 A, même leçon), vous pourrez fermer ce trou par une couture comme dans la photo 24 de la même leçon - ou bien comme dans cette vidéo. Bon tricot!
04.12.2024 - 07:36
![]() Anna wrote:
Anna wrote:
Ops! Dimenticato la taglia... XL
18.09.2023 - 10:24
![]() Anna wrote:
Anna wrote:
Salve è grazie per la grande varietà di modelli disponibili:-) ,se volessi lavorare questo cardigan in tinta unita quanto filato dovrei acquistare? Grazie in anticipo e buon lavoro !
18.09.2023 - 10:20DROPS Design answered:
Buonasera Anna, la bellezza di questo modello è proprio lo sprone lavorato! Per la quantità di filato in più necessaria, si può rivolgere al suo rivenditore DROPS di fiducia. Buon lavoro!
25.09.2023 - 23:15
|
|||||||||||||||||||
Christmas Time Cardigan#christmastimecardigan |
|||||||||||||||||||
 |
 |
||||||||||||||||||
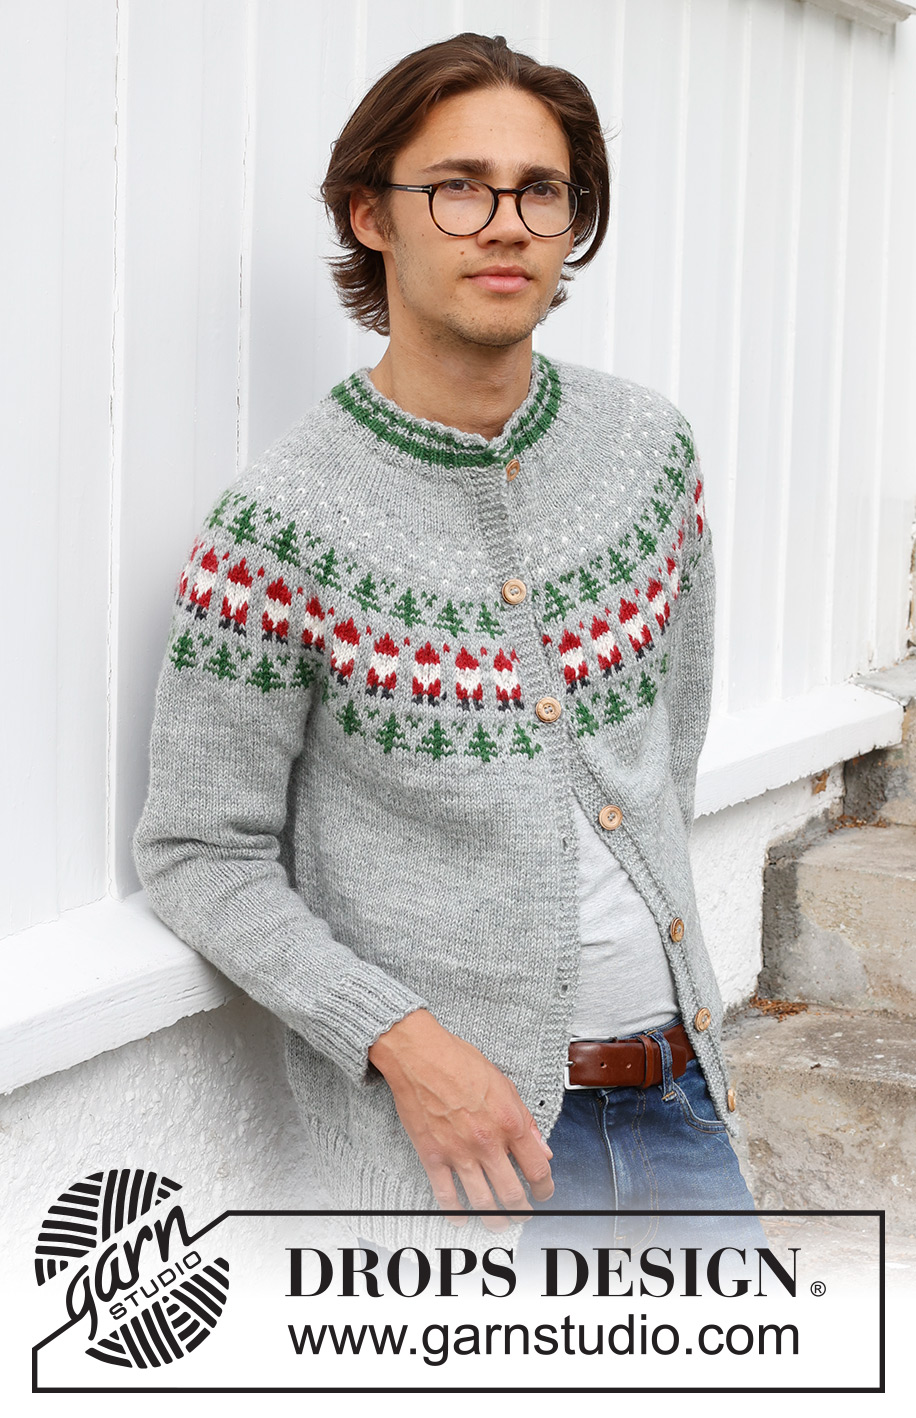
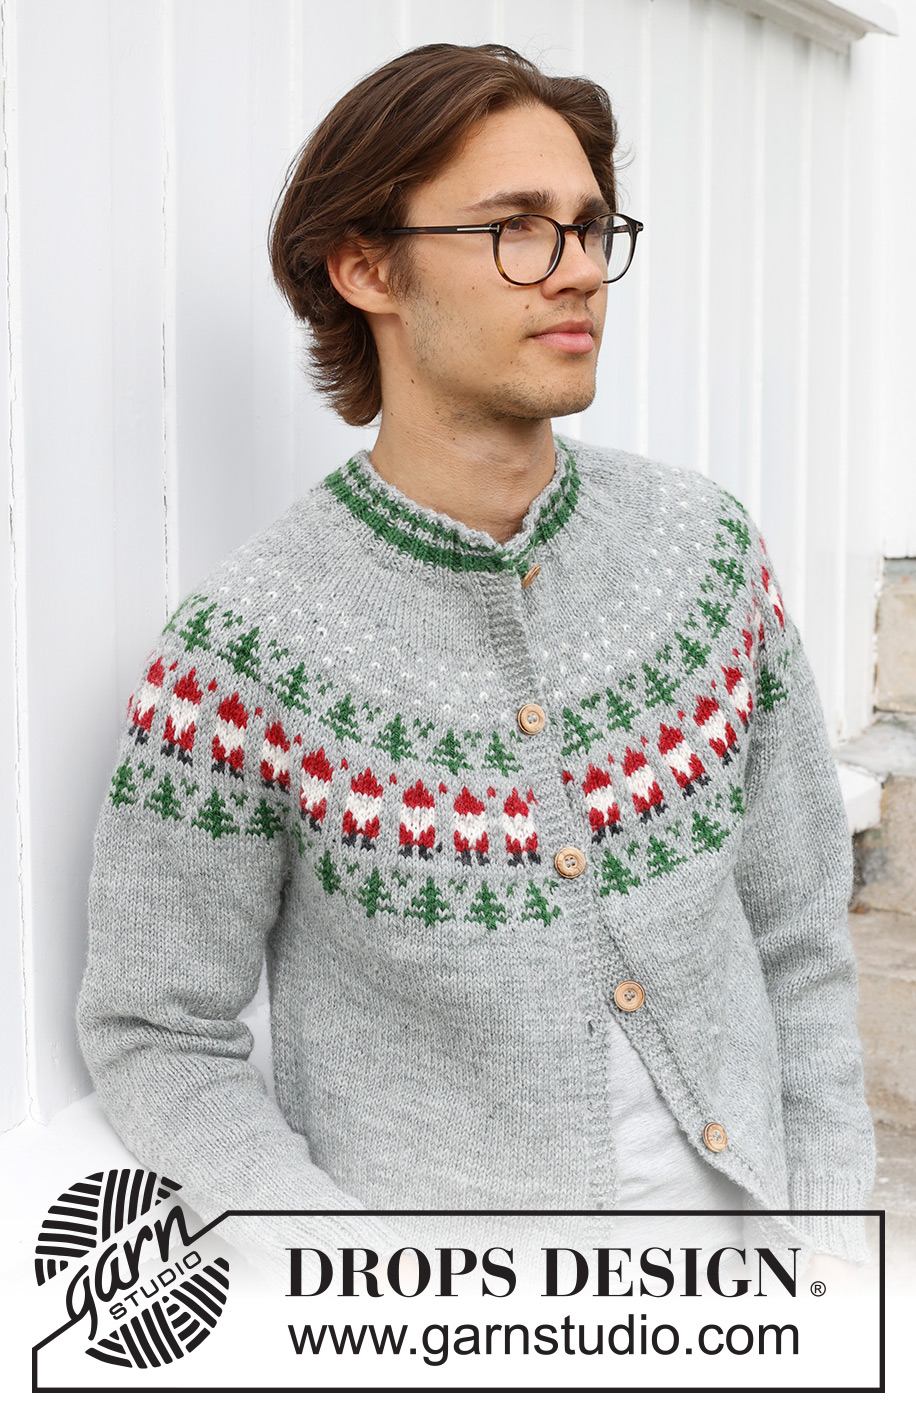
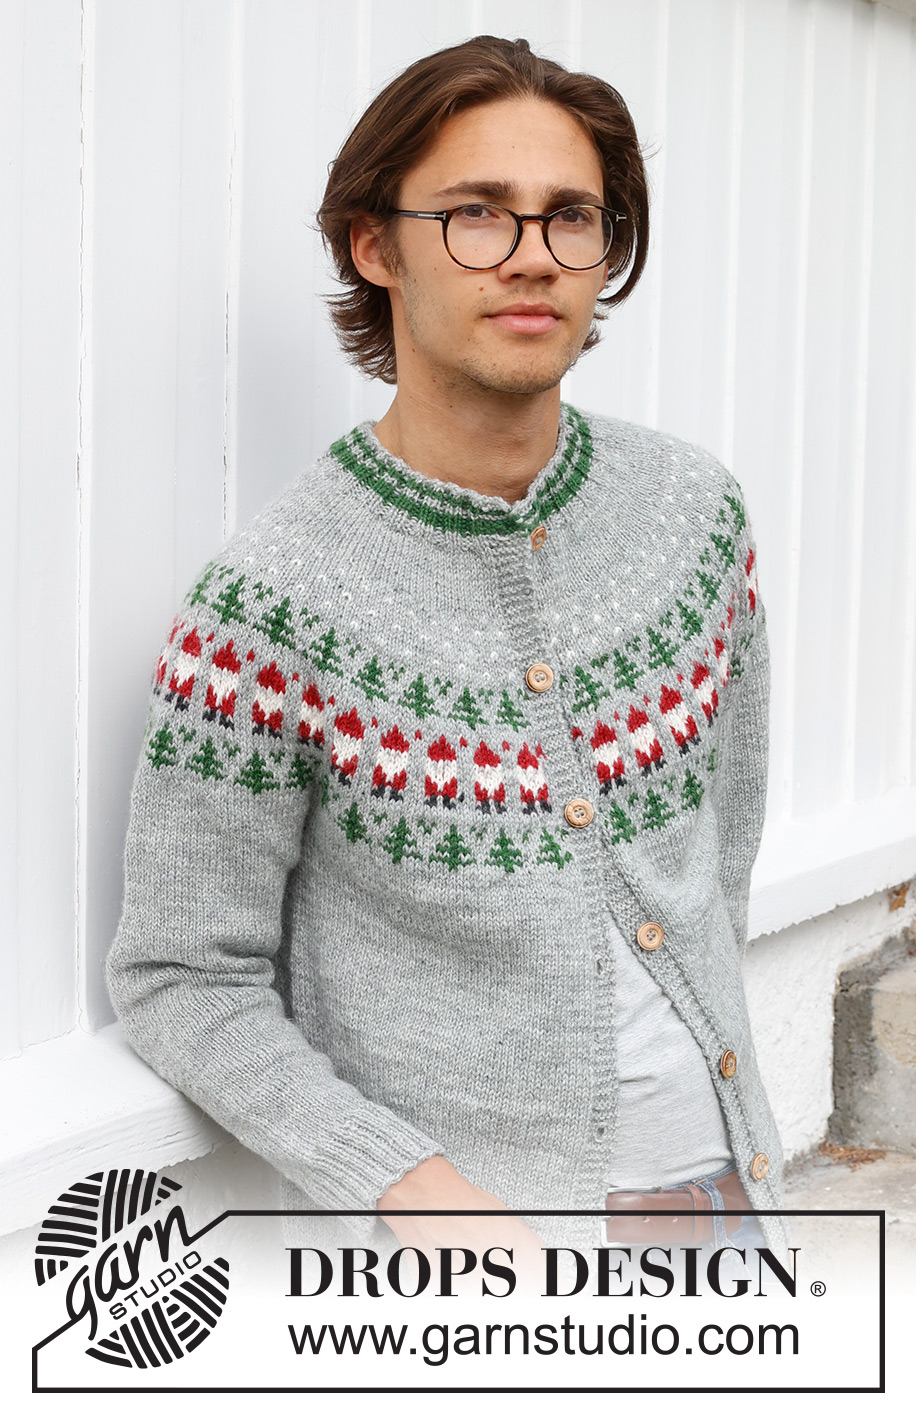
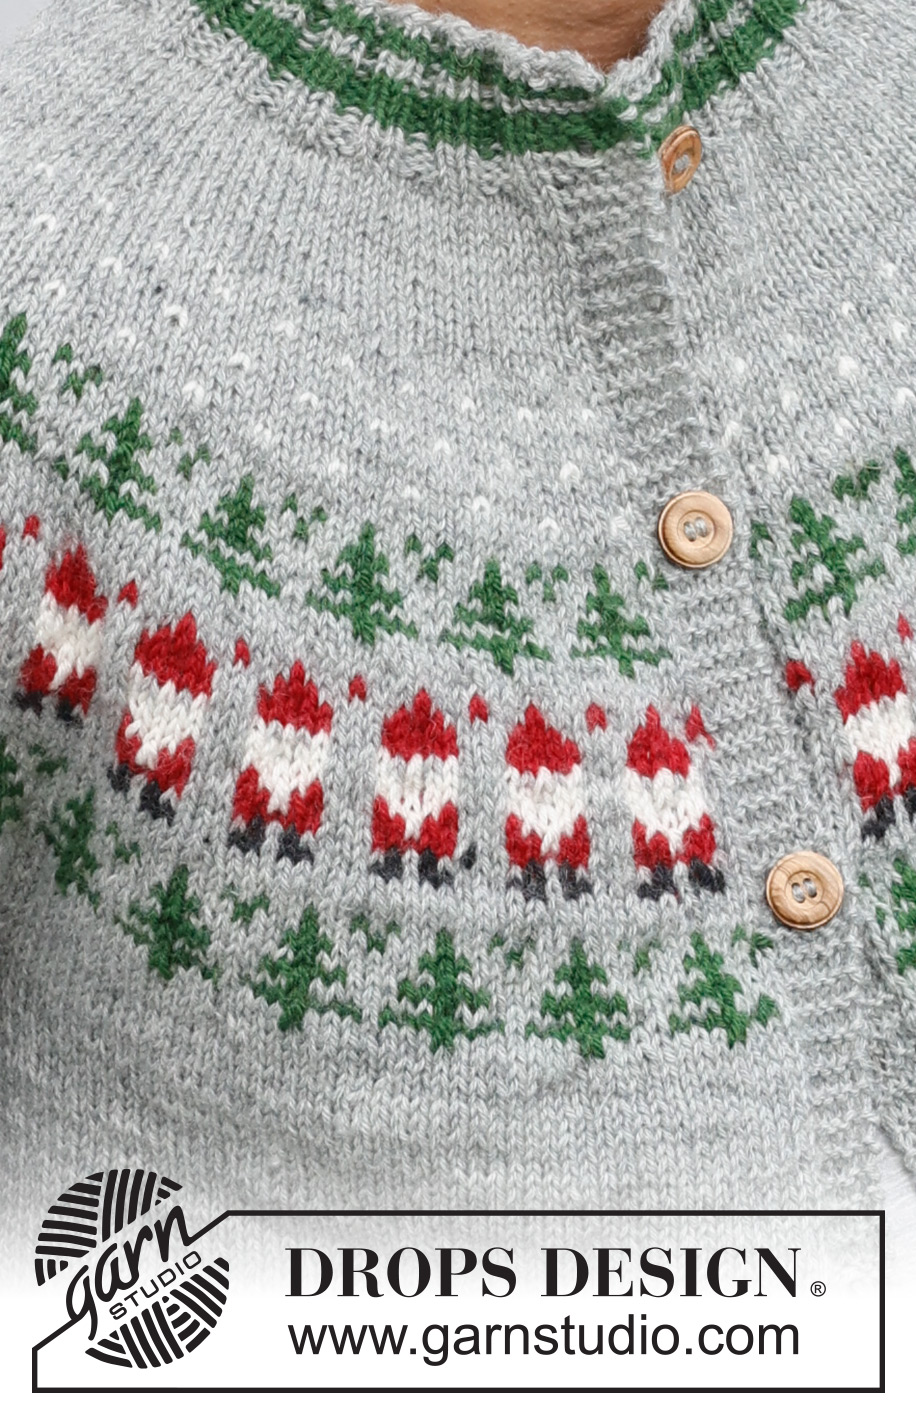
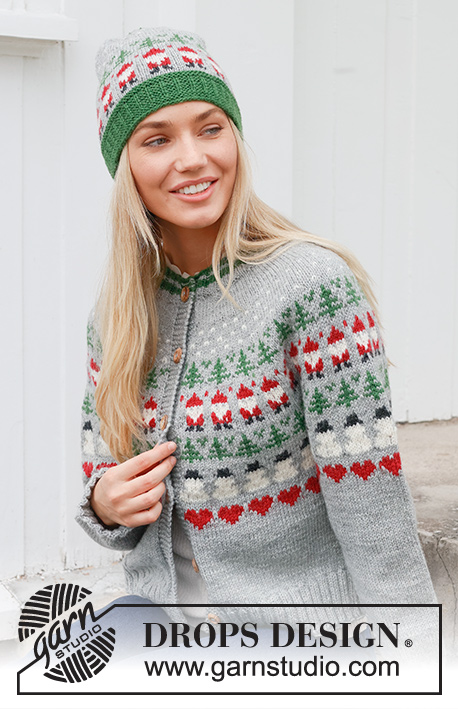
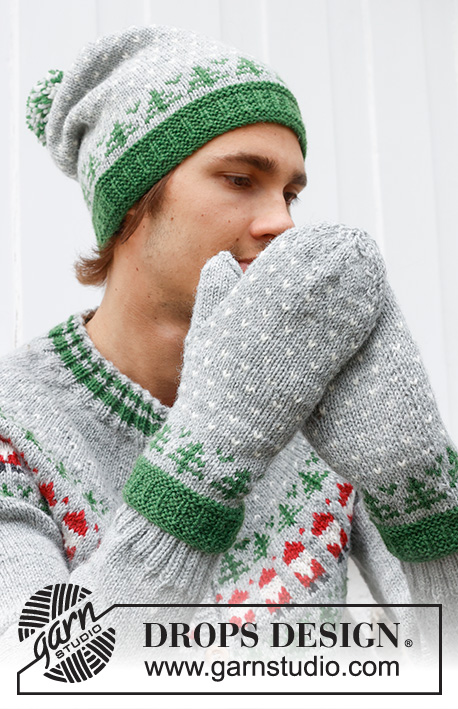
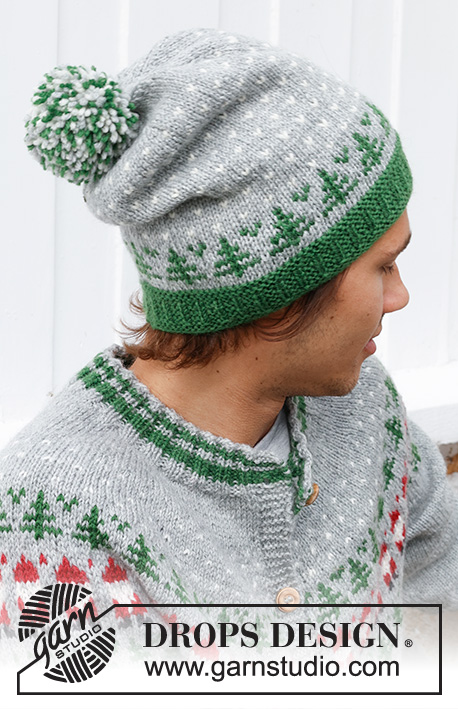
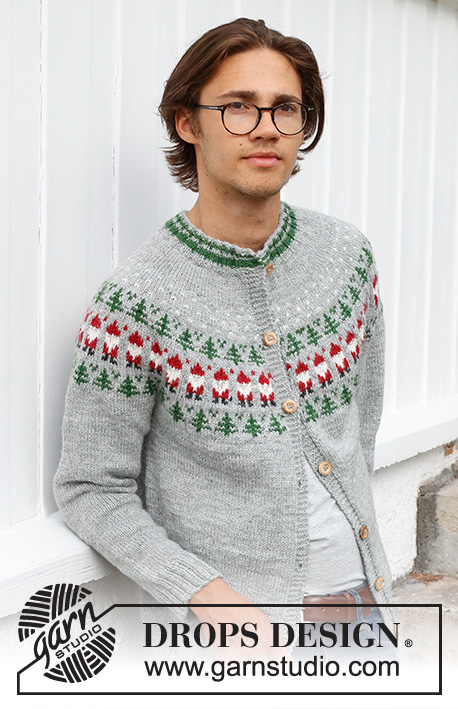
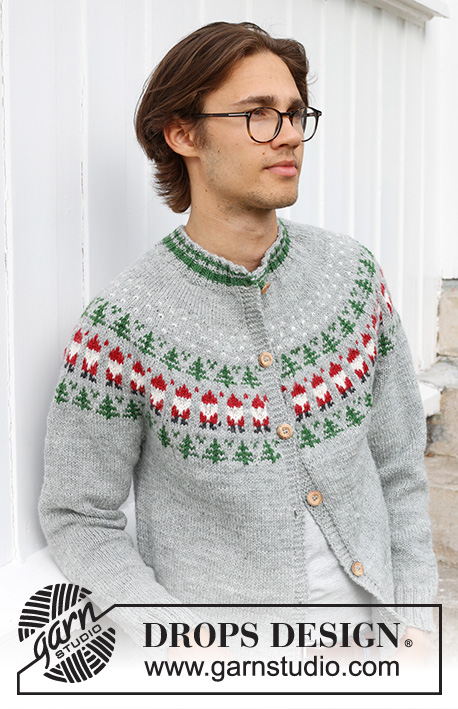
Knitted jacket for men in DROPS Karisma. The piece is worked top down, with round yoke and coloured pattern of Santa and Christmas tree. Sizes S - XXXL. Theme: Christmas.
DROPS 233-13 |
|||||||||||||||||||
|
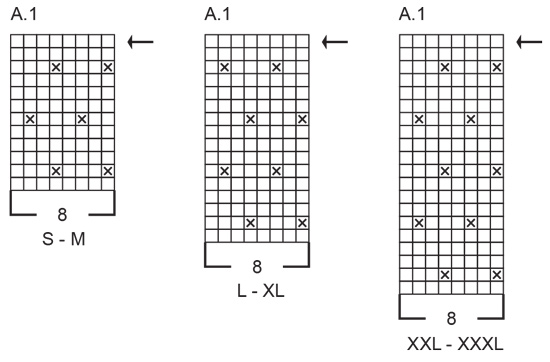
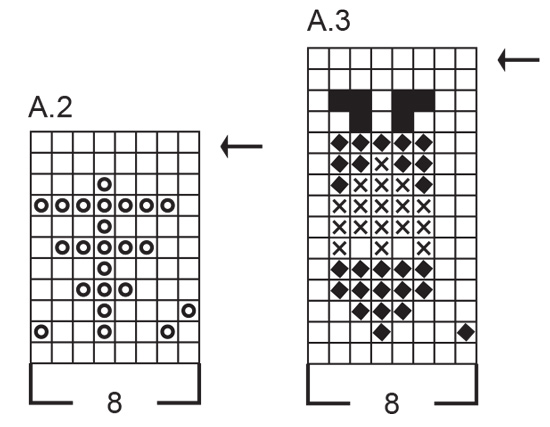
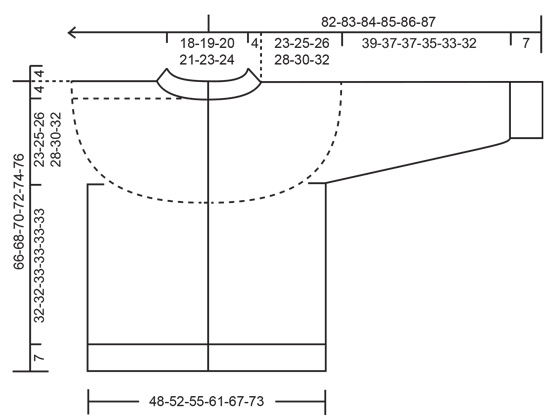
------------------------------------------------------- EXPLANATIONS FOR THE PATTERN: ------------------------------------------------------- RIDGE/GARTER STITCH (worked back and forth): Knit all rows. 1 ridge = knit 2 rows. PATTERN: See diagrams A.1 to A.3. Choose diagram for your size (applies to A.1). The diagrams show all rows in the pattern from the right side and are worked in stocking stitch. KNITTING TIP-1: To avoid the knitting tension losing its elasticity when working pattern it is important that the strands at the back are not tight. Use a size larger needle when working pattern if the piece becomes tight. KNITTING TIP-2: If you want more pattern on body and sleeves continue with the diagrams in your desired order but remember this will affect the yarn amounts. On the sleeves, position the motif mid-top of the sleeve and count out from there where to start the diagram under the sleeve. INCREASE TIP (evenly spaced): Increase 1 stitch by making 1 yarn over, which is worked twisted on the next row/round to avoid a hole. DECREASE TIP (for sleeves): Decrease 1 stitch on either side of the marker-stitch as follows: Work until there are 2 stitches left before the marker, knit 2 together with colour light grey, knit the stitch with the marker with colour light grey and knit 2 twisted together with colour light grey (2 stitches decreased). BUTTONHOLES: Work buttonholes on the right band (when the garment is worn). Work from the right side when there are 4 stitches left on the row as follows: Make 1 yarn over, knit 2 together and knit 2. On the next row (wrong side), knit the yarn over to leave a hole. The first buttonhole is worked when the rib on the neck measures 3 cm. Then work the other 6-6-7-7-7-7 buttonholes with approx. 9½-10-9-9-9½-9½ cm between each one. ------------------------------------------------------- START THE PIECE HERE: ------------------------------------------------------- JACKET – SHORT OVERVIEW OF THE PIECE. The neck and yoke are worked back and forth with circular needle, from mid front and top down. The yoke is divided for body and sleeves and the body continued back and forth with circular needle. The sleeves are worked in the round with double pointed needles/short circular needle. NECK: Cast on 122-126-130-134-142-146 stitches with circular needle size 3 mm and colour light grey DROPS Karisma. Purl 1 row from the wrong side. Change to colour forest green. Work the next row from the right side as follows: 6 band stitches in GARTER STITCH – read description above, * knit 2, purl 2 *, work from *-* until there are 8 stitches left, knit 2 and 6 band stitches in garter stitch. Continue this rib back and forth, at the same time as you work stripes as follows: Work 1 more row with colour forest green, 2 rows with colour light grey, 4 rows with colour forest green, then continue with colour light grey until the neck measures 4 cm – remember the BUTTONHOLE on the right band – read description above. When the rib is finished knit 1 row from the right side with colour light grey and increase 29-31-37-41-43-45 stitches evenly spaced – read INCREASE TIP (do not increase over the bands) = 151-157-167-175-185-191 stitches. Purl 1 row from the wrong side (bands knitted and yarn overs purled twisted). Insert 1 marker after the band at the beginning of the row. The yoke is measured from this marker! YOKE: Change to circular needle size 4 mm and work stocking stitch with light grey and 6 band stitches in garter stitch on each side. REMEMBER THE KNITTING TENSION! When the yoke measures 5-5-6-6-7-7 cm from the marker, increase 38-40-54-54-60-62 stitches evenly spaced – remember INCREASE TIP (do not increase over the bands) = 189-197-221-229-245-253 stitches. Adjust so that the next row is worked from the wrong side. begin the pattern and increase as described below – read KNITTING TIP-1 and PATTERN in explanations above. The bands are continued in colour light grey. A.1: Work 6 band stitches in garter stitch, the first stitch in A.1 (seen from the right side), then work A.1, 22-23-26-27-29-30 times (read the diagram from left to right when working from the wrong side), 6 band stitches in garter stitch. Continue this pattern. NOTE: When working from the right side, repeat A.1 after the band until there are 7 stitches left, work the first stitch in A.1 so the pattern is symmetrical and finish with 6 band stitches in garter stitch. Continue this pattern. AT THE SAME TIME on the row marked with an arrow increase 48-56-56-64-64-72 stitches evenly spaced (do not increase over the bands) = 237-253-277-293-309-325 stitches. A.2: When A.1 is finished in your size, work A.2 as follows from the wrong side: 6 band stitches in garter stitch, work the first stitch in A.2 (seen from the right side), work A.2 28-30-33-35-37-39 times, 6 band stitches in garter stitch. Continue this pattern. AT THE SAME TIME on the row marked with an arrow increase 40-48-48-56-64-64 stitches evenly spaced (do not increase over the bands) = 277-301-325-349-373-389 stitches. A.3: When A.2 is finished, work A.3 as follows from the right side: 6 band stitches in garter stitch, work A.3, 33-36-39-42-45-47 times, work the first stitch in A.3 so the pattern is symmetrical and 6 band stitches in garter stitch. Continue this pattern. AT THE SAME TIME on the row marked with an arrow increase 24-32-40-48-48-56 stitches evenly spaced (do not increase over the bands) = 301-333-365-397-421-445 stitches. A.2: When A.3 is finished, work A.2 again as follows from the wrong side: 6 band stitches in garter stitch, work the first stitch in A.2 (seen from the right side), work A.2, 36-40-44-48-51-54 times, 6 band stitches in garter stitch. Continue this pattern. AT THE SAME TIME on the row marked with an arrow increase 16-16-16-16-24-32 stitches evenly spaced (do not increase over the bands) = 317-349-381-413-445-477 stitches. When A.2 is finished, continue with stocking stitch and colour light grey – read KNITTING TIP-2 – at the same time divide for the body and sleeves. DIVIDE FOR THE BODY AND SLEEVES: Work until the yoke measures 23-25-26-28-30-32 cm from the marker. On the next row divide as follows: Work 52-56-60-66-72-78 stitches as before (front piece), place the next 60-68-76-80-84-88 stitches on a thread for the sleeve, cast on 8 stitches with colour light grey (in side under sleeve), work 93-101-109-121-133-145 stitches as before (back piece), place the next 60-68-76-80-84-88 stitches on a thread for the sleeve, cast on 8 stitches with colour light grey (in side under sleeve), work the last 52-56-60-66-72-78 stitches as before (front piece). Body and sleeves are finished separately. The piece is now measured from here! BODY: = 213-229-245-269-293-317 stitches. Continue with stocking stitch and 6 band stitches in garter stitch on each side - see KNITTING TIP-2, until the body measures 32-32-33-33-33-33 cm from the division. Knit 1 row from the right side and increase 41-41-45-53-57-61 stitches evenly spaced (do not increase over the bands) = 254-270-290-322-350-378 stitches. Change to circular needle size 3 mm and work as follows from the wrong side: 6 band stitches in garter stitch, * purl 2, knit 2 *, work from *-* until there are 8 stitches left, purl 2 and 6 band stitches in garter stitch. Continue this rib for 7 cm. Cast off a little loosely. The jacket measures approx. 66-68-70-72-74-76 cm from the shoulder down. SLEEVES: Place the 60-68-76-80-84-88 stitches from the thread on the one side of the piece on short circular needle/double pointed needles size 4 mm and knit up 1 stitch in each of the new stitches cast on under the sleeve using colour light grey = 68-76-84-88-92-96 stitches. Insert a marker in the 5th of the 8 new stitches under the sleeve (mid-under sleeve). Start at the marker and continue with stocking stitch and colour light grey – see KNITTING TIP-2. AT THE SAME TIME, when the sleeve measures 3 cm, decrease 2 stitches under the sleeve – read DECREASE TIP. Decrease like this every 5-3½-2½-2-2-1½ cm a total of 7-10-13-14-15-16 times = 54-56-58-60-62-64 stitches. Continue working until the sleeve measures 39-37-37-35-33-32 cm from the division (or to desired length. There is approx. 7 cm left). Knit 1 round and increase 10-12-10-12-10-12 stitches evenly spaced = 64-68-68-72-72-76 stitches. Change to double pointed needles size 3 mm and work rib (knit 2, purl 2) for 7 cm. Loosely cast off. The sleeve measures approx. 46-44-44-42-40-39 cm from the division. Work the other sleeve in the same way. ASSEMBLY: Sew the buttons onto the left band. |
|||||||||||||||||||
Diagram explanations |
|||||||||||||||||||
|
|||||||||||||||||||
|
|||||||||||||||||||
|
|||||||||||||||||||
|
|||||||||||||||||||
Have you finished this pattern?Tag your pictures with #dropspattern #christmastimecardigan or submit them to the #dropsfan gallery. Do you need help with this pattern?You'll find 33 tutorial videos, a Comments/Questions area and more by visiting the pattern on garnstudio.com. © 1982-2025 DROPS Design A/S. We reserve all rights. This document, including all its sub-sections, has copyrights. Read more about what you can do with our patterns at the bottom of each pattern on our site. |
|||||||||||||||||||


With over 40 years in knitting and crochet design, DROPS Design offers one of the most extensive collections of free patterns on the internet - translated to 17 languages. As of today we count 314 catalogues and 11822 patterns translated into English (UK/cm).
We work hard to bring you the best knitting and crochet have to offer, inspiration and advice as well as great quality yarns at incredible prices! Would you like to use our patterns for other than personal use? You can read what you are allowed to do in the Copyright text at the bottom of all our patterns. Happy crafting!
Post a comment to pattern DROPS 233-13
We would love to hear what you have to say about this pattern!
If you want to leave a question, please make sure you select the correct category in the form below, to speed up the answering process. Required fields are marked *.