
Popular categories
Looking for a yarn?


Comments / Questions (65)
![]() Lilian wrote:
Lilian wrote:
Me encantó tejer este patrón, es muy fácil de hacer y además queda hermoso.
01.07.2025 - 13:29
![]() Hanne Grendahl Sivertsen wrote:
Hanne Grendahl Sivertsen wrote:
Det er noe feil i raglanøkningen. Jeg strikker str m, og antallet masker man skal ha fordelt på ermer og for- bakstykke etter økningene går ikke opp med antall runder.
19.06.2025 - 08:29DROPS Design answered:
Hei Hanne. Når du har økt til raglan og skal fordele maskene, går noen "ermmasker" over til "bolmasker", slik at det blir en bedre passform på plagget). Når du har økt til raglan og strikket til arbeidet måler 25 cm skal bol og ermer deles. Du strikker først 38 masker (35 masker fra bolen + 3 masker fra ermet). Så settes de 54 neste maskene på 1 tråd. Legg opp 10 nye masker og strikk de neste 78 maskene (3 masker fra ermet + 72 masker fra bol + 3 masker fra neste erme). Sett de neste 54 neste maskene på 1 tråd. Legg opp 10 nye masker og strikk de resterende 40 maskene (inkl. 3 masker fra ermet). mvh DROPS Design
23.06.2025 - 11:01
![]() Barbara wrote:
Barbara wrote:
Buonasera vorrei fare maglione mod. Cranberry kiss Sweater rosa ciliegia 13 + mandorla. se cambio rosa 13 con rosa antico 04 quale colore posso usare al posto di mandorla? grazie
28.02.2025 - 17:42DROPS Design answered:
Buongiorno Barbara, per un aiuto così personalizzato può rivolgersi al suo rivenditore DROPS di fiducia che l'aiuterà a scegliere la sfumatura più appropriata. Buon lavoro!
08.03.2025 - 11:48
![]() Ann wrote:
Ann wrote:
Hello! If I were to knit this with one color, do you think I will need the full 200 grams of yarn for a size Large? I was hoping perhaps I can get by with 175 grams (which I already own).
12.02.2025 - 02:29DROPS Design answered:
Dear Ann, you need 200 gr in all 3 smallest sizes (S, M, L). And you need more than 200gr for size XL. So you will most likely need closer to 200gr than 175gr for size L. Happy knitting!
16.02.2025 - 23:44
![]() Eleanor wrote:
Eleanor wrote:
Hi! What does it mean when the pattern says that I should continue to use raglan increases for the body every 2nd row, but the sleeves every 4th row? Which stitch markers represent the body and which represent the sleeves? Thank you for your help!
14.12.2024 - 12:25DROPS Design answered:
Dear Eleanor, the markers are in the transition between the body pieces and the sleeves: marker-1 between back piece and right sleeve, marker-2 between right sleeve and front piece, marker-3 between front piece and left sleeve and marker-4 between the left sleeve and the back piece. So, depending on where you need to increase you will increase on one side or another of the marker. For increasing on the body increase before markers 1 and 3 and after markers 2 and 4. For the sleeves increase before markers 2 and 4 and after markers 1 and 3. So you alternate between increasing on all sides of all markers (every 4th round) or only in the body. Happy knitting!
15.12.2024 - 22:46
![]() Nina wrote:
Nina wrote:
Hello, i am very confused by the increases in the short rows. if i follow the raglan instructions of the pattern i should only end up with 8 increases in the short rows instead of the 16 i need. the way i understand the raglan increase it is : yo, st, st marker, st, yo. this gives 8 increases in a regular row and only 4 for the short rows. am i missing something ? i looked through the questions and couldn’t find an answer that helped me. thank you for your help.
10.10.2024 - 11:56DROPS Design answered:
Dear Nina, you increase for raglan on every row from RS when working the elevation (short rows): on first row and on 3rd row = you will have increased a total of 16 sts for raglan. Remember to increase on each side of all markers - this video might help you understanding how to increase 8 sts on each short row from RS. Happy knitting!
10.10.2024 - 16:01
![]() Frédérique Boniface wrote:
Frédérique Boniface wrote:
Bonjour pour la taille L, au niveau des manches il est écrit 9 diminutions. Sur l'explication j'en vois seulement 6 : 5, 3,5, 2,5 , 2,5. , 2. , 1,5 ; Comment faire? Merci d'avance
03.10.2024 - 20:07DROPS Design answered:
Bonjour Mme Boniface, en taille L on va diminuer 9 fois tous les 2,5 cm, autrement dit quand la manche mesure 4 cm, puis 6,5 cm (4+2,5 cm), puis 9 cm (6,5+2;5 cm) et ainsi de suite jusqu'à ce que vous ayez augmenté 9 fois au total. Bon tricot!
04.10.2024 - 07:36
![]() Maria wrote:
Maria wrote:
Spørsmål ang halsringning/forkortede pinner: Dere skriver: «Strikk glattstrikk og øk til RAGLAN til du har strikket 3 masker forbi 2.merketråd (høyre side av halsen foran)» Snu arbeidet, stram tråden og strikk tilbake fra vrangen til du har strikket 7 masker forbi 3.merketråd. Jeg lurer på, når man skal strikke til 3 eller 7 masker forbi en merketråd, skal man regne med de økte maskene også (ta dem med i tellingen)?
30.09.2024 - 13:07DROPS Design answered:
Hei Maria. Når du strikker fra vrangen, strikkes kastene som en maske. Disse maskene (som har vært et kast) telles som en maske. Så på 1. pinne fra vrangen, når det skal strikkes 7 masker forbi 3. merketråd blir kastet telt som en maske (= kastet + 3 masker (her startet du omgangen) + 3 masker til = 7 masker forbi 3. merketråd). mvh DROPS Design
14.10.2024 - 08:26
![]() Caroline wrote:
Caroline wrote:
Bonjour, J'ai un problème avec votre découpage juste après les augmentations de l'empiècement (TAILLE 2). J'ai bien 264m mais non réparties comme les vôtres. Mon 1er demi-dos: 35m (9mdébut+aug 2+12+12) contre 38m pour vous. Manches: 60m (20m début+4+24+12) contre 54m pour vous. Devant: 72m (20m début+4+24+24) contre 54m pour vous. Mon 2ème demi-dos: 37m (11m début+aug 2+12+12) contre 40 m pour vous. Pouvez-vous m'aider svp?
24.09.2024 - 13:31DROPS Design answered:
Bonjour Caroline, La division ne se fait pas au niveau des raglans: les 3 premières mailles et les 3 dernières mailles des manches sont attribuées au dos/au devant, ainsi vous avez 3 m en plus à la fin du demi-dos, 3 m en plus de chaque côté du devant et 3 m en plus au début du demi-dos en fin de tour, et 6 m en moins pour chaque manche. Bon tricot!
25.09.2024 - 08:02
![]() Florina wrote:
Florina wrote:
Hey, ich wundere mich gerade über die Ärmellänge, er scheint mir viel zu kurz (er hat die für S geforderten 42cm)...habe den Pulli grade mal übergeworfen und es fehlen fast 10cm, wird das durchs Blocken noch kommen? Ich kette italienisch ab und würde es ungern nachher nochmal aufmachen müssen 😅
13.09.2024 - 22:49DROPS Design answered:
Liebe Florina, zu diese 42 cm sollen Sie die 22 cm von der Passe auch mitrechnen; am besten vergleichen Sie diese Maßen mit den von einem Pullover den Sie gerne haben; oder ziehen Sie den Pullover an und stricken Sie bis die gewünschten Länge vor dem Bündchen. Viel Spaß beim Stricken!
16.09.2024 - 08:01
|
|
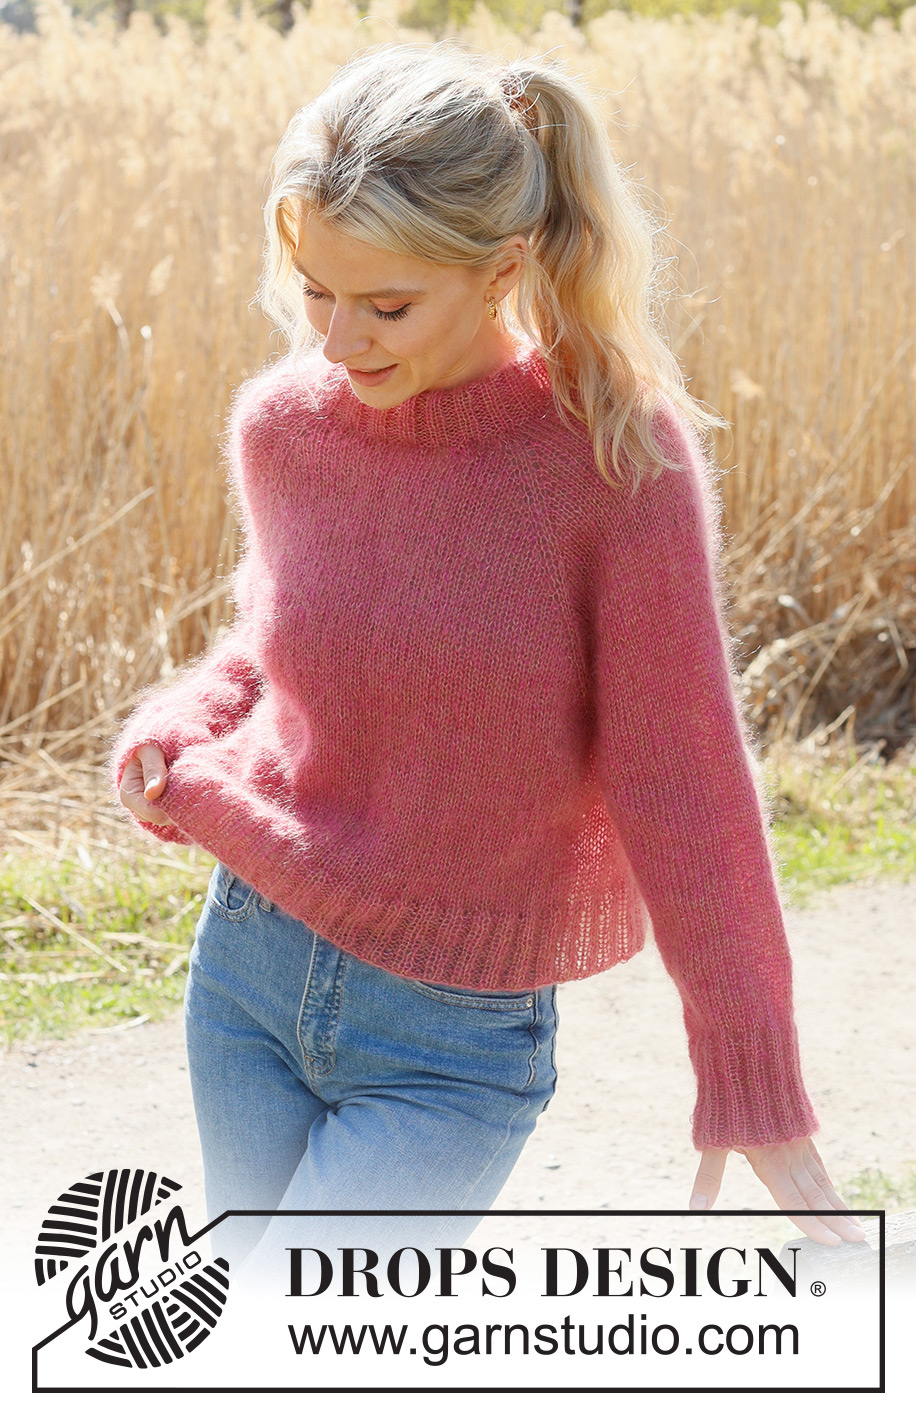
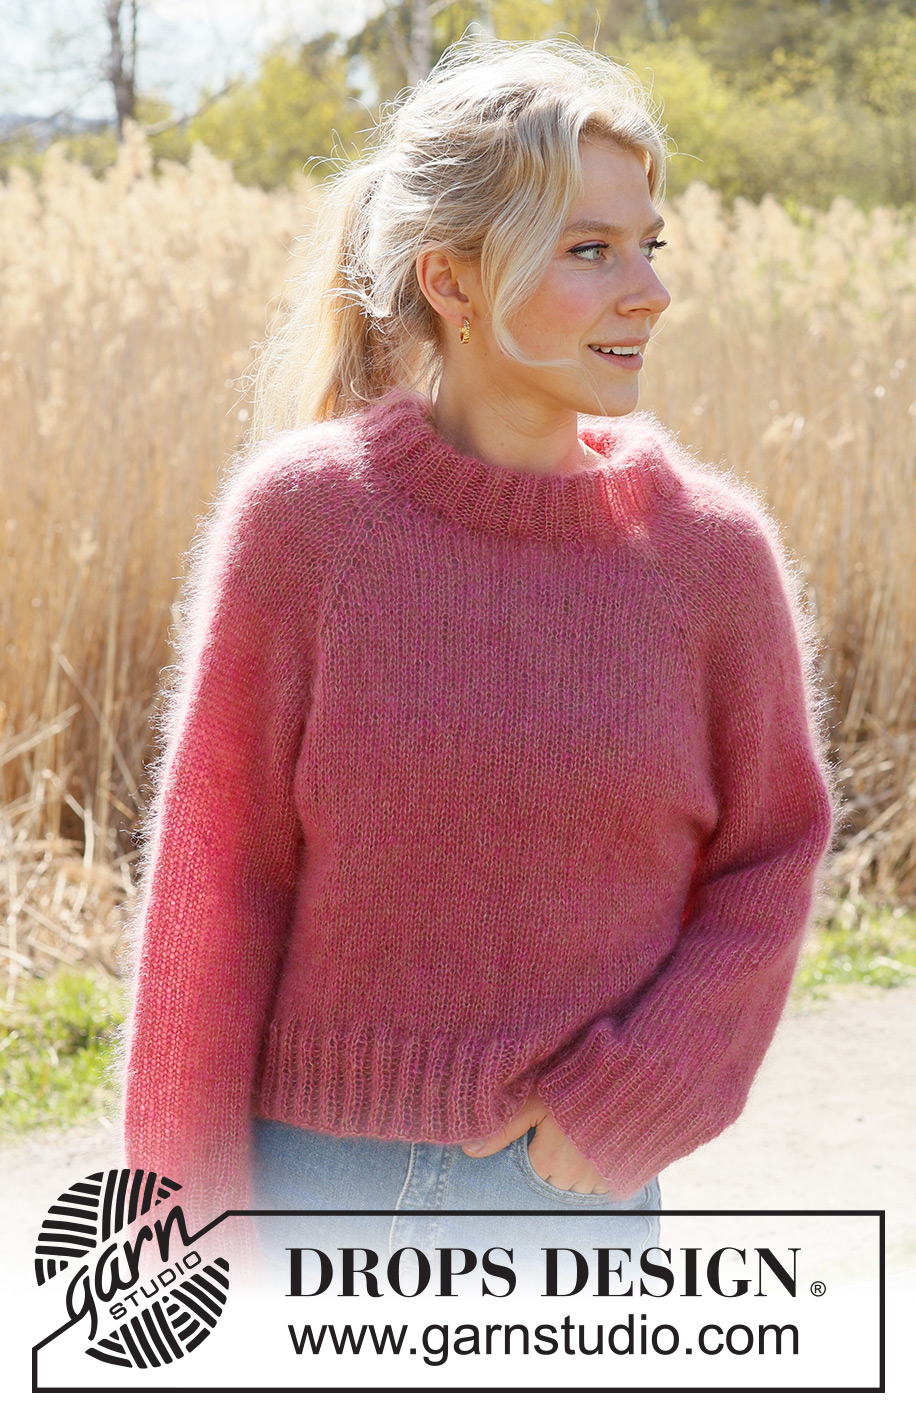
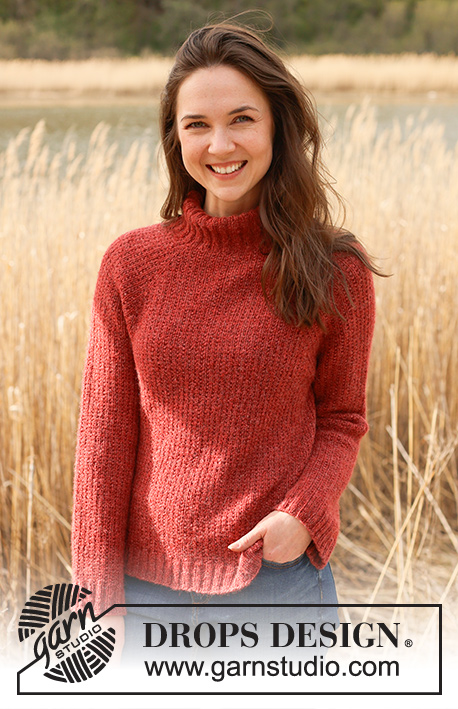
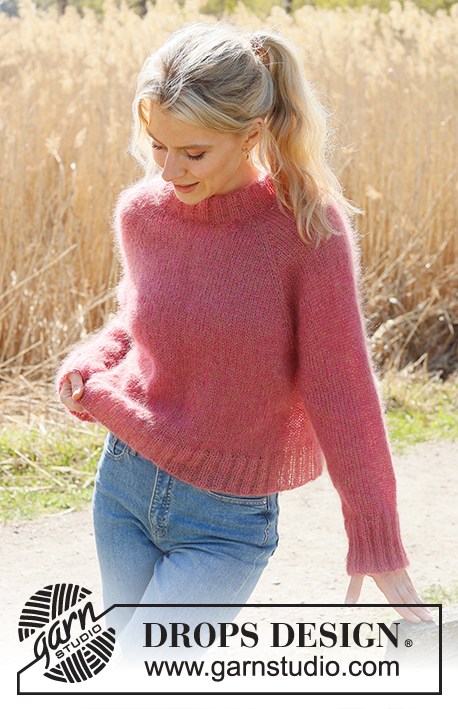
Cranberry Kiss Sweater#cranberrykisssweater |
|
 |
 |
Knitted jumper in 2 strands DROPS Kid-Silk. The piece is worked top down with raglan, stocking stitch and double neck. Sizes S - XXXL.
DROPS 235-8 |
|
|
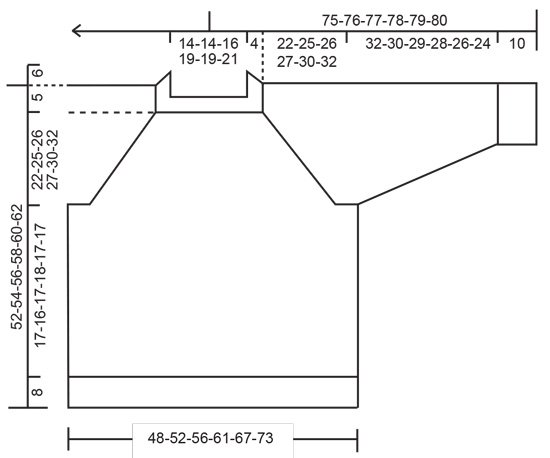
------------------------------------------------------- EXPLANATIONS FOR THE PATTERN: ------------------------------------------------------- RAGLAN: Increase 1 stitch on both sides of 2 stitches in each transition between the body and sleeves; the marker sits between these 2 stitches (8 increases on the round). Increase 1 stitch by making 1 yarn over, which is then worked twisted on the next round to avoid holes. Work the new stitches in stocking stitch. DECREASE TIP (for sleeves): Start 3 stitches before the marker, knit 2 together, knit 2 (marker sits between these 2 stitches), slip 1 stitch as if to knit, knit 1 and pass the slipped stitch over the knitted stitch. ------------------------------------------------------- START THE PIECE HERE: ------------------------------------------------------- JUMPER – SHORT OVERVIEW OF THE PIECE: The neck and yoke are worked in the round with circular needle, from mid back and top down. The yoke is divided for body and sleeves and the body is continued in the round with circular needle. The sleeves are worked in the round with short circular needle/double pointed needles. DOUBLE NECK: Cast on 80-80-88-96-96-104 stitches with one strand of each colour DROPS Kid-Silk, using short circular needles size 3.5 and size 5 mm held together. Remove the needle size 5 mm keeping the stitches on the needle size 3,5 mm (doing this gives you an elastic cast-on edge). Knit 1 round then work rib (knit 2, purl 2) for 12 cm. Fold the neck double to the inside and knit 1 round, where every 2nd stitch is knitted together with its corresponding stitch on the cast-on edge. This gives a double neck. Change to circular needle size 5 mm. Insert 4 markers without working the stitches; these are used when increasing for raglan and each marker is inserted between 2 stitches: Count 9-9-13-13-13-17 stitches (half back piece), insert marker-1, count 20 stitches (sleeve), insert marker-2, count 20-20-24-28-28-32 stitches (front piece), insert marker-3, count 20 stitches (sleeve), insert marker-4, there are 11-11-11-15-15-15 stitches left after marker-4 (half back piece). Cut the strand. NECK-LINE: Now work a neck-line with short rows: Start from the right side, 3 stitches before marker-3 (front left-hand side of neck when garment is worn). Work stocking stitch and increase for RAGLAN – read description above, until you are 3 stitches past marker-2 (front right-hand side of neck). Turn, tighten the strand and work back to 7 stitches past marker-3. Turn, tighten the strand and work back to 7 stitches past marker-2 – remember to increase for raglan. Turn, tighten the strand and work back to 3 stitches past marker-3. Cut the strand. YOKE: = 96-96-104-112-112-120 stitches. Start mid-back and continue to increase for raglan every 2nd round a total of 12-14-16-17-15-13 times (including the increases on the short rows) = 176-192-216-232-216-208 stitches. Continue with stocking stitch and increases for raglan, but every 2nd increase is only on the body; i.e. you increase on the body every 2nd round and on the sleeves every 4th round. Increase like this 12-12-12-12-18-22 times on the body (6-6-6-6-9-11 times on the sleeves), a total of 24-26-28-29-33-35 times on the body and 18-20-22-23-24-24 times on the sleeves. After the last increase there are 248-264-288-304-324-340 stitches and the yoke measures approx. 22-25-26-27-30-32 cm measured mid-front and from after the neck. If necessary continue working without increasing to the correct measurement. Divide the yoke for the body and sleeves as follows: Work the first 36-38-44-45-49-55 stitches (half back piece), place the next 50-54-58-60-62-62 stitches on a thread for the sleeve, cast on 8-10-10-12-14-16 stitches (in side under sleeve), work 74-78-86-92-100-108 stitches (front piece), place the next 50-54-58-60-62-62 stitches on a thread for the sleeve, cast on 8-10-10-12-14-16 stitches (in side under sleeve), work the remaining 38-40-42-47-51-53 stitches (half back piece). BODY: = 164-176-192-208-228-248 stitches. Continue with stocking stitch in the round for a further 17-16-17-18-17-17 cm. Knit 1 round and increase 16-16-20-20-24-24 stitches evenly spaced =180-192-212-228-252-272 stitches. Change to circular needle size 3.5 mm. Work rib (knit 2, purl 2) for 8 cm. Cast off. The jumper measures approx. 52-54-56-58-60-62 cm from the shoulder down. SLEEVES: Place the 50-54-58-60-62-62 stitches from the thread on the one side of the piece on short circular needle/double pointed needles size 5 mm and knit up 1 stitch in each of the new stitches cast on under the sleeve = 58-64-68-72-76-78 stitches. Insert a marker thread in the middle of the new stitches mid-under the sleeve. Continue in the round with stocking stitch for 4 cm. Now decrease 2 stitches under the sleeve – read DECREASE TIP. Decrease like this every 5-3½-2½-2½-2-1½ cm a total of 6-8-9-10-11-11 times = 46-48-50-52-54-56 stitches. Continue working until the sleeve measures 32-30-29-28-26-24 cm. Knit 1 round where you increase 6-4-6-4-6-4 stitches evenly spaced = 52-52-56-56-60-60 stitches. Change to double pointed needles size 3.5 mm and work rib (knit 2, purl 2) for 10 cm. Cast off. The sleeve measures approx. 42-40-39-38-36-34 cm from the division. Work the other sleeve in the same way. |
|
|
|
Have you finished this pattern?Tag your pictures with #dropspattern #cranberrykisssweater or submit them to the #dropsfan gallery. Do you need help with this pattern?You'll find 29 tutorial videos, a Comments/Questions area and more by visiting the pattern on garnstudio.com. © 1982-2025 DROPS Design A/S. We reserve all rights. This document, including all its sub-sections, has copyrights. Read more about what you can do with our patterns at the bottom of each pattern on our site. |
|


With over 40 years in knitting and crochet design, DROPS Design offers one of the most extensive collections of free patterns on the internet - translated to 17 languages. As of today we count 314 catalogues and 11821 patterns translated into English (UK/cm).
We work hard to bring you the best knitting and crochet have to offer, inspiration and advice as well as great quality yarns at incredible prices! Would you like to use our patterns for other than personal use? You can read what you are allowed to do in the Copyright text at the bottom of all our patterns. Happy crafting!
Post a comment to pattern DROPS 235-8
We would love to hear what you have to say about this pattern!
If you want to leave a question, please make sure you select the correct category in the form below, to speed up the answering process. Required fields are marked *.